Tuesday, December 15, 2020

Forgotten Cookies -- One of My Most Favorite

I reserve the last post of the year for one of my favorite recipes.  This year I want to record a seasonal favorite:  Forgotten Cookies!

I say "seasonal" because I tend to make them at Christmastime, however they are good any time of the year.  I just know that if I make them, I will eat them, so keeping it to a season is best for my waistline.

Once these are made, they are hard to forget.  They are light, crisp, sweet, and flavorful.  At a time when sweet goodies are in abundance, they are a nice change from the heavier cookies, cakes, and pies.

So why are they Forgotten Cookies?  Because once you prepare their mixture, you put them in the oven and forget about them!  I typically choose to make them at night so they can sit in the oven while I sleep, but you can make them any time you know you won't need your oven for the day.

Please enjoy one of my favorite recipes:

Forgotten Cookies  (30 to 35 cookies)


My handwriting many years ago.
2 large egg whites
2/3 cup sugar
1 teaspoon vanilla
1 cup chocolate chips
1 cup chopped pecans or walnuts


I used vanilla sugar instead of sugar and vanilla.  Works great either way!

Preheat oven to 350 degrees F.  Beat the egg whites to foamy.  Gradually add the sugar and vanilla, and beat until very stiff.  Fold in chocolate chips and nuts.

Put aluminum foil on the cookie sheets then spoon-drop cookies onto the foil.   Never use a greased pan.

Turn off oven.  Put cookies in.  Forget about them until the next morning.  Don't open the oven until ready to take the cookies out.

My Notes

Sometimes I use vanilla sugar and sometimes I use sugar and vanilla, as directed in the recipe.  Either way is fine, especially if your vanilla sugar is highly flavored. If you don't know how to make vanilla sugar, look at this post:  Vanilla Sugar and Grace Firth.

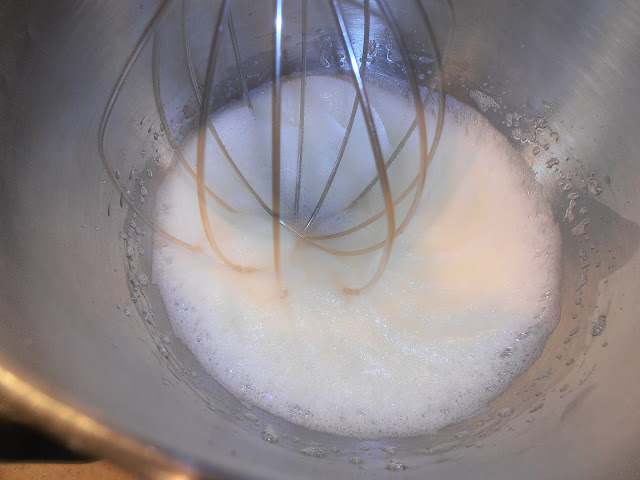
By "foamy", I used to think "as soon as I see a lot of bubbles in the whites."  But putting in the sugar at this stage gives a wetter mixture, so I wait until the bubbles are small and the whites are changing from yellowish to creamy.

Too soon!
Getting closer
Now is a good time to add the sugar.
When I add the sugar and vanilla, I truly just toss in a little at a time while the mixer is beating the whites.  Let them mix in and then toss in some more.  Since your aim is to have the whites "very stiff," you can take your time with their addition.

See the peaks?
Sometimes I use foil and sometimes I use my ceramic-coated cookie pan or my silicone baking sheet.  It helps to have the cookies on a flexible sheet because they like to stick to the surface.  If you are very careful you can use a spatula to get them off a hard pan, but they are delicate and easily broken.  It is easier to just peel them off the foil or silicone sheet.

As for the chocolate chips and nuts additions, I vary it according to my needs and tastes at the time.  Just chocolate chips (as I did for this example) is fabulous.  There is something about the slow bake time that transforms the chips into slightly softer versions of themselves, which is appealing. I used 1 cup chocolate chips for this example and thought the amount was just right.

Sometimes I use just nuts, and sometimes I put in crushed peppermint candies.  The candies are small and intense in flavor, so using 1/2 to 3/4 cup seems about right.  It is also fine to put in both chocolate chips and peppermints!  Whatever your taste buds desire.

When you drop the mixture onto the cookie sheet, pay attention to how big the portions are.  Too big means the heat won't necessarily get through to the middle of the cookie, which leaves a danger of eating uncooked egg white.  They don't have to be huge to be appreciated.

The pictures I have of the cookies here show the cookies being too big.  Not greatly so but there were some that had sticky centers.

These cookies don't spread and only slightly puff, so you can put them very close together on the cookie sheet.

Here is a pan before baking:

Make them a little smaller than this.
And here it is after baking (turned 180 degrees):

They have a rounder, softer look after baking.

The Verdict

These are so good!  You can vary the sugar level to make them less sweet.  The combination of crispy egg white, sweet, vanilla, and creamy chocolate is irresistible.  And they are light, which makes it easy to enjoy them and not feel full.

If your oven is big enough, make several batches at a time.  I did a triple batch after having a lot of whites left over from another recipe.

I have heard that people have piped the cookies for a more uniform, decorative effect.  This is great as long as the additions can fit through the nozzle.

I also know that there is a way to bake them in a low temperature oven, to make them quickly instead of waiting overnight.  Either way, you end up with a scrumptious cookie.

Merry Christmas!

Tuesday, December 1, 2020

Boiled Water Soup

I can see my cookbook collection from where I sit at the dining table, so I often find myself looking over the titles and deciding if there is any one title that is "calling" to me.  This time it was Loaf, Crust, and Crumb by Silvija Davidson.

ISBN 0-7181-3825-2

She starts off her book with a discussion of breadmaking, the ingredients and the history of not only making bread but using bread in cookery.  Then she has this amazing directory of bread types; literally about 130 pages of breads and their descriptions all in alphabetical order.  

The descriptions list where the bread originated, main flavors, uses.  Many I have never heard of!  For example, bara brith is a fruit bread from Wales:

The finest bara brith I have tasted was made in a turn-of-the-century wood-fired brick bakehouse ...  It was richly fruited, dense and chewy, made with organic stoneground whole-wheat flour and imbued with the tang of woodsmoke...  (page 28).

The recipes follow this, but make no mistake:  these are not bread recipes.  They are recipes that use bread in a variety of ways.  There are things to do with breadcrumbs, along with recipes for sandwiches, soups, savory dishes, stuffings, sauces, and desserts.   

The recipe that caught my attention was named Aigo Boulido, which "is the Provencal dialect for eau bouillie - boiled water."  I thought it would be amusing to write a blog post on Boiled Water Soup.

Aigo Boulido  (page 224)

1 3/4 pints water

2 - 6 cloves garlic, crushed

1 bay leaf and/or 4 sage leaves

1 tablespoon extra virgin olive oil

salt and pepper

1 egg yolk (optional)

4 thick chunks country bread, slightly stale


Put the water, garlic, herbs, oil, and a little salt in a large saucepan, bring to the boil and simmer for 15 minutes.  Beat the egg yolk in a large jug and gradually strain on the flavoured water (discarding the herbs), whisking all the time.  Adjust the seasoning, adding pepper if you wish.  The bread can either be grilled, placed in warm soup bowls and the soup ladled over, or torn into chunks and stirred into the thickened soup -- in which case you might whisk the soup into the egg in a warmed tureen, dispensing with the jug.

My Notes

I had some whole wheat bagels, which I cut in half and let sit on the counter for a few hours.  I turned them once to make sure both sides were drying out a little.

I used 5 cloves of garlic, which I crushed with the flat end of my big pestle.  I also chose to use just the bay leaf, and I put in 1/4 teaspoon salt.


Water, not yet boiled

While the broth was simmering, I noticed a funny popping noise, which I thought was the garlic.  

Once the broth was ready, I strained it into a quart measuring cup that had the beaten egg yolk in it.  I poured in a little broth, whisked, added more broth, whisked more, etc. until all the broth was mixed into the egg yolk.

Water, boiled

With egg yolk beaten in

When I tasted the broth to adjust the seasoning, I noticed it was lightly garlicky, subtly bay, and needed more salt (1/2 teaspoon did the trick) and some pepper (1/4 teaspoon).  That gave a nice balance to the delicate flavor of the broth.

The broth had a chance to infuse the pepper while the bagels were prepared.

Two bagel halves went under the broiler until they were golden brown.  I placed them each in a bowl and poured the broth over the top.  I put in enough broth to barely float the bread.


The Verdict

The bagels quickly soaked up the broth and became soft.  I used my knife and fork to cut them into bite-sized pieces, and then used my spoon to eat the soup-with-bread.


I had broth left over when I ate all the bread, so I broke up the other half of a bagel (that had been toasted) and ate the rest of the soup with that.  It was interesting to note that the toasted bagel didn't absorb the soup as quickly as the broiled bagel, and I liked the bit of crunch I got from that.

My guest taster and I both liked what we ate.  We agreed it wasn't hearty enough to be a main dish (although I did serve it that way, with some mashed sweet potatoes that had sauteed apples and onions mixed in), but we thought it would make a good first course soup.

The broth was delicately flavored and the bread gave it some body.  Broth + bread was a good combination!  The whole wheat made it more like a "peasant" soup and I liked that very much.  I was surprised at how much of the garlic and bay flavors came through from just 15 minutes of simmering and it was just right because it wasn't overwhelming.  

Success!  I would consider doing it again, but as a side dish or first course.  The vegetarians would like this, and they could skip the egg yolk.  The yolk made the broth yellow; without it, it would look more like boiled water.

I think I would like to spruce up the look of the served soup with some sort of garnish.  Perhaps a bit of chopped parsley or thinly sliced green onions would be nice on top.  

And there you have it:  boiled water soup!


Sunday, November 15, 2020

Gingerbread Waffles, and a really neat book

This is one of my favorite cookbooks and I was astonished when I realized that I had not put any of its recipes into my blog:  Spoonbread and Strawberry Wine, by Norma Jean and Carole Darden, published in 1978 and then 1994. 

ISBN 0-385-47270-6

Why is this my favorite?  Because of the family stories that are connected to the recipes, because the family itself is inspiring and accomplished, and because of the obvious love the authors have for their family.

For example, when describing their grandfather, they wrote (pages 4 - 6):

Family legend has it that in 1868, at the age of fourteen, Charles Henry Darden walked into Wilson, North Carolina.  He had no money, no relatives, no friends there, and no one knew where he had come from -- he wouldn't say.  Somehow, somewhere in his mysterious fourteen years, he had gained considerable skill as a blacksmith and could make and repair wheels.  These abilities allowed him to eke out a small living and to put together the long wooden toolbox that was to become his trademark as he traveled door to door repairing broken locks and sharpening knives.  In a short time he established a good reputation and at seventeen was able to open a small repair shop at the end of the main street in Wilson.

Charles Darden went on to building his business -- in part to prove to the family of the woman he fell in love with that he was worthy -- and then expanded into other businesses, including a store where he also sold produce he grew, and a funeral parlor.  He set an example for his community, taught his ten children the value of hard work, and encouraged them to get a good education.  In fact, when his adopted town of Wilson built a high school for black students, they named it after him.

Papa Darden was seldom known to travel, yet he attended the graduations, from elementary to graduate school, of every one of his children.  Without a doubt, he must have been the proudest "papa" in the group, for in his lifetime, against many odds, he saw three sons become physicians, two become lawyers, and two become morticians, while two of his daughters became teachers and one a nurse.

Norma Jean and Carole Darden are the daughters of Charles Darden's youngest son, "Bud."  They spent time gathering stories and recipes from both sides of their family, and present them in a way that shows the reader what sort of people these family members are or were.  They have a lot to be proud of.

There are a variety of recipes that I want to try.  I love collard greens in a savory, flavorful broth; I want to try Papa Darden's wines and Aunt Artelia's hush puppies; the hot crab-meat salad looks scrumptious; and the candy recipes are inviting.  What I chose was the Gingerbread Waffles, not only because they look good (I love gingerbread and the spice mixture that is in it) but I was in a Sunday-morning brunch kind of mood.

Gingerbread Waffles (page 301)

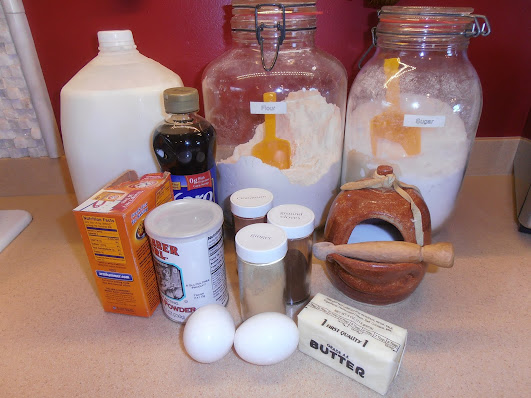
2 eggs

1/4 cup sugar

1/2 cup molasses

1 cup sour milk (see note)

1 1/2 cups all-purpose flour

1 teaspoon ground ginger

1/4 teaspoon ground cloves

1/4 teaspoon ground cinnamon

1/4 teaspoon salt

1 teaspoon baking soda

1 teaspoon baking powder

1/3 cup melted butter


Beat eggs until light.  Add sugar, molasses, and sour milk.  Sift dry ingredients together.  Add to egg mixture and beat together until smooth.  Add butter.  Cook as you would regular waffles.

Yield:  6 to 8 servings

Note:  To make sour milk, add 1 tablespoon distilled white vinegar to 1 cup milk

My Notes

I didn't have molasses so I substituted dark Karo syrup.  I think the molasses would make the flavor richer and bolder.  

I made the sour milk first as I know it needs to sit a little while after it is mixed.

The waffle iron started heating as soon as I got out all the ingredients.  It always works best when it has had a chance to heat up well before I ever try baking the first waffle.

The eggs were whisked until they were foamy.


Instead of sifting the dry ingredients, I measured them into a bowl and whisked them until they were well-blended.


It didn't take long to beat the batter until it was smooth.  This picture was taken after the melted butter was added in:

It smelled so good with all the spices!

I brushed a little butter over both sides of the hot waffle iron, then poured the batter onto the center.  Every waffle came out beautifully!  


The Verdict

My guest taster and I tried them without any spreads or toppings.  The spice mixture came through, which is what sells it to me.  We also tried them with a little butter and also with some Lemon Goop, which complimented the ginger flavor well.  All three ways are recommended!

Lemon Goop is a recipe I have tried several times, as given by Dorie Greenspan.  Click here for her recipe.  It is easy to make and you also get a great syrup out of it.  We have used the goop as a spread on breads, and the syrup in a variety of ways, like mixing it with soy sauce and black pepper to make a tasty marinade for salmon.  She also recommends making it into a salad dressing.  The goop is lemony and tart, barely sweet, a little salty.  You might think it is like lemon curd, but it is mostly concentrated lemon and not at all like the curd.

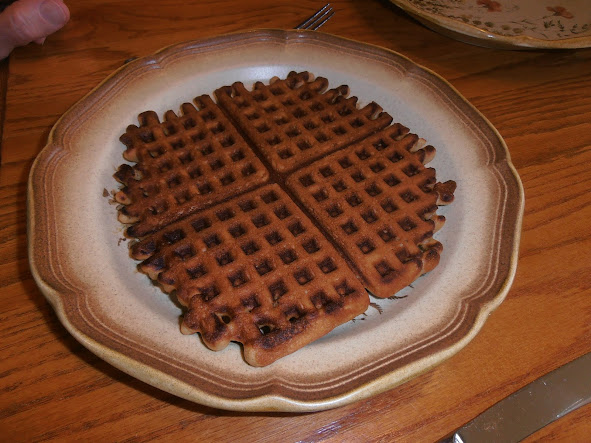
Success!  This recipe made five full waffles, each of which breaks into four small pieces.  What we didn't eat was frozen, and I look forward to another Sunday brunch with it.

You just can't go wrong with fixing waffles, and to add the lovely gingerbread spice mix just makes it even better.  


Sunday, November 1, 2020

A Brown and Polson Fruit Pudding

 I was back perusing Mr. Charles Elmé Francatelli's book, A Plain Cookery Book for the Working Class.  I first wrote about it in this recipe:  Sausage Rolls and Queen Victoria.  The book was published in 1861.

Something that caught my attention was recipe #47:  Brown and Polson Pudding.  In the ingredients list he has "six ounces of Brown and Polson's prepared Indian corn", which he later describes as 

a most excellent and economical article of food, equal to arrow-root, and will prove, on trial, to be both substantial and nutritive, and also easy of digestion to the most delicate stomachs.

My first thought was that he was describing corn meal, and I would expect this recipe to be something like a spoonbread.  But that connection to arrowroot made me rethink it.  

A quick surfing around the internet produced this result from  http://letslookagain.com/tag/history-of-brown-polson/:

John Polson Jr (1825 - 1900) discovered a method for manufacturing pure starch from maize, which he called corn flour.  He patented the process in 1854.  It was the first corn flour to be manufactured in Britain.

In fact, the site says Brown and Polson's is still for sale in Britain!  Here is what the vintage container looked like:

At this point I really wanted to try a pudding made from cornflour, but I moved to recipe #48, 

Brown and Polson Fruit Pudding

Prepare the pudding batter as indicated in the foregoing Number, and when you have poured one-half of it into the greased pie dish, strew about two pounds of any kind of fruit upon this, such as gooseberries, currants, plums, cherries, etc., and then pour the remainder of the batter all over the fruit.  Bake the pudding an hour and a quarter.  Peeled apples or pears may be used for the same purpose.

Here is the foregoing Number:

No. 47.  Brown and Polson Pudding

Ingredients, six ounces of Brown and Polson's prepared Indian corn, two quarts of milk, two ounces of sugar, a bit of cinnamon or lemon-peel, a pinch of salt, three eggs.  Mix all the above ingredients (except the eggs) in a saucepan, and stir them on the fire till they come to a boil; then add the eggs beat up; mix thoroughly, pour the batter into a pie-dish greased with butter, and bake the pudding for one hour.

I chose to do a half-recipe.

 My Redaction

1 quart whole milk

3 ounces cornstarch (not Brown and Polson, sadly)

1 ounce sugar

1/2 teaspoon cinnamon

pinch salt

2 eggs, well-beaten

24 ounce jar Morello cherries, drained (reserve the liquid)


The milk went into the saucepan, then I weighed out the dry ingredients.  I whisked them together in the bowl and then whisked them into the cold milk.  


The saucepan went onto the stove over medium heat.  I didn't stir it the whole time, but I did stir it often.  As it heated, the mixture became thicker and foamy.  


When it just started boiling, I took it off the heat, and poured in the beaten eggs while whisking.  This thickened the mixture even more, so I quickly poured half into the greased pie-dish.  Then I spooned the cherries over it (they sank) until they were fairly evenly distributed.


At that point I poured and spooned the rest of the batter over the top.  Some of it was very thick and sticking to the bottom of the saucepan, but it didn't scorch.  I used a scraper to get the rest.


It went into a preheated 350 degree F oven.

After one hour, the top was browning nicely but the center was still very jiggly, so I reduced the temperature to 325 degrees F while it cooked another 15 minutes.

It smelled lovely!

While it was baking, I decided to make a sauce from the cherry juice.  There was about 1 cup juice (my estimation) so I put in two big spoonfuls of sugar, and 1 tablespoon cornstarch.  That all was whisked well and then placed over medium high heat.  I whisked it constantly until it boiled, then reduced the heat and simmered it (while whisking) for one minute.  It cleared and thickened.  Once that minute was over, I took it off the heat and mixed in a splash of almond extract.  It cooled while the pudding continued to bake.

After baking it for one hour and a quarter, I took the now well-browned pudding out of the oven.  It was still very jiggly but a stick put into the middle came out clean.  I left it to cool.

The Verdict

I tasted the batter right out of the saucepan.  It was good!  Thick, creamy, mild in flavor, slightly sweet.  I could have eaten it as it was, with a spoon.  This made me look back at his recipe #49, Brown and Polson Thick Milk, which is very similar to this batter but without the eggs.  He has you boil it for ten minutes to make a dish that "is most excellent for children's breakfast or supper, and would be found both cheaper and better for their health than a sloppy mess of tea."

As the pudding cooled, the top sank and the center firmed up nicely.  

I tried to serve it by cutting it into wedges, but only the top crust cut; the interior was soft and would not hold a shape.  I ended up serving it with a spoon.  It was still warm when we tried it.


The flavor was mild, slightly sweet, and the cherries were prominent.  My guest taster wondered if there was cheese in it.  I wished for more cinnamon to add some complexity to it.

Overall, it was good.  We both felt it was "a keeper."  

After we tasted it thoroughly as it came out of the pan, we tried it with the cherry sauce I had made.


Oh, my!  That added a lot more flavor and interest to the dish!  It was a hit and my guest taster said, "I think I'm hooked on this."  We ate our fill and enjoyed it very much.

Success!

I tried the leftovers the next day.  This dish chilled had a texture that reminded me strongly of bread pudding.  And it was still tasty!  I'm so glad I made it with cherries.


Thursday, October 15, 2020

Dead Men's Bones -- a dessert biscuit

I enjoy watching the Great British Baking Show.  This does not surprise anyone!  I am not a dedicated baker -- I tend to wander here and there in the cooking world (again, not a surprise) -- but that show is a delight.  I often wonder what I would do if I was in the contestants' shoes, and honestly assess my skills as seriously lacking in comparison with theirs.

The technical challenge is especially intriguing to someone who plays with old recipes.  The "pared down" recipes sound so much like what old recipes say!  "Mix it, cook it, and serve" quite often are the type of directions old recipes have, or they say things like "boil" without specifying how hard, how long.  (Note to my gentle readers:  "boiling beef" means use a gentle simmer, or the meat becomes tough and chewy.  Trust me on this one.)

So when I was reading The Cookery Book of Lady Clark of Tillypronie and spotted the sweet biscuit recipe called "Dead Men's Bones," I was intrigued.  I didn't realize how much like a GBBS technical challenge it would be until I set out to try it.

The Lady's book was written during her lifetime and published by her husband after her death.  It is a compilation of Victorian era recipes and, because of the large number of them as well as their simplicity and the variations due to many cooks contributing, is considered to be very important and representative of the time.  In a previous post, I made the recipe for Frontignac (elderflower syrup).  Click here to read it.

Halloween is rapidly approaching and I wanted to make this recipe available in time for it.  

From page 27, in the "Biscuits, Sweet" section, we are given:


This looks pretty straightforward.

5 ounces all-purpose flour

4 ounces sugar

3 egg whites

vanilla to taste


My Notes

I used vanilla-scented sugar, so I did not add any more vanilla.  

Now here is where the technical challenge jumped right in:   How much should the egg whites be whipped?  

I decided to take them to about firm peak.


Here is where the trouble began.  When I mixed in the flour and sugar, the whole thing became thick and stiff.


I suspected (and I was right) that there was no way this would go through a funnel.  I decided to drop spoonfuls onto my baking sheet and bake them at 325 degrees F.  After 11 minutes they were very light brown on the bottom.


When they cooled, they were crunchy but not crisp.  They had a nice vanilla and sweet flavor.  

However nice they were, they were not what I expected from the recipe.


Take Two

I decided to add about 3 tablespoons water to thin the batter down and make it runny enough to pass through a funnel.


It worked but it flowed so slooooooooowly that I ended up using a chopstick to push it through.

You can see above that I made them small.  I tried the round (ratafia) and the long shapes and a few creations of my own.


I had no idea how long to let them "rise a little before the fire" and the batter was spreading so I waited maybe five minutes before putting them into the oven at 325 deg F.  It took 8 minutes to get the bottoms lightly browned.

Then I glazed them with just powdered sugar mixed with a little water and brushed on them while they were hot.


They weren't really crisp as much as they were chewy, and too sticky from the glaze, even after they cooled.  The flavor was a nice vanilla but, frankly, they weren't interesting to eat.  After a few hours, they were downright hard to bite.

Take Three

I used the same quantities but this time didn't beat the whites very much.  Really just until foamy and not showing liquid white below the foam.


The flour and sugar mix still made it stiff so I added a little bit of water until it was thick but flowed smoothly.

I put some on my silicone-coated pan and some on a standard baking sheet and baked them at 350 degrees F.  My hope was that baking them a little faster would crisp them.  

At 10 minutes, they weren't looking baked.  At 12 minutes they were almost there.  And then life intervened and I didn't get back to them until 14 minutes...


The ones on the silicone pan came off and were obviously overbaked.  You can see that they flowed together while baking as I had left a good 1/2 inch or more between them.  

They did not taste good as they were tough and dry.

The ones on the standard baking sheet were glued solid on the surface.  


You can see the broken one -- that is where I used a spatula with great effort to remove the cookie.  The rest had to be soaked about an hour in hot water to be removed.

The Verdict

I was glad I was not in the tent and that Paul and Prue were not watching.  What a disaster!  I ended up throwing the cookies away.

Failure.

I have since done some reading.  I probably should have baked them at a lower temperature (say, 300 degrees F) instead of increasing it to 350.  

I'm not sure how much the egg whites should have been beaten.  

The addition of the flour is what bothered me.  If it had been just sugar, the cookies would have been a crispy meringue.  The flour seemed to bring the whole mixture to a thick dough instead of a batter.

What Lady Clark would have done is beyond me.


Thursday, October 1, 2020

Sausage Rolls and Queen Victoria

 Wow.  I watched the entire three seasons of Masterpiece Theater's Victoria series.  I am excited for the fourth season!  I think the actors are wonderful and I am thoroughly caught up in the stories of their lives.  But, as what happened when I watched Downton Abbey, my attention got riveted on the kitchen scenes.

I was impressed with the actor, Ferdinand Kingsley, who played the chef Charles Elmé Francatelli.  Something they showed several times was him vigorously mixing things in bowls -- and the actor looked like he was really putting in the effort it took to make mayonnaise and other goodies.  

My favorite guest taster noticed my interest, did some research, and discovered that Mr. Francatelli (the real one!) had published some cookbooks.  He bought me A Plain Cookery Book for the Working Classes.  It was originally published in 1861.  

What I like about this book is that the man who wrote it was in charge of cooking for Queen Victoria and her royal household.  Later, he was a cook/chef/manager for a number of notable clubs in England, mixing with all sorts of upper class people, I'm sure.  He could have looked down upon the working class as not worthy of tasty food that is prepared well.  He could have thought his talents and experience were too high for the common folk.  But he wrote this book, for them.  He included tips and advice to the woman of the house, encouraging her to think broadly about what she can fix with inexpensive cuts of meat, or to treat her family, or to stretch what she can afford.  To me, he comes across as a kind man.

There are several recipes I want to try.  This one, Sausage Rolls, is quick and convenient because today I have bread dough.  Usually I make one big loaf with my sourdough starter but today I used half to make a loaf and the other half is reserved for this recipe.  It is recipe number 85 on page 44.

Sausage Rolls

Procure a quartern of dough from the baker's, knead this with four ounces of butter, dripping, or chopped suet; divide it into twelve equal parts, and use each piece of paste to enfold a beef sausage in it; place these rolls on a baking-tin, and bake them in the oven for about twenty minutes or half an hour.

My Redaction

1 pound and a little more sourdough bread dough

1 ounce and a little more butter (softened)

1/2 pound homemade sausage, blend #3  (click here to learn what this is)

My Notes

A quartern of dough was about four pounds by weight.  My dough was a little over 1 pound, so I kneaded it with a little over 1 ounce of butter.  This made the dough very slippery and buttery. 

I didn't have beef sausages but, being a resourceful working-class cook, I made do with some of my homemade sausage.  I cut the meat into four equal pieces and patted them into beef sausage shapes.  

I cut the dough into four equal pieces, flattened them out as best I could, and embedded a piece of sausage in each one.  This was challenging because buttery dough does not really want to stick to itself.  I persevered and encased the sausage completely, although I don't think the rolls were really very attractive to view.

They baked in a preheated oven at 375 degrees F. for 30 minutes, which made them lightly brown and smell really good.  


The Verdict

I let them cool to be comfortable to handle, and served them with a good, coarse mustard.  My guest taster and I weren't hungry enough for a full meal, so we just had one roll each and some pinot noir on the side.

I worried that the bread-to-sausage ratio would be too big, that we would feel like we were eating chunks of bread that might have some sausage in it somewhere, but that wasn't the case.  There was a lot of bread but it wasn't dominating over the sausage except near the ends, which is usually what happens when you have a bread-encased whatever.  

The butter proved to be a good addition.  The bread was flaky, not doughy or dense, which my guest taster commented on favorably.  I was pleased with the result.  A few places were a little undercooked but not in any way that put me off.

The flavor was what you might expect:  tasty bread with tasty sausage.  The mustard was a good addition, as long as it was put on lightly, or you couldn't really taste the meat.  The bread and meat combination was a good one, but that is not surprising.  I enjoyed it and so did my guest taster.

It might have been better to cook them at 400 degrees F instead.  The bread soaked up the fat from the sausage, especially on the dough between the meat and the metal tray.  It was moist but not raw or sticky.  I think a higher temperature might have browned the surface better, and cooked the dough more to the middle, but I do have to point out that the sausage was cooked all the way through.

I suspect that I should have kneaded the dough longer to mix the butter in.  I'm not sure why I think that but it seems like it might have given the dough more time to absorb it before shaping and baking.

Success!  I would do this again for a simple dinner or fun food for a gathering.  We had the two other sausages for breakfast the next morning, which was tasty and fun.  I might try it again (the next time I make bread!) with actual sausages, and attempt to make the bread casing thinner.

And, just for kicks and bragging rights, here is my loaf of sourdough bread: