My occasional forays into family history and genealogy helped me learn that one branch of the family was Pennsylvania Dutch, which tickled me because I have always found their foodstuffs and techniques appealing. I have several cookbooks with their recipes in my collection, and today's recipe came from J. George Frederick's Pennsylvania Dutch Cook Book.
 |
| ISBN 0-486-22676-X |
It was published by Dover Publications in 1971 and is described as "an unabridged republication of Part II, 'Cookery', of The Pennsylvania Dutch and their Cookery, as originally published ... in 1935."
I found the cover charming, and the various categories include the usual soups, salads, vegetable dishes, etc., but also more intriguing ones like "Various Dutch Oddities", "The Dutch 'Seven Sweets and Seven Sours'" (a reference to the tradition of loading the table with precisely seven sweets and seven sours of preserves, canned good, pickles, etc.), and "Ways with Philadelphia Scrapple."
This recipe is found in the "Pennsylvania Dutch Pies" section, on page 114. I was tempted to try it because it was a savory dish and uses one of my favorite ingredients, corn.
Dutch Corn Pie
Line a casserole with pastry (not quite as rich as for a pie). Into this put a can of corn (not crushed) mixed with four or five chopped hard boiled eggs and seasoned with salt and pepper. Scatter a good tablespoon of flour over the top. Put dabs of butter around and enough milk to almost cover the corn and then cover with an upper crust.
Bake in a hot oven for about an hour.
My Ingredients
enough pastry for a two-crust pie
2 cans (15.25 ounces each) sweet corn
5 hard boiled eggs, shelled and chopped
1/2 teaspoon salt
1/2 teaspoon pepper
about 1 1/2 tablespoon flour
butter (1 to 2 tablespoons)
about 2/3 cup milk (I used 1/3 cup evaporated milk and 1/3 cup water, mixed)
My Notes
I used my go-to pie crust recipe, as found here in a previous post. Since I needed as "less rich" crust, I used equal parts butter and vegetable shortening. It hydrated and chilled in the refrigerator for several hours before I rolled it out.
I wasn't sure how many cans of corn I would need, which is why there are four cans in the picture. Two turned out to be enough.
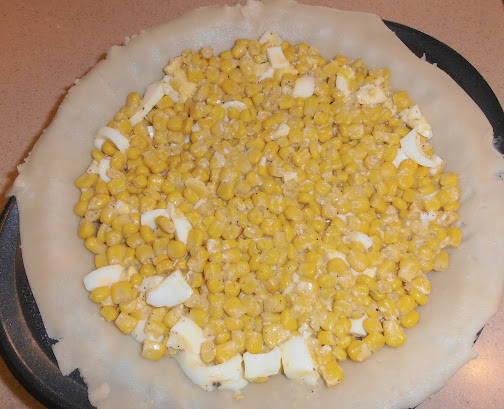
I mixed the corn, eggs, salt, and pepper in a bowl and then put them into the crust. That quantity seemed to fill the 9 inch wide pie crust just right.
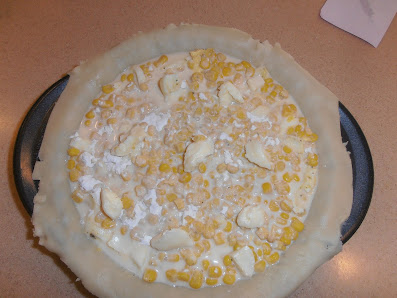
It was difficult to sprinkle the big spoonful of flour evenly across the top of the corn. I think I would use a small sifter next time. I ended up putting on another small spoonful after my first attempt, and I did a slightly better job sprinkling it on the bare spots.
I didn't measure the butter, I just took little bits (maybe 1/2 teaspoon each?) and put them around the top.
It turned out that 2/3 cup of milk was just right. It was a good guess!
After I put on the top crust and crimped the edges, I put it in the oven at 350 degrees F for 50 minutes. That is when the crust was a nice golden brown.
It cooled on the counter and then was put into the refrigerator for taste-testing the next day.
The Verdict
The pie was cut when cold but the pieces to be eaten were heated in the microwave oven until steaming hot in the center.
What amazed me was how firm the filling was. The milk, flour, and butter combined to make a filling that didn't fall apart when a piece was cut. It was not runny at all, even after heating.
So how was it?
The filling had a creamy texture, although the corn remained crisp. There was enough salt and pepper - the balance was good.
The eggs and corn were good complements, although the egg flavor was muted next to the corn flavor. (My guest taster appreciated the eggs as added protein.)
As I said, the filling was firm, but it was not dry. It didn't need to be more juicy or wet.
As for the crust, there is a reason it is my go-to: it was "just right"! Fluffy, flaky, light, and cut easily with a fork. And it is so easy to make!
Success! If you love the taste of corn (and I do), give this a shot as either a main dish or a side dish to some roast meat.
Or, if you want to match what we did, have it for breakfast!


