Thursday, March 15, 2012

Tudor Kitchen, Part 3

As I mentioned in Part 1, in 2007 I was fortunate enough to visit London, England.  The number one item on my "to do" list was to visit the Hampton Court Palace, which Henry VIII used as one of his palaces.  It has a working Tudor kitchen and I want to share what I saw with you.

This part focuses on food and storage.

Here is some beef that was roasted on the spit.  Notice the hole!


And here are some pies before they are baked...


... and afterwards!  Pies were their own container and didn't need any special cooking dish.  This was convenient when cooking for crowds.


Serving implements include metal plates if you can afford them; wooden if you can't.  Trenchers, plates made from sliced, stale bread, are out of fashion at this time.


 Most people ate with spoons and knives.  Forks were not considered eating utensils in England.  The spoon shapes you see here are typical of the period.


Storage containers came in a variety of shapes and materials, depending on usage.

These are various containers:  tall storage jars with lids (unglazed because they didn't need to be), two pitchers, and some bowls.


These are pitchers and jugs.  The green glaze is a typical color popular in the Henrian era.


You can take cloths and tie them over the tops of the containers, especially if the containers have a lipped edge to catch the string.  I have also heard that sometimes the cloth was oiled or waxed.  I think that would be considered expensive in this time period.


These storage pots are only partially glazed, as was typical of the era.


These beautiful red ware bowls are only glazed on the inside.  Good for mixing, serving, and storing.


I believe this is a salt cellar.  Salt was considered a spice, was often mentioned as a "sauce" to be served with meats, and was expensive, though not as expensive as pepper and other imported spices.  The container could be something else, though, since it wasn't labeled.


So there you have it.  A brief tour though the Tudor Kitchens at Hampton Court Palace.  I hope you go there some day and witness an actual cooking event.  They do demonstrations with experts who are in costume and probably in character.  I want to hear about your adventure!


Thursday, March 8, 2012

Tudor Kitchen, Part 2

As I mentioned in Part 1, in 2007 I was fortunate enough to visit London, England.  The number one item on my "to do" list was to visit the Hampton Court Palace, which Henry VIII used as one of his palaces.  It has a working Tudor kitchen and I want to share what I saw with you.

This part focuses on food preparation tools.

This turns a spit automatically, so some poor soul doesn't have to sit there for hours doing it by hand.


These tools allow you to suspend a pot over the fire and adjust its height.


A chunk of tree trunk serves as a chopping block for meat.


A grinder for sharpening knives.


This looks like a handy, stable bowl for chopping things like herbs.  I have a similar one that is smaller and came with a blade that was curved to fit (an Alaskan ulu knife).  I don't know if this had a curved blade with it or not.  I know that having a bowl for chopping makes the work easy and efficient.


Compare it to this mortar, which is about 10 inches in diameter and set into a counter.  Wow!


 This grater looks like it will do a good job!

 
 These are pipkins (ceramic first, metal below).  They are small, footed saucepans or cooking vessels.  The feet keep them stable and raised above a bed of coals, allowing air to circulate to help the coals stay hot.  Notice the glazing, which is not uniform over the container.  Glazing was expensive although it does seal the pot and makes it easier to clean.


This is a fry pan sitting on a stand.  Since the pan doesn't have feet, the stand raises it and stabilizes it.  Behind the pan is another pipkin.  The hole in the handle allows it to stay cool over the fire.  Some people say you can put a wooden stick in there to help move it but I would be concerned it would break the handle.

These are a grate and a drip pan.  The grate helps you cook directly over the coals, like a piece of fish you want to cook quickly.  The drip pan catches the juices of the meat as it cooks so you can baste with it or make a gravy.  **This could be a griddle instead!  Or it might play both parts.

 
 This stand can be used with a variety of pots or pans to raise them above the coals.  If a fry pan comes with its own legs, it is called a "spider". 

I noticed that this kitchen had a lot of brick counters on which the food was cooked, instead of a lot of little fire pits scattered around the room.  The counter had small openings with bars. This put the cooking surface at a comfortable height and allowed the cook to better control the fire's overall temperature.  I think you would bring over coals from a main fire, place them in the pit and put the pots over it for cooking.

These tools help you manipulate the fire.  I have similar ones (it helps to have friends who are blacksmiths!) so I would use the forked object to find live coals buried in mounds of ash. 


Some food was cooked in copper bowls set into the counter top with a fire built below it.


 The available techniques were varied, not primitive at all.  Food was baked, boiled, broiled, roasted, grilled, fried, and stewed.  The temperatures for cooking were controlled well.  This kitchen appears to be efficient and quite useful!

Part 3, "Food and Storage" will arrive next.


Thursday, March 1, 2012

Tudor Kitchen, Part 1

In 2007 I was fortunate enough to visit London, England.  The number one item on my "to do" list was to visit the Hampton Court Palace, which Henry VIII used as one of his palaces.  It has a working Tudor kitchen and I was determined to see it.  Of course I went nuts and took about 100 pictures of items that would really only appeal to cooks...

I am interested in how kitchens, equipment, and some food items looked from this time period and I want to share what I saw with you.  This tour comes in parts for brevity and organization.  Let's start with the kitchen.  **Remember, this is a royal kitchen, designed to make and serve food for hundreds of people each day.  This is not your average, ordinary home-style kitchen.  Men were the cooks and everything was, well, "king-sized".

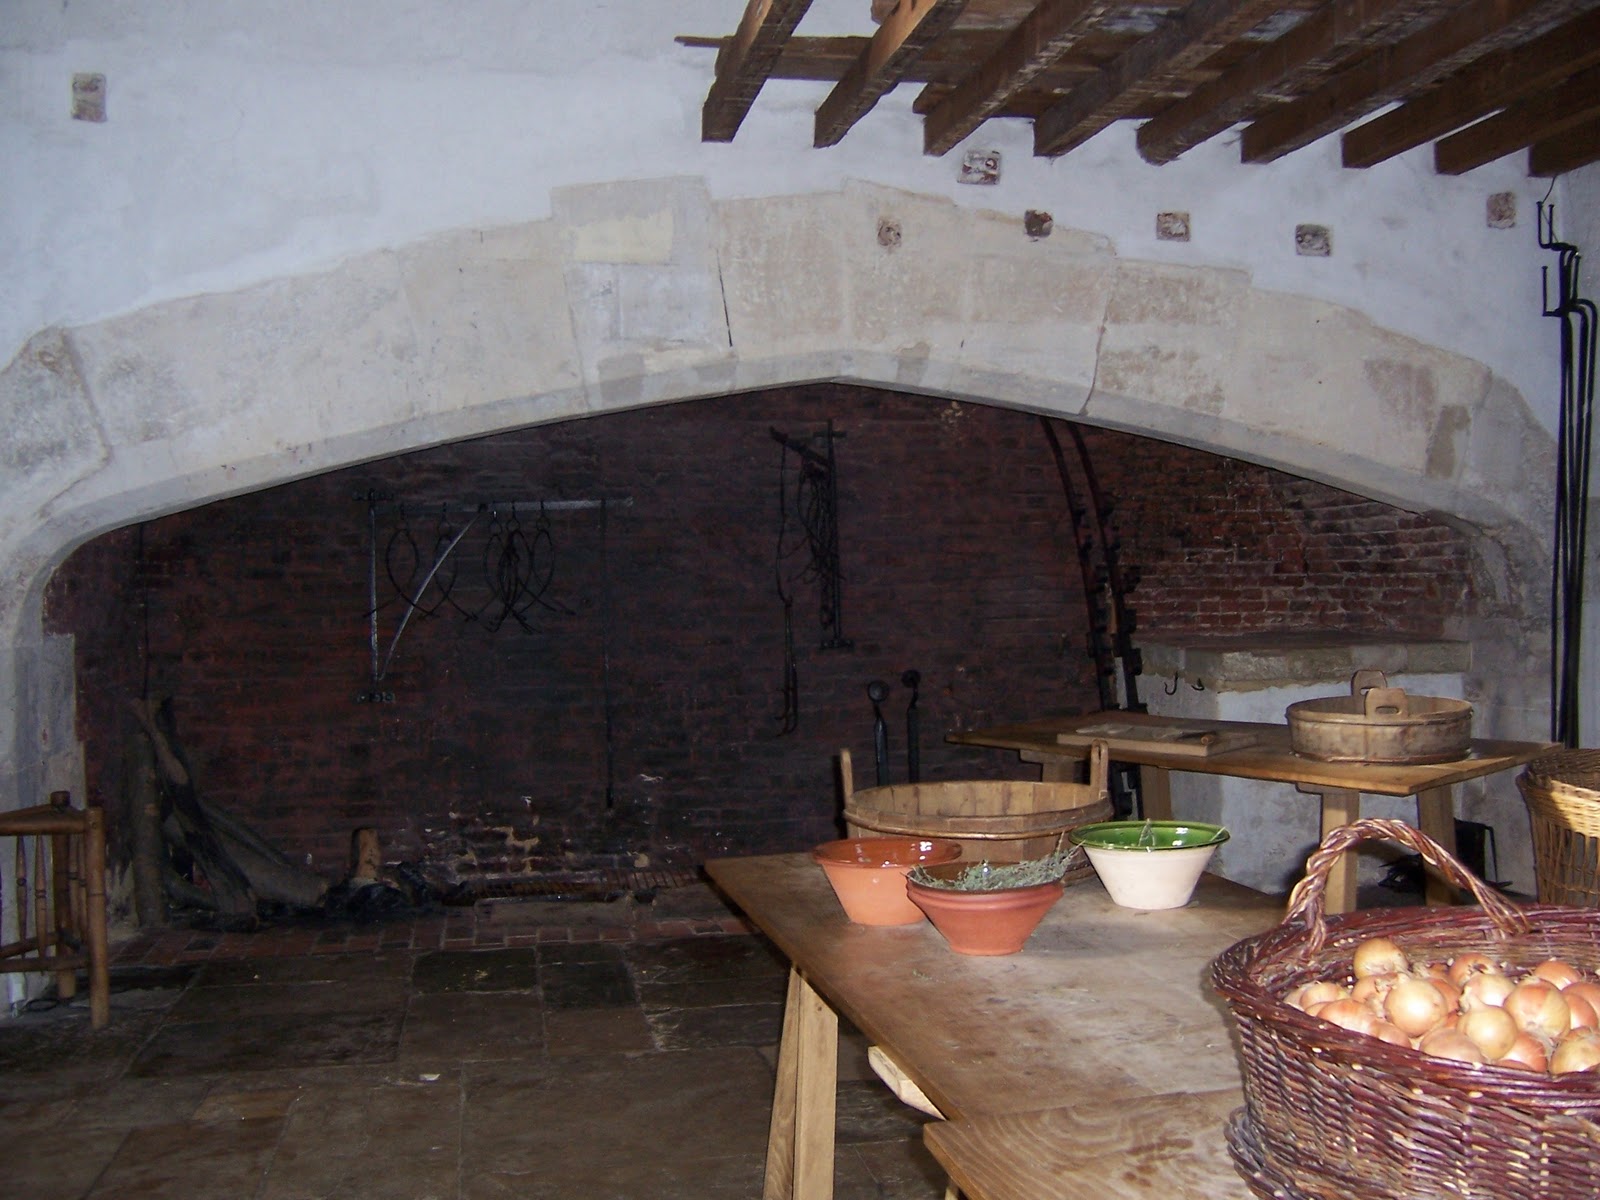
This is just one room where preparations were made.


Another room with another table.


One fireplace, big enough to cook a very large animal!


Another fireplace, designed with spits to roast large chunks of meat.


The ovens were smaller.  This allows them to hold the heat close to the items being baked.


 This is a small storage room with barrels and baskets.  Look at the fish!


This gives you just a glimpse of what the place was really like.  They do cooking demos here and of course let the public wander through.  From what I have read, when this was a working kitchen, the place would be packed with people and tables and supplies all trying to coordinate meals fit for a king and his court.

Part 2:  "Food Prep Tools", to follow.

Wednesday, February 15, 2012

Baked Stuffed Pumpkin

I'm not sure where or when I picked up this cookbook.  I know I've had it since before 1993.  Its title is Early American Cooking and was published in 1977 by The Early American Society.  (I can't find any references to them online except books they have published; I don't think they exist anymore.)


The preface says, "The Early American Society staff examined dozens of 18th- and early 19th-century cookbooks, some from private collections and some from the Rare Book Division of the Pennsylvania State Library."  It goes on to say that the recipes were adapted for smaller quantities, tested, and tasted.  It is a very small book; I hand-numbered the pages (29).  But it has some interesting recipes, like Pickled Shrimp, fregasies, stews, meat puddings, and savory pies.

The one that caught my eye was on page 21, "Baked Stuffed Pumpkin".  I have had two pumpkins sitting on my porch since Halloween and really wanted to use them up.  At least one!  Here's the recipe:

1 small pumpkin
1 pound sausage meat
1 large onion, chopped fine
2 tsp fresh sage, chopped fine (or 1 teaspoon dried)
1 cup celery, chopped fine
(I used apples.  I'm not fond of celery and wasn't going to buy some just for this recipe!)
3 cups cubed bread, toasted until dry
2 beaten eggs
Salt, pepper
1 tablespoon melted butter
Hot water


Wash the pumpkin, cut off the top, and remove the seeds and stringy pulp.

 
Place the sausage meat in a heavy iron skillet and fry over moderate heat, breaking it up with a fork.  When sufficient fat has collected, add the onion, and continue cooking until the sausage is browned and the onion tender.  Drain off as much fat as you can.

Not quite all the way cooked yet!

Place the toasted bread crumbs in a large bowl and add the sausage and onion.  Add a little hot water to the skillet and scrape up the brown particles, stir until smooth and add juices to the bowl.  Add the celery, sage, and beaten eggs.  Stir to blend, adding a few drops of hot water if the mixture seems too dry.


Fry a teaspoon of the stuffing in a small skillet, taste and correct seasoning, adding more salt and pepper if necessary.

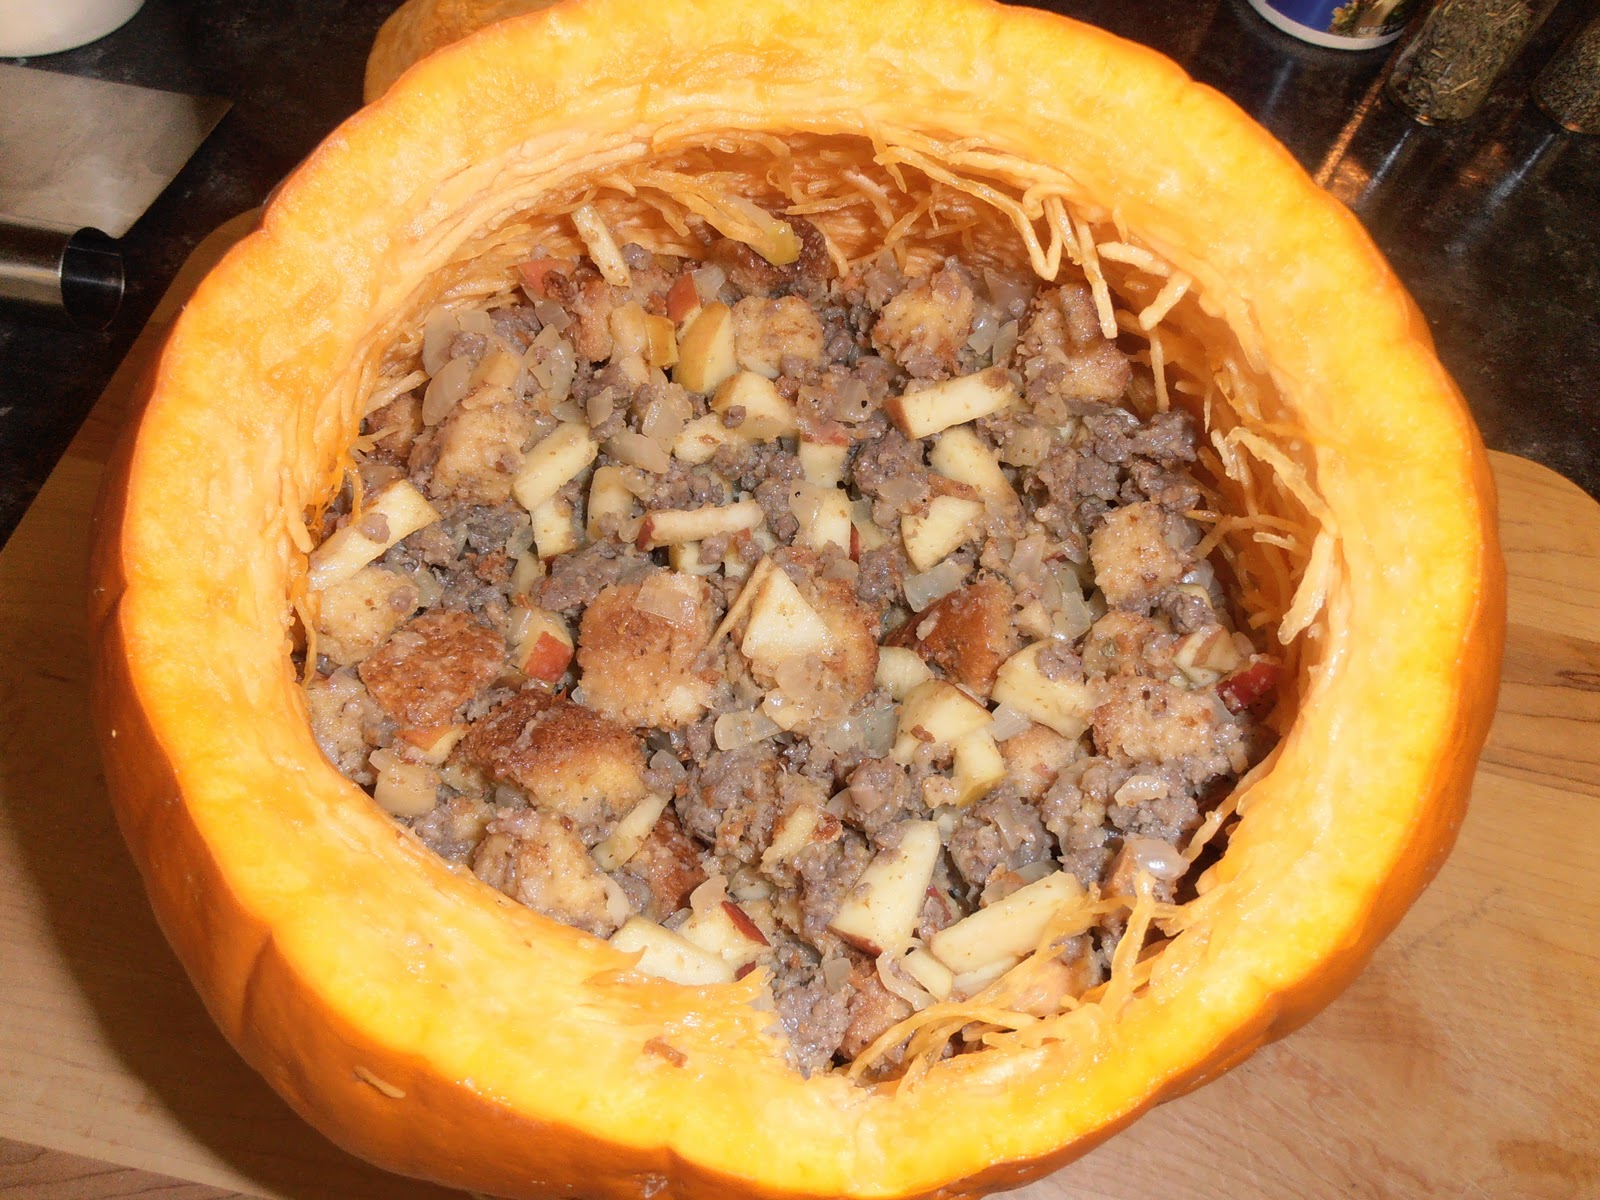
Fill the pumpkin with the stuffing -- loosely, for it will swell slightly as it cooks.


Place the lid on the pumpkin and put it in a shallow baking dish with the melted butter and just enough hot water to cover the bottom of the pan.


Bake at 350 degrees until the pumpkin is very tender (about 3 hours), basting occasionally with the water and butter in the pan.  Add more water as the pan becomes dry.


When the pumpkin is done, remove it to a heated platter and let it stand for about 15 minutes before cutting into wedges and serving.


The Verdict:  So what did I think?  It is an easy recipe to make.  Overall it was tasty, although there were a few issues.

My pumpkin was about 8 inches in diameter; I think it should have been more like 6 inches for the stuffing quantity in the recipe.  Also, my pumpkin was old; after sitting on the porch for three months it was stringy and, even when cooked until it started slumping, was not all the way tender.  There were good pumpkin parts but there were parts I didn't eat because they were tough.

The stuffing was good although I would probably bump it up a notch next time with raisins or currents or cranberries.  I guess I just like a riotous flavor to my stuffing!

I ate some when it was first cooked but liked it better the next morning when I ignored most of the pumpkin (too hard) and put a fried egg over the stuffing.

The most important part to note is that this pumpkin had to fit in my refrigerator since I wasn't serving it to a crowd right away.  That was a bit of a challenge.

***

Pumpkins were a big part of the Colonial American diet; they were easy to grow and provided both vegetable and protein (the toasted seeds).  I've heard (but don't know for certain) that if you grow pumpkin vines around your corn stalks, you get fewer rampages from raccoons.  This could be just a "wives' tale".

Conclusion:  It was pretty good and I might be tempted to do it again if (1) my pumpkin was small and fresh and (2) I had more people to serve it to immediately.  I think it is a nice taste of Colonial America!


Wednesday, February 1, 2012

Vanilla Sugar and Grace Firth

One of the favorite cookbooks in my collection is Secrets of the Still by Grace Firth.  (EPM Publications, Inc.)  One of the reasons I love it is the chatty, insightful stories Ms. Firth tells relating to whatever topic she has just introduced.  What a life this woman had!  And she manages to relate it all to stills, scents, cooking, food, and fun.  I recommend reading her book just for the pleasure of experiencing her adventures.

You can read about her time in Alaska during the late 1940s and her explorations of nature with her beloved husband, Lewis.  You will, in the process, learn about fermentation, distillation, flavors, fragrances, cosmetics, herbal medicines, and yes, even alcohol. 

One short adventure she had as a child is found on page 102, under the section "Flavoring is a Leader."  Here it is:

"My grandmother kept vanilla pods in a tightly lidded gallon container filled with sugar.  She used the sugar in baking and did not add vanilla extract.  Her vanilla beans lasted for years; she simply added more sugar when she took some out.  She stored the jar in the bottom of the food closet and I can remember getting into it, sitting on the floor, wetting my finger, dipping and savoring.  She caught me once and that was the last of that happiness."

I've been making vanilla sugar for years and can verify that it works and works well.  I use it in cooking, in tea, and sometimes I give a small container of vanilla sugar as a gift.  If I really love the person, I include a vanilla bean with the jar and instructions on how to keep the stock going.

The only thing that caused me to get more beans for my own supply was that in scooping sugar out of the jar, I sometimes break the beans.  After awhile the pieces are small and annoying, so I get a few more beans to replace them. 

I've noticed it takes a few weeks for fresh sugar to absorb the vanilla flavor.  I don't replace what I take out immediately; I usually wait until the level is low.  It is not an issue because I don't cook with it daily or even weekly.

I've heard -- but have not tried -- that you can make sugar with other flavors using a similar method.  Some day I will probably try using mint leaves.  My main worry is that they will get moldy.  One friend is going to try burying a bean into her stash of cinnamon sugar.  Mmmm!  Vanilla cinnamon sugar!


Sadly, Ms. Firth died in 2004.  She had written several books; the other one I have is the companion book to Secrets, called Stillroom Cookery.  I like it but have not tried the recipes in it.

The Verdict:  I highly recommend you read The Secrets of the Still.  If you have any interest in fermentation (includes things like sauerkraut, pickles, and vinegar), distillation, or scents, this book is for you.  If you love travel, you will love her adventures.

Monday, January 16, 2012

Potato Soup from the 1950s

I was fortunate to inherit my grandmother's copy of Betty Crocker's Picture Cook Book.  I think it is a second edition but I can't tell because some of the front pages are missing.  I know it is not the first edition because I purchased a replica reprint on its 50th anniversary, in 2000.


The two editions look about the same (the picture is of my grandmother's book) but the first edition has an alphabetical index by chapter and my grandmother's book has a standard index.  I find the standard index much more convenient; I can look up all recipes for say, potatoes, at once instead of having to check each chapter.

Speaking of which, I had a bag of potatoes in my pantry that needed to be used.  This, my friends, is how women used to cook all the time -- What do I have and how can I use it?  What is in season?  There was not a lot of running to the store to get the latest trendy ingredient or deciding what to cook based on how you felt on the spur of the moment.  So in this spirit, I decided to try Betty C's simple recipe for potato soup (it being a wet and blustery day).


****

Potato Soup (page 371)

"The homey, old-fashioned kind."

Saute' gently in 2 tbsp. butter...

   1 tbsp. grated carrot
   1 tbsp. scraped onion

Stir in ...
   1 tsp. salt
   1/4 tsp. celery salt
   1/8 tsp. pepper
   2 cups hot milk
  1 cup mashed or boiled potatoes put through a coarse sieve

Cook 20 min., stirring occasionally.

Amount:  6 servings.

*****

I used the fine holes on the grater for the carrots and, instead of scraping the onion (which I find messy), I finely chopped them.  It seemed like a lot of butter for my tastes but, when I considered that I'd be using non-fat milk, I was fine with it.


I boiled the potatoes unpeeled for about 20 minutes, until they were tender all the way through.  I pierced them with a cooking fork to check.  They were drained and cooled for a while and then I peeled them.


The recipe called for 1 cup of mashed potatoes.  I cooked four potatoes knowing that it was too much.  No problem!  I can always use the remainder for some other dish, like a gratin. I ended up using two. (They were all pretty small potatoes.)


I admit to not using a sieve but I stirred it for awhile to break up the potato bits.  When I cooked it for 20 minutes, I kept the fire as low as possible and stirred it more often once the soup started steaming.  This got the soup nice and hot and also blended the flavors.


The Verdict:  Yum!  It smelled good, making me want to taste it.  It was interesting to look at, with the carrot and onion bits, the pepper, the small lumps of potato, and the butter floating on top.  It was tasty and a little bit creamy -- would be more so if I had used whole milk as they would have in the '50s, I think.  I'm not a fan of celery salt but I used it anyway and was pleasantly surprised at the flavor.  I think it is just right.


By the way, "6 servings" would work if this was a soup course before a bigger meal.  I don't think I would get more than 2 servings if soup was the main focus of the meal.  If you like chunky potato soup, you could use some of the extra cooked potato, cut into small dice, to make it that way.  I think it would also be good with some cheddar cheese melted into it. I had it "as is" for lunch with some saltine crackers and a sliced apple.

Cookies Consent

This website uses cookies to offer you a better Browsing Experience. By using our website, You agree to the use of Cookies

Learn More