Friday, May 15, 2020

The "Making Do" Challenge -- Sorrel

In order to avoid going to the store during the pandemic, I looked around my yard for ideas on things to eat.  This is not as crazy an idea as that may sound as I tend to plant edibles when I can.

Several years ago I bought four little sorrel plants from the nice lady at the local farmers market and planted them in a corner.  I also bought spinach and planted them at the same time.  In less than a few days, the spinach had disappeared, presumably eaten by rabbits or squirrels or snails.  But the sorrel went untouched.

This was promising.  Even better, the sorrel grew and thrived so much that sometimes I just had to cut off all the leaves and toss them into the compost pile in order to get tender new leaves to eat.  You see, sorrel is like spinach with a tart, acidic bite.  The older leaves are a little tough (but not bad) and a lot more tart than the new leaves.

I often put some fresh sorrel leaves (old or new) into my salads and I really like putting big handfuls of chopped sorrel into soups and stews.  I noticed that the leaves tend to cook down to nothing recognizable as greenery and yet they add flavor, fiber, and nutrition to the dish.

But this was not the time to toss the great quantity of leaves into the compost pile.  I wanted to use them!

What caught my attention was a recipe found in The Gourmet Cookbook, volume 1.  It is a book published through "Gourmet Magazine" and this edition was published as the magazine neared its silver anniversary.  It is a lovely, two-volume boxed set, with a classy reddish-brown and gold cover.  I received as a gift from my friend DS, a talented cook who wanted to pass it on to someone who would appreciate it.  And I do.

6th printing, published 1974, by Gourmet Books, Inc.
I found on page 220 the recipe for

"Purée d'Oseille" or Sorrel Purée.

For 1 cup purée, wash thoroughly and drain 3 pounds sorrel.  In a saucepan over high heat cook the sorrel in the water that clings to the leaves for 10 to 15 minutes, or until it is very soft.  This is called "melted" sorrel.  Drain it in a sieve and press out as much water as possible.  Rub the sorrel through the sieve and add 2 tablespoons butter and salt and pepper to taste.


Three pounds less the weight of four earwigs and two snails

My Notes

Three pounds of sorrel is a lot of sorrel.  A lot of sorrel!  It took nearly all of the leaves my plants had -- and I was grateful for it as they were all older leaves.  None of it went into the compost pile.  I washed it in batches, making sure all the bits of mulch and dead leaves were pulled out.  I left the stems on the leaves.

The biggest saucepan I have could only hold about 1/2 pound of fresh leaves at a time, so I cooked them in batches, too.  Once a batch was "melted", it went into a sieve over a bowl to drain while I cooked the next batch.

About 1/2 pound
Fortunately, the leaves reduced in volume quickly.  The directions called for high heat but I learned to reduce it to about medium (4 out of 10) to keep the leaves from scorching.  It didn't take 10 to 15 minutes to get them very soft, either.  It was more like 4 to 5 minutes per batch.  I cooked them until the stems were soft and floppy as they were the last part to get that way.

From a full pan to a little puddle
I used tongs to turn the leaves while they were cooking.  That helped reduce scorching as well as made sure all the parts were cooked evenly.

All the melted sorrel drained very little -- maybe a tablespoon or so of liquid -- and I was reluctant to push on it much as I didn't want to press it through yet.  I estimated its quantity to be about 3 to 4 cups.

Preparing to push
I pushed the sorrel through the sieve using the backside of a ladle.  This worked well.  I noticed that an area would reduce to mostly fibers while the green purée dripped through to the bowl underneath.  But it was intense work!  I stopped after getting about 2 cups of purée, when I probably could have gotten another 1/2 cup more.

Voila!  See how thick it is?
I mixed in 3 tablespoons of melted butter and about 1/2 teaspoon each of salt and pepper.

The Verdict

The purée was a dark olive-green and very thick.  It mostly held its shape when stirred or piled up with a spoon.

I served it with some roast pork, a green salad, and some leftover red potatoes and rice.  This was a good choice because the sorrel was very tart and needed to be paired with something that could stand up to that.

And wine!  Don't forget the wine!
Yes, it was tart.  Almost too tart for my taste, although my guest taster thought it was wonderful.  We both described it as robust, tart, creamy, and complex.  Like spinach with lemon but with more.  The texture was silky smooth.  A small amount on the plate was plenty for me; my guest had seconds.  We both liked it but as I said, for me it was on the edge of being too tart.  I kept wishing I had cut it with spinach purée or something to tone it down a bit.

So I declare it a success!  Definitely a repeater for when the sorrel patch gets overgrown again, or earlier if I want to try it with new leaves and hope for a lower tartness level.  I wouldn't need to use the entire three pounds, though, to get enough for two.  (The book said the recipe would serve six.)

Two cups of purée is a lot to use up when each serving is small, so I started looking for other ways to include it in a meal.  Once it was thinned with some pork broth to make a sauce to spoon over poached eggs for breakfast.  Another time I put in more salt and pepper and then a little beef bouillon to shift the flavor to more meaty and used it as a side dish.  And yet another day we mixed a few spoonfuls of it into a bean-corn-and-pumpkin soup.  It shifted the flavor of the soup to something different, which was good because it was the third meal where we had the soup.  (Not the third meal in a row!)

I finished using up the sorrel purée by turning it into a soup.  I added a very herbal beef stock, more salt and pepper, chunks of crispy bacon, bits of onion cooked in the bacon fat, a big spoonful of cream cheese, and honey.  Yes, honey!  It seemed to temper the tartness.  I didn't add the honey until after I put in everything else and felt that it was still too tart for my tastebuds; after adding the honey, it was just right.  No, it wasn't sweet or even sweet-and-sour, but tart at a level I liked very much.  The soup was a big hit and I served it with toast (great for dunking!) and some pieces of bacon on the side.  The quantity was just right for two.  Success again!

I wonder how it would taste and what the texture would be if, instead of pushing it through the sieve, I put it through the blender.  That will be an experiment for another day.


Sunday, May 3, 2020

The "Making Do" Challenge -- Sausages, part 3

I'm in the midst of making sausage from a chunk of pork cushion meat, using the ingredients I have around the house.  This is part three; to see yesterday's post:  Click here.


Today I tried full-sized patties of each blend, to see how they turned out after having a day in the refrigerator for the flavors to blend.

Blend #1

As I feared, it was too salty.  Even my salt-loving guest taster agreed, and that says a lot.  I hadn't considered the impact of the salt in the liquamen when I was measuring the straight salt at the beginning.

To adjust this, I cut up more pork chunks and included seasoning and added it to Blend #1.  Here's what I used:

     2 lb 6 oz meat
     3 g pepper
     3 g mace
     15 g fresh parsley
     1/2 cup cold water

Note that I did not include any salt and I was out of dried apple.  The nice thing about the parsley was that it showed me how well I had mixed the new part in with the old.  It wasn't well blended until the parsley was distributed throughout.

This worked out so well.  The new blend had just the right amount of salt and a bright, slightly spicy flavor.  We enjoyed it with fried eggs at breakfast.

Blend #2

Well, the recommendations to mix garlic in to make sausage was spot on!  The garlic flavor was strong but not so much to put us off.  We truly enjoyed it as a patty along with a salad and crackers.  The salt balance was right and it was moist and flavorful.

Blend #3

This was the mix where I decided to increase the flavor ingredients to really make an impact, and boy, did it work.  My guest taster declared it "A keeper!" and I agreed.  I couldn't really taste the apple but imagined it added a bit of sweetness.  The rest of the flavors were bold in a pleasant way and the salt level (from just the liquamen) was just right.

And now for a bonus!

When I chunked up the rest of the cushion meat to adjust Blend #1, I had enough left over to try another blend.  I kept recalling a conversation I had with an Egyptian friend,  AF, when we discovered we were both foodies who liked to cook.  He told me his favorite spice combination on meat used cardamom, pepper, and cinnamon.  This caught my imagination and inspired me to try it with the fourth sausage flavor blend.

Blend #4

4 lb 5 oz pork
28 g salt
50 g raisins
2 g pepper
1 g ground cardamom
2 g cinnamon
1/2 cup red wine


This turned out to be my absolute favorite.  Sweet, spicy, bold, salty (just right), and the red wine added its own floral perfume to the mix.  Truly a wonderful eating experience.  I would make this again any time!


The Verdict

I declare my sausage-making experience quite the success.  All the blends turned out well, even #1 after I adjusted it to balance the salt.  And, of course, #4 was the best of all.

At this point I had to decide how I wanted to proceed.  I had the ingredients to make tube sausages but I was running out of time; I had too many other things that had to be done.  So I decided to make them all bulk sausage.

I weighed out 1/2 lb quantities, shaped them into cylinders, and wrapped each in plastic wrap.  Each lump was labeled with the blend number and all the lumps were put into freezer bags with notes as to what was in the blend.

The funny part was how potent the garlic scent was, even through two layers of plastic and solidly frozen.  It has since settled down but, wow!  Strong!

It is nice to know I have a variety of sausage flavors to work with.  It was also fun to discover how easy it was to make up my own flavor combinations and still have them tasty.  My guest taster was astonished at how good they all were; he just hadn't had "high quality edible art" before.

Now he knows!

Stay safe and well, everyone.

Pinterest needs a picture for me to post, so I am including a picture of my cat.  She did not get any sausage but she did ask for some.  : )


Saturday, May 2, 2020

The "Making Do" Challenge -- Sausages, part 2

Yesterday I wrote about the beginning of my sausage-making challenge.  I had 15 pounds of pork cushion meat and a variety of items in my kitchen and garden to help make amazingly-flavored sausages (I hoped!).  See yesterday's post here.

Today I want to tell you about the flavor combinations I tried.  These were combinations that I wanted to do by thinking about what I like and playing from there.

The First Blend

3 lb (1359 g) pork chunks
34 g salt
15 g dried apple
2 g total mace and black pepper, roughly 1 g each
about 65 ml liquamen mixed with 65 ml water

Following the directions from Sausage Making for Beginners, I weighed the salt and "other" ingredients, mixed them in with the pork, then set up my grinding station.

Meat and flavoring, but no liquid, tossed and waiting for the grinder
I have a metal grinding attachment for my mixer, so that was assembled and put into the freezer to chill.  The beginner's website said to use the fine plate but the mixer's instructions said to use the medium plate for sausage, so that is what I used.  I set up an ice water bath for the metal mixer bowl which will catch the ground meat.

The fit was very good!
As directed, everything was clean and cold.

It didn't take long to grind the three pounds of pork.


I took a little of the ground meat and cooked it to see what it tasted like before I added the liquid.  It was fine; I liked the flavor, which was a blend of the ingredients and none actually stood out.


Then I added the liquamen and water to it and mixed it with a wooden spoon until meat looked like the bulk sausage I have bought in the store.  I figured that was the best representation of what the paste should look like.  Really, it was just the ground meat but stickier.  I made another patty and was a little worried that it was too salty.  But I was willing to wait until the next day so the flavors could blend.

Then I packed the sausage into a plastic tub and put it into the refrigerator while I planned the next mixture.

The Second Blend

I had read so much about the wonderfulness of garlic in a pork sausage that I decided to try it in this blend.

3 pounds (1359 g) pork chunks
34 g salt
8 g of chopped garlic in oil
12 g fresh parsley
130 ml water

Garlic, salt, and parsley ready to be ground
I went through the same process:  grind the mix, add the water, stir to get a paste.

I cooked a small patty and thought the flavor was the right blend of garlic.  Not sure I got much of the parsley but it wasn't bland.

Then into the refrigerator while I set up the third blend.

The Third Blend

I had just a little over 2 1/4 lbs of pork chunks left.  I decided I would change the flavor ratios more, to make the flavors stronger.  I also wanted to use up the rest of the dried apple.

2 lb 5 oz pork
11 g chives
9 g dried apple
2 g mace
2 g black pepper
125 ml liquamen

Notice that I didn't add any salt to this one.  Since I decided to use all liquamen for the liquid, I hoped that would be enough salt.  I was still worried about the first blend being too salty.

Apple and oniony chives.  Yum!
When I tried a small patty of the paste, I thought the salt level was just right.  I also got the idea that I had put in too much pepper -- it had a bit of a burn to it!  But again, I thought it was a good idea to wait for the flavors to blend.

Tune in tomorrow for part 3 of the sausage-making extravaganza!

Friday, May 1, 2020

The "Making Do" Challenge -- Sausages, part 1

So the world came to a halt while we all hunkered down to wait for the COVID-19 virus to run its course.  As so many other people did, I purchased food to have enough to feed me and mine without having to go to the store very often.  I did not hoard and I never took the last of anything; it is important to me to share with others.

It occurred to me that I am fortunate enough to be able to afford the more expensive food items, like big chunks of meat, higher price-per-pound meat, fancy cheeses, etc.  Then I realized I should buy those foods and leave the inexpensive items for people with lower incomes.  So I came home with a 15 pound bag of pork cushion meat and an idea to learn how to make sausage.

My reading around the internet reminded me that our word "botulism" comes from the Latin word for sausage, emphasizing the need to be careful and clean in the making process.  I needed to learn the right way to do it; to this end, I found this website:  "Sausage Making for Beginners."

I appreciate the step-by-step instructions and discussion the author offers.  I like that he gives some recipes to help me see what to do.  And I am grateful for his emphasis on cleanliness.  The process looked doable, so I set about doing it.

I was inspired by this line:

You will be crafting high quality edible art.

In the area where he gives recipes, he gives these ratios:

  • 1 part meat and fat
  • 2.5% salt
  • 1% other stuff
  • Up to 10% liquid
The "other stuff" will define your sausage.  These are things like black pepper, paprika, garlic, sage, onion and chili powder.
The liquid portion can be anything wet (water, wine, stock, milk) and serves four purposes.  (1) It adds moisture to the meat resulting in a juicier sausage.  (2)  It lubricates the meat making stuffing much easier.  (3)  It adds flavor to the sausage if you choose to use wine or stock.  (4) It helps disperse the other seasonings throughout the rest of the sausage.  Make sure any liquid is ice cold before adding to the meat.

In a situation where I need to use what is in my house and not go shopping for specific ingredients, I felt like I was in control of the flavoring.  Between the spices in my pantry and the herbs in my garden, I believed I could make a variety of tasty sausages.

My goal, given the entire 15 pounds of pork to work with, was to make that variety and then freeze them for future use.  I decided that I would take several days to do the entire process.

I love the flavor combination of pork and apple, especially with nutmeg or mace involved.  I asked some experienced charcuterie makers what they thought about using fresh, grated apple and the general opinion was "meh."  Not really worth the effort and it added a lot of moisture.  But, they mentioned, they have had good results with dried fruits, so I decided to make dried apple bits to put into the sausage.

I took a clean apple, cut it into quarters, cored it, then sliced it thinly on my hand-shredder/slicer.  The pieces went onto a sheet and into my oven, set on warm.

Ready to dry
After drying like this overnight, I had crispy apple slices that I broke up into pieces (not intentionally but most had stuck to the pan), and planned on using them in at least one sausage mixture.

Dry and flavorful
I also got out the pork and started cutting it into the suggested 1 to 2 inch size chunks.  It was very cold, as it should be, but after getting through about half of the package, my meat-holding hand was going numb.  I stopped there and put the meat back into the refrigerator to chill overnight (the same night the apples were drying).

First cut the slabs.  Leave the fat, remove the slime (of which there was very little)
About 8 pounds of pork chunks.
Whew!  It helps to have a very sharp knife.

Tune back in tomorrow to see how I flavored the meat and did the grinding.


Wednesday, April 15, 2020

Playing with Pumpkins, Part Two

My last post was taking a pumpkin and filling it with a stuffing made of pork sausage, apples, onions, bread, and spices.  It was tasty and the pumpkin had a mild flavor that was, fortunately, not bland or bitter like previous pumpkins I have cooked.

Now I want to cook with the other pumpkin I bought at a farmer's market.  The vendors said this would be such a sweet pumpkin and I was hoping they were right.

I decided to try it with a custard inside, studded with fruit and nuts.

I decided not to use the cream
I used Michael Ruhlman's book Ratio to help me plan the custard.  I chose the 2 to 1 ratio of half-and-half to eggs for a creamy but firm custard as the base for my dessert.

Ingredients

1 pumpkin, washed and rinsed
12 ounces half-and-half
3 large eggs
1/4 teaspoon almond extract
1/2 cup sugar
2 1/2 ounces sour cherries, coarsely chopped
1/4 ounce slivered almonds, chopped

My Notes

Before I knew how much half-and-half and eggs to use, I had to prepare and measure the pumpkin.

I cut off the top, putting the knife in at a slant, to make a lid and to leave as much of a bowl-like interior as I could.  Then I scraped out the seeds and strings from the inside and off the bottom of the lid.

When I rinsed the inside of the pumpkin, I filled it with water and measure how much it comfortably held.  It seemed like 15 ounces was about right, so I planned on a total of 18 ounces to work with Ruhlman's ratio:  12 ounces of half-and-half with 3 large (so 6 ounces) eggs.  I knew that could overfill it but I didn't worry about it.

I just guessed on the amount of sugar, extract, cherries, and nuts.  I wanted it mildly sweet and I thought the extract would compliment the cherries more than vanilla extract would.


Ruhlman suggested putting the half-and-half, eggs, sugar, and extract into some sort of blending device to make it smooth.  I used a stick blender.  I put the pumpkin into my Dutch oven.

Then I poured the custard mix into the pumpkin and stirred in the cherries and nuts.  This made the pumpkin very full so I put the lid on the side instead of on top.  Then I poured boiling water around the pumpkin, put the lid on the Dutch oven, and put the whole thing in a preheated 325 degree F oven.


After one hour, I took the lid off the Dutch oven to let the custard finish baking.  I notice the custard had risen and occasionally leaked out over the edge of the pumpkin bowl but I didn't worry about it.

It took another hour before I felt the custard had set enough to remove from the oven.  It wasn't entirely firm and I saw a lot of liquid around it, which I assumed was from the pumpkin itself.

I used two slotted spoons to remove the pumpkin from the baking pan and placed it in a bowl.


I then covered it with plastic wrap and put it in the refrigerator overnight.

The Verdict

The next day I tasted it.  The custard was firm, the pumpkin was tender, and the whole thing sliced beautifully.  It all stayed together when moving a slice to a plate for serving.


As I had expected, the cherries and nuts were mostly on the surface, but there was enough of them that it was easy to get a bite of them even when scooping up custard from deep in the pumpkin bowl.

And the flavor? 

First, the custard was just right.  Creamy, smooth, lightly sweet.  I couldn't taste the almond extract but that was okay by me.  The cherries weren't as sour as they were uncooked but still flavorful and added a nice bright sparkle of flavor to the mild custard.  The almonds did exactly what I wanted:  they were a bit of crunch that was much needed to balance the texture. 

The pumpkin was absolutely the best, sweetest pumpkin I have ever eaten.  No bitterness, sweet without being cloying, tender and smooth.  Even the rind was tender and easy to eat.  It worked so well with the custard that each mouthful was a pleasure. 

Oh my, Success!

I am saving the seeds in hopes of growing more of these pumpkins.  I wish I could remember what the vendors at the farmers market had called the variety!  I've done more reading on tasty pumpkins and I wonder if this is the variety called "Cinderella's Carriage."  It looks a lot like the description and it is soooooooo tasty. 

I wish more farmers grew this pumpkin.  It could start a trend for pumpkin-eating!  Like the nursery rhyme:  Peter, Peter, Pumpkin-Eater! 


Wednesday, April 1, 2020

Playing with Pumpkins, Part One

This post is the tale of two pumpkins, both of which were purchased (at separate times) from a local farmers market and a local produce stand.


You see, I want to cook with pumpkins but the ones I've bought in the grocery store are just icky in flavor.  Jack-o'lantern pumpkins are bitter and nasty.  Even the last "pie pumpkin" was pretty mediocre in flavor.  So when I found these pumpkins grown locally, I knew I had to try them.

What to do with them?

The orange one was still called a pie pumpkin but I decided to stuff it and make a savory main dish from it.

I used foods I like for stuffing, but I put them together rather haphazardly.  This means I wrote down what I used but didn't take a picture of all the ingredients before I used them.  Here is the list:

1 pound pork sausage (bulk)
1 apple, cored and cut into small pieces
1/4 large onion, sliced into thin pieces
1/2 bagel, cut into cubes and toasted
1/4 teaspoon powdered mace
1/2 cup red wine

Preheat the oven to 300 degrees F.

Any bread will do, I think.  I just happened to have a bagel handy.

The key to stuffing something (a bird, a pumpkin, whatever) is to have your stuffing completely cooked before the whole thing goes into the oven.  So brown the sausage and break it up into smallish pieces.

Partially cooked; still needs to be broken up more.
Saute the apple and onion together until tender.

I love apples and onions cooked together!
After the bread bits are toasted, break them up into smallish pieces, if they aren't already so.

I used my fingers to break them into small pieces.
Mix the sausage, apple and onion, bread cubes, and mace together in a big bowl.  Then sprinkle the wine over the top and mix it in.

Smells yummy!
Wash and dry the outside of the pumpkin.  Cut open the top -- make the opening wide -- and scoop out the seeds and strings.  Trim the strings off the inside of the top, too.

Using 1/2 teaspoon each of salt and pepper, sprinkle the inside surface of the pumpkin to spice it.

Sprinkle them separately or mix them together.  Tilt the pumpkin to get all the inside covered.
Stuff the pumpkin.  I had to push to get it all to fit, but it did fit.


Put the lid on the pumpkin and place the pumpkin in a deep pan, like a Dutch oven.  Add 1/2 cup water to the pan.

Put in oven and bake until the pumpkin is tender when you push a pick into the side.  I baked mine about 2 hours.  I checked it after one hour and added a cup of water to the pan.  The original 1/2 cup had evaporated.

The Verdict

After two hours, the pumpkin was tender but not falling apart.  I served it as a main dish and had grilled brussel sprouts as the side dish.

When I took off the lid, I could still smell the wine.  Yum!


It was easy to slice the pumpkin into wedges for serving.


The taste?  The stuffing was enjoyable:  The sausage was flavorful as a good pork sausage can be. The apples and onions added moistness and sweetness while also complementing the pork. The bread added bulk and held the wine while shifting the texture away from just meat.

The pumpkin itself was, fortunately, not bitter.  It had a mild pumpkin flavor that went well with the stuffing.  I am glad that I spiced the inside of the pumpkin before stuffing because I could taste the salt and pepper, and I liked what I tasted.

Overall a good meal.  We both liked it and are looking forward to eating the leftovers.  Success!


Sunday, March 15, 2020

Roman Fish Sauce -- Liquamen, Garum -- Once Again

A little over a year ago, a fisherman friend, MB, gave me a bag of mackerel he had caught off a local pier.  I decided I wanted to make liquamen again, but this time with a lower salt ratio.

My previous attempt is documented here.  Beware:  Some of the pictures are pretty graphic.

After reading around the internet at other bloggers' attempts, I decided to use the smallest recommended amount of salt, roughly 10 parts fish to 1 part salt, by weight.

The mix of whole fish and salt went into a glass container that I sealed up tight and put on the floor by a sliding glass door.  The idea was that I could see it go through the process, get some sunshine on it, and still not stink up my house.  Well, that and keep the cats out of it, too. 

The container sat on my floor for an entire year.  I watched it first start accumulating liquid, then the fish started "melting" into the liquid.  Occasionally I shook the container just to see how it was coming along.

After a while I saw fish bones and brown chunky muck as the majority of the contents.  And then the muck started separating into layers:  chunks on the bottom, clear liquid on top, and other particulate liquid on top of that.  Even after I shook it, the layers would reappear.

You can see the layers reforming after the container was moved.
Once the one-year mark passed, I opened the container and began filtering the contents.   One thing I noticed is that there were no big particles left -- all the flesh had broken down into tiny bits.  The only things that were big were the bones.

This is what I ladled out, leaving bones behind.  Very fine textures.

First filtering.
I used the same bag and metal filtering process I used before.  The bag got out the "big" particles but the liquid was still cloudy.  The metal coffee filter cleared it up.

But now the big test had arrived.  How did it taste as compared to the previous attempt and to what you can buy in the Asian market?

I asked my Vietnamese friends, CN and LP, to give it a try.  CN had told me once, "I am Vietnamese!  We have fish sauce in our blood!"  So I knew they were the right people to judge.

They had tried my first attempt and I asked them to compare it to my second attempt.

Their assessment was put so nicely in a note from LP: 
I have never had pure fish sauce before.  It's so good, especially the second time with less salt.  The taste is rich in protein.
I have had fish sauce my whole life and this sauce is the best.  I have used a couple of teaspoons in soup.  It tasted better than the fish sauce I bought in the store. 

There you have it!  An expert's opinion!

I liked it, too.  My thought was that, with less salt, I could taste more of a sweetness to it.  Perhaps it was wishful thinking or perhaps it was that I expected it to taste more like the Thai fish sauce + reduced grape juice mixture that I tried first.  (See this post.)  But it tasted better to me.

I am so glad I tried the "reduced salt" version.  Trust me, it is still very salty, but I think more flavorful.

I use it in soups and stews, to increase the salt content but, more importantly, to raise up the richness and meaty taste, the "umami" fifth flavor we love so much.  Sometimes I made a sauce from it.  It is really good on grilled beef.

Success!  I won't actively seek out more raw fish to make this sauce, but if some happens to come my way, I know what to do with it.
 

Sunday, March 1, 2020

I Made a Tvare

My friend KC made me aware of a cooking gadget called a tvare, a Norwegian whisk.  She showed me the steps and how convenient making it from a Christmas tree really is.  So I did!

Wikipedia tells us:
tvare f or m (definite singular tvara or tvaren, indefinite plural tvarer, definite plural tvarene)

    1. stirring stick for cooking, with tines at the end.  A Norwegian whisk.  Fashioned crudely from the crowns of conifer trees, etc.
    2. archaic auger or drill 

Other sources I spotted mentioned that "tvare" is the tool and "tvara" means "to mix."  The idea is to cut the tree trunk so you get a handle and have branches near the thick end to make the tines.

The instructions were straightforward:
  1. Cut the part of the tree you want to use
  2. Trim the branches
  3. Remove the bark -- don't worry about this too much because of the next two steps
  4. Soak it in boiling water for 10 to 15 minutes 
  5. Resume removing the bark
  6. Sand it smooth
  7. Seal it with oil
My Attempt

I used my Noble fir Christmas tree, with my focus on the top two fifths or so.  I thought I could get two tvarene from this and still have handles long enough to make me happy.  


I looked for branch cluster and cut the trunk just below it.  I had to remind myself that the handle was the part of the trunk above the cluster so the tines would curve upward when the tool was in use.


I cut the thickest part of the trunch first and then, after deciding how long a handle I wanted, I cut above that to get the second tvare.

Then I trimmed the branches to what I considered a good length for the tines.


I knew it could be a challenge to smooth off the bumps of the branches I didn't want, so I cut them as close to the trunk as I could.  


I had a very sharp knife to start peeling off the bark.


There were three parts to pay attention to for this step:  the brown bark, the white fibrous layer under the bark, and the creamy wood below that.


My goal was to remove as much of the first two layers as I could while working outside and then leave the details to come off once the tvare soaked in the hot water.


To soak them, I used a big pan filled with water and brought to boiling.  I turned the fire down so the water was simmering.  Neither piece of wood fit in the pan, so I put one end in the water for about 10 minutes then flipped it so the other end soaked, too.  The steam seemed to be beneficial for the parts that never actually touched the water.


The water turned dark reddish-brown and smelled wonderful.

What I liked about this is the layers that still needed to come off were easily removed -- they slipped off with my fingernail or with a gentle push with the knife blade.  The wood cleaned up beautifully, even in the tight corners where the branches met the trunk.


The next step was to sand everything but I felt the wood was still too freshly cut off the tree.  I left the tvaren on the counter for a week or so, until they felt lighter and warmer to the touch than when they were freshly cut.  They dried inside and out, and I could tell the difference.

For the bigger tvare I used a 120 grit sanding sponge.  It worked well, especially in the tight spots, except where small wood parts protruded from the tines.  I had to get my knife and whittle those off so they wouldn't tear the sponge.  I also carved the thicker bumps down as much as I could so there wouldn't be any place for food to hide when the tvare was being cleaned.

I decided to go more "rustic" for the smaller tvare.  I sanded it completely with a piece of sandstone.  This worked really well, especially over the bumps and across the cut trunk ends.  The piece (when I started using it) had a narrow point that I used to get in the tight spots.  Eventually it broke off but I was done using the point at that time.

The sandstone in the middle.
The difference between the two sanding methods was this:  the sponge made the wood satiny smooth and a joy to hold.  The stone made it easy to remove bumps and smooth them down without having to use the knife but the wood's surface wasn't as texturally pleasant.  It was perfectly acceptable, just not like satin.  

Some of the cut tine ends splintered when I cut them, so I used the knife to whittle them to more of a point.  My goal was to reduce places for food to hide from cleaning.

Once the pieces were wiped with a damp cloth to remove the sanding dust, I let them dry for a few hours.  

I wiped them both thoroughly three times with block oil, letting it soak in for about an hour for each layer.  The wood soaked the oil up each time, with no excess to wipe off.  I feel that was just right but can always oil them again any time.

Completed tvaren.  I oiled the cutting board, too!
The Verdict

They are both fun to hold.  The bigger one's smooth surface just invites your hand to slide over it.  It is fun to feel the bumps.

The smaller tvare's handle, near the top, is very thin and a little flexible.  I will have to be careful not to break it when using it, but I think I would only be using this to mix small quantities or substances that were not too heavy or thick.

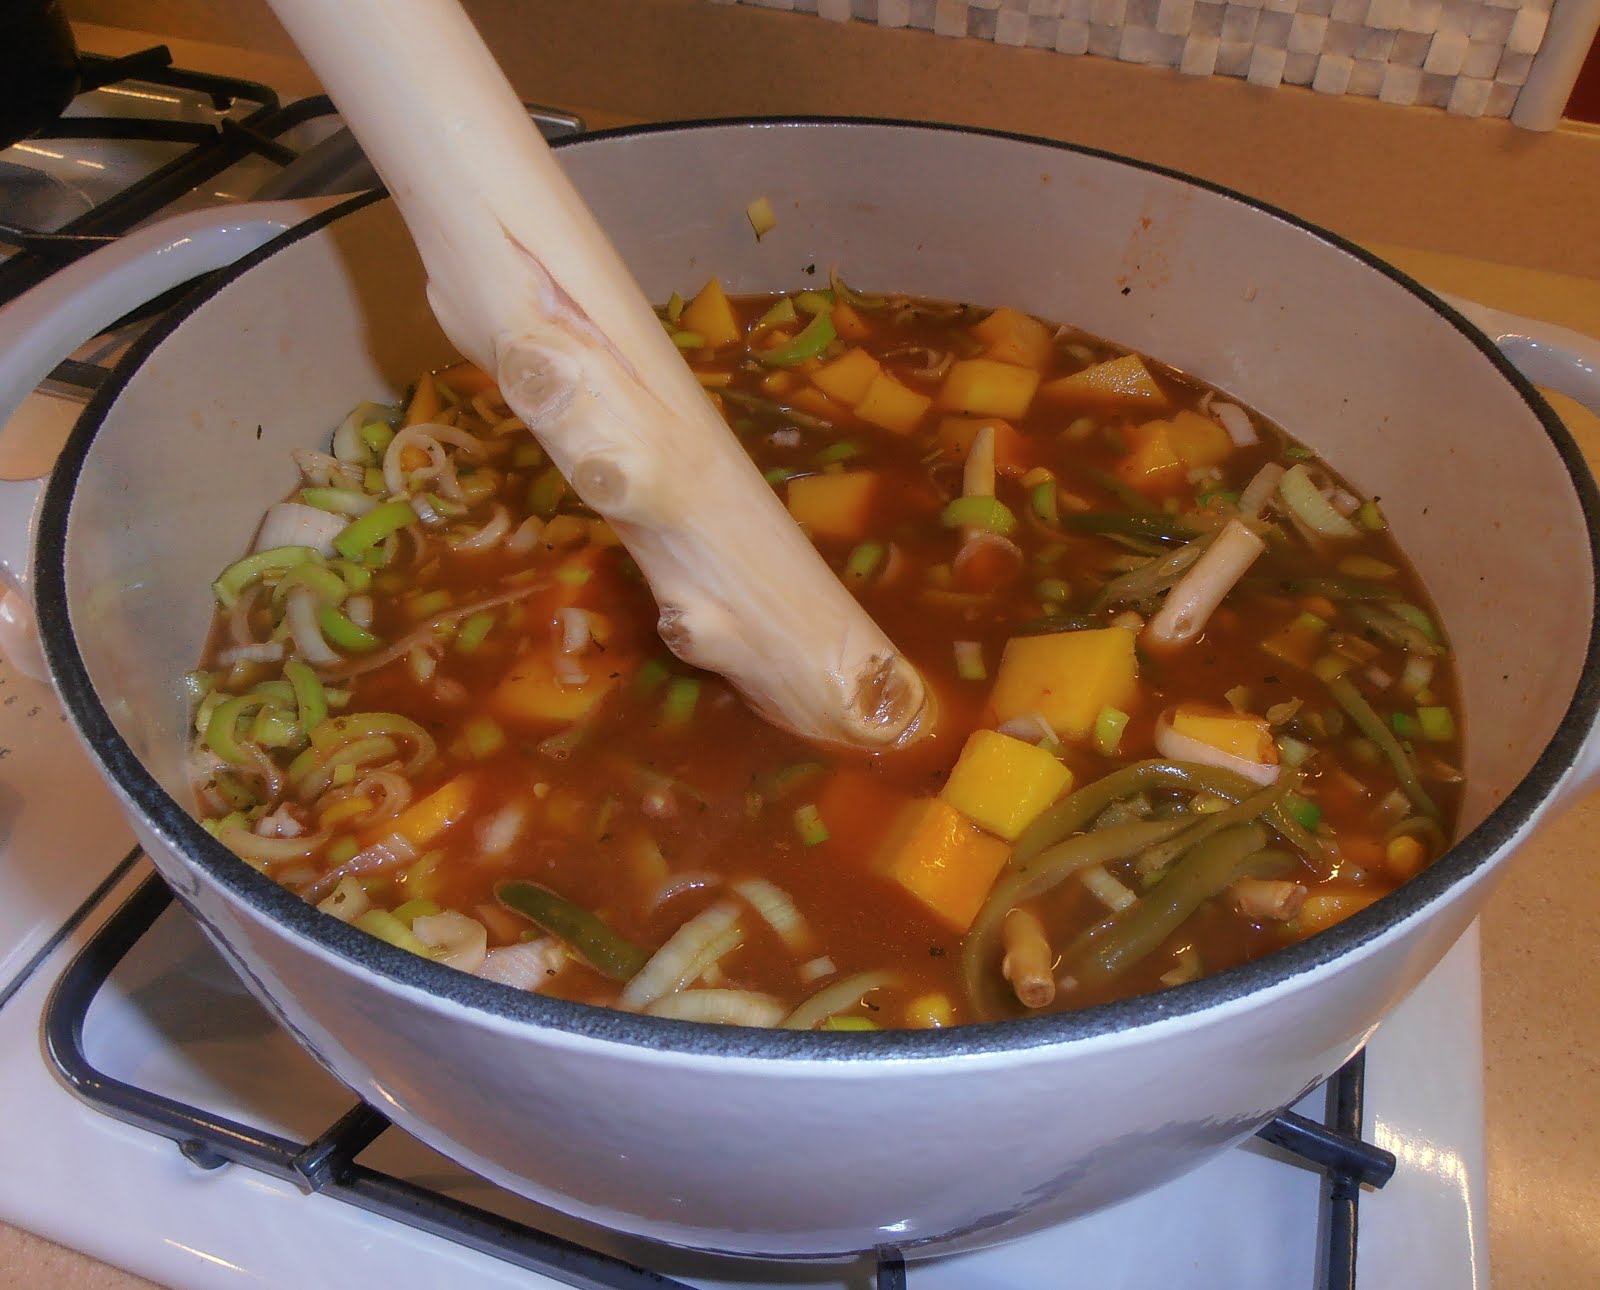
To feel that I was completing this experiment, I had to try them out.  So I made a stew of sausages and vegetables, in my big Dutch oven, and gave it a stir.  The result?  The big tvare was almost too big for that pot -- stirring was restricted but twirling it worked really well.  The smaller tvare worked better but I worried I would break the handle.  It wasn't very stressed but I was being cautious.

They both cleaned up well with a quick rinse and a wipe down.

So I declare it a success!


I really like having both of them.  They are striking to look at, fun to hold, and quite usable.  I decided to put them on display in my kitchen in a glass vase to show off their entire glory.

I encourage you to make one, too, the next time you have the opportunity to get the top of a pine tree.  I enjoyed the process and felt like I was connecting to history!


Cookies Consent

This website uses cookies to offer you a better Browsing Experience. By using our website, You agree to the use of Cookies

Learn More