Saturday, February 16, 2019

Eating an Egg Sausage - part two of a recipe from the Transylvanian cookbook

Yesterday I posted about how to make an egg sausage.  The recipe was from

The Prince of Transylvania’s court cookbook 

From the 16th century 

THE SCIENCE OF COOKING


You can find a copy of it here:
 http://www.fibergeek.com/leathernotebook/files/2018/05/Transylvanian-Cookbook-v3.pdf

The recipes I have tried are here:  Prince of Transylvania's court cookbook

This is recipe number 44, found on page 11.


Cow intestines stuffed with sweet milk. 

Wash the intestines so that they will not smell; you will need sweet milk, eggs, saffron, black pepper, but mostly eggs. Mix these together, this is the stuffing. Add some parsley leaves to the milk, tie the two ends of the intestines so that the stuffing won’t leak. Poach it in hot water so that the milk will get dry like a liver. If you’re cooking it, cook it in another pot of clean water, once cooked, pass the water through a strainer, pass some sweet milk through a strainer on top of it, put some parsley leaves on it and cook it like that. Add some saffron half an hour before serving it, add some black pepper and salt.

You can view my redaction here.

Today I will tell you the results (in other words, I ate them!) of the sausage-making adventure.

When I considered the instructions, I decided that first you cook the sausages in water, and then make a sauce (of sorts) in which to further simmer the sausages and possibly serve them in it.

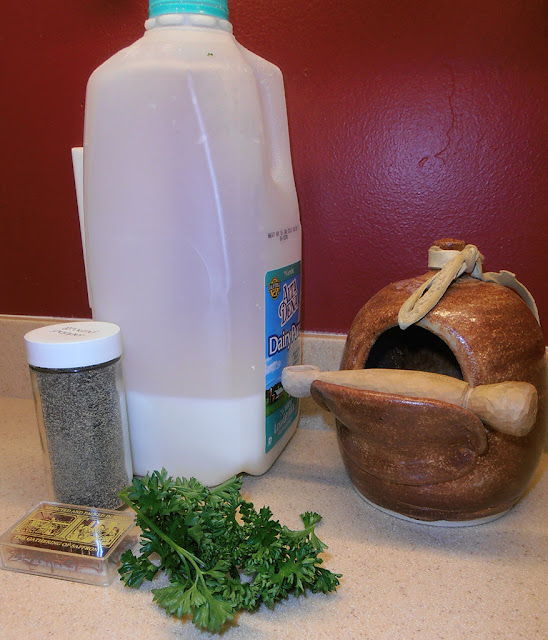
The sauce ingredients

1/2 cup hot water from simmering the sausage
5 threads saffron
1 cup milk
1/8 teaspoon salt
1/8 teaspoon pepper
1 tablespoon chopped parsley


I put the bigger of the two sausages into a pan with just enough water to cover it and simmered it until I thought it was heated all the way through.  When the water started to simmer, I took out 1/2 cup, strained it, and put the saffron in it to steep.

Simmering sausages!
Once the saffron had steeped for about 20 minutes, I stirred in the milk, salt, pepper, and parsley.

Then I poured the water off the sausage, rinsed and cleaned the pan, wiped the foam off the sausage, and put the sausage back in the pan.  I poured the milk mixture over it and brought it to a slow simmer, turning the sausage over once.

Not a lot of sauce in which to simmer.
I waited about 15 minutes and decided that the sausage was cooked enough.  I wasn't clear on how to use the milk sauce and it seemed thin and not very flavorful, so I chose not to use it when I served the sausage.

I put the whole sausage on a plate and cut it into serving-sized pieces.  I garnished it with a little more parsley but it didn't seem to matter.


The Verdict

I served it as it was.  The focus was on flavor and texture.

First, the sausage casing was rubbery and difficult to cut.  I have since learned from my online friends that I should have let the sausages sit uncovered in the refrigerator for 24 hours to fix that problem.

The filling was soft, with bits of the seasonings either at the top (parsley floats) or at the bottom (pepper sinks) and nothing in between.


The texture was strongly reminiscent of flan -- a very delicate, fine-textured custard.  It was the texture I had hoped to achieve when I first envisioned this recipe.

The flavor was very bland.  I could not taste the seasonings except when I chewed on a piece of casing.  This was okay sometimes but other times I got a blast of pepper, which I did not enjoy.

Overall, the group impression was, "Meh."  Not interesting.  I found myself thinking of flan even more as I ate it, and wishing there was a caramel sauce over the top.  (Not that it would go with the parsley or pepper.)

I would call it a success in that the recipe turned out as I expected.  But we did strategize on how to improve the eating experience for the rest of the sausages and for if I made it again.

For Eating the Rest

I took several pieces and fried them, like regular sausages, in olive oil.  That crisped up the casings but did nothing to make the flavor exciting.

Then I cut up the rest of the pieces and cooked them with chopped ham and cubed cheddar cheese.


This was tasty but why not just put the ham and cheese with scrambled eggs?  Why go to the trouble of making these sausages?

For Making It Again

My first thought was to make the filling more like scrambled eggs, so possibly make it 2 parts eggs (or more) to 1 part milk.  That might keep the seasonings better distributed in the filling, too.

The next idea was to simmer the spices in the milk first to flavor it, then let the milk cool before mixing it with the eggs.

I also thought it would be interesting to make it more flan-like by making it sweet and use spices like cinnamon, and then serving it with a thin caramel sauce.  A dessert sausage!  Quite the sotelty, I think.

It Was Asked

My guest tasters asked, "Why do you think this was made in the first place?  What made this recipe important enough to be included?"

My guess is that it is intriguing.  It is a pretty sausage to look at, with the yellow and the speckles of seasonings.  That is enough to get a guest's attention.  And then when you discover it is a sausage filled with eggs (or custard) instead of the usual meats, that can cause discussion.  I think if I could fathom the right egg-to-milk ratio and get the seasonings to distribute well, it could be a very tasty treat on my guests' plates.

I won't make any promises, but if I do this recipe again, I will report on it.  I do still have plenty of sausage casings left over!

UPDATE:  My friend, SS, believes this recipe might have been invented as a food for Lent.  It would make a meal more like you were eating meat, giving variety to an otherwise repetitive diet.  I think that is an excellent observation.


Friday, February 15, 2019

Making an Egg Sausage (part 1) -- Another Transylvanian cookbook recipe

It is time to pick a recipe from the Transylvanian Prince's Cookbook!

This is the digital translation of a book in Hungarian that I have tried recipes from before.  Here is the book reference:

The Prince of Transylvania’s court cookbook 

From the 16th century 

THE SCIENCE OF COOKING


You can find a copy of it here:
 http://www.fibergeek.com/leathernotebook/files/2018/05/Transylvanian-Cookbook-v3.pdf

The recipes I have tried are here:  Prince of Transylvania's court cookbook

Today I picked recipe number 44, found on page 11.


Cow intestines stuffed with sweet milk. 

Wash the intestines so that they will not smell; you will need sweet milk, eggs, saffron, black pepper, but mostly eggs. Mix these together, this is the stuffing. Add some parsley leaves to the milk, tie the two ends of the intestines so that the stuffing won’t leak. Poach it in hot water so that the milk will get dry like a liver. If you’re cooking it, cook it in another pot of clean water, once cooked, pass the water through a strainer, pass some sweet milk through a strainer on top of it, put some parsley leaves on it and cook it like that. Add some saffron half an hour before serving it, add some black pepper and salt.

My Redaction

The idea is that this is a sausage that is filled with an egg/milk mixture.  When I first read it I thought the filling should be like a stiff custard.  To make a custard, you use roughly 2 parts milk to 1 part egg, however the instructions say "mostly eggs", which made me think (as the translators noted) this should be more like scrambled eggs.  I struggled with this and so compromised by using roughly equal parts milk to egg.

This is my first time ever working with sausage casings (pig intestines, not cow) so I was a little nervous.  I asked my online friends who make salumi and used their experienced advice on how to poach it without overcooking it.

12 eggs (2 1/2 cups), well-beaten
3 cups milk
2 tablespoons fresh parsley, finely minced
1 1/2 teaspoons ground black pepper
saffron, ground in the mortar (see close up picture for quantity)

1 four foot and 1 two foot sausage casings (32 mm diameter), soaked and rinsed


This much saffron.
The sausage casings had to soak for nearly an hour, so while that was going on I put water in my big Dutch oven and put it over high heat with the cover on.  When it got to a boil, I turned the heat to low.

The four foot casing
The beaten eggs, milk, parsley, pepper, and saffron all went into a pitcher.  I saw that this liquid stuffing would be best poured into the casing and the pitcher made it easy to control the flow.  I noticed that the parsley and pepper floated to the top, so I kept a spoon handy and stirred it well just before each pouring.


Once the casings were ready, I slid them over the end of a funnel and tied a knot in the end.  I decided I would work over a bowl, just in case I lost my grip on the casings or there was a leak or other disaster.  It was really pretty easy to pour the egg mixture into the casing and allow the casing to slide off into the bowl.

The entire four foot casing fit over the tip!
The parsley and pepper floated to the top anyway.
When the first casing was full (the four foot one) and tied off, I realized I had about 1 1/2 cups of filling left, so I soaked the second casing.

I think it is pretty!
At this point I was ready to poach the sausage.  I brought the water back up to a boil, turned off the heat, put the sausage in, then put the lid on and set the timer for 20 minutes. At the halfway point, I turned the sausage over.


When the time was up, the sausage was firmer and lighter yellow in color.  I moved it into a bowl of ice water, as my salumi friends said it was best to poach it gently (as I did) and then shock it in the cold water.  I added more ice as needed to keep the water very cold and turned it over once.
It is obvious in these pictures that the parsley and some of the pepper floated to the top and the rest of the pepper sank to the bottom along the length of the sausage.

The "up" side
The "down" side
It took about 20 minutes until the sausage was cool to the touch.  Then I drained it and put it on a towel on a plate.  I put it into the refrigerator, uncovered, to dry and continue to cool overnight.


The second sausage was prepared just like the first, except it only took about 10 minutes in the ice water to get it cool to the touch.  I noticed that a lot of the pepper had sunk to the bottom of the pitcher, despite my attempts to keep it afloat with stirring.  It was hard to get it to go into the sausage casing.

Pre-poaching sausage number two.
This is the end of making the egg sausages.  Tune in tomorrow for part two, eating the sausages!

Friday, February 1, 2019

Liquamen/Garum -- Making Roman Empire Fish Sauce from Fish

Previously I had made liquamen at home via Sally Grainger's recipe using a premade fish sauce and adjusting the flavor with reduced white grape juice.  See the results here.

But now it is time to try making it on my own, from scratch, using fish.  I had talked to people at last February's Culinary Symposium about it, and they assured me it was a reasonable task to undertake.

Many websites talk about how to make it, and many bloggers have tried.  Let's see how this goes!


WARNING:  Some of the pictures show dead fish parts.  Decide before you look if you can stomach it.


Day 1

I started with about 5 lbs of bonita parts:  heads, skeletons (the leftover parts after removing the tasty flesh), innards (it is important to use the intestines for the enzymes they bring), and bits of meat that just weren't worth trying to cook.  I put them in a clean plastic bucket **that had a lid** along with about 1 lb of kosher salt.

I first put in a layer of salt, then some fish parts, then sprinkled the parts with more salt.  Then I kept layering until about 1 lb (20% by weight of the fish parts) was used.  I stirred the whole thing as best as I could (to coat the pieces), put the lid on, and placed the whole container out on the back patio, where it would get a lot of sun.

Salted bonita parts.  
You really need a lid, to keep out dirt but also to keep out the flies that are very attracted to it.  I put a heavy weight on top of it to discourage nighttime visitors from getting into it.

The Romans used unglazed ceramic containers.  Most of the bloggers used glass jars.  I didn't have a jar or a ceramic container big enough to hold all this, so I was glad for the advice to use a plastic bucket.

You can see that the fish parts filled about 1/4 to 1/3 of the bucket.


Day 2

The next day, when stirring it, I decided it needed more whole fish, so I bought some frozen mackerel, about 73 ounces worth, and added that and another 10 ounces of salt to the bucket.  Again, I stirred the whole thing as well as I could.  I noticed some liquid was already forming.  The smell was fishy and a little rotten, so I was glad I could get the brown liquid to coat everything.

Salty mackerel, before stirring.
The blogs that talk about it say the salt-to-fish ratio runs from 1/10 to 1/5, so I figured I was in the right range, without obsessing over exact quantities.

Day 3

I stirred everything again.  The mackerel was starting to break apart, so they were easily pushed down into the dark brown liquid that was now deeper than the day before.  The smell was fishy, but not rotten, which surprised me.  It actually smelled better than the day before.


Day 4

This time I didn't stir as much as I used the spoons to push the mackerel down into the liquid.  This broke them up a little more, too.  The liquid level was almost to the top of the fish.

The smell was very faint.  Very mildly fishy and I could not smell it at all outside the bucket.  I am astonished.

Day 7

The fish parts are all broken up and the whole quantity has compacted down to about 1/4 of the bucket's volume.  The liquid was thick and brown on top, but when I stirred it, I found thinner liquid underneath.  I think that stirring it was a good idea, as it took the pieces that were on top and got them coated in the salty liquid.

Day 22

I left the whole thing alone until today.  There was a layer of "stuff" floating on the surface, and lots of liquid underneath.  I could see bones (backbone and ribs) that were completely devoid of muscle and flesh.  Instead of stirring, I rotated the bucket around to splash the liquid up on the surface stuff and mix it up a bit.  The smell was pretty fishy but not disgusting, so I am letting it continue.

My fingers are crossed for luck!

Day 30

This is the one month mark, so I took pictures before and after stirring.

Before stirring.

After stirring.

I scooped out about 1 cup of the mixture.

As it was, right out of the container.
First I poured it through a small strainer, which removed the biggest bits and some of the gritty-looking parts.  Then I put it all into a fine filter, a metal coffee strainer that had never been used for making coffee.  This was put over a container and covered with plastic, so it could drip through.

The odor was fishy but not disgusting.  The cats thought the smell was amazing, so I gave them several drops of the liquid, which they quickly licked up.

I filtered it but could not get it clear, so I put the liquid into the refrigerator to see what would happen.  I noticed that everything the liquid touched had a greasy film on it, which wasn't very pleasant at all.

I tasted it and it was very, very fishy.  It did not have that slightly sweet taste the liquamen I made from the fish sauce and grape juice had.  I really didn't like it much but I do have to note that it wasn't too salty, and it didn't taste rotten.

So after one month of fermenting, I think it should continue.

Four Months

The mixture has been sitting on the patio for four months now, and it is time to finish it.  When I opened the container, I was really put off.  The smell was unpleasant and it looked weird, and I was unsure whether what I saw was fish oil or mold.  But before I reacted, I checked with my online friends who have done this before.


D G-T gave me this description:
Fishy salty sludge that looks like chucky mud?  That's OK.  Strain out the solids and you have liquid yuck.  Run that through a coffee filter or wet paper towel and you should get clear amber salty fishy goodness ... that's the goal.  It will flow through the filter VERY slowly.
I felt much better about my experiment and set about with the filtering.

The first round was done outside, using a ladle to get the liquid out of the tub and into two strainers, one a little finer mesh than the other.  I also had a trashcan nearby so I could empty the strainers regularly.  I worked quickly, so I could get it done before too many flies found me.


The result of this first round of filtering was, yes, liquid yuck.  I did notice that the scent wasn't bad at all:  fishy but not rotten or nasty, and I kept getting a hint of the fruity scent that the previous liquamen had.

First round yuck.
I could see all the particles in the liquid and knew I would have to filter them a lot to get it clear.

Filtering, round two, was done indoors.  I used the ladle to scoop the liquid into a strainer that was even finer mesh than the two I used in the first round.  One scoop would drain for a little while and then I had to rotate the strainer to put the liquid over areas that weren't clogged with particles.

Strainer after the liquid passed through.  Time to shake and rinse!
Then I shook the particles out into a bowl.  After every two or three shakes, I rinsed the strainer under clear water.  This worked well.

It didn't take long to accumulate 14 cups (3.5 quarts) of the second round filtered liquid.
Liquid not-so-yuck.
It is still not clear.  Next I will run it through my metal coffee filter to see how that works.

One aspect of this that made me laugh at myself:  All the while I kept thinking, "I need to find a place in the refrigerator for this big container."  Then I realized it had been sitting on my patio for four months and didn't need to be kept cold!  The beauty of salt!

Putting the liquid through the coffee filter helped a lot.  This left me with a slightly cloudy amber liquid, so I poured it through a wet paper towel to finish it off.

The result was an almost perfectly clear amber liquid that smelled fishy but was not bad.

The Verdict

Time for a taste test!

I put the fermented liquamen up against Thai fish sauce and my homemade liquamen that was a mixture of the Thai fish sauce and reduced white grape juice.

All about the same color.  Newest on the right.
I tasted a little of each one and drank a lot of water between tastes to clear my palate.

My fermented liquamen was very salty, slightly sweet, and had a deep umami flavor that I liked.  That umami really made my tastebuds dance and sing.

The Thai fish sauce was salty but not as much as my fermented sauce, it was not sweet, it had a tangy sensation that I didn't like much, and it had umami but the fermented sauce had more.

The fish sauce plus grape juice was definitely sweeter (remember that I mixed them so I controlled the sauce/juice ratio, and I like sweet), not as salty, no tang, and not as rich in umami. 

The fermented sauce had the most umami and the most salt.  The Thai sauce was thicker, almost syrupy, than the other two. 

D G-T says she gets the best results using 7 parts fish to 1 part salt.  Mine was about 6 parts fish to 1 part salt, so I am not surprised about the salt levels in mine.

So was there a clear winner?  Not quite but I would choose depending on my food prep goal.  The fermented sauce was very salty but very umami, so I would take that into account in my recipe.  If I didn't want so much salt, I would use the fish/juice sauce.  The Thai sauce will be used to make more of the fish/juice sauce. 

I declare this to be a success!

One point to note:  at the one month interval, I noted that there was a greasy residue that stuck to everything and bothered me.  This no longer was an issue.  I could see oil/fat in the mixture but it was not sticky nor did it make itself known. 

I'm so glad I did this; what a neat experiment!  My plastic tub resulted in about 14 cups of liquid yuck, which I am still filtering.  Trying to filter it 1/2 cup at a time in the coffee filter was not the best use of time, so I set up a jelly bag (cloth bag for filtering juice for making clear jelly) in a tall jar so I could put in nearly two cups of yuck to filter over time but still cover it to cut down on the fishy odor in the house and keep out bugs/dust/cats.

Very. Slow. Drip.
This can take its time filtering and then I can wash and reuse the bag for the next batch.  Each batch gets filtered through the wet paper towel as the last step, then stored in a corked bottle.  I suspect I will be sharing this liquamen with fellow foodies to get their take on it.  At least I hope I will.

I am thankful to the friends who gave me encouragement and advice on fermenting fish.  I would not have finished it without you.  Special kudos to D G-T!