Showing posts with label chile. Show all posts

Tuesday, April 15, 2025

Adobo para carne de cerdo - Pork Marinade, a Pinedo recipe

Encarnación Pinedo, in her cookbook, El cocinero español, mostly arranged her recipes in categories with those categories in alphabetical order in Spanish.  (I say "mostly" because not all recipes in a category seem to fit into that category.  For example, under her "Fritters" category, we find a recipe for carmelized peanuts.)

Under her "Adobos" category, there is a recipe for a pork roast marinade on page 3.


My Translation


This recipe intrigued me because of her use of mint.  Now I have been experiencing historical cooking for decades, so I am used to seeing ingredients that are otherwise familiar to me being used in ways that are different than what I grew up with.  But mint with meat and it wasn't even a mint sauce or jelly on lamb?  I had to give it a try.

My Redaction

2 dried New Mexico chiles
8 dried costeño chiles
4 tablespoons chopped garlic
1 teaspoon salt
1 teaspoon pepper
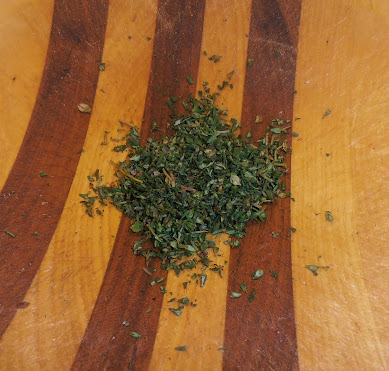
1/2 cup chopped peppermint, stems and all
1 cup chopped Italian oregano (a cross between oregano and marjoram)
1 cup apple cider vinegar
2.8 pounds boneless pork cushion meat

I love the colors!
Remove stems and seeds from the chiles.  Soak the chiles in hot water to cover until soft, about 15 minutes.

While they are soaking, chop herbs.  Put into a container large enough to comfortably hold the pork.  Add the salt and pepper.

Put the chiles and garlic into a blender with just enough of the soaking water to blend it.  I got a thick, red liquid with small chunks of chile and garlic in it. Pour this into the container.

Use the vinegar to rinse out the blender, pouring it all into the container.

Mix the marinade in the container.

Add the pork.  Turn the meat until all sides are covered by the marinade.   Spoon some marinade over the top.

Cover and refrigerate for 3 hours, turning the meat occasionally.

Drain off liquid but leave the paste and herbs on the surface until ready to roast.* See note below.

When you are ready to roast the meat

Preheat oven to 425 degrees F.  

Remove pork from the refrigerator.  Rinse off marinade and pat dry.

Place the pork on a baking sheet with low sides. 

Bake at 425 for 15 minutes, then turn the temperature down to 375 degrees F to finish the baking.  Start checking the internal temperature about 30 minutes in - the goal is 145 degrees F.  Recommended baking time is 15 to 20 minutes per pound.

When baking is done, cover the meat with a tent of foil and let it rest for 10 minutes.  Slice thin and serve.

Pureed chiles and garlic
Herbs, pepper, and salt
Have not yet added the vinegar
At the start of the marinating process
After 3 hours
Two days later, ready for the oven.

My Notes

The goal was a strongly-flavored marinade, and that is what decided the amount of ingredients I used.

I used those amounts of chiles because that is what I had available.  Feel free to change the amounts and the varieties.

I know that different mints have different flavor profiles, but peppermint was the only mint available in my yard at the time I made the recipe.

Similarly, my oregano is nearly dead so I turned to Italian oregano as a substitute.

*My reading on using vinegar in a marinade is that if you leave the meat in it too long, the meat gets "chalky" in flavor and possibly gets a weird texture.  So I chose three hours for the meat to have contact with the vinegar part.  

Once the meat was just in the paste and herbs, it rested in the refrigerator for two days until I had time to bake it.

I removed the meat from the oven when its internal temperature was 140 deg F because resting will allow for more cooking and we like our pork rare.

The Verdict

It looked beautiful just out of the oven.  

Mmmmmmmmm!
Slicing it showed the pale pink we want in our pork roasts. (Note:  The US pork industry is well-known for being safe from trichinosis - but if your local pork supply is suspect, cook it to an internal temperature of 145 deg F to be safe.)

Yes, mmmmmmmm!
My guest taster and I tried various parts of the sliced meat to see how the marinade worked.  We both noticed that the flavor was stronger near the edges and got lighter more towards the middle.  This is not surprising because the marinade was near the edges!

Overall, the marinade flavor was not strong, which I think was good.  It was there and it definitely enhanced the flavor of the meat.  

We both liked the subtle mint flavor!  The mixture of chiles, garlic, oregano, and mint was good, although we couldn't really distinguish the chiles, garlic, and oregano from each other.  I suspect that you could use more of each and still make a good marinade.  Or let it marinate longer, but I don't know how long until the vinegar makes the meat chalky.

It was a pork roast with additional flavors that were good and not overwhelming.  Success!  The leftovers were tasty, too.  Reheating allowed the marinade flavors to shine through better than eating the meat cold.


Wednesday, May 1, 2024

Liebre enchilada -- Hare enchilada, a Pinedo recipe

The Pinedo recipe I chose for this post is on page 148, "Liebre enchilada", or "Hare enchilada."  When I think about Mexican food, the word "enchilada" conjures up visions of rolled tortillas filled with shredded meat or cheese or vegetables, drenched in a red or green chile sauce, and sprinkled liberally with shredded cheese after being baked in the oven. 

While she does have recipes that meet my vision, the only part of that description this recipe matches is the chile sauce.  It is really a stew, so the word "enchilada" means "to season with chiles."


My Translation

Hare enchilada.

                   Cut the hare into small pieces. Put to fry in fresh and hot butter with pieces of lardon.

         The hare will be fried over a live fire, and when it begins to brown, add enough chopped onion, garlic, and salt.

         Everything will fry well, stirring the casserole without stopping, immediately adding tomatoes, olives, chopped mushrooms, one or two tablespoons of dry flour and oregano powder.

         Cover the hare well with a chile sauce, letting it cook, covered, in the casserole over a moderate heat.


My Redaction

3 1/4 pound rabbit

2 - 3 tablespoons butter

1 - 2 tablespoons vegetable shortening (or equivalent in lardo or bacon)

1 large onion, chopped

2 heaping teaspoons crushed garlic

1 teaspoon salt

1 tablespoon dried oregano leaves, ground in a mortar until powdered

6 ounces sliced crimini mushrooms

4 Roma tomatoes, chopped

20 black olives, halved longwise

2 tablespoons flour

28 ounce can red enchilada sauce


Have the oregano ground, the mushrooms cleaned and sliced, the tomatoes and onion chopped, and the olives sliced before starting the cooking process.

Rinse and pat dry the rabbit, then cut into serving-size pieces (they will still have bones).

Heat the butter and shortening (or lardo or bacon) in a large Dutch oven over medium heat until melted and hot.

Add the pieces of rabbit.  Turn them as they sizzle to brown them on all sides.  It took about 15 minutes.

Add onion, garlic, and salt, stirring them in well.  Stir often (but I did stop at times) until the onions are translucent, about 5 minutes.

Add the tomatoes, olives, mushrooms, flour, and oregano.  Stir well and let cook a minute or two.

Add the enchilada sauce.  Stir well.  

Reduce heat to medium low, making the sauce simmer.  Cover the Dutch oven.

Cook until the meat is tender and cooked through, about half an hour.


My Notes

I understand that Ms. Pinedo, by specifying hare, was probably envisioning meat with a more wild taste than the farmed rabbit I used here.  Even if she substituted in rabbit, it was probably also wild, which I would expect to have more flavor than a farmed rabbit.  But we have to work with what we can get, and I could get a rabbit.

It is important to have all the ingredients prepared before starting the cooking process because the timing is short between steps.  

I used canned enchilada sauce, which is made from red chiles, water, vinegar, and salt.  I have made red chile sauce from dried chiles, but on pages 248-9, Miss Pinedo gives us a recipe for a "Red chile picante sauce", which is made by soaking and pureeing dried chiles, then flavoring them with green onions, oregano, olives, salt, vinegar, and olive oil.  She then states that for enchilada sauce, we should not use the olive oil and vinegar.  I decided not to worry about the vinegar.

The steps:

In the midst of browning the meat.
With garlic, onions, and salt.

With everything but the sauce.

Everything!

The Verdict

I served a simple dinner of the stew and warmed corn tortillas on the side.  I made sure every bowlful had at least one meaty piece of rabbit in it.  I also put a bowl on the table to take the bones once the meat was cut or bitten off them.


We enjoyed it very much!  The flavor was spicy from the chile sauce (I used a medium heat sauce, which I think was very brave of me - ha!).  The oregano was a light side flavor, enough to make it interesting and not too strong.  The salt level was just right.

We loved the chunks of onion, olives, and tomato.  Sometimes a spoonful (or forkful) did not include meat, so having those chunks of flavor kept the sauce from just being a sauce.  

The only challenge was getting the meat off the bones.  We each had a fork, knife, and spoon; the strategy was to use the fork and knife to cut the meat off the bone, and then use the fork or spoon to eat the meat with sauce and maybe chunks.  We both worried about splashing sauce on our clothing.  At one point, I held the meat with my fingers and nibbled the meat off the bones.  In other words, our cloth napkins were well-used by the end of the meal!

Sometimes I put a spoonful of meat/sauce/chunks onto a corn tortilla.  I then folded the tortilla over the stew and ate it that way.  That was good, too.  I also enjoyed dunking pieces of tortilla into the sauce.

Success!  If I were to do this again, I would debone the meat.  The rabbit was super expensive, so I would probably use chunks of pork or deboned chicken thighs instead.  

The leftovers were, I think, even better the next day.  The flavors seemed more blended.  I was out of corn tortillas, so I served it with sourdough bread.  The sour of the bread was a good compliment to the spicy of the sauce.  

For all Pinedo recipes, see my blog "The Spanish Cook Without Equal" at pinedo1898.blogspot.com


Friday, March 15, 2024

A Little Foodie Fun, with Fire! Mole Colorado

It was another cold and rainy day, so I made a fire in my fireplace.  At this point, it is almost a reflex to want to cook with that fire, so today I decided to create a mole colorado, Oaxacan style.  (Pronounced "moh-lay".)

A mole is a sauce, and this particular one needed to be tomato-based.  My challenge was to create it without a specific recipe.  I wanted to make it using general guidelines for moles and many of the traditional ingredients as I had read about them.

The guidelines are:

  • Moist ingredients (tomatoes, onions, garlic) - char the exterior on a comal or dry skillet
  • Dry ingredients (chiles, spices, nuts, seeds) - toast on a dry skillet
  • Blend everything together with just enough water
  • Simmer until the flavors meld and the sauce thickens

Some of the ingredients I picked were not appropriate for charring or toasting, so I held those out until the blending step.  But I get ahead of myself.  

My Creation

1 large brown onion, unpeeled
4 Roma tomatoes
3 cloves of garlic, unpeeled
3 New Mexico chiles
3 costeño chiles
1/4 cup white sesame seeds
1-3 inch long stick of cinnamon plus another 1/2 teaspoon ground cinnamon
3 allspice berries (you might want more)
1 ounce bittersweet chocolate
1/2 cup raisins
1/4 teaspoon salt
about 2 1/2 cups water

First I needed to char the tomatoes, onion, and garlic.  The onion was big, so I cut it in half and placed the pieces cut-side-down on the dry skillet.  The tomatoes went whole over hot coals.  The garlic cloves were also placed in a dry skillet.
Coals cool down and sometimes they do that faster than I anticipate, so the garlic and the tomatoes got moved around as needed to find the heat.  You can see in the picture above that the live fire was closest to the pan with the onions, so that is where the garlic and tomatoes ended up.

I wanted to do more than just char the onion halves on the cut side.  I wanted them to be pretty cooked once they were ready to leave the fire.  So after they cooked on the cut side, I turned them to cook on the skin sides.  In all, they were on the fire the longest and were soft almost all the way through.  They also got a nice char on the cut side.


I charred the garlic with their skins on until the skins split.  This had cooked the garlic to soft.  The chiles were charred in the dry skillet until they had turned mostly black and puffed up.

The big chiles are New Mexico, the small are costeño.  Note the garlic cloves.

The tomatoes didn't get much charring but they did get soft and the skin broke up.


I toasted the sesame seeds until they smelled nutty, which also made them more ivory than white in color.  Toasting the cinnamon stick didn't change its appearance much, but it smelled more spicy than usual.  The whole allspice berries also smelled a little fruity once toasted.

Use more allspice

Once everything was done with the fire, I moved to the kitchen.  I removed the peel from the onion and the garlic cloves.  I did not remove the stem ends from the tomatoes.  I pulled off the stems from the chiles and removed their seeds.  

All the ingredients went into the blender *in batches* with some water to get it all moving.  This included the chocolate (broken into pieces) and the raisins but not the ground cinnamon and salt.

The first batch needed one cup of water.  Once that was blended, I poured most of it into a kettle.  I left some behind to act as liquid for the next batch, which only needed 1/2 cup water to get it going.  The third and fourth batches didn't need more water at all when I left some of the previous batch with them.  Then I used about 1 cup water to rinse out the blender jar.

All batches went into the same kettle, then were stirred together.  This means it is not important what ingredients went into which batch -- as long as they were blended to smooth each time and added to the kettle.  By "smooth", I mean that there were no visible chunks, even though the mixture looked grainy.  The chiles became tiny, dark flakes in the liquid, so it wasn't perfectly smooth looking.  

This is smooth!

The kettle went onto the fire, where I put coals below it, a few around it, and it was near the live fire.  I stirred it often.  I also rotated the kettle so the hot side near the live fire was switched with the cooler side away from the fire.  I added more coals around the edges as needed.

It started steaming quickly.  Sometimes it bubbled and blurped on the hot side, reminding me to stir it more.  

See the blurp?

I tasted it occasionally.  Before cooking, the dominant flavor was raw tomato, bright and acidic.  I knew the mole had to cook at least until that raw tomato flavor was gone.  That took about 30 minutes.  Then the dominant flavor was onion (it was a very large onion), and I wanted to cook the sauce long enough to get that onion flavor blended with the others.  That took about another 30 minutes.

After 1 hour of cooking, I decided it needed more cinnamon, so I added 1/2 teaspoon ground cinnamon (untoasted) and it needed salt, so I added 1/4 teaspoon.  I wish I had added more allspice, but I was reluctant just in case I over-seasoned it.

It cooked another 10 minutes when I declared it thick enough.  You can see by comparing the first kettle picture to the one below that the level reduced about an inch, mostly from steaming.


Notice, too, that the color darkened considerably.  That isn't from the lighting -- the uncooked sauce was red; the cooked sauce was brown.

The Verdict

I had some roasted pork tenderloin and some roasted turkey in my refrigerator, so I sliced them up and warmed them in the oven.  A few slices went onto each plate, some mole was spooned over the top, and was garnished with sesame seeds.  There were flour tortillas and a tossed green salad on the side.  And wine!
Pretty!
We liked the mole with both meats.  We couldn't really decide which one was better with it.  (This was not a problem!)  I particularly liked dunking the flour tortilla into the extra mole and eating it without any other meat or garnish.  I thought the flavor of the mole was emphasized this way.

That flavor was ... complex...  Not that this was unexpected, with all the different ingredients involved.  It is just challenging to describe.

My guest taster thought there was meat in it, so I would say it had an umami taste.  We both thought it was fruity, probably from the raisins.  It was bitter, but not in a bad way.  That could be from the charring, but also from the bittersweet chocolate.  My guest taster had wondered if there was chocolate in it, and was happy to learn there was.  I could taste the cinnamon but not the allspice.  I wanted more of both spices.

I could not taste the garlic, but I don't know if it needed any more.  I would say not.  

The chiles were there, adding a lot of flavor and only some heat.  I had been warned that costeños were hotter than what I was used to, and to use them with caution.  This was good advice!  While I didn't get a burn from the chiles, their heat was present.  Maybe I could have put in one or two more, but considering I am a chile newby, it was good that I didn't.

The sesame seeds, surprisingly, didn't get broken up much by the blender.  I was surprised at how many were still whole or nearly so after the mole was cooked.  This added a nice little sesame flavor blast while I was eating it.  

In summary, it was sweet, bitter, deep, rich, mildly spiced with a little chile heat.  As I said, it was complex.  We loved it.

The next day we heated up some of the pork roast, covered the slices with a fried egg, and spooned some mole over the top.  That, with some flour tortillas, was breakfast.  Excellent.

I don't know how my mole would compare to a "typical" mole colorado from Oaxaca.  I don't think it matters.  It was good and we wanted more.  I achieved success.

Wednesday, November 1, 2023

Lengua en adobo, Marinated tongue -- a Pinedo recipe

I wanted to make a Pinedo recipe that used a different ingredient than the recipes I had been choosing.  I know a local store that includes a butcher shop with high-quality items, so this recipe with tongue was a solid possibility.  I was pleased to find tongue for sale in their store.  The recipe is on page 146.


My Translation

Marinated tongue.

(French style.)

         Toast some mulatto chiles that will be ground with garlic and oregano from Castilla [thyme]

         Olive oil, vinegar and butter are put in a saucepan. Then the chile is added, taking care that it does not burn and has some broth left to serve it.

         In this marinade, put the cooked and sliced tongue.


I have not eaten tongue often, but a friend who lived on a cattle ranch would pressure cook one and share it with me occasionally.  And once I had marinated tongue as an appetizer at a Basque restaurant.  Both experiences were positive, so I wanted to try cooking tongue on my own.

My Redaction

3 pound cow's tongue, washed well
2 cups pinot noir wine
2 cups + 1/2 cup apple cider vinegar
6 cups water (or to cover)
2 ounces guajillo chiles, toasted, stemmed, seeded, and ground
5 cloves garlic, chopped
3 tablespoons fresh thyme, finely chopped
2 tablespoons butter
2 tablespoons olive oil
1/4 teaspoon salt


Place the tongue, wine, water, and 2 cups vinegar in a large pan.  Bring liquid to a boil, lower to a simmer, and cook for 1 1/2 hours.  Turn the tongue over and cook for another 1 1/2 hours.


While the tongue is cooking, toast the chiles, then grind them until mostly powdered.  Finely chop the thyme.  Chop the garlic cloves.
Chiles toasted, stemmed, and seeded
Ground in a small coffee grinder.
I used this much thyme.  Consider using more.
Put the chiles, thyme, and garlic into a sturdy bowl or mortar.  Using a pestle or similar object, pound and mix the ingredients until they form a paste.  Set it aside.

Chiles, garlic, and thyme, ready to be pounded.
Pounded.  The moisture from the garlic eventually made it a paste.

When the tongue is cooked, remove it from the liquid and allow to cool just to the point where it is easy to handle.  Pull the skin off and discard.  (The internet tells me that if the tongue cools too much, it is hard to remove the skin.)
Barely cool enough.
Skinned.

If you need to let the tongue cool more, let it cool now.  Then slice the meat very thin, cutting across the grain whenever you can.
In a saucepan or frying pan, melt the butter, then add the olive oil.  Gently sauté about 2/3 of the chile paste along with the salt.  When the garlic starts smelling very good, add 1/2 cup vinegar.  Simmer for several minutes to blend the flavors, then add the tongue a few pieces at a time.
The sauce.
When the pieces are heated through and coated with the marinade, remove to a platter.  Repeat with the other pieces, however many you want to serve.  (Three pounds is a lot!  You might want to save some for later.)

The Verdict

My guest taster and I had the tongue as the main part of our meal -- we had some sourdough bread along side it and that was about all we ate.  (There was the rest of the pinot noir, of course!)

We tried it "as is" and also on top of small pieces of bread.  We compared its flavor to pieces of tongue that were warmed up without being in the sauce.


We liked it!  The sauce was very strong in flavor -- mostly chiles and garlic, but the thyme did add a layer of flavor that was subtle, more like a background flavor.  I think I would have liked to taste it more for balance, so if I did this again, I would perhaps double the amount of fresh thyme.  

The tongue itself was mildly flavored.  I couldn't really taste the wine and vinegar, but I'm pretty sure they made the meat better.  Some parts of the tongue were chewy and some were more tender.  I liked both, and so did my guest taster.  

The tongue with the sauce was very good.  The sauce added a kick and a depth to make the meat much more interesting.  I thought eating it with a bite of bread was best because the bread added a tang that was different from the vinegar in the sauce.  It also added a different texture that I felt on my tongue (as I was eating the tongue!).

My guest taster and I both felt the spiciness level was just right for us -- spicy from the chiles but not too much so.  Any more and we would be distracted from the flavors of the meat and sauce.  I gave some slices to another guest taster who wished it was spicier.  As I have discovered, everyone has their own preference for the fire of chiles, so adjust your choices accordingly.

Success!  We had more of it later on, reheated in the sauce, which was still good.  Putting a few slices on a sandwich was also enjoyed.  I recommend it heartily.

 I'm not sure why Miss Pinedo called this "French style", as I would consider the use of chiles to be more Mexican in style.  Perhaps it was wine and vinegar liquid for cooking the tongue?  Or the use of garlic and thyme with the chiles.  Still, the flavor combinations were just right.

Thursday, December 1, 2022

Cooking Chicos, a Pinedo recipe

Previously I wrote about making chicos on my other food blog, The California Food Project, in which I described first roasting ears of corn in the oven then hanging them to dry for about a month.  These dried kernels are able to be stored for months, then are rehydrated and cooked.  Click here to see the previous post.  (If you are not familiar with my collection of Pinedo recipes, search on both this blog and the CA Food Project using the keyword Pinedo to see them all.)

Miss Pinedo gives this recipe in her book:


My translation:

I needed some help on how to cook them, so I turned back to Edible New Mexico.    Visit this site to see their work.

They suggest using 2 cups of chicos, which are soaked overnight in 10 cups of cold water.  Then they are cooked all day in a slow-cooker on low, or for three hours at a simmer on the stove.

I chose to use the slow-cooker.

My Redaction

Cooking:

2 cups chicos
10 cups water

About 3 1/2 cups of chicos


Place chicos in the water in a slow-cooker and allow to soak overnight.  Then set the slow-cooker to low and allow to cook all day.

Beginning of the soaking time

End of the soaking time

After the chicos are cooked, I chose to stew them with green chiles (not red).  I used canned Ortega chiles, and included Cotija cheese which was crumbled.  Some of the cheese went into the chicos and some was reserved to sprinkle over the top.


I just added the chiles and cheese to the corn and heated them all together.  

Soaked and cooked chicos

With the addition of chiles and cheese

After heating

The cotija cheese is robust enough that it didn't melt quickly.  There was a certain point where it melted, which I did not like because it was clumping and sticking to the bottom of the pan.  I think heating the chicos with just the chiles first would be better, then adding the cheese at the end and letting it warm up from there.  That way the chicos and chiles would blend their flavors.

Use a slotted serving spoon.

The Verdict

The dried chicos in the container smelled so good!  I love the smell of corn and this was excellent.  Not strong, but the scent was there.

Before soaking, an individual kernel was hard.  After soaking, it was soft, easily squished by my fingers.  It still smelled good.

The cooked chicos with the chiles and cheese also smelled enticing.

I served the result with a piece of baked chicken -- and wine! -- for a simple dinner.

Don't forget the wine.

The flavor was surprisingly good.  I expected it to taste good but I was pleased at how the chiles and chicos blended their flavors and supported each other.  The corn offered a deeper, richer corn flavor than you would get with canned kernels.  The chiles added a more acidic note as well as their distinct flavor.  The cotija cheese added a slight salty kick, a little umami, and a change in texture.

In fact, both my guest taster and I found the dish rather addictive.  We loved the flavor and wanted to have more.  We had several servings each!  The second time I served it, I put a dish of crumbled cotija cheese on the table and we could add more as we felt like it.  I even took a batch that was made without the cheese in it to a potluck, and saw that people liked it, especially the vegetarians.  Again, I put a dish of crumbled cheese nearby for people to use as they pleased.

Success!

I want to try it again using dried red chiles.  I have enough dried chicos left to do this again, and I think it is worthwhile continuing to dry corn for this as a kitchen pantry staple.  I could see using them in stews, soups, and other side dishes.  

I also think that 10 cups of water to 2 cups of chicos is too much water.  I would try it again using 8 cups.  I also would remove a lot of the cooking liquid before mixing in the cheese if I were to serve it as a side dish.  The liquid would probably be good as a soup or stew base.