Showing posts with label syrup. Show all posts

Wednesday, December 1, 2021

Candied Egg Yolks

I find reading recipes from other cultures and times to be fascinating -- I love learning new techniques and new flavor combinations.  Having a sweet tooth, I also love to read and sometimes try recipes that use sugar.  This recipe from Encarnación Pinedo's book, El cocinero español, published in 1898, on page 13:

My translation:

Brilliant sugar syrup bath. 

The amount of sugar is graduated according to what you want bathe and add syrup that is clarified, letting it boil until, taking a little with your fingers, it snaps between them.  Once the syrup is cooked to its point, take the saucepan off the fire, nestle it into straw, and add almonds, cooked egg yolks or whatever you want to polish, covering the saucepan so that it cannot give the air to the syrup and so it is left until it is perfectly cold. Once cold, the rind or crust that has been formed is cut on the side of the yolks or what has been done:  this will be carefully removed, and the honey is drained well; immediately rinse them in warm water and again let drain.

It is intriguing!  I've candied nuts and peel before, but I have never thought about candying cooked egg yolks.  

I looked around the internet and discovered there is a classic Spanish recipe called "Yemas de Santa Teresa".  The recipes vary but the general technique is to make a sugar syrup flavored with lemon peel (or juice) and sometimes cinnamon, then the raw egg yolks are mixed into it.  The whole mixture is cooked lightly, cooled, and formed into balls that are sometimes rolled in powdered sugar.  It is quite popular.

So this seemed to me an adaptation of the idea, and I wanted to try it.  

The challenge is deciding what temperature is right for the sugar syrup.  The idea that the hot syrup snaps between your fingers suggests the hard crack stage (about 300 degrees F) but allowing the ingredients to soak in the syrup until everything is cold and there is syrup to drain off suggests the thread stage (about 230 - 235 degrees F).  

I chose the thread stage so as to have something to drain when the mixture is cold instead of a solid block of candy. Also, I'm not sure anyone wants to put their fingers into syrup at the hard crack stage.

My Redaction

6 hard-cooked eggs

2 cups sugar

1 cup water

*Have a candy thermometer handy, if possible.

Just add water.

Carefully peel the eggs and remove the whites.  The goal is to keep the yolks as whole and round as they can be.  Save the whites for another recipe.

Put the sugar and water into a small saucepan that has a well-fitting lid.  Stir until the sugar is dissolved.  The mixture won't be clear but you won't hear any more scraping noise from the sugar on the bottom of the pan. Turn the heat to medium.

Do not stir the mixture any more.  Watch it cook (it will boil and turn clear at about 212 degrees F) and start checking the temperature after it boils.

When the temperature of the liquid hits 232 degrees F, remove it from the heat and put it on a folded towel.  Then carefully add the yolks.  They float, so gently swirl the pan to make sure the yolks are completely coated with the syrup.

Finally, put on the lid and wrap the pan in towels.  I used two:  one under the pan that also came up and covered the lid, and one that wrapped around the sides.  I tucked the towels closely around the pan and left it to cool, undisturbed.

After letting it sit for 11 hours, I unwrapped the pot and opened the lid.

There was no crust to cut.  The syrup was very thick.  The yolks had remained floating, so the tops did not look candied.

The tops looked a little dry.
I used a slotted spoon to remove them to a colander.  They were so fragile!  I accidently tapped one with the spoon and a piece broke off.  Be very careful when fishing them out of the syrup.


Putting them in the colander was not a good choice -- the syrup was so thick that it was slow to move through the holes.  So I moved everything to a rack.

This made it easy to separate the yolks and also to pour warm water over them, letting the plate catch the pour.  I turned the yolks over after the first rinse and then poured a little more.

Shiny!  And a little damp, still.
I decided to let them sit out overnight to dry.

The Verdict

The next morning, they had lost their sheen.


I tasted one and it was -- disappointing.  

It tasted like a cooked egg yolk.  It was only vaguely sweet.  It was not interesting or different; it could have been just freshly taken from the hard-cooked egg and had a little sugar sprinkled on it.  The texture was that of a cooked egg yolk.  Honestly, I think it would have tasted better with a little salt on it.

I'm not willing to say Miss Pinedo was wrong here; I think I misjudged the syrup temperature.  My guess was based on her statements about the syrup snapping between your fingers and that the yolks had to soak in the syrup until everything was cold.  

It is not clear to me that cooking the syrup at a higher temperature would have improved the result.  The syrup did not penetrate the yolks much, as can be seen here:


The darker areas show about how far the sugar penetrated into the yolk.  I had hoped for more after it sat for so long.  Cooking the syrup to a higher temperature would not have had it penetrate so far, I suspect (but don't know).

I had also hoped for a shiny, possibly hard, shell around them, which I knew might not happen with the syrup cooked to below the hard crack stage.  I don't know why the instructions were to rinse them with warm water as it didn't seem to help at all.

Before I cleaned everything up, I decided to dunk two of the remaining three yolks into the syrup and allow them to drain and dry.

Easy to tell which two were recoated.
These were definitely improved.  The sugar coating made the creamy yolk-to-sugar ratio better, making it more like a candy than just an egg yolk.  They were shinier and also not sticky once they had some time to dry.  I wonder if dunking and drying them again would make it even better. 

I will call this a failure.  Perhaps I can learn more and improve it.  Or perhaps I will try the Yemas de Santa Teresa as a comparison.


Monday, November 15, 2021

Chicken Poached in Pyracantha Jelly (Syrup)

My attempt at pyracantha jelly (click here to see the post) ended up with syrup but that didn't bother me one bit.  Now it is time to put that syrup to work with a follow-up recipe from the same book, The Edible Ornamental Garden by John E. Bryan and Coralie Castle.

ISBN 912238-46-1

They suggest that the pyracantha flavor compliments baked sweet potatoes, cold lamb, hamburgers, hot dogs, and poultry dishes.  You know, I have some sweet potatoes growing in my garden that would be a great test for this!  Anyway, they offer a recipe on page 137 that I decided to try.

Chicken Poached in Pyracantha Jelly

Sauté in:

2 tablespoons butter and/or rendered chicken fat

1/2 cup minced onion

1 teaspoon minced garlic


Season with:

salt

freshly ground white pepper

paprika


4 large chicken legs and thighs

Place in sauté pan with:

1/4 cup rich chicken stock

Cover and simmer 10 minutes.


Add:

1/2 cup pyracantha jelly


Cover and cook, stirring to distribute the jelly and adding more stock if needed, until the chicken is almost tender.  Then add:

1 green pepper, cut in chunks

1 large onion, cut in eighths

Cover and continue cooking until vegetables are tender but still crisp.  Serve over white or brown rice, bulghur wheat or barley.

Serves 4.

Somehow I lost the picture of my ingredients, so here is my pyracantha bush.

My Notes

I used olive oil instead of butter, chicken thighs only (5 fit comfortably in the pan), and pineapple chunks because I really don't like green peppers.

I also used chicken broth from a box and ground long pepper instead of white pepper.  If you don't know long pepper, it is a lot like black pepper but with a bit of an afterburn.

My sauté was over medium low heat -- the minced onions and garlic cooked until the onions were nearly translucent.  

Before cooking

Ready for spices and chicken.

I used 1/4 teaspoon each long pepper, paprika, and salt.  They went into the onion/garlic mixture and were stirred in well before the chicken was placed on top.  Then I added the broth, covered the pan, and set the timer for 10 minutes.

Thighs on the onions and garlic, before the broth was added.

Next I took the meat out, added the syrup to the cooking broth and stirred it in.  The thighs went back into the liquid.  I put them in skin-side down to coat that surface, then turned them to skin-side up for cooking.  They simmered covered for 15 minutes.

The dark is the syrup!

Both sides coated.

Next the onion chunks and pineapple chunks went on top.  I pushed them down into the liquid as much as I could.  The cover went back on and they simmered for another 20 minutes.

Onions and pineapple added.

The Verdict

It wasn't really a meal time when this dish was ready, so my guest taster and I shared a thigh.  

Cooked!

The meat was thoroughly cooked, tender, moist, and flavorful.  The pineapple chunks were lovely with more depth of flavor than just pineapple.  The onion wasn't cooked enough for our preference -- it was crisp but not as tender as we liked, although I have to say the onion flavor was muted, so I know it wasn't raw.  

The sauce was wonderful!  Sweet but with an umami background.  The spices were just right:  there and adding a kick but not overwhelming.  My only criticism was that it was too thin for what my mouth wanted.

We gave it a rating of "success" as it was (except the onion), but then I modified it.

The meat came out of the sauce, then I simmered the sauce until the onions were cooked just right.  The onions and pineapple were removed and placed over the top of the chicken.  Then I simmered the sauce by itself to reduce it -- it turned into a thicker, darker brown sauce that smelled fruity and spicy and rich.  That was poured over the chicken.

Sauce reduced.
That was much, much better.  The onions were cooked but still a little crisp.  The sauce was more concentrated, with an onion flavor dominating but the spices and the sweet still present.  Very nicely balanced, although I think more paprika and pepper would have been acceptable.  The sauce's texture was not thick - I would probably have to add a thickener to get it so - but that didn't matter as the flavor was more intense.

The pineapple was a good choice as bell pepper substitute.  It went well with the sauce flavors and added a chewy, sweet, acid bite to the mix.

A second success!

Not everyone has access to pyracantha berries or their syrup/jelly.  What is commercially available is pomegranate molasses, which is sweet and tart and more strongly flavored than the pyracantha syrup.  I think it would be a good substitute.  Another fruit jelly, like currant or blackberry or raspberry might be good, too.  

This is an easy dish to make and tastes great.  Worthwhile serving to friends and family, and easily adapted to purchased products.

When I see the bright red berries on my pyracantha bush, I think about the first time I ever truly understood that there were different kind of birds, because I saw what I now know as a Cedar Waxwing eating the berries.  Then I realize that the berries mean that the Cedar Waxwings will arrive soon to my yard.  Sure enough, I heard their call today.  I haven't seen any yet but I know they are here.  I hope they enjoy the berries as much as I have.


Monday, November 1, 2021

Pyracantha Jelly - a long time goal

When I was a child, I fell in love with a book my parents had.  I don't know if they knew it, but it really clicked with me and I knew I wanted to try the recipes and ideas it contained.  When I was an adult, they  cleared out their excess books -- and I made sure I got this one.  

Published in 1974 (it cost $3.95!!!) and written by John E. Bryan and Coralie Castle, The Edible Ornamental Garden is an alphabetical collection of interesting and sometimes unusual garden plants.  Each entry is accompanied by a description, some botanical history, and recipes.  

ISBN 912238-46-1

The authors wrote in the Preface:

Here we propose a unique approach:  commonly known edible plants, lesser known for their decorative qualities, blended with ornamental flowers, bushes and trees almost completely unknown today for their culinary applications, along with unusual recipes for both.

The illustrations are basic but powerful - many are reproductions from Gerard's Herbal, published in 1633.  The authors include a section with gardening advice and another that discusses in general how to gather and cook with flowers, leaves, and herbs.  There are even recipes for making infused syrups, honey, oil, and more, and how to crystallize, deep fry, or glaze leaves, flowers, or fruit.

So what sort of plants were the authors referencing in their preface?  Here is a sample:

  • asparagus
  • bay
  • scarlet runner bean
  • birch
  • chamomile
  • Chilean guava
  • chives
  • chrysanthemum
  • Douglas fir
  • fuschia
  • geranium
  • lavender cotton
  • violet
And then there is the one that I am addressing today:  the pyracantha or firethorn.  As a child we had pyracantha shrubs on our property; I intentionally bought two to plant on my property now.  They are a few years old and are producing berries in abundance.

It was time to try the recipe for pyracantha jelly (page 137).

Pyracantha Jelly

Combine and bring to boil:
4 cups slightly underripe pyracantha berries
5 cups water

Cover (tilt lid slightly) and cook over medium heat 40 minutes.
Mash berries lightly and transfer to jelly bag as directed on page 59:
Wet a jelly bad and wring out well.  ... Hang bag over a saucepan or place on a strainer over saucepan.  Let drip overnight to extract all juice.  Discard pulp ... and bring liquid to boil.  Skim any scum that rises to surface.

There should be approximately 2 cups liquid.

 Add to the juice:
1/4 cup grapefruit juice
2 tablespoons lemon juice
1 cup sugar

Continue following directions for making jelly and start testing after 10 minutes of cooking.

Stir to dissolve sugar and boil rapidly 8 minutes.  Start testing at this point by placing a small amount of syrup in a wooden spoon and cooling it slightly.  Tip spoon and let syrup drop from side of spoon back into saucepan.  As the syrup thickens, 2 drops will form along the edge of the spoon on either side.  When drops run together and drop as one, the firm jelly stage has been reached.  Remove syrup from fire and pour immediately into hot sterilized jars to within 1/4 inch from the top.  Seal.  Store in dark, cool place. 

Enough for a double batch.

My Notes

I filled a container with berries, thinking it would be about 4 cups.  It was 8 cups!  I decided to make a double batch.

After picking, I picked through the berries well, removing leaves and most of the stems.  I noticed there was a lot of dirt on them, so I rinsed them in small batches, rolling them in the sieve to make sure they were clean.  Each batch went into the Dutch oven as it was drained.  Then I added 10 cups of water.


I turned the heat to high.  It took a while to bring it to boiling, which I expected because of the quantity.  However, I do think I might have missed the time when it actually started boiling.  It was not a roiling boil - I saw a lot of bubbles bumping the berries around.  I decided it had been long enough that I needed to start the timer.

You can see a color change from the cooking.

Then I put on the tilted lid, turned the heat to medium, and set the timer to 40 minutes.  It smelled good while cooking - appealing and slightly fruity.  Here it is after cooking:

Some of those yellow bubbles looked like they had fine particles in them.

I took the potato masher and mashed the berries until I thought most were at least even slightly crushed.

My jelly bag was set up on a stand over a bowl.  I ladled the berries and liquid into it.  I was really surprised that it all fit - I was certain I would have to drain it in batches.  

All of it!

The liquid that went into the bowl was red, which also surprised me.


I let it drain overnight.  The goal was 4 cups of liquid.  The liquid that was already in the bowl went into the refrigerator and the bag was left out to drip more.  

I tasted the liquid:  it was mildly tart, not sweet.  Slightly astringent.  A flavor that was mild and pleasant, although I can't really describe it.

The next day I measured 6 cups of liquid.  I put it into the Dutch oven over a very low heat to warm it while preparing the canning jars.  Then I added:

2 cups sugar
1/2 cup grapefruit juice
4 tablespoons lemon juice

and stirred it until the sugar was dissolved (no more scraping noises when I stirred).

It was brought to a rapid boil over high heat.  I saw a lot of small particle scum on the surface and so started to skim that immediately.  In total, I removed about 3/4 cup of liquid + particles.

The scum kindly gathered together, as you can see in the creamy patch at the upper right corner.

After the suggested 10 minutes, I found the temperature to be about 211 degrees F and the liquid still very runny.  This is not surprising due to the quantity I started with.  At 215 degrees F it started foaming and I had to lower the fire.  The cooking was completed over a medium heat.

Nearly done.  You can see how much it reduced.

It took a total of 35 minutes to get the temperature to 222 degrees F, which is in the range of jellying.  However I never saw the sheeting action as described in the directions.  A small bit poured on some cool metal thickened and looked somewhat jelly-like, so I called it done.

The final quantity was about 2 cups, which I put into one canning jar and allowed to cool.  My 6 cups of liquid had reduced to 1/3 of its original amount.


There was a little liquid left over which went into a bowl and into the refrigerator.  Thirty minutes later it was cold but not jelled.  It was a very thick syrup.  This is what was used for the taste test.


The Verdict

My guest taster and I tasted it by putting a small spoonful in our mouths.  We both liked it!  It did not taste the way we thought it would (although we really weren't sure what that was, except possibly like the raw berry).  

I could taste the grapefruit, and I thought it was a good flavor addition.  The flavor was balanced and the astringency was muted to just right.  The astringency was, I think, what made it intriguing.  My mouth didn't expect it in a jelly (AKA syrup!).  Also, it was just acid enough and not too sweet.  

Success!

Later I checked the jar full of syrup to see if it had jelled at all.  Nope.  It was a very thick syrup.  I didn't mind at all.  It still tasted good.

Not thick enough to jell.

The authors included a recipe for chicken poached in the jelly.  I think the flavor of pyracantha syrup makes it just right for a savory dish.  It looks like a good candidate for more kitchen playtime.


Monday, June 15, 2020

The "Making Do" Challenge -- Frontignac (Elderflower Syrup)

I am still attempting to keep this blog going by doing historical recipes but using just what I have at hand.  My elder tree is flowering, so what to do with all those blooms?  I have enough dried for tea and other recipes.  Some recipes are for making elderflower fritters but I am not in the mood for that.

I revisited a book I have used before, Flower Cookery -- The Art of Cooking with Flowers.

No ISBN; the Library of Congress Number is 67-24072
The author is Mary MacNicol and the book was published in 1967 in New York by the Fleet Press Corporation.

I feel very strongly that Ms. MacNicol did not test all these recipes; rather her goal was to gather them into one volume.  She cites her sources in many cases.

There are seven pages of recipes for the elder flowers and berries.  Jam, wine, fritters, vinegar, pickled buds, sauces, ices, even pancakes.

The one that caught my attention is on page 57 and is listed as

Elder Flower Water, "Frontignac"

When elders are in flower gather them on a dry day.  They should be in full but fresh blossom.  Put the flowers in a preserving pan with sufficient water to cover them, and boil for 1/2 hour.  Then strain through a fine sieve, or woolen bag, and let it stand.  When cold put again in the pan, and allow 1/2 lb. of sugar for each pint of the flavoured water.  Boil 10 minutes, skimming well all the time.

When cold, bottle for use, corking the bottles tight and sealing them down.

For an ordinary shape of ice use a breakfastcupful of this syrup and make like any other ice, but use less sugar.

                                                                          The Cookery Book of Lady Clark of Tillypronie


I thought it was interesting the recipe is called a "water", when it truly is a syrup.  I thought waters were distilled and did not have sugar in them.  But I learn new ideas all the time.

The name Tillypronie was amusing to me, so I decided to see if I could look it up and find out more about Lady Clark and her book.  I was pleasantly surprised to find a lot about it.

Tillypronie is in Aberdeenshire, Scotland.  You can read in detail about it here.
The house was originally built 150 years ago in 1867 by Sir John Clark, the diplomat son of Queen Victoria’s physician, Sir James Clark, who was himself the son of a butler from Banffshire. 
There are some pictures of the grounds and it is a gorgeous place to live.

I was more interested in Lady Clark, so here is what I learned about her:
 Lady Clark was not just an exemplary hostess; she was also a highly accomplished cook. After her death in 1897, Sir John arranged for the thousands of recipes she had collected throughout her lifetime, and particularly during his diplomatic postings in Brussels, Paris and Turin, to be edited into a single volume which was published in 1909. Virginia Woolf gave the resulting book a glowing review in The Times Literary Supplement at the time.
It made me sad that her book was published after she died.  You can read more about it here.
The book is considered a valuable compilation of Victorian era recipes. Lady Clark obtained the recipes by asking hostesses or cooks, and then testing each one at Tillypronie. She documented each recipe's source with the name of her source, and often also the date. There is comprehensive coverage of plain British cooking, especially of meat and game, but the book has sections on all aspects of contemporary cooking including bread, cakes, eggs, cooking for invalids, jams, pies, sauces, sweets (puddings) and vegetables. She had lived in Italy and France, and the cuisines of these countries are represented by many dishes, as is Anglo-Indian cooking with a section called "Curries".
It looks so interesting!  I looked around the 'net and found a digital copy of her book (you can also buy print copies).  Her recipe is found here, under the Ices category.  Ms. MacNicol cited it word-for-word in her book.

My Notes

Elderflowers, sugar, and water are all that are needed here.  Here are my flowers:


That is how many I picked.  Here is what was left after I removed most of the stems:


"Water to cover" meant they were floating a little off the bottom, but not too much.  I measured 8 cups.


When the water got hot, the flowers and water darkened.  After it reached a boil, I turned down the heat and let it simmer for 30 minutes.


I used a coarse strainer first to get out the flowers and stems.  Then I poured it through a fine strainer to get out the small particles.

It measured 6 cups (3 pints).  I let it cool for a few hours.

Three pints meant 1 1/2 pounds sugar, which I weighed and then added to the liquid.  I heated it to a boil, stirring to dissolve all the sugar, then set it to a slow boil for 10 minutes.  I did not stir it and there was nothing to skim.

Once that cooled down, I bottled it.  I measured 5 1/4 cups syrup.  They are stored in the refrigerator.

The Verdict


Sweet, but not too sweet.  Flavorful and if you don't know what elderflowers taste like, I think it is hard to describe.  Floral but not perfumy, light and yet enticing.

I enjoyed sipping it from a spoon and putting some in my tea.

I had some leftover pie crust so I rolled that into strips, baked them, and then brushed them with the syrup (three times) while they were still hot.  I served them cool, with an unbrushed crust for a taste comparison.  The flavor was enhanced by the syrup but it was very subtle.


I also put together a simple dessert of sliced oranges and fresh strawberries, and drizzled a little of the syrup over them.  That was tasty.

Recently I was looking at a recipe for Roman honey cakes, made of cheese and flour and an egg, baked, then soaked in honey.  I think this syrup would be good to use instead of honey, too.  I don't have much honey in my pantry, so it is worth a try.

Success!  Worthwhile and perhaps I will try Lady Clark's suggestion to turn it into an ice.

What are you cooking?


Sunday, May 19, 2019

Rose Shrub, a Springtime Treat

I have been hard-pressed to do my blog posts for the last two months.  No, work and life in general have not been the culprits; I can only point to my loquat tree in astonishment.

A loquat, in case you didn't know, is a semi-tropical fruit that happily grows in my area and I have a decent-sized tree on my property.  It has produced fruit before but this year, it outdid itself.  I have picked over 120 pounds of fruit so far and it looks like another 20 to 40 are still on it.  I have made loquat jam, loquat chutney, spiced loquats, and loquat liqueur.  I have 12 pounds cleaned and frozen, waiting for a break in my schedule.  I've given away many pounds to friends.  Loquats are lovely to eat fresh, so I've had a lot of that.

Here is a picture of my tree and a closeup of the fruit on the tree.

One heavily laden loquat tree
Luscious, heavenly, flavorful loquats
The fruit is sweet and tastes somewhat like peaches or apricots without the tartness.  But it is different from them, which makes it a treat.  The recipes are not historic and, although they are foodie fun, most of them I got off the Internet, so I didn't want to write them up for my blog.  Now you know!

But today's recipe has to do with another springtime treat:  Roses!

The wet winter and now cool, wet spring has my yard in full bloom and among the flowers are the roses I planted a few years ago.  Two are highly scented and one of those has been producing flowers regularly.  I decided I wanted to try something with the petals.

I turned to a book I used once before, when I made a Rosemary Tea Sherbert  (part 1 and part 2).  It is Flower Cookery -- The Art of Cooking with Flowers.

By Mary MacNicol, Fleet Press Corp, published 1967

Today's recipe is on page 164.

Rose Shrub

Take one and a half pounds of fresh rose petals, add three cups of water and boil up.  Remove from heat and when cool, strain.  Then add two and half pounds of sugar, and the beaten white of an egg, boil, skim, strain and bottle.


My Redaction

I picked all the rose petals I could off of the three rose bushes.  The dark red roses aren't scented but I wanted them for color.  The other two were deeply scented. 

The recipe books all say to remove the bitter white base of the rose petals.  I tasted them and found that only the red petals had a bitter base, which I tore off.  The other bases were sweet.

A beautiful basketful, picked on a rainy day
It filled my basket to the brim and yet the total weight was barely six ounces.  I needed to scale the proportions.

Rounding up to call it 6
1 1/2 pounds petals (by weight) to 3 cups of water (by volume) is the same as

24 ounces petals to 24 ounces water, so that scales down to 6 ounces of petals to 6 ounces of water.

Similarly, 2 1/2 pounds of sugar is 40 ounces (by weight), so

24 ounces petals to 40 ounces sugar gives

3 ounces petals to 5 ounces sugar.  I had 6 ounces petals so I used 10 ounces of sugar.


That is not a lot of water but the roses took up so much volume that I chose to use my enameled cast iron Dutch oven.  I put the water in the bottom and then packed the petals in on top.

A large pot filled with roses.
I liked that the lid was heavy as I wanted to keep as much of the water and rose scent in the container as possible.  I set the heat to medium high until the water boiled -- I saw steam coming out from under the lid.  Then I turned the heat down to low, which stopped the steam, but I could still hear it simmering.

After about 25 minutes, I turned the heat off and let the whole thing cool for a few hours.  At no time during the cooking and cooling process did I lift the lid.

Once it was cold, I looked inside.

Now they are cooked down.
I decided to squeeze the petals to extract all the liquid I could from them.  I scooped them into a small colander, placed that in the pan, and squeezed with my hands until no more liquid came out. 

Squished until they could offer no more.
You can see the lovely red liquid in the bottom of the pan.

Then I strained the liquid through a fine sieve into a measuring cup and saw it was almost 8 ounces.  I still decided to use the original 6 ounces of liquid quantity to determine the sugar amount because that is what the recipe seemed to indicate.

I put the liquid into a small saucepan and then I added the sugar and the entire amount of egg white, beaten.  I suppose I could have put in a lot less white but I chose not to.  I stirred it all together and put it over medium heat.
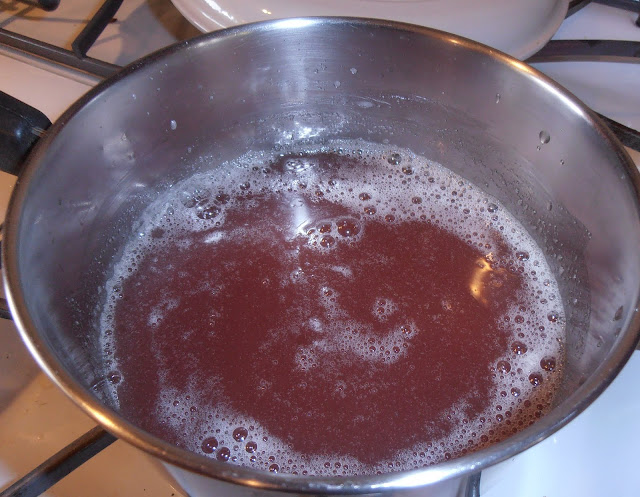
Just starting to warm up.
It started foaming almost immediately but I waited to skim it until it had come to a boil.  As it was heating I kept turning the temperature down so it wouldn't foam over.  When I saw bubbling along the edges, I used a small ladle to skim the foam off the top.

Foam!  You can see the boiling at this point, so I started skimming.
I kept skimming through the foam even though it seemed like I was taking a lot off.  Eventually I started seeing the clear syrup peeking through the foam.

Dark islands of syrup.
So I kept skimming, trying not to take the syrup off, until the surface was pretty clear.

Nearly done.
I used a wet paper towel to wipe the sides of the pan so that when I poured the syrup out, it wouldn't pick up more foam.  Then I poured the syrup through the fine mesh sieve into a clean jar.
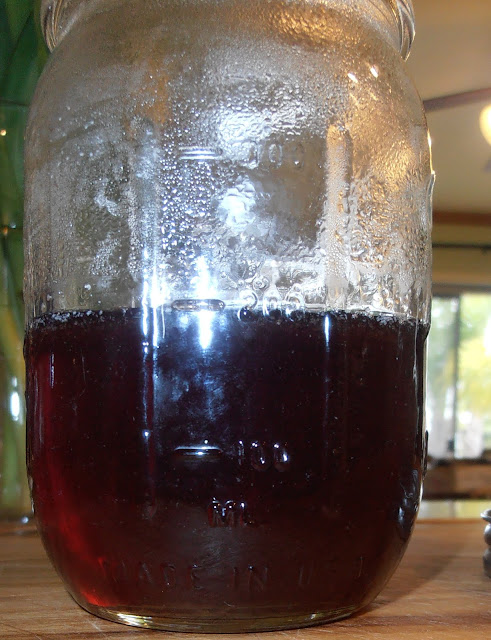
8 Ounces of Nectar!
After it cooled, I gave it the taste test.

The Verdict

First we tasted it just as it was, straight out of the jar.  It was definitely a sweet syrup, thick, with a lovely rose flavor.  One tester is a person who does not generally like the flavor of roses.  When she tried this, she liked it.  She felt the sugar gave the taste enough body to feel like she was drinking something, instead of just getting a strong scent of roses.  She also felt the rose flavor was an actual flavor and not just perfume.

Everyone liked it although we all agreed that it was too sweet to have more than just a sip or two.

So we tried it mixed with several other liquids.

Just adding cold water was okay but I think too much water was added; the ratio should be more like equal parts rose shrub and water but for me to say that, I will need to experiment more.

I also added equal parts tonic water, which was interesting because the tonic water is bubbly and has a bitter taste.  That shifted the whole experience away from sweet, which I liked, and the bitter added an extra dimension in flavor.  One taster, who does not like bitter, did not like the tonic water mix.

I mixed some of the shrub with a white wine, a little more wine than syrup.  That was intriguing because I no longer got the definite rose flavor but it didn't taste like wine, either.  It was a perfumed, fruity sensation that I truly liked.  One tester thought it could be described as a "rose sangria".  She does not normally like wine but felt this was a mixture she could drink, and she described it as "classy."  I liked that.

We also mixed it with white wine vinegar.  When it was about 2 parts shrub to 1 part vinegar, it was too tart for a beverage but we thought it would be a good sweet-and-sour glaze on roasted meat.  At about 3 parts syrup to 1 part vinegar, it was a refreshing, sippable beverage.  Actually, this is what I think of when I think about a beverage called shrub.

Success!

I want to make more (keeping blooming, my rose bushes!) and try it with other foods.  I think it would be good in lemonade, or drizzled over fresh loquats (or strawberries), or on pancakes, or in my hot chocolate, or mixed with vanilla yogurt as a fruit salad dressing, or brushed on the top of a cake hot from the oven (white, yellow, or lemon cake).

Cookies Consent

This website uses cookies to offer you a better Browsing Experience. By using our website, You agree to the use of Cookies

Learn More