Showing posts with label onion. Show all posts

Sunday, December 15, 2024

Apples and Onions -- One of My Most Favorite Recipes

I reserve the last post of the year for one of my most favorite recipes.  This is my 13th year of food blogging (!), and I struggled to decide what to write about.  I have favorites, but which one should I pick?  One day I realized that a very quiet favorite -- one that I cook often but really don't think about much -- was a side dish that was both versatile and historical:  apples and onions.

Versatile:  I use it as a side dish to a main course such as baked chicken, a robust stew, or grilled salmon. It is fabulous with pork.  It is wonderfully supportive because it adds sweet, tart, and savory notes, depending on the ingredients you choose.  But it is also a good side dish for breakfast foods, such as French toast, pancakes, or omelets.  It adds the same notes but its overall flavor profile can be adjusted according to the spices and their ratios.

Historical:  I keep finding recipes or references to it in a variety of cultures over a wide span of time periods.  It seems that if a culture has both apples and onions available to it, it has discovered how wonderful the combination is.  The main differences are which spices are utilized.  In other words, once people taste it, they like it, and they pass that information to future generations.

The quantities I choose depend on my use.  My questions are:

Do I want more apple than onion?  Or more onion than apple?  Or a balance of their flavors?

I typically use spices such as black pepper, cinnamon, and salt.  Sometimes I throw in saffron or nutmeg or ginger or cardamom, depending on my mood and goal for the meal.  So I also ask:

Do I want it leaning towards savory or sweet?  

What are the spices used in the rest of the meal?

The answers direct the ratios.  Savory means more black pepper than cinnamon; sweet means more cinnamon than pepper.  Use both, as they complement each other well as I have learned from cooking medieval English recipes.  I might also include some herbs.

Another choice I make is about the fat used to cook the apples and onions.  Olive oil works well for the savory direction and butter for the sweet direction.  

I also decide how I want to cut up the apples and onions.  Do I want chunks or thin slices?  Often I will chunk the apples and thinly slice the onions, so I get a contrast of shapes.

The final decision is the type of apple:  a tart cooking apple really contributes a tang to the final dish, which goes well with savory meats and sweet breakfast breads.  But an eating apple that stays firm when cooked adds more sweetness, and that can be lovely, too.

I made it for this blog with the idea it would be a side dish to a main course of baked chicken.  I had very tart cooking apples and brown (yellow) onions.  I used black pepper and cinnamon in equal measure and salt to support them.  And I used olive oil.

Apples and Onions

2 tart apples

1 small yellow onion

1/8 - 1/4 teaspoon black pepper

1/8 - 1/4 teaspoon cinnamon

1/8 teaspoon salt

1 tablespoon or less of olive oil

Peel and then thinly slice the onion.

Heat olive oil in a fry pan.

Add the onion and slowly saute it.

In the meantime, quarter and core the apple.  Cut into bite-sized chunks.

Add to the onions.  Mix well.

Saute apples and onions together, stirring occasionally.  If it looks dry, add a splash of water.  If you are in a hurry, put a lid on the pan to steam the apples, which cooks them quickly.

Stir in the spices (to taste).  Cook a little while longer to allow the spices to flavor the dish.

Taste and adjust spices as desired.  Serve hot.  (Also good reheated.)

My Notes

Well, most of my notes are written before the recipe.  When to add the apples?  When the onions are almost cooked to where you want them.  Do you want them transparent?  Browned?  Your choice!

How long to cook the whole thing?  Until the apples are tender.  Or further, if you want the spices to really infuse.

The spice range is to your taste.  I used the upper values for the pepper and cinnamon.

This quantity is good for 2 to 4 people.

Thinly sliced.

Chunks.  Leave the peel on!

Apples and onions cooking together.

With the spices just added.

Done!

The Verdict

This is always good.  I've been known to eat it as a meal in itself.  

My guest taster thought the spices were just right.  I thought that maybe they would be too strong for people not used to them.  Use your good judgement.

Success!

And cheers to the end of 2024.


Saturday, February 1, 2020

The Magic of Fire -- A Book Review

I live in Southern California, where the idea of seasons is laughable to many who live elsewhere.  Yes, we have seasons but their differences are mild:  winter is colder (but no snow, maybe we get rain, rarely does it freeze), spring is typically cool ("May gray" and "June gloom"), summer is hotter and drier (but "hot" is a relative assessment), fall can be cooler (but it is our usual wildfire season, so expect hot and dry).

This puts my next statement in context:  It was cold enough that I was able to build a fire in the fireplace.  (That is, without overheating the room.)  That means it was an opportunity to cook!

I love cooking with fire.  I don't get the opportunity to do it very often as my home isn't set up for it unless the weather is cold enough.  I could try it outside but reference that wildfire comment made above; we are all very aware of the danger a single spark poses.

So I grabbed that opportunity, and will do so again if others arrive.

Fortunately, my fireplace is huge and raised up off the floor.  The area in front of it is all ceramic tile.  There are enough horizontal surfaces around it to give me working space.  *Sigh*, it is a lovely setup for an historical cook.

As the fire was getting started, I recalled a book I used in 2014 in a post for this blog: String-Roasted Chicken.


ISBN 1-58008-453-2
There are many aspects of this book I enjoy -- the drawings, the stories, the recipes, and the cooking ideas -- but the one I want to focus on is Mr. Rubel's description of the different fire types you need for your cooking.  He includes how long the fire has been burning, the amount of embers and heat to expect, and each type's usefulness in cooking.

I'm going to paraphrase his words from pages 17 and 18:
New fire:  15 to 30 minutes after lighting; no embers; has limited use in cooking.
Moderately mature fire:  30 to 60 minutes after lighting; some embers; only useful for dishes that need a few embers.
Mature fire:  60 to 90 minutes after lighting; first five logs in fire reduced to embers that are producing most of the heat needed for cooking but still there is a gentle fire that helps, too.  Most recipes start with this level.
Long-burning fire:  More than four hours after lighting; has a substantial ash base which is what distinguishes it from the mature fire.  May have one of the flame types listed below. 
Gentle:  one or two logs burning lazily; slow ember production
Moderate:  two or three logs burning with some energy but flames only a few inches long; there is a hot bed of embers, enough to harvest a fresh amount every 10 to 15 minutes
High:  three or four longs burning fiercely; a substantial bed of embers and more being produced rapidly; long flames
What I like about his description is that I now have a way to judge either what recipe to make or what fire to aim for.  Do I need a long, slow heat to cook beans?  Do I need the more focused heat from a lot of embers?  Mr. Rubel tells us what fire he recommends for his recipes but I can extrapolate from there for recipes from other books.

So what did I cook over my first fire of the season?  Nothing precisely from his book but it did inspire me to try some techniques I haven't used in a long time as well as a new one.

The easiest, but still wonderful, recipe is for Roasted Onion Salad. I wrote about it in 2013 but baked the onions in the oven.  This time I set the onions in the fireplace and let them roast by the fire, with an occasional turn.


As the fire changed, I moved the onions around to keep them cooking.


They came out beautifully tender and mild.  After they were peeled, I sliced them and dressed them with a quality balsamic vinegar, freshly grated nutmeg, and a dash of olive oil.  I served them with grilled sausages for a light, flavorful dinner.  (I tried to grill the sausages over embers but didn't have enough to make it work.)

The next day was still cold so I kept the fire going and tried out cooking in my big ceramic pot.  An important part of cooking with ceramic is getting it warmed up slowly to avoid thermal shock.  I put the empty pot on the hearth as the fire was rekindled and turned it a few times to warm it evenly.

Then I added the ingredients for a chicken and vegetable stew:  chicken thighs, garlic cloves, cabbage, young potatoes, mushrooms, cherry tomatoes, onions, fresh thyme, ground pepper, salt, lemon slices, and water.


I put in the thyme and about half of the veggies first.


Then the chicken and spices on top of that.


I topped it off with the rest of the veggies and the sliced lemon, with water to cover.


The cover went on and the pot was moved close to the fire.


I turned it to put the cooler side towards the fire every 30 minutes or so as the fire grew in size, embers were produced, and the contents warmed up.  Then I moved the pot onto the bricks.


At this point the pot was hot all the way through, so I just checked on it and the fire every hour or so.  I let the stew cook most of the day (to the fire at 11:30 am, it was ready for dinner around 6pm).

It was a good stew!  It needed more seasoning -- especially salt -- but the meat was cooked, the water turned to broth, and all the vegetables were tender.  I dished the vegetables and broth into a bowl then used tongs to put a piece of chicken on top.  It was a complete meal, along with a glass of wine, of course!  (For the leftovers, I added some red wine and more salt and pepper before I reheated it.  Yum!)


I want to point out an advantage of using the bricks.  The fireplace floor is below the tiled hearth so the bricks give me a higher floor, making it easier to move the heavy pot in and out without having to lift it up.  This is important considering I'm sitting sideways to the fire and have to lean over to move the pots!

That evening I got out my small iron kettle and filled it with course sea salt.  I decided to make Hard Eggs, which I wrote about in 2012.  I buried four eggs in the salt, set it near the fire for an hour or so, then moved it even closer before going to bed.

The next morning I dug the eggs out of the salt to see how they had cooked.


They looked good, but the telling is in the peeling, and this is how they turned out.


Two were obviously cooked more than the other two, to the point where they looked dark and rubbery.  But we ate them anyway, just to see.


The lighter ones were really good:  the flavor was deeper, almost caramel-like, than a typical hard-boiled egg.  The surface was slightly salty, which surprised me.  I think the salt may have infiltrated the shell because the eggs were slightly damp when they went into the salt.  I am not a big hard-boiled egg fan but I did like these very much.

The darker ones were too chewy, too rubbery for my liking, but they were still edible.  I suspect that I moved the kettle too close to the fire when it was very hot.  The salt is very good at moderating the heat around the egg (which is why they didn't explode) but it can only do so much when the fire is hot.

Mr. Rubel brings up this point, too, on page 81, "Roasted Eggs" (in ashes):
While these instructions are easily stated, this is, in fact, one of the most difficult recipes in this book to master.  If the buried eggs get too hot too quickly, they soon explode with a muffled "pop."  If they are less hot, but still too hot, and especially if too hot for too long, they dry out in the all-night baking.  But if the ashes are too cool, the eggs don't cook fully.  Perfect warmth maintained for 8 hours results in eggs of lovely golden hues and a delicate flavor.
I achieved the golden hue and delicate flavor for two of the four eggs.  Between that, the stew, and the onion salad, I declare my fire-based cooking adventure a huge success!

I do recommend getting The Magic of Fire by William Rubel.  It is beautifully produced and has a wide variety of cooking techniques.  I am itching to try Fagioli al Fiasco, which has us cooking beans in a glass container.  When you read his writing, you know you are hearing the voice of long experience.  And that is the highest compliment I can give!


Saturday, April 20, 2019

Onion Shortcake

My cookbooks reside on shelves in my dining room, which I can easily see from my place at the table.  Sometimes a book just seems to be vying for my attention, by catching my eye over and over again.  This time the book was River Road Recipes.  I have had it for a while but I never really looked it over.  So I gave into its siren song and pulled it off the shelf.

Published by the Junior League of Baton Rouge, Inc.
The cover says it is a Louisiana #1 Best Seller, and looking inside the front cover tells me why.  The original copyright, for the first printing, is 1959.  My copy is from the fifty-eighth printing, in October 1983.  At 10,000 copies for each of the first twenty printings (200,000 copies!) and 20,000 copies for each of the rest (760,000 copies), this book clocks in at over 1,000,000 copies -- and that was 36 years ago.

I looked around the Internet and saw one copy boasting the 80th printing and the total number of copies at 1.2 million.

I am impressed, and the Junior League of Baton Rouge, Louisiana, should be very proud. 

I also found it amusing that my copy was inscribed:  "Won by Mildred Cyran on Delta Queen."  My book has been on the Delta Queen!

So what called to me from this book?  I looked through it and saw many recipes of the category I call "Ladies' Group":  recipes submitted by women (and some men) to build a fund-raiser cookbook.  Examples are:  "Hot Stuffed Tomatoes", "Baked Lasagna", "Cheese and Walnut Balls", and "Eggs Benedict."   Those are fine and lovely recipes, but I wanted to see something unusual, intriguing, or new.

Enter page 45, in the Hot Breads section.  At the top of the page was "Onion Shortcake" and I was intrigued.

Onion Shortcake

2 cups flour
4 teaspoons baking powder
1/2 teaspoon salt
4 tablespoons shortening
1/2 to 2/3 cup milk
2 tablespoon butter
2 1/2 cups sliced onions
1 egg
1/2 cup top milk
1 teaspoon salt

I used just one onion for the 2 1/2 cups
Sift together flour, baking powder, and 1/2 teaspoon salt.  Cut in shortening.  Add milk and knead dough slightly.  Flatten into a greased casserole. 

Melt butter in a skillet; add onions and brown.  Cool and spread over dough.

Beat egg, milk, and salt and pour over onions.  Bake in a 400 degree oven for 15 - 20 minutes.  Good with roast beef, and also nice when you have no gravy.

-- Mrs. D. C. Johnston, Lindsay, La.

My Notes

Preheat the oven to 400 degrees.

I decided to start the onions first since they would take longer to cook than it would take to make the dough.  I didn't let them cool before using.

I sliced the onions into thin half-rounds while the butter melted in the skillet.  Then I cooked them over medium-low heat, stirring occasionally, until they were mostly browned.

Thin!


I used 2/3 cup milk in the dough.  This gave me a fairly dry dough that still stuck to itself more than the bowl.

The dough was patted into a 2 liter casserole dish that had been coated with non-stick cooking spray.


Once the onions were cooked, I spread them evenly over the dough.


"Top milk" is the milk-and-cream mixture that you get in unhomogenized milk.  I didn't have any cream available but I didn't worry about it because the butter in the onions would probably make it rich enough.


I declared the dish ready after 20 minutes of baking and the milk-egg mixture was slightly browned, puffy, and looked set in the middle.


The Verdict

I served the onion shortcake as a side dish to a lovely Tahiti squash soup. 

The shortcake is basically a biscuit with a topping of onions in a savory custard.  And it was tasty!


The biscuit portion was tender and fluffy.  The onion/custard topping was moist and flavorful and tied the whole dish together.  Overall, the experience was a savory bread with enough substance to stand up to roast beef.

My guest taster and I both enjoyed it and I thought it was a good pairing with the soup.  Success!

If I were to make it again, I would use a slightly bigger pan to spread the dough out more and not make the biscuit part quite so thick.  My guest taster disagreed as he liked how much biscuit was there.  We both agreed that more onions in the topping would be better.  I would like almost twice as much, I think.

My guest taster thought the shortcake was rich, and I thought it was just right.

I recommend the book based on this one recipe and on how many interesting recipes there are in it.  There is a Game recipe section and even one called "How Men Cook":  "We give to you their recipes -- untouched -- just as they gave them to us.  To standardize would have wasted their wording; to edit would have lost their charm.  To change them in any way would be unfair, and so the wording, the methods, as well as the recipes themselves are how men cook!"


Monday, August 15, 2016

Game of Thrones Candied Onions

Ooooo, I am in a quirky mood today!  I wanted to do something different for this blog post but the new cookbooks were not meeting that need.  What to do???

There is a section in my cookbook collection that is for silliness:  a Star Trek cookbook, a Green Eggs and Ham cookbook, and so on.  What caught my eye today was The Unofficial Game of Thrones Cookbook, by Alan Kistler.

ISBN 978-1-4405-3872-8
It is an amusing book if you are a GofT fan (I've read the books).  The recipes are mostly standard and common ones, like leek soup, black bread, rib roast, leg of lamb.  But their names are tied to characters and places from that world and that makes it cute.

In Chapter 2, "A Morsel in a Moment:  Appetizers and Snacks", I found

The Cheesemonger's Candied Onions (page 52)

1 bag (2 cups) peeled pearl onions
2 teaspoons sugar or brown sugar
1/4 teaspoon salt
1 tablespoon butter or olive oil
1 cup cold water

And water
1.  In a heavy-bottomed skillet over medium heat, combine onions, sugar, salt, and butter with 1 cup cold water; bring to a simmer.

2.  Cook gently until all water is absorbed and onions are coated in a light glaze, about 5 minutes.

3.  Reduce heat to low.  Cook slowly until glaze browns and onions attain golden-brown appearance, about 5 minutes more.

4.  Alternative method:  Once liquid is reduced to a glaze, put the entire pan in a preheated 350 degree oven, and roast until browned.

(Ed.:  The recipe suggests you use fresh onions if possible; they are better than the frozen and peeled kind.)

My Notes

It took me about 20 minutes to peel the onions, which is what the book said it would take.  I put the ingredients into the cast iron skillet in the order it listed but I then wished I had added the onions after I had stirred the other ingredients together first.  It didn't appear to be a problem, though.

I was suspicious about the timing listed in the recipe:  using medium heat, would the 1 cup of water be absorbed or evaporated in about five minutes?  The same went for step three.  It just didn't seem like enough time.

Here was my dilemma:  Do I follow the instructions according to time?  Or according to description?  I chose description.

Starting to simmer
It took about 5 minutes for the water to simmer.  Then another 30 minutes or so to reduce the water to almost nothing.  To achieve "cook gently", I turned the heat down to medium low once the simmer started.  Perhaps too gently?

Water nearly gone after 30 minutes
Then it took another 30 minutes to get some browning of glaze and onions.  That was with the heat to low.  Perhaps too low?

Some browning.  This is where I stopped the cooking
When finished it appeared that the onions were thoroughly cooked and very soft.  What confused me about that was the recipe said fresh onions are better than frozen because of "the sweetness and crunch."  What crunch?

The Verdict

The recipe did not specify serving them hot, warm, or cold.  I tried one hot, then one warm, then one cold after it had been chilled for a few hours.

Hot:  Very tasty!  Lightly sweet from the glaze, lightly sweet and meaty from the onion, and, surprisingly, I got a mild acid, vinegar taste, too.  It was a nice surprise.  This would be good to serve as a condiment next to roast meat.

Warm:  Even better!  Buttery, a mild onion flavor, and a light blend of sweet and salty.  I noticed a bit of a crunch from a larger onion.  I tasted the glaze without the onion, too, and liked that.  That is where I got the acid flavor.  This would be good as a condiment or hors d'oeuvre.

Cold: Tasty!  Like the hot version in flavor but a bit more sticky.

I liked the warm version the best because the flavors were more distinct.

Success!

To be honest, I expected either a thicker sugar coating on the soft onions or a thin but crackly candy coating on nearly raw onions.  I got neither.  I am glad the onions were soft and not bitey.  I'm not sure if I would want more sweet coating on them or not.

So what sort of candied onion recipes might I find in our world?

This looked good:  Candied Red Onions.  It uses red onions, red wine vinegar, and sugar.

This, too:  Candied Onions.  It uses white onions, salt, butter, sugar, and steak sauce.

The idea that did not look good was someone using pearl onions dipped in chocolate as a prank!  (Although, hmmmm.  A cooked onion dipped in dark chocolate?  Might be worthwhile, especially if it is a little salty.)

The basic idea of all these recipes is to get the onion cooked enough to be enjoyable eating and then getting a tasty glaze on it to enhance the flavor.  I think you could play around with the spices and liquids to customize the flavor to match your entree.

Wednesday, April 1, 2015

Lemon Chicken Stew -- North African Cuisine

The book from which this recipe comes is Medieval Cuisine of the Islamic World, by Lilia Zaouali.

ISBN 978-0-520-26174-7
However, it is in the chapter on contemporary North African cuisine.  So while it is not terribly historical, it is from a region I wanted to explore.  And it looked good!

The medieval recipes are translated but unredacted and make for some interesting reading.  One I want to try some time soon is on page 65, "Marinated Olives with Thyme" and one I am dubious about trying is on page 64, "Fish Drowned in Grape Juice."  Yes, you take a live fish and immerse it in grape juice so it will "thrash about and swallow the juice until its body is filled with it."

Getting back to what I did do, I present to you (from page 148)

Lemon Chicken Stew

1 chicken (about 3 1/2 pounds), cut into pieces
4 tablespoons olive oil
salt
1/4 teaspoon ground cinnamon
1/2 teaspoon ground turmeric
1/4 teaspoon ground white pepper
2 medium (or three small) potatoes, peeled and thinly sliced
1 medium onion, peeled and thinly sliced
2 tomatoes, thinly sliced
2 small lemons, thinly sliced
1 bunch fresh parsley, leaves only, finely chopped


Moisten the best pieces of the chicken (thighs, wings, and breasts) with a tablespoon of the oil and season them with a pinch of salt, the cinnamon, and half the turmeric and white pepper.

Arrange the potato and onion slices in the bottom of a terrine.  Sprinkle them with salt and the rest of the turmeric and white pepper, and add enough water to cover them completely.  Add the remaining 3 tablespoons of oil and mix well.  Arrange the chicken pieces on top along with the tomato and lemon slices.

Put the terrine into a preheated medium oven and cook for about 45 minutes, turning the chicken pieces from time to time.  Before serving, sprinkle with the chopped parsley.

My Notes

I used three pounds of boneless, skinless chicken thighs, black pepper instead of white, two potatoes, half of the shown onion, and 1 1/2 of the shown lemons.  The parsley was skipped.

Instead of a terrine I used a round casserole dish.  The recipe did not say to cover the dish, so I didn't.
Filled to the brim and ready to cook
The oven was heated to 350 degrees Fahrenheit and it took 1 hour and 20 minutes to ensure the meat was cooked through.

I didn't turn the chicken much as the dish was very full and I worried about spilling and splashing.  Just a few times at the end to make sure the meat was cooked thoroughly.

The Verdict

Success!  This was quite good.  The tomatoes and lemons cooked to tender and started melting into the sauce around the meat.  I could taste the lemon juice in the sauce -- it made the sauce "sparkle" in flavor -- and yet the potatoes and onions were still robust enough to make this dish more than just chicken in sauce.

I was glad I sliced the lemons as thinly as I could as they get eaten (rind, white, and pulp) with everything else, adding a nice twist in flavor.  The turmeric makes the sauce an orangey-yellow and that is attractive against the other specks of spices and colors from the tomatoes and lemons.

A beautiful presentation
If I were to do this again, I would put in less water with the vegetables or perhaps use broth instead.  The rounded bottom of the casserole dish fooled me, I think, into putting in more water than I really needed to make a good sauce.  It did taste a little thin on flavor.

I would also use more spices than called for, especially salt.  This says a lot because I don't usually salt my foods.  My guest taster discovered that seasoned salt was a good enhancement and from that, I conclude that increasing the amount of cinnamon and pepper would be the right thing to do.  This could be because of too much water for the sauce but perhaps not.

The stew was perfect served with rice.  I would add a cucumber salad to it next time, too.

Dig down deep to get the onions and potatoes

Saturday, November 1, 2014

Creamy Sweet Onions -- Tapping into the experiences of others

One category of cookbooks is the fundraiser book, where the members of a group contribute their favorite recipes.  This compilation is bound and sold to raise money for the group.  Quite often the group is a women's club or church organization.

I have several of these in my collection and I prize them for three reasons:  some have the names of people I know, some have recipes I've loved and lost in the past, and every one of them contains tried-and-true recipes.  Consider that these people know each other and tend to buy the books for themselves, too.  No one is going to submit a recipe that isn't proven wonderful!

The style of recipes depends on the age of the book.  You can see the shift in ingredient preferences over the decades, from canned soup casseroles to gelatin desserts to gluten-free anything.  You'll often find "throwbacks"; these are recipes that have been handed down over several generations of cooks and cherished despite current taste or health trends.

I also like the variations on recipes with which I am familiar, like three-bean salad and seven layer dip.  It is fun to see what others have done to substitute ingredients they were missing or just to enjoy a twist in the usual flavor.

I was attending a neighborhood potluck barbecue and felt like bringing something different, so I turned to my ladies' group collection.  I chose the Washington Stars Quilt Guild 10th Anniversary Cookbook, published in 2009 out of Olympia, Washington.  Are these recipes historical?  Probably not but I think this qualifies as General Foodie Fun (salute!).

See www.washingtonstars.net
The hosts were providing the burgers and hot dogs with condiments.  I knew many people would bring desserts and potato chips, so I focused on a side dish.  My choice was submitted by Pat Umino with an end note, "It was very popular at our potlucks."  How could I go wrong?

Creamy Sweet Onions (page 67)

5 large onions, white (sweet)
2 1/4 cups sugar
1 1/2 cups cider vinegar
1 1/2 cups water
4 teaspoons salt
1 cup sour cream
3 tablespoons mayonnaise
1/4 teaspoon celery salt *
salt and pepper to taste

*The body of the recipe calls for celery seed, which is what I used.

I switched to celery seed after I took this picture.
Thinly slice the onions and place in a large bowl.  In a saucepan combine the sugar, cider vinegar, water, and salt.  Bring to a boil and then pour over the sliced onions.  Cover and refrigerate overnight.  Drain onions, discarding the liquid.  In a bowl combine the sour cream, mayonnaise, celery seed, salt and pepper, mix well.  Add the drained onions and toss to coat.

My Notes

My onions must have been very large because three of them sliced filled my large bowl.  I stopped there.  Mine were designated as white onions but not labeled as "sweet".  That did not turn out to be a problem.

Boiling the vinegar mix made an onion-scented kitchen smell very strong indeed.  I let the bowl of onions with liquid cool a bit before I covered it and placed it in the refrigerator.  Basically you are pickling the onions!

The next day, a few hours before the party, I drained the onions, mixed the sauce, and loved the contrast of the celery seeds against the white onions and white sauce.

Just before stirring
The Verdict

Yes, it was a hit!  I noticed that the people who like peppers, chilies, and other strong-flavored foods liked it the most.  One woman said she put it on top of her hamburger patty as a condiment.  I didn't label what it was so people were guessing a noodle salad at first, then they thought coleslaw, and then they realized it was onions.


I would put this in the category of "onion coleslaw".  The creamy sauce mixes with the little bit of vinegar pickling liquid that clings to the drained onions.  Adding the celery seed just pushes that creamy-sweet-sour mixture right into the coleslaw range.  The onion flavor became milder with the pickling process yet still retained some crunchiness that made it exciting to eat.

I liked it!  It isn't my favorite because it was a stronger onion taste than I usually seek out but I would eat it again.  If I were to make it more for me, I would use half onions and half cabbage.  Of course I like sauerkraut and pickled red cabbage, too, so that would be a bonus for me.

Success!  Tasty!  Give it a try!

Sunday, September 15, 2013

More on the Ymbre Tart

I made this tart to take to a potluck party.

From my experience in the previous post, I microwaved the onions for 8 minutes on high, which made them cooked to tender.

I also used the food processor to chop them so they were bits instead of long, thin slices.

Finally, I had no dried currants so I used three dried prunes.  I cut them into slices with a knife and added them to the onions in the food processor before they were chopped.

The result was OUTSTANDING.  The prunes added that extra depth-of-flavor and a light sweetness that I have never gotten from using the currants.  The fully-cooked onions were a joy to taste -- mild and subtle.

Overall, my reaction was "I can't stop eating this!"   I received several compliments at the party, including one from a professional caterer who wanted the details of the recipe.

It was even better the next day after it had chilled.

From now on, I will use prunes instead of dried currants for this recipe!

Success!

Sunday, September 1, 2013

Tart in Ymbre Day (An Onion Tart)

At my daughter's behest, I returned to one of my favorite books, Pleyn Delit:  Medieval Cookery for Modern Cooks by Hieatt, Hosington, and Butler and published by the University of Toronto Press.

ISBN 0-8020-7632-7
Her desire?

Tart for an Ember Day

Take and perboile oynouns & erbis & presse out the water & hewe hem smale.  Take grene chese & bray it in a morter, and temper it up with ayren.  Do thereto butter, safroun & salt, & raisouns corauns, & a litel sugur with powdour douce, & bake it in a trap, & serve it forth.

This translates to

2 large onions, peeled and sliced or chopped
1 tbsp chopped parsley
1 tsp chopped sage (less if dried)
3 oz cream cheese  OR 1/2 cup cottage cheese
4 eggs
2 tbsp butter
pinch ground saffron
1/2 tsp salt
2 tbsp currants
1/8 tsp sugar
pinch each ground cardamom, mace
unbaked pie shell

Parboil the onions and herbs; add butter to thoroughly drained onions.  Blend the cheese with the eggs.  Add butter, and remaining ingredients and stir in the onions and herbs.  Bake in a 350 degree oven 30 - 40 minutes, until the filling is set and the pastry lightly browned.

Sans currants
The Free Dictionary gives this definition:

Em·ber Day  (mbr)
n.
A day reserved for prayer and fasting by some Christian churches, observed on the Wednesday, Friday, and Saturday after the first Sunday of Lent, after Whitsunday, after September 14, and after December 13.

In the medieval era, it wasn't for fasting as much as it was for avoiding meat but dairy products were permitted.   This is a medieval vegetarian dish!

*****
Credit Where It Is Due
My daughter shopped for, prepared, and cooked this entire recipe!
***** 

She makes her own pie crusts (see recipe below) which she then rolled out and patted into her pan.

"Parboiling" means boiling until barely tender, so she modernized the cooking of the onions by microwaving them for about 7 minutes after peeling them and cutting them in half.  Once they were cool enough to handle, she sliced them thinly.  The parsley was also microwaved for about a minute.

She blended the eggs and cheese by hand and noted that they would have blended better if the cheese had been warmed to room temperature.  Or perhaps they could have been mixed by a machine.  Once everything was mixed, into the crust it went.


It baked for 40 minutes and came out as per the recipe description.

Fresh out of the oven
However the middle was still pretty gooey (although set), so she put it under the broiler until the surface was bubbly and there was more browning.
Fresh out of the broiler
This looked much better and was cooked through.

The Verdict

This is tasty; much like a quiche.  The filling was a lot like creamy scrambled eggs with a herby, savory undertone.  I liked how the onions were just slightly crisp but not so much as to have a strong onion-y bite.  Some who tried it thought the onions could be cooked a little more.


Overall, a success!  It was good for dinner and the leftovers were good the next day for breakfast.  Paired with a salad (green at dinner or fruit at breakfast), it would be an excellent main course.  It could also be cut into little slices and served as an appetizer, although then I would chop the onions instead of slicing them.

______________________________________________

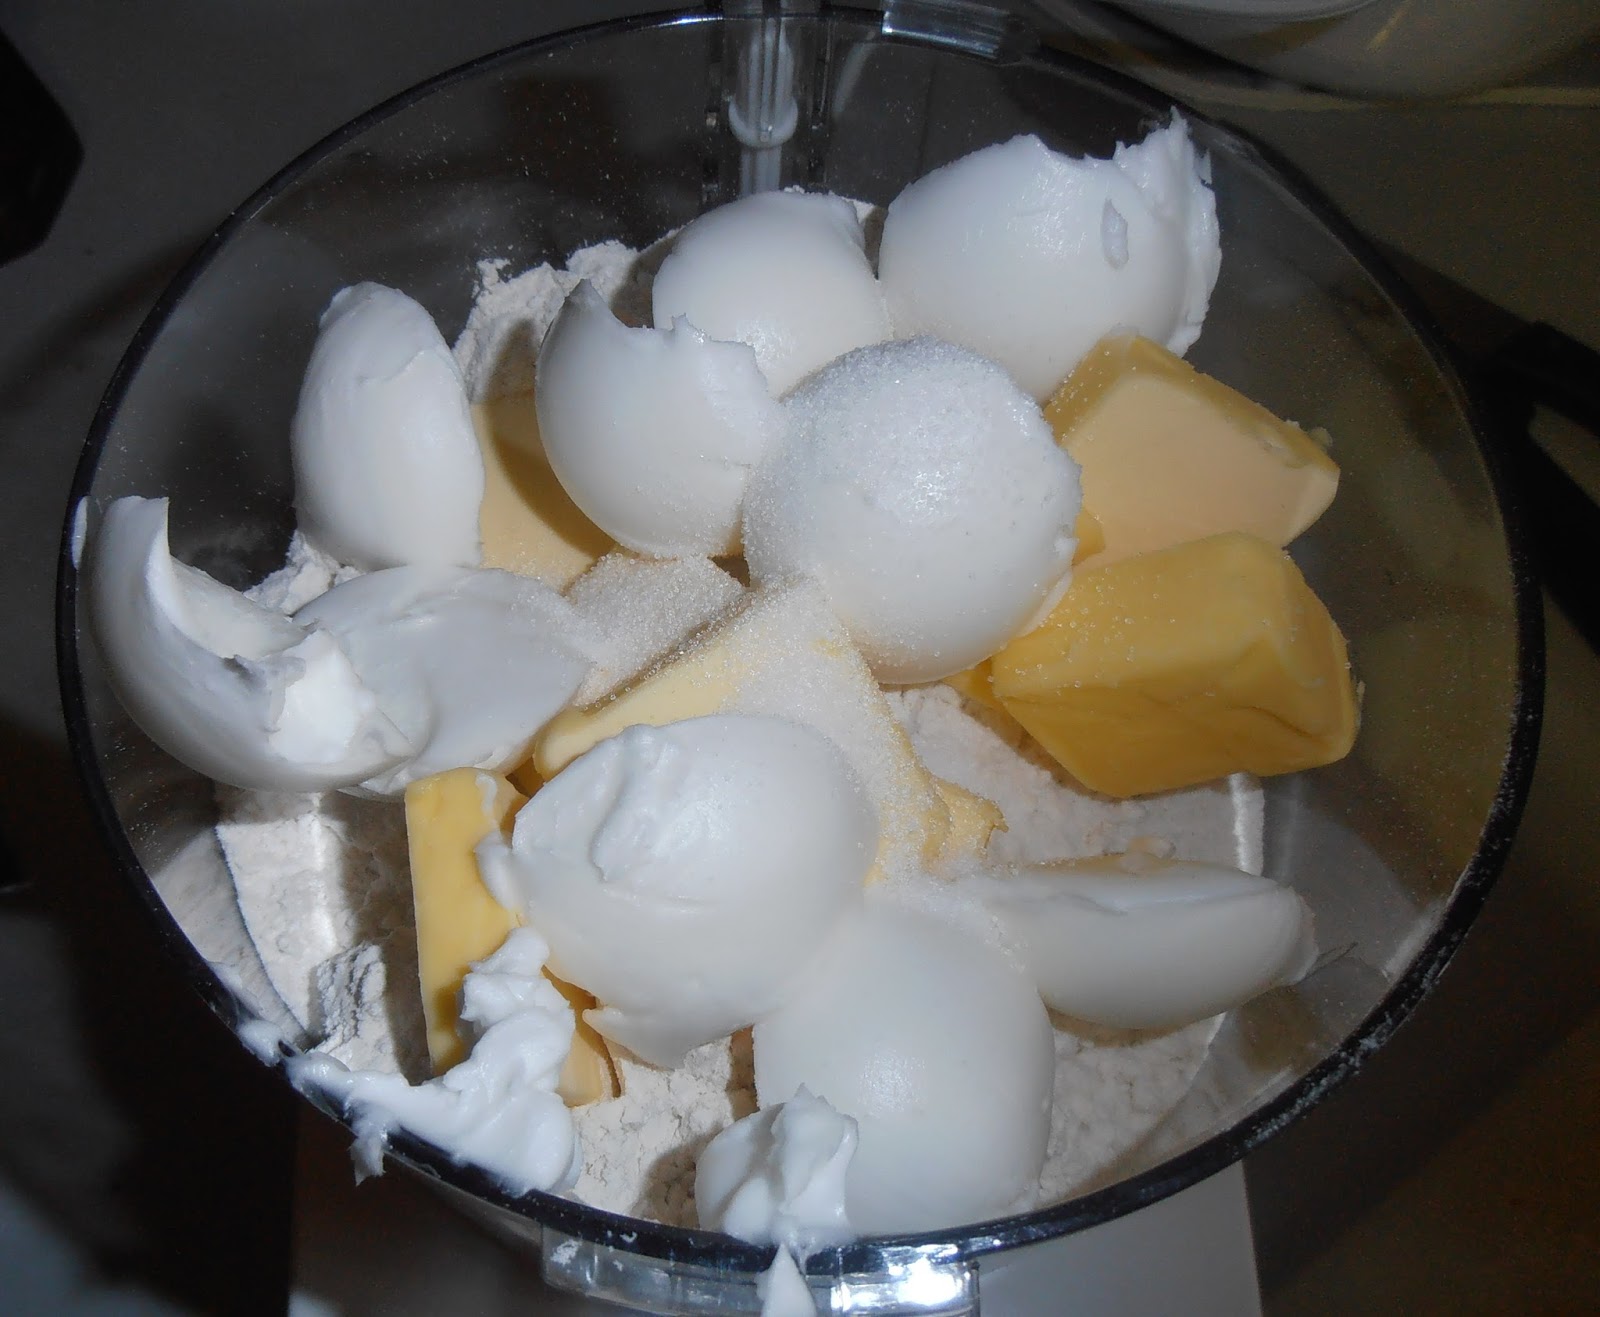
The Pie Crust

She uses this recipe:  http://allrecipes.com/recipe/flaky-food-processor-pie-crust/


Please look at this website for the ingredients and instructions.  She loves it because it is so very simple to put together and works every time.  She just might have me converted!

Looks simple enough!
Those aren't hard-boiled eggs but spoonfuls of shortening


After the prescribed pulsing
Lovingly squeezed by hand

Cookies Consent

This website uses cookies to offer you a better Browsing Experience. By using our website, You agree to the use of Cookies

Learn More