Showing posts with label Arab. Show all posts

Monday, June 1, 2020

The "Making Do" Challenge -- Stuffed Eggplant

I decided that I needed to "up" the challenge of maintaining an historical food blog during a pandemic by cooking an historical recipe without running to the store for all the ingredients.  This is what they had to do:  cook with what you have and still make it taste good.  (I've been doing that a lot lately and love the creativity it inspires!)

Two eggplants were telling me they needed to be used.  I kept thinking about a recipe I did a long time ago for this blog,  Eggplant -- The Perfect Way.   It is wonderful, with cheese and basil and spices.  But I did not have the right cheese and definitely no basil -- the snails made short work of that in my garden and the seedlings are not big enough yet.

But I did have a packet of ground lamb in the freezer.  Lamb and eggplant are a good pairing, and both together suggested a particular geographic location to consider for recipes.

ISBN 978-0-520-26174-7
I really like this book.  The foreword was written by food historian Charles Perry who deftly puts the recipes and time period into context.  It even contains a description of how to make murri, a soy-sauce-like condiment used at the time.  The recipes themselves are easy to understand and enticing to make.  The color plates are mostly of art, servingware, and kitchenware from the time period.

I chose Recipe 44, on page 94.

Stuffed Eggplant

Ibn Razin, in one of seventeen recipes for stuffed eggplant, calls for extra stuffing to be spread over the eggplant before it is put in the oven.

Take some of our large eggplants.  Remove the head [ris] of each eggplant and hollow out the inside in order to extract the pulp while taking care not to cut the skin; indeed, [the skin] should be of a good thickness.  Then take some meat and pound it in a mortar and boil it.  When it is cooked, pound it in the mortar [again] in order to make it still more tender.  Put [it] in a pot [dast] and add fresh sheep tail fat, dry coriander [seeds], caraway, pepper, Chinese cinnamon, and fresh chopped coriander [cilantro] and parsley in great quantities.  Fry all of it until it is roasted.  Add salt and stuff the eggplant with this mixture.  Close up [the stuffed eggplants] with what was cut off [i.e., the head].  Insert [in each eggplant] three sticks of good-quality wood that has been smoked [in order to reattach the head], then put them in the pot and cook over a lively fire in the sheep tail fat until they are well cooked.  Then put them on a serving dish [zubdiyya] and sprinkle with dry coriander.  At the moment of serving, remove the sticks and throw them away.


My Notes

I had no cilantro so I decided to use just parsley (from my garden!).  Instead of sheep tail fat, I used olive oil.

I thought it interesting that there was no mention of "purging" the eggplant, after having read Perry's discussion of how eggplant was unpopular until it was discovered that salting it would remove the bitterness.  I decided to follow the preparation directions in order -- that is, hollowing the eggplants before cooking the filling -- so I put the prepared eggplants into salted water while making the filling.

Honestly, I wasn't sure which end of the eggplant was the head.  I decided it was the big end so it would be easy to hollow it and still leave thick walls.


I used a knife with a long, slender blade to roughly cut a circle into the length of the eggplant.  This defined the thickness of the walls.  Then I used a sturdy spoon to scoop out the flesh.  Sometimes I poked the flesh a few times with the knife to make it easier to scoop.

Considering the meat I had was already ground, I decided I didn't need to pound it, boil it, and pound it again in order to make it tender. 

The one pound of lamb was sauteed in olive oil and I added

     1/4 teaspoon powdered coriander
     1/4 teaspoon caraway seeds
     1/2 teaspoon pepper
     1/2 teaspoon cinnamon
     1/4 cup chopped fresh parsley
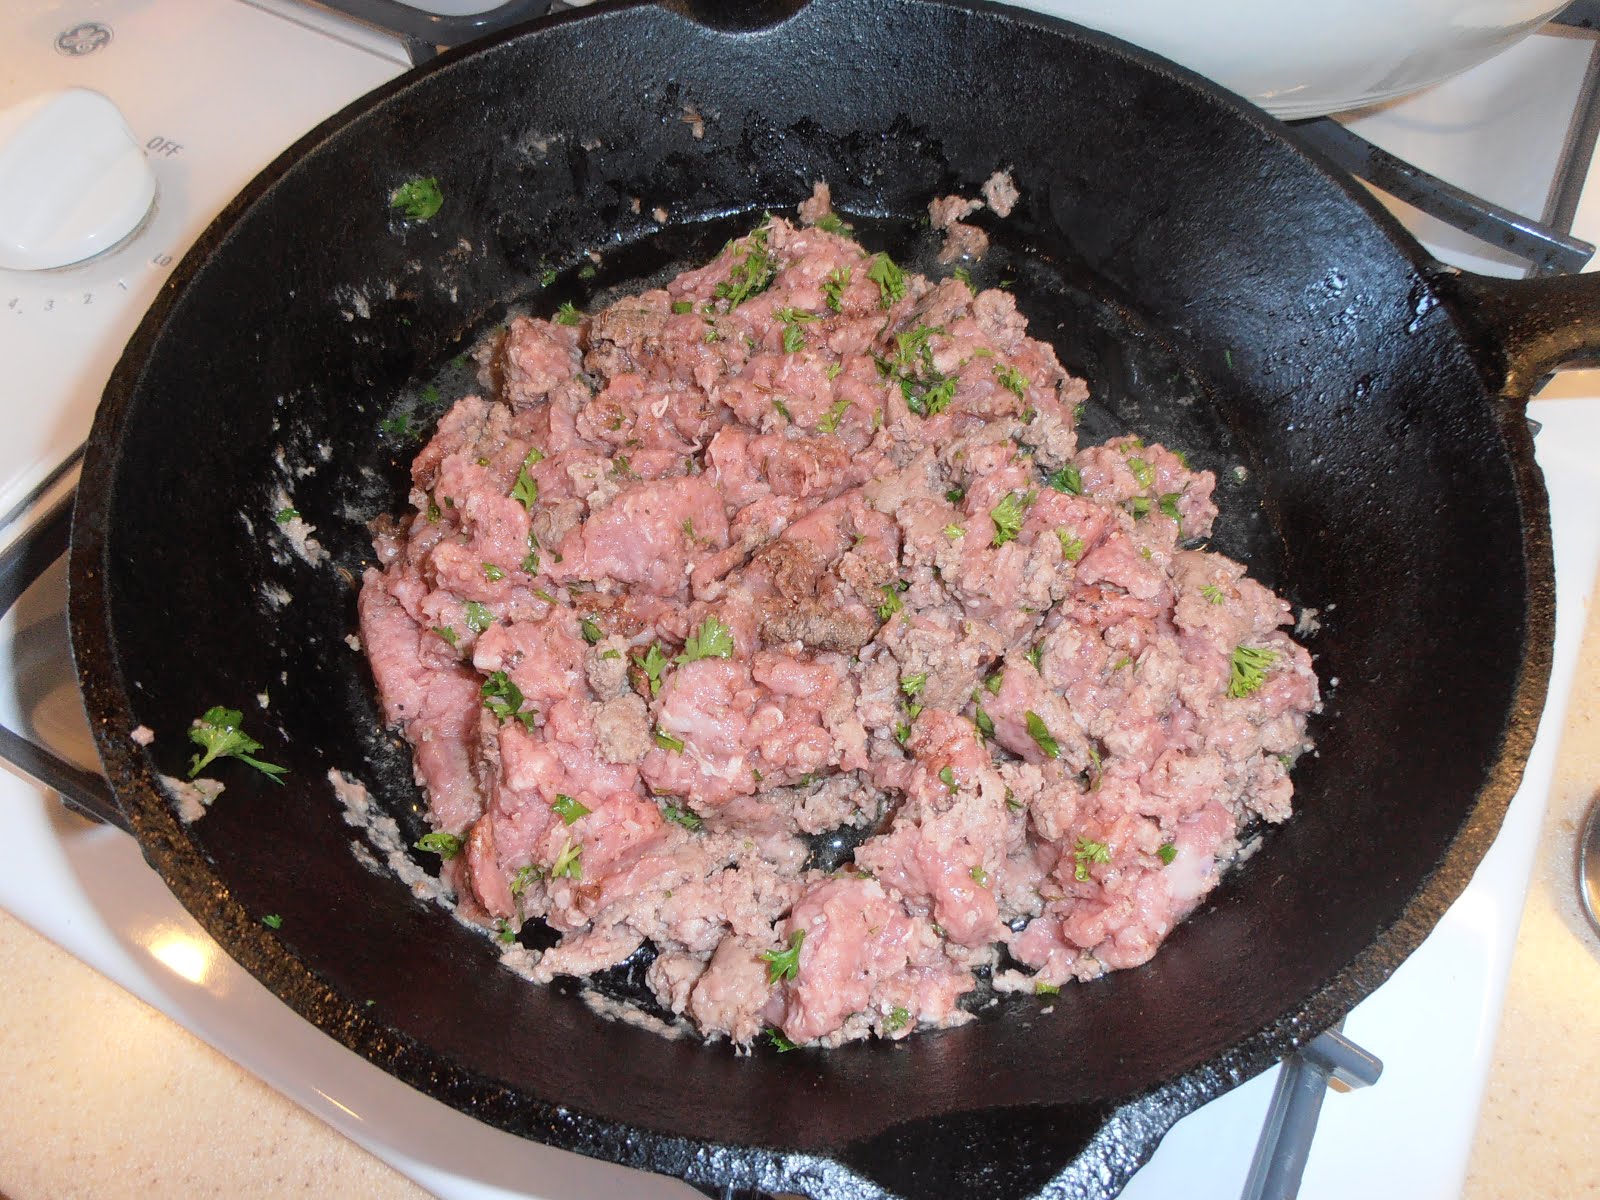
Nearly done
Once it was cooked, I added 1/4 teaspoon salt and stirred it in well.

Stuffing the eggplant was easy.  I just spooned the filling in, pushing it down to compact it after every few scoops.  My goal was to stuff it to the brim and just a little past.

Stuff it!
I didn't happen to have any smoked sticks around so I decided to use toothpicks instead.  Then I fried the eggplants in olive oil, turning them to cook on all sides.

The picks were angled a little to help hold on the head.
I cooked them until the head fell off and the stuffing starting coming out. 

To serve them, I put them on a plate with the head next to it, after removing and throwing away the toothpicks.  Then I sprinkled them with some powdered coriander.

The Verdict


I served them with a tossed green salad and some of the sorrel puree that had been thinned and flavored with beef bouillon. 

The stuffing was great -- very flavorful and I think I got the spice balance just right.  The eggplant was slightly undercooked in places, making it harder to cut than the well-cooked parts.  But the combination of eggplant and filling was tasty! 

The eggplant was a little bland by itself, which served as a good support for the filling.  The combination was savory, spicy, creamy (the eggplant), slightly chewy (the filling).  I noticed that the coriander sprinkled on top was warmed by the hot eggplant and provided a lovely, enticing, spicy scent when I sat down to eat.

Success!

The ends of the eggplant were not cooked well at all.  I believe this is because they never touched the hot oil in the pan.  The sides were all that were eaten.

The note in italics at the beginning of the recipe came to mind at this point.  If I had baked the eggplants instead of frying them, I think they would have been thoroughly cooked, even at the ends.  I would not have had the issue of needing to stop cooking when the head fell off, either. 

If I did this again, I would try baking them.  I might even spread more of the filling over the top before doing so!

I did have extra filling, which went well in a quesadilla for my lunch the next day.


Friday, July 5, 2019

Carob Molasses: Gulepp tal-harrub DONE RIGHT

Wow, did I make a big mistake.  It was just my good fortune and a bit of old training that kept me out of harm's way.

I previously wrote a post on Carob Molasses and found it was awful.  Extremely bitter.  I tasted a little and threw the rest away.  Then I contacted Dr. Albala, the author of the book with the recipe I tried, in order to figure out what was wrong.

Our discussion lead me to realize that I MISIDENTIFIED THE TREE.  Yes, what I thought was carob was not.  All my life that tree had been identified to me as carob.  I even looked through the internet to double-check.  But I was wrong.

The tree was actually Cassia leptophylla, the Gold Medallion Tree.  Parts are toxic!  I recalled that there is an evolutionary reason we taste bitter things, and that is to tell us when something is not good for us.  I am so glad I responded correctly to that, because it probably saved me a trip to the hospital.

It goes to show that eating plants can be hazardous, so always be careful!  I should have checked more thoroughly on the tree's identity before I tasted it.

Lesson learned.

Dr. Albala sent me some real carob pods.  This is what they look like, in comparison to what I had harvested.

One carob pod, about 4 inches long
Many carob pods
Gold Medallion Tree pods.  Toxic!
The carob pods are small and curved, whereas the other pods are long and straight.

I followed his instructions to make the syrup:

To make the syrup, just break up the pods, boil them for several hours in water and then strain.  Cook this down until thick, adding a little sugar to taste if you want.

Broken and ready for water
With water
Once the water was boiling, I turned the heat down to low to make it just simmer.  I had to add more water early on because I had barely covered them at the start.  They smelled slightly sweet while they were simmering.  I did cover the pan to cut down on evaporation.

After more than two hours of simmering, I strained them, then simmered to reduce it.
Strained
Reduced in the pan, for comparison.


The final quantity.


The Verdict

I tasted a pod after it was cooked and cooled.  It was soft and sweet and tasty!  I chewed it a little and got the almost-chocolate flavor.  I liked it.

I tasted the syrup after it cooled.  Well, it never got thick but I decided that it had reduced enough -- 1/4 cup!  I didn't want it to burn or evaporate all away.  But I will call it a syrup anyway.

It was still watery, not as concentrated as I think it should be.  But it was sweet with a deeper flavor that was something like chocolate and something like coffee.  I liked it!  Not bitter at all.  

Success!

The internet tells me that the syrup is used to flavor drinks, make a cough syrup, and to coat sore throats.  Some people make a liqueur out of it.  It is sometimes flavored with orange.

Thank you, Dr. Ken Albala, for your time, your help, and for sending me the right pods.  It was kind of you!

Saturday, June 1, 2019

Carob Molasses: Gulepp tal-harrub

UPDATE:  The pods you see in this post are NOT carob.  They are toxic and should not be used at all.  Please see my updated post for the correct pods.  Here is a link to the effects of ingesting this plant:  https://wagwalking.com/condition/golden-chain-tree-poisoning/

I recently acquired a copy of The Lost Arts of Hearth and Home -- The Happy Luddite's Guide to Domestic Self-Sufficiency, by Ken Albala and Rosanna Nafziger Henderson.  One reason it appealed to me was that the recipes were of very basic but interesting skills, exactly what the title promises:  lost arts, like unusual (to me) breads, making soy sauce, pickling fish, distilling and brewing, and even non-food skills like making soap, brooms, braided rugs, and your own exterior bread oven.

ISBN 978-0-399-53777-6

One recipe caught my eye, on page 43, called Carob Molasses.  Carobs are used as decorative features in my area -- they are pretty trees -- and I have always wondered what I could do with the pods.

Dr. Albala wrote up this particular recipe and I loved his description:
Carob is one of those health foods that suddenly appeared on the market when I was a kid, as a substitute for chocolate, which it isn't.  
This made me laugh, as that was exactly the experience I had as a kid!  I recall having it handed to me with a statement like, "This is made of carob, and tastes exactly like chocolate!"  No, no it doesn't.  Not even close.  I didn't know about being a foodie back then, but I knew carob's flavor was a poor imitation of chocolate and I wasn't going to accept it as an alternative.

But this recipe intrigued me.  It didn't promise to be like chocolate, just a long-valued syrup to be used in beverages or even (as he suggests) in barbecue sauce or chili.

Carob Molasses

To make the syrup, just break up the pods, boil them for several hours in water and then strain.  Cook this down until thick, adding a little sugar to taste if you want.

It was easy to gather an armful of pods off the ground around a convenient tree.

Easily two feet long or more
These pods are big!  I had to break them into fourths to fit them into my 6 liter Dutch oven.  I washed them first to get off dust and bugs.  The wash water turned light brown almost immediately.

Adding water to cover

I had originally thought the syrup would be made from the seeds, but it is the pods that contain the flavor.  The seeds are hard, and I tasted a piece of pod but really got nothing from it.


Wet pods gave off a slightly sweet scent.

I brought the water to a boil and reduced the heat to a rapid simmer and set the timer for 3 hours.  After about 30 minutes I decided to put the lid on to reduce evaporation, since I had already needed to add boiling water to keep all the pods covered.

I wasn't sure what would happen to the pods while cooking.  I imagined they would get pulpy or soft, but honestly, they remained hard.  You can see the water got very dark brown.

I removed all the pods and strained the liquid.  It measured 8 cups.


So I put it into another saucepan and brought the heat up so the liquid was steaming.  After another 2 1/2 hours, it had reduced to 2 cups.  Not thick but definitely thicker.


At this point, I decided to taste it.

The Verdict

It was pretty awful.

The dark brown, slightly thick liquid had only one flavor:  bitter.  No, let me restate that, it was BITTER.  Deep, concentrated, make-your-tongue-curl bitter.

The recipe suggested to add a little sugar but I realized that no amount of sugar would offset that intense bitterness.

Failure.

I must have done something wrong.  There is no way a concoction like this could be so loved and reproduced over the years.  I decided to contact Dr. Albala to get his opinion on my disaster.

He was kind enough to reply!  Our conversation led me to believe that either the pods were already bitter or that boiling them hard might have been the culprit.  Other online recipes suggest more soaking in hot water or simmering them very gently.

If I get the opportunity to get more pods, I will try it again.  I would really like to see what people enjoy about this food.

Wednesday, November 15, 2017

Arabian Lamb Cakes - Maqlūa al-shiwā

I was recently able to do some demonstration cooking and this is a recipe I picked out as part of my repertoire.  However I never got around to it!  The ingredients all came home with me and I decided to make it for this blog.

It is originally out of one of my favorite books, Pleyn Delit, which makes it medieval.

ISBN 0-8020-7632-7
There was a lot of Arabic influence in the foods of this time.  The lamb cakes stand out as Arabic primarily because of the use of lamb, mint, nuts, and the spices combination.  This is recipe #5 in the book.

Arabian Lamb Cakes - Maqlūa al-shiwā

Original recipe

Take cold roast, and cut up fine with a knife, adding the usual seasonings, together with walnuts:  then proceed as for maqlūba, with eggs.  If desired sour, sprinkled with a little lemon juice.


Redacted version

1 1/2 cup pieces of cold roast lamb
1/4 cup chopped walnuts
1/4 tsp coriander
1/8 tsp each ground cumin, cinnamon, pepper
2 tsp chopped fresh mint
1 egg
1/2 tsp salt or to taste
olive oil for frying
juice of 1/2 lemon


Mix ingredients (not oil or lemon) and form small cakes.  Fry in oil, turning over once.  Sprinkle with lemon juice before serving hot.


My Notes

My lamb was purchased ground.  I cooked and drained it before using it (it was cold when I packed it to take to the demonstration).

I chopped the walnuts well, so no one would get a big chunk of nut in their lamb cake bite.

An original sized piece included for comparison.

First I mixed the meat, nuts, and all the seasonings together well.  Then I beat the egg before adding it to the mixture.

Pre-egg

Post-egg.  It looks moister.

I preheated the pan and the oil.  The first spoonful of the mixture was squeezed in my hand and set into the pan.  It immediately crumbled!

Definitely not a cake.

I decided the mixture was too dry so I added another beaten egg.  Now it looked very moist.

Downright soggy now.  The particles cling better, too.

I tried making the little cake shapes again.  I was very gentle in squeezing the mixture, in placing the cakes on the pan, and in turning them over once.

Cooking on the first side.

Cooking after turning.

Despite all that gentleness, nearly half of the cakes crumbled before being put on the serving platter.  Very disappointing!

I piled the whole cakes mostly on one side of the platter and the broken bits on the other.  Everything got a sprinkling of lemon juice.  I garnished the dish with two more pieces of lemon and a sprig of mint.


The Verdict

I served them with the Sweet-and-Sour Olives and some tortilla chips for crunch.

The chips were shy and avoided the photograph.
The lamb cakes that were whole were easy to pick up and eat but you realized quickly that they had to be handled gently or they would break apart.

The flavor was good:  mostly the lamb came through and the spices were very subtle.  I wanted more of a kick from the mint.  The nuts seemed slightly toasted from the cooking, which I liked.  The cakes weren't oily, which I appreciated.  The lemon juice is a necessary ingredient to add some sparkle to a somewhat bland dish.

So success on the flavor, although I wanted more of a dance on my taste buds.

As a finger food, it was a failure.  The cakes weren't robust enough to be finger food at all.  I ended up eating most of the cooked meat mixture with a spoon.

I suspect that the addition of some dried bread crumbs would help with that.  Perhaps if I make it another time, especially as a demonstration recipe, I would add some.

Side note:  the liquid that the olives came in was also very good on the lamb cakes!

Sunday, October 1, 2017

Sweet and Sour Green Olive Appetizer -- Zeitoon bi Hamod er Rummaan

This is my first post since May.  Life went into overdrive in June and is just now settling down!  Nothing bad, just very busy.  But enough of that, let's talk about recipes!

I was in the mood for something Arabic so I perused one of my fun books, The Arabian Delights Cookbook by Anne Marie Weiss-Armush.

ISBN 1-56565-219-3
Ms. Weiss-Armush, born American, was introduced into the food from the Middle East when she and her husband moved to Syria and she first met her mother-in-law.  She learned recipes and traditions from a variety of places in the Middle East during the 11 years she lived and traveled there.  This book was published in 1995.

This recipe, a type of mezzeh or appetizer, is one she and a friend concocted after having it at a Lebanese restaurant.  Look for the recipe on pages 47 and 48.

Sweet and Sour Green Olive Appetizer

1 cup green olives
1/2 small onion, slivered
3 tablespoons hamod er rummaan pomegranate syrup
3 tablespoons water
3 tablespoons olive oil
2 teaspoons brown sugar
salt

The onion is sitting on the blue lid.  
1.  Drain the olives of their brine.

2.  Combine the remaining ingredients and pour over the olives.  Cover and marinate in the refrigerator for at least 24 hours before serving.


My Notes

While the olives were draining, I mixed the marinade.

I used about 1/4 of the onion you see in the picture.  I don't think I really slivered it but I did slice it thinly so the marinade could penetrate it.

I used about 1/4 teaspoon of salt.  This is what I thought would bring out the flavors without making anything taste salty.

Just the marinade
Once I had everything ready, I mixed the olives into the marinade.

Olives only slightly mixed into the marinade.
I then put them into a sterilized canning jar.  I sterilized it using the water and microwave method I have used before.  I am not certain it was really sterilized but it certainly was very clean!


I worried that the marinade didn't cover the top of the olives, so I turned it over and gently shook it during the first 24 hours in the refrigerator.

The Verdict

I waited a few days instead of just one to taste it.

Oh my, very good!  At first the onion flavor was dominant, which did not please me, but then the marinade and the sour of the olives came through.  It was a little too sweet, so if I make it again I will reduce the amount of brown sugar to 1 teaspoon and see how I like that.  It could be that the pomegranate syrup Ms. Weiss-Armush used wasn't as sweet as mine.

After a week or so the onion flavor mellowed and was more acceptable.  It should be a background flavor.  The little bit of crunch the onions added to the mixture was pleasant, too.

What I tasted was the slight chewy from the olives, the crunch from the onions, the sour and sweet from the pomegranates.  It was all very inviting and made me want to eat more.

One important note:  I stored the olives in the refrigerator, which caused the olive oil to harden.  The mixture tastes best if you allow the olives to come to room temperature before serving them.

Success!  I gave some to friends who also shared it with friends.  They gave me positive reviews and one person asked for the recipe.  I think it is time to make some more!

Wednesday, April 1, 2015

Lemon Chicken Stew -- North African Cuisine

The book from which this recipe comes is Medieval Cuisine of the Islamic World, by Lilia Zaouali.

ISBN 978-0-520-26174-7
However, it is in the chapter on contemporary North African cuisine.  So while it is not terribly historical, it is from a region I wanted to explore.  And it looked good!

The medieval recipes are translated but unredacted and make for some interesting reading.  One I want to try some time soon is on page 65, "Marinated Olives with Thyme" and one I am dubious about trying is on page 64, "Fish Drowned in Grape Juice."  Yes, you take a live fish and immerse it in grape juice so it will "thrash about and swallow the juice until its body is filled with it."

Getting back to what I did do, I present to you (from page 148)

Lemon Chicken Stew

1 chicken (about 3 1/2 pounds), cut into pieces
4 tablespoons olive oil
salt
1/4 teaspoon ground cinnamon
1/2 teaspoon ground turmeric
1/4 teaspoon ground white pepper
2 medium (or three small) potatoes, peeled and thinly sliced
1 medium onion, peeled and thinly sliced
2 tomatoes, thinly sliced
2 small lemons, thinly sliced
1 bunch fresh parsley, leaves only, finely chopped


Moisten the best pieces of the chicken (thighs, wings, and breasts) with a tablespoon of the oil and season them with a pinch of salt, the cinnamon, and half the turmeric and white pepper.

Arrange the potato and onion slices in the bottom of a terrine.  Sprinkle them with salt and the rest of the turmeric and white pepper, and add enough water to cover them completely.  Add the remaining 3 tablespoons of oil and mix well.  Arrange the chicken pieces on top along with the tomato and lemon slices.

Put the terrine into a preheated medium oven and cook for about 45 minutes, turning the chicken pieces from time to time.  Before serving, sprinkle with the chopped parsley.

My Notes

I used three pounds of boneless, skinless chicken thighs, black pepper instead of white, two potatoes, half of the shown onion, and 1 1/2 of the shown lemons.  The parsley was skipped.

Instead of a terrine I used a round casserole dish.  The recipe did not say to cover the dish, so I didn't.
Filled to the brim and ready to cook
The oven was heated to 350 degrees Fahrenheit and it took 1 hour and 20 minutes to ensure the meat was cooked through.

I didn't turn the chicken much as the dish was very full and I worried about spilling and splashing.  Just a few times at the end to make sure the meat was cooked thoroughly.

The Verdict

Success!  This was quite good.  The tomatoes and lemons cooked to tender and started melting into the sauce around the meat.  I could taste the lemon juice in the sauce -- it made the sauce "sparkle" in flavor -- and yet the potatoes and onions were still robust enough to make this dish more than just chicken in sauce.

I was glad I sliced the lemons as thinly as I could as they get eaten (rind, white, and pulp) with everything else, adding a nice twist in flavor.  The turmeric makes the sauce an orangey-yellow and that is attractive against the other specks of spices and colors from the tomatoes and lemons.

A beautiful presentation
If I were to do this again, I would put in less water with the vegetables or perhaps use broth instead.  The rounded bottom of the casserole dish fooled me, I think, into putting in more water than I really needed to make a good sauce.  It did taste a little thin on flavor.

I would also use more spices than called for, especially salt.  This says a lot because I don't usually salt my foods.  My guest taster discovered that seasoned salt was a good enhancement and from that, I conclude that increasing the amount of cinnamon and pepper would be the right thing to do.  This could be because of too much water for the sauce but perhaps not.

The stew was perfect served with rice.  I would add a cucumber salad to it next time, too.

Dig down deep to get the onions and potatoes

Wednesday, October 15, 2014

Historical Raviolis! The fourth filling (somewhat English)

See the previous post from September 1 for the dough recipe and first filling recipe, the September 15 one for the second filling, and also the October 1 one for the third filling.

My daughter and I decided to experiment with 14th and 15th century recipes for raviolis.  We had to redact the recipes ourselves, working from the lists given but having to figure out quantities by taste and goal.

We were working from a website that looked like a good class handout for a Society for Creative Anachronism workshop, called "Pasta Class" and found at this link:  http://www.katjaorlova.com/PastaClass.html

After successfully redacting three fillings for boiled raviolis, we decided to try a fried version.  The Pasta Class document lists some fried raviolis and some other books we perused mentioned them, too.  We wanted something sweet, so we adapted the recipe for Emeles, a medieval almond cake, as the filling.

England + Italy = Middle East

2.5 ounces ground almonds
1/2 ounce graham cracker crumbs
1/2 teaspoon cinnamon
3/8 teaspoon ground cardamom
3 tablespoons honey


Mix the ingredients well.  Like in the previous filling recipe, we chose not to use an egg to bind the mixture for two reasons:  one was that we made a small amount of filling and one egg might have been too much and the other was that the honey seemed to be doing a good job of binding by itself.  It went into the refrigerator while we worked on the dough.

We used graham cracker crumbs because I already had them handy.  Dried bread crumbs would work well, too.

The mixture turned out to look like what we expected for the Emeles:


Nutty, sweet, and spiced
We made a second batch of dough only this time I added a tablespoon of sugar to the flour.  By the way, I had to add a lot more flour to the recipe to get the right texture for rolling.  I am convinced the original recipe contains a typo.


We rolled the entire batch out into a rectangle, cut it in half, and covered one half with a damp towel to keep it from drying out.  


We scored the bottom dough and portioned out the filling.  Oops!  There was not enough filling for what we planned, so we used some of the leftover cheddar/bacon/chicken filling for the rest.


I should have doubled the filling amounts as I had first planned
Then we wet the scored edges and placed the top dough, pushing out the air and making neat little packets, then cut them apart.


This time I fried them a few at a time in about 1/4 inch of hot vegetable oil until they were a delightful brown on both sides and crispy.


Too many at once and the oil has a hard time staying at the right temperature
After that I drained them on paper towels and dusted them with a cinnamon and cardamom sugar mix.


The Verdict

This was incredibly tasty.  In fact, they tasted like mini-baklavas!  We were not expecting that and it was quite a treat.  They were crispy, spicy-sweet, and nutty with a depth of flavor from the honey.  They were not greasy -- I credit frying only a few at a time.

Success!

The only thing I would change is that we didn't roll the dough out to be as thin as we had for the boiled raviolis.  It wasn't translucent.  I think the raviolis would have been crispier if we had.  I'm not complaining, mind you!  They were delicious.  I would do it again to surprise people with the flavor.

One thought:  If I were feeling lazy or in a hurry, I might use purchased won-ton skins instead.  They are thin and pre-cut and I know they fry up well.