Wednesday, November 1, 2023

Lengua en adobo, Marinated tongue -- a Pinedo recipe

I wanted to make a Pinedo recipe that used a different ingredient than the recipes I had been choosing.  I know a local store that includes a butcher shop with high-quality items, so this recipe with tongue was a solid possibility.  I was pleased to find tongue for sale in their store.  The recipe is on page 146.


My Translation

Marinated tongue.

(French style.)

         Toast some mulatto chiles that will be ground with garlic and oregano from Castilla [thyme]

         Olive oil, vinegar and butter are put in a saucepan. Then the chile is added, taking care that it does not burn and has some broth left to serve it.

         In this marinade, put the cooked and sliced tongue.


I have not eaten tongue often, but a friend who lived on a cattle ranch would pressure cook one and share it with me occasionally.  And once I had marinated tongue as an appetizer at a Basque restaurant.  Both experiences were positive, so I wanted to try cooking tongue on my own.

My Redaction

3 pound cow's tongue, washed well
2 cups pinot noir wine
2 cups + 1/2 cup apple cider vinegar
6 cups water (or to cover)
2 ounces guajillo chiles, toasted, stemmed, seeded, and ground
5 cloves garlic, chopped
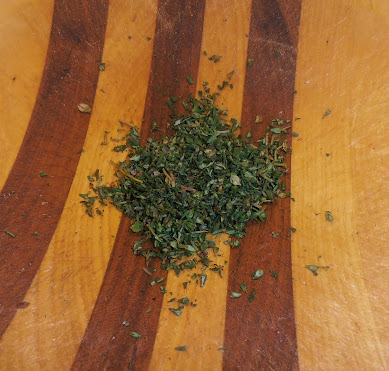
3 tablespoons fresh thyme, finely chopped
2 tablespoons butter
2 tablespoons olive oil
1/4 teaspoon salt


Place the tongue, wine, water, and 2 cups vinegar in a large pan.  Bring liquid to a boil, lower to a simmer, and cook for 1 1/2 hours.  Turn the tongue over and cook for another 1 1/2 hours.


While the tongue is cooking, toast the chiles, then grind them until mostly powdered.  Finely chop the thyme.  Chop the garlic cloves.
Chiles toasted, stemmed, and seeded
Ground in a small coffee grinder.
I used this much thyme.  Consider using more.
Put the chiles, thyme, and garlic into a sturdy bowl or mortar.  Using a pestle or similar object, pound and mix the ingredients until they form a paste.  Set it aside.

Chiles, garlic, and thyme, ready to be pounded.
Pounded.  The moisture from the garlic eventually made it a paste.

When the tongue is cooked, remove it from the liquid and allow to cool just to the point where it is easy to handle.  Pull the skin off and discard.  (The internet tells me that if the tongue cools too much, it is hard to remove the skin.)
Barely cool enough.
Skinned.

If you need to let the tongue cool more, let it cool now.  Then slice the meat very thin, cutting across the grain whenever you can.
In a saucepan or frying pan, melt the butter, then add the olive oil.  Gently sauté about 2/3 of the chile paste along with the salt.  When the garlic starts smelling very good, add 1/2 cup vinegar.  Simmer for several minutes to blend the flavors, then add the tongue a few pieces at a time.
The sauce.
When the pieces are heated through and coated with the marinade, remove to a platter.  Repeat with the other pieces, however many you want to serve.  (Three pounds is a lot!  You might want to save some for later.)

The Verdict

My guest taster and I had the tongue as the main part of our meal -- we had some sourdough bread along side it and that was about all we ate.  (There was the rest of the pinot noir, of course!)

We tried it "as is" and also on top of small pieces of bread.  We compared its flavor to pieces of tongue that were warmed up without being in the sauce.


We liked it!  The sauce was very strong in flavor -- mostly chiles and garlic, but the thyme did add a layer of flavor that was subtle, more like a background flavor.  I think I would have liked to taste it more for balance, so if I did this again, I would perhaps double the amount of fresh thyme.  

The tongue itself was mildly flavored.  I couldn't really taste the wine and vinegar, but I'm pretty sure they made the meat better.  Some parts of the tongue were chewy and some were more tender.  I liked both, and so did my guest taster.  

The tongue with the sauce was very good.  The sauce added a kick and a depth to make the meat much more interesting.  I thought eating it with a bite of bread was best because the bread added a tang that was different from the vinegar in the sauce.  It also added a different texture that I felt on my tongue (as I was eating the tongue!).

My guest taster and I both felt the spiciness level was just right for us -- spicy from the chiles but not too much so.  Any more and we would be distracted from the flavors of the meat and sauce.  I gave some slices to another guest taster who wished it was spicier.  As I have discovered, everyone has their own preference for the fire of chiles, so adjust your choices accordingly.

Success!  We had more of it later on, reheated in the sauce, which was still good.  Putting a few slices on a sandwich was also enjoyed.  I recommend it heartily.

 I'm not sure why Miss Pinedo called this "French style", as I would consider the use of chiles to be more Mexican in style.  Perhaps it was wine and vinegar liquid for cooking the tongue?  Or the use of garlic and thyme with the chiles.  Still, the flavor combinations were just right.

Sunday, October 15, 2023

Pastel de Cándida, Cándida's Pie -- a Pinedo recipe

It's time for another Pinedo recipe!  This time my sweet tooth was working hard on my thoughts, so I picked a dessert recipe.  I looked through the pie section and chose one that looked intriguing.  It is on pages 181 - 182 and another copy is on page 188.

Cándida's pie.

Boil a kettle cup of sugar and a half of milk: let it boil until the state of cajeta.

           The pies are made with rich dough and after they are cooked, the inside of them is filled with the cajeta, smearing them with fresh cream and sprinkling them with walnuts and almonds ground in the mortar.

         Put the pies in the oven right away to dry.


Cándida's pie.

         Boil a kettle cup of very rich milk with another cup of sugar to the point of cajeta. After cooking, the pie crusts are covered with the milk mixture. They are spread with fresh cream and sprinkled with walnuts and clean almonds broken in the mortar.

         Place the pies in the oven for five to ten minutes to dry and brown.


This recipe has a person's name on it -- and I wish I knew who Cándida was.  But it is interesting, too, to know that cándida also translates to "white", which the pie is when you pour cream over the top, or it translates to "candy", which describes the filling.

To give you fair notice, I failed making this recipe.  In the verdict section below, I will give you my recommendations on how to make it that may not fail.

My Redaction

64 ounces whole milk (too much!)
128 ounces sugar
1 pie crust to cover a 9-inch pie pan (you can do an 8-inch pan, too), pre-baked
Fresh cream, about 1/4 cup
1/4 to 1/2 cup chopped walnuts and almonds.

Don't use all that milk

Boil the milk and sugar together until it gets thick, somewhere between the thread stage (230 degrees F) and the soft ball stage (240 degrees F).  Let cool until spreadable, not runny hot.

Pour the filling in the baked crust.  Spread it around and level the surface.

Pour enough cream over the top to make a thin layer.  Sprinkle with nuts.

Put the pie into the oven to dry it.  I used a warm oven for 20 minutes.

My Notes

Pinedo suggests either a 2-to-1 ratio of sugar to milk (in the first recipe) or a 1-to-1 ratio (in the second recipe).  I decided to use the 2-to-1 ratio.  

I also (foolishly) chose to start with 1/2 gallon of milk, when I should have, more likely, used 2 cups.  I wasn't sure how much the mixture would reduce to during cooking, and I am still not sure what volume a kettle cup holds. 

The idea of cooking to the state of cajeta means to make a thick mixture.  This mixture of only milk and sugar matches the more modern cajeta recipes, which makes a caramel often called dulce de leche.  That is what I set out to do.

I have previously attempted to make a cajeta and was reasonably successful (see this post).  I have read advice online to cook it in an uncovered slow-cooker.  I started my milk and sugar mixture this way.  It barely fit in the slow-cooker, and after 6 hours of it cooking on high, there was no change in the mixture other than the sugar being dissolved and it was a little foamy.  I thought that at this rate, it would take days to get the mixture thick.

In the beginning

After six hours
So I put it in my Dutch oven on the stove, brought it to a boil, and let it slowly boil.  I was surprised when it overflowed the pan.  When hot, the mixture expanded a lot!

Not the Dutch oven but still had issues with it boiling over.

Then I moved half the volume to another pan, brought both pans to a simmer, and let them cook until they reached the soft-ball stage.  I kept checking their temperatures and doing a cold water test, and I wasn't convinced they would thicken well until I got it to the soft-ball stage.

Once spread in the crust, the mixture was tacky but not very sticky to the touch.  

I poured on the cream and decided to cover the whole surface well with the nuts.  I used about an equal mixture of walnuts and almonds.


My oven was heated to warm, and I left the pie in there for 20 minutes.  I could not tell if the cream had dried or browned, but the nuts appeared to have absorbed much of the cream.

I let the pie cool before serving.

The Verdict

There was a lot of leftover filling, which I spread into shallow, foil-lined casserole dishes.  This filling crystallized as it cooled, turning into a candy that was harder than fudge but not truly hard.  I could break it up with a knife into chunks, although sometimes the chunks shattered.  

This did not bode well for the pie filling.  So I was not surprised that its filling was also very firm.  Disappointing, because I expected (well, hoped for) a softer filling.  At least it didn't all flow off the crust when I cut it.

I still ate some of it.  It was tasty but too sweet, really.  The firm filling was too firm, so sometimes I warmed it up in the microwave.  This melted the filling a little and made it more like a pie.  (Careful!  It can burn your mouth!)

I liked the cream on top and I especially liked the nuts, which toned down the sweetness.  Sometimes I poured more cream on top as I was serving it, which also helped tone down the sweetness.  My guest taster loved the pie even with the hard filling, which surprised me.

It has to be declared as a failure, though.  The filling was supposed to be soft.  I expected it to be sweet but not THAT sweet.  Perhaps the 1-to-1 ratio would have been better.

The extra filling candy went to my work and was shared with many people.  One woman, born and raised in Mexico, noted that she has had that candy before -- so I know I am not the only person who has crystallized dulce de leche.  It makes a good candy in small doses.  People commented that they were surprised it was only made of milk and sugar.  It was brown and rich, and made me think it had vanilla in it.  

So how would I fix the filling?  

If I wanted to make the filling from scratch, I would use perhaps 2 cups of milk and 2 to 4 cups of sugar.  This would cook faster and not have such an opportunity to crystallize when cooling.  (Although you wouldn't have the extra candy!)  I'm not sure if I would stop it at the thread stage or take it to the soft-ball stage.  More experimentation is needed.

Or I could buy two cans of sweetened condensed milk and boil them unopened for a few hours while completely submerged in water.  Once they are cooled (in the water), they can be opened.  The internet recommends this, but you do have to be careful to keep the cans submerged.  I have done this in the past, and it makes a good creamy caramel filling.

Or I could buy cans of dulce de leche.  

I would make my choice based on how much of a hurry I was.  Keep in mind this makes a very sweet pie.  The cream does help, and you can pour a thicker layer if you'd like.  You can also choose how much coverage you want with the nuts.  I covered the cream layer completely.  If you want to show the color contrast between the cream and the nuts, use fewer.  That is assuming drying the pie in the oven keeps the cream white.

Officially, a failure, but all was not lost.


Sunday, October 1, 2023

Lebkuchen or German Honey Cake, the 1553 edition

After having attempted and, finally, succeeded in making German Honey Cakes via Laura Ingalls Wilder (click on these posts to view the saga: attempt #1, attempts #2 and #3, and success at last), I decided to try a 1553 recipe for Nurnberger Lebkuchen as found in the Sabina Welserin cookbook, Das Kochbuch der Sabina Welserin, as translated by David Friedman.  Click here to see the translation.

What makes lebkuchen special is that the baked cookies are said to last a long time without spoiling, staying moist and flavorful.  Also, the dough does not have fat or eggs, so it can be stored unbaked for months and even years, and it supposed to develop a better flavor with time.  It was an item of wealth in medieval times, where bakers would invest money in jars and ingredients, and mature dough was given in dowries.

My goal was to make the dough with the intent to let it rest and mature for many months.  I'm not sure how long, and I might do some test baking along the way to assess any changes.  Here is the part of the recipe I was using:

163 To make Nürnberger Lebkuchen

Take one quart of honey, put it into a large pan, skim it well and let it boil a good while.  Put one and a half pounds of sugar into it and stir it continually with a wooden spatula and let it cook for a while, as long as one cooks an egg, pour it hot into a quarter pound of flour, stir it around slowly and put the described spices in the dough, stir it around slowly and not too long; take on and a half ounces of cinnamon sticks, one and a half ounces of nutmeg, three fourths of an ounce of cloves, three ounces of ginger, a pinch of mace, and chap or grind each one separately so that they are not too small, the cinnamon sticks, especially, should be coarsely ground.  And when you have put the spices in the dough, then let the dough set for as long as one needs to hard boil eggs.


I gathered my ingredients and had at it.

My Redaction

1 quart honey (about 3 pounds)

1 1/2 pounds sugar

1/4 pound flour

2 ounces ground cinnamon (see my notes, below)

1 1/2 ounces ground nutmeg

3/4 ounce ground cloves

2 1/2 ounces ground ginger (see my notes, below)

a pinch of mace

And the mace.
My Notes

It did not go well.

First, and I take responsibility for this decision, I boiled the honey and the honey-sugar mixture too long.  I made a hard-crack candy that in no way resembled a dough.  Afterwards, I read more about lebkuchen and now believe the honey should be heated to just boiling for two reasons:  to dissolve the sugar and to make it easier to mix in the flour.  But no cooking beyond that seems necessary.

Despite all my planning and shopping, I discovered I only had 2 1/2 ounces of ginger, so I used that and put in another 1/2 ounce of ground cinnamon in its place.  The entire amount of spices was a lot!  It turns out it was too much.  More on that below.

Almost 7 ounces of spices by weight

I was skeptical about the amount of flour.  It seemed like it was not enough to actually make a dough.  I was right:  what I ended up with was a vat of goo, not dough.  It was still goo even after mixing in the spices.

Mixing in the flour.


Mixing in the spices.

I put the goo into a jar to let it cool, then thought about how I would address the problem.

Note the total amount that was made.

Yes, I ended up with a solid mass in the glass jar (why did I put it in the jar???).  Clearly this was not the intended result.  

So I put the jar into a pan filled with hot water and put some more water on top of the solid mass in the jar.  After letting it heat for a while, the mass softened enough that I was able to pour it out of the jar and into a saucepan.  

A low heat allowed the mass to dissolve into the water, then I brought it to a boil and cooked it until it was nearly at the thread stage, about 220 degrees Fahrenheit.  It seemed to resist getting hotter, and I didn't want to scorch it.

Then I mixed in more flour.  I lost track of how much flour it was -- I just kept adding flour and mixing until the mass started clinging to itself more and acting like a dough.

This made a very dark dough, and I took two small balls of it and baked it on a greased pan in the toaster oven at 350 degrees for 10 minutes. 

The cookies smelled good and were baked just right.  However, they tasted awful:  all I got was a too-strong spice flavor that was decidedly unpleasant.  

I didn't want to throw it away and declare a failure.  It seemed that I just needed to dilute the spices to get a better cookie.

So I added about three more pounds of honey and one cup of sugar, heated to just boiling, and mixed in well.  Then I added more flour, mixing in a cup at a time until I couldn't stir it by hand any more.  At that point I put big scoops of the almost-dough onto the counter and mixed in more flour by hand (gently kneading) until I had a soft, almost sticky dough.

Huge!  I guess it weighed about 10 pounds.

I baked two more cookies.  They were lighter in color than the awful ones, and their taste was much better.  The spices were still strong but not repellant.  The cookies were moist and lightly browned on the edges.  I decided that was enough.

What a color difference.

It was a huge amount of dough.  I filled two jars with it, then baked the rest:  I rolled the dough to about 1/4 inch thick, used a cutter to get the cookies, then baked them in the toaster oven at 350 degrees for 7 minutes, which was right because they were thinner than the hand-formed balls I practiced with.  Notice that I did not follow the given directions (see the Friedman webpage) for baking them.  Maybe I will at another time.

Rolling and cutting

Baked.

Dough for storing.

The Verdict

The cookies were good.  Not mouth-wateringly spectacular, but good.  I think they would be improved with the chocolate frosting (see the Wilder post attempt #1) or a simple white frosting decoration.  They also seem to ask to be eaten with coffee or tea, or dunked in milk.  They were moist, not crisp, and I might try baking them longer to see if I like crisp.

I took four cookies and baked them at 350 degrees for 8 minutes.  This made them hard (not really crunchy or crisp) and not comfortable to eat.  Then I brushed them with rose water and let them dry.  This improved the flavor but were still to hard to eat comfortably.

I also took two baked cookies and brushed them on both sides with rose water, then let them dry.  My guest taster and I both agreed that this new flavor improved the cookie eating experienced.  I recommend it!

The dough jars were covered with a lid and put into a cool, dark cupboard, along with a box of the cookies.  Everything had the date written on them, and I put notes on my calendar to check on them.

When I check in on them, I will report back.

I declare this a success.  It took a lot of effort and perseverance to achieve it, but I believe I did.  Part of the effort was all the clean up:  every pan and utensil had sticky goo on it, as did the counters and stovetop.  Fortunately, it was all sugar-based goo, which cleans up completely with hot water and patience. 

Now I will apply more patience while the dough and the cookies mature.

Whew!


Friday, September 15, 2023

Pato con nabos, Duck with turnips -- a Pinedo recipe

 It's time for another Pinedo recipe! (If you don't know what that is, search for the recipes with the label "Pinedo").

On page 193, I saw Pato con nabos, or Duck with turnips.


My Translation

Duck with turnips.

         Having put a casserole on the fire with a good piece of butter which, being very hot, the duck cut into pieces will be emptied into it.

         When it begins to take color, add bacon, chopped into small pieces, turnips, and two onions with two cloves, a head of young garlic, a bay leaf, and parsley.

         When everything is well browned, boiling water is poured over it and salt and pepper are added, allowing the stew to boil over a low heat so that it seasons well.


My Redaction

1/4 cup butter

one 4 to 5 pound duck, cut into serving size pieces

1 pound bacon, cut into about 1-inch pieces

4 medium turnips, washed, peeled, and cut into large, bite-sized chunks

1 head garlic, peeled but not broken apart

1 bay leaf

2 onions, one of which is studded with 2 whole cloves

2 tablespoons parsley (dried)

1/2 teaspoon salt

1/2 teaspoon pepper

And cloves

Preheat some water in a kettle.

Heat the butter in a large Dutch oven until very hot.  Add the duck pieces a few at a time to brown.  Turn them to brown both sides.  Once the pieces take on some color, remove them to a plate and add a few more pieces.  Repeat until all the pieces are browned and out of the pan.

When the duck is done, put the bacon and turnips into the pan.  Cook them until the bacon is nearly done.  Don't expect the bacon or turnips to brown much (if at all) as the butter, bacon fat, and juices from the duck produce a lot of liquid.

Remove most of the bacon/turnip mixture from the pan and into a bowl.  Leave a thin layer on the bottom.  Place several pieces of duck on top of it, and nestle the onions, garlic head, and bay leaf into them.  Sprinkle on the parsley.  Put on a layer of bacon/turnips, then another layer of duck.  Repeat until all the duck and bacon/turnip mix is in the pan. This might fill the Dutch oven! 

Pour the hot water over the top until the ingredients are covered.  Sprinkled on the salt and pepper.  Bring the water to a boil, then turn the temperature down so that the water is just barely simmering.

Cook for 1 1/2 hours, or until the turnips are tender, the duck is cooked, and the broth tastes lovely.  Adjust salt and pepper as needed.  

Remove the bay leaf, cloves, and garlic head before serving.  The onion should break up easily for serving.

My Notes

The redaction covers it all.  Here are the pictures.

They took on some color.
This is the right size.
They didn't brown, but the bacon was cooked.
Nestled, all snug in their beds.
Just add water.
Ready to slow simmer.
Cooked.  *SIGH*

The Verdict

The duck was tender.  The turnips were tender.  The bacon was a little chewy, which is how I like it.  

The broth was perfect:  rich but not too rich, flavorful without being strong.  Honestly, it was its delicateness that stood out.  The flavor was well-balanced with the meaty flavor as dominant (but not strong) and supported with the herbs and spices.  One guest taster thought it needed more salt, but the other two tasters thought it was just right.

The turnips could have been potatoes and I would not have noticed much of a difference.  They had absorbed some of the bacon flavor, which was good.

The only negative was the amount of fat floating on top.  It did not spoil the meal at all, but it was fattier than I am used to eating.

The whole dish made an enjoyable meal.  It came across as sophisticated and even classy.  I served it with some of Pinedo's French wafers, fresh grapes from my garden, and a side salad composed of chopped tomatoes, tomatillos, and sweet onions (slivered) dressed with salt, pepper, and balsamic vinegar.

Enjoy!

The leftovers were also good.  I noticed the broth became solid when chilled.  I defatted it, and that made the food even better.

Success, in a classy way!

It helped to have a bowl on the table dedicated to holding the bones as people ate their servings.

Friday, September 1, 2023

Swedish Potato Sausage

My aunt, PV, has been a cook and a foodie all her life.  She has shared some marvelous recipes with me over the years, and I admire her skill.  Recently we were talking about food, and she told me about the recipe her Swedish father-in-law taught her to make:  Swedish potato sausage.  I asked her for the recipe so I could document it.  

Potato Sausage

5 pounds potatoes -- peel and grind

2 1/2 pounds ground pork shoulder

2 1/2 pounds ground beef chuck

2 or 3 medium onions -- grind

5 tablespoons salt

1 1/4 tablespoons pepper

1 1/4 teaspoons allspice

Beef casings (also called beef rounds), enough to make at least 10 pounds of sausage

Kitchen twine 

Cut the casings into 16-inch long pieces. Rinse the salt from them (inside and out), then soak them in fresh lukewarm water for at least ten minutes.  

Mix the potatoes, pork, beef, onions, and spices well.  

Fill this mixture lightly into the beef casings, recognizing they will expand when cooked.  Tie the ends with the twine.  Or you can skip tying them off and just leave a one-inch overhang on each end.  Do not prick the sausage.

Heat water with one tablespoon salt in a large kettle.  Bring the water to a simmer.

Add the sausages.  Simmer them for about an hour; do not boil them!

Let the sausages cool in their broth.  Then store or freeze them in their broth.

To serve the sausages, reheat them by simmering them in their broth.  Remove the filling from the casings before eating.

My Notes

My wonderful, amazing daughter volunteered to help me, and it turned out having two people made the work much easier!

I used three medium onions that weighed about two pounds total.  

I ground the meat, then the onions, then the potatoes.  Everything was put into a large canning kettle so I had room to mix them with the spices.

Beef
Pork
Onions
Potatoes
Spices on top
All mixed together.
Casings ready to go
Fortunately, I have the sausage stuffing attachment for my mixer's grinder.  It was easy to slide a casing over the tube, tie off one end, then have the grinder push the stuffing into the casing.  My daughter put the mixture into the grinder, and I was in charge of regulating how fast the stuffing went into the casing.  This is when having two people was very important.
About a pound of filling

Casing is on the tube.  Ready to be tied and filled.

In all, we used 12 casings, and they weighed on average 16 ounces each.  We tied off all but one because we wanted to try my aunt's method of leaving the ends open.  Thus, we had twelve pounds of sausages.  Hooray!

Once the sausages were made, we cleaned the kettle then heated the water in it.  I filled the kettle about half full of water.  This was plenty to cover all the sausages for cooking.

In the beginning
After about an hour of simmering, I noticed the sausages were floating instead of sitting on the bottom of the kettle.

Floating sausages
Once the sausages had cooled, I saved one out to taste.  The rest went into bags for freezing.  Each sausage was individually packaged with about 1 1/2 cups of its broth.

To reheat, I put the sausage in its broth in a pan and brought the broth to a simmer.  I covered the pan and simmered for about five minutes, then flipped the sausage and let it simmer another five or so minutes.

The untied sausage, reheating
My aunt emphasizes you should never fry or boil these sausages.  Simmer them for the initial cooking and again when they reheat for serving.  Also, the beef rounds are not digestible.  You must cut them open and scrape out the stuffing to eat it.  (A spoon helps remove the stuffing.)  Discard the casing as it is just a cooking vessel.  (Just like haggis!)

The Verdict

It was good!  The texture made us think of a corned beef hash, and the flavor was meaty with the onion, allspice, salt, and pepper as a good supporting cast.  The potato added its distinctive flavor but also made the sausage lighter in texture than a solid meat mixture would be.  It was a soft main course.

Success!  I look forward to eating the rest of them.

The main course

I served toast with it, so sometimes we ate the sausage as it was (by the forkful) and sometimes we spread it on the toast.  Both were good.

Later, I opened the casing of a cooked sausage and browned the mixture.  This was also a good way to serve it.  (Tasted great with a side dish of onions and apple chunks cooked in butter and spiced with pepper, cinnamon, and salt.)

My aunt says this is considered an authentic Swedish recipe, but noted there are spicing variations.  She has made this many times and finds the allspice, pepper, and salt mix "quite pleasing to my taste buds!"

After stuffing the casings, there was meat mixture left in the grinder and the tube, so we took that out and fried it as patties while the sausages were simmering.

This was also very tasty:  the exterior was a little crunchy and the interior was soft, so it was like eating meaty hash browns.  My only criticism is that it was too salty -- and that is easily fixed by adjusting the recipe.  I think that someone who didn't want to deal with stuffing beef rounds could make this filling (with less salt) and freeze it in small amounts, then fry it before serving.   A bonus recipe!


Cookies Consent

This website uses cookies to offer you a better Browsing Experience. By using our website, You agree to the use of Cookies

Learn More