Friday, November 24, 2023

An Update on the Medieval Lebkuchen

Previously I tried a recipe for Lebkuchen (click here to see the post) that suggested the dough and the cookies get better with time.

So I baked a batch and put them away in a dark cupboard.  I also put away two large containers of dough.

It has been three months, so time to check in on them.  How are they doing?

The cookies looked the same as when they were put away:

Three months old
The dough looked the same, too!

No mold on the surface.
My guest taster and I tried the cookies.  We could not detect anything different from what we had tried before.  Spicy, a little chewy.  (Still almost too spicy for me.)

So I took some of the dough from the top and shaped it into a short log.


I felt that the dough was drier or less tacky than it had been previously.  I could shape it easily with my hands without getting all covered in dough.  

Then, with a greased knife, I cut the log into approximately 1/4 inch-thick slices and prepared to bake them.  Forgive me; I was not trying for beautiful cookies at all, and it shows.

Don't judge!
I baked them at 350 degrees Fahrenheit for about 10 minutes.  That is when they looked like they were done.


My guest taster and I both agreed that these cookies were fluffier (less dense) than the previous batch.  We also felt that the spices were less intense, which I appreciated very much.  I liked them!

So we enjoyed a few then put the rest into the container with the first batch, marking them separately so I can track how each batch does over time.  My calendar is marked to check in on them in another 3 months.

So far, so good!

Wednesday, November 15, 2023

Pumpkin Tian

My friends MS and SS gave me this interesting book they found on a trip:  Simple Cooking by John Thorne, which was published throughout the 1980s.

ISBN 9780865475045

Mr. Thorne has written a book where he gives us his opinions of cookbooks, the people who write them, and ways of cooking during a time of changing goals and techniques due to technology and convenience.  He makes some good observations along the way:

My goal as a cook has always been not so much to attain some specific sense of mastery as to be able to go into the kitchen, take up what I find there, and make a meal of it.

If you're in sympathy with this notion, you'll know from your own experience that such simple cooking isn't easy cooking, or the supermarkets wouldn't be as stuffed as they are with convenience foods.  You may also have discovered that an impromptu, impulsive, and ever-adaptive cooking style is not one that the cookbook - of whatever sort, it seems - is by nature equipped to explain. 

He shares with us the idea that cooking is not so much the following of a recipe but an understanding of the concepts, and even then knowing that it is (and should be) an art:  "opinionated, argumentative, contradictory, with each cook making the exact same 'traditional' dish in his or her own particular way".  From this, we transcend the constricting recipes:

Observing, listening, tasting, we feel inside ourselves a shifting of that complex balance of option, opinion, and taste - the living logic of the dish - as it settles itself into the shape that we will want to make.  And then we find ourselves on the other side - the before side - of the recipe, which is just where, I think, a good cook wants to be.

I know that I have achieved that level of cooking, at least sometimes.  I see the concepts of the recipes in front of me, and I occasionally feel like I can take those concepts and use them with other ingredients not called for on that piece of paper.  I think my experience redacting historical recipes that come with minimal instructions and often no measurements helped pushed me to that level:  you have to use your imagination and your sense of what is right.  When you listen to that, you are more likely to reach success.

Mr. Thorne includes a chapter titled "The Tian", which describes this Provençal dish as

a vegetable casserole, a modest penny-stretcher meant, whether served hot or cold, as the main course or a side dish, to provide the bulk of the meal at the least possible cost. ... The defining characteristic of a tian -- slow cooking in olive oil and seasonings -- brings out the best of taste and texture in a host of vegetables. ...

Originally, the tian was a simple peasant dish of vegetables that took its name from the vast, heavy earthenware terrine it was cooked in -- a tian. 

A look around the internet shows a variety of recipes and the adaptability of the technique.  No pumpkin?  Use whatever vegetables you have on hand, like spinach, Swiss chard, red bell peppers, zucchini, eggplant, mushrooms, or tomatoes -- singly or mixed together. You can include other ingredients like rice, cheese, eggs, chickpeas, or bread crumbs.  For seasoning, pick whatever you think would go well with the vegetables you have, and that includes fresh herbs, wine, milk, cream, and spices.

Mr. Thorne gives us citations for other cookbooks and chefs to explore for more ideas.  Since the concept of a tian is an old one, there are many ways to approach it, and many different outcomes that can be like a gratin or more like a frittata.  Ratatouille can fit into this category (and so I think of the cute and fun movie!).

I chose to make his recipe that focuses on just one vegetable, the pumpkin, and aim to have it "cooked to perfection."  I love pumpkin and this looks just amazing.

Pumpkin Tian (pgs 43-44)

One small pumpkin (3 to 4 pounds)

1/4 cup flour

6 cloves garlic, finely minced

Generous pinch fresh thyme (approx. 1 teaspoon)

2 tablespoons freshly grated Parmesan cheese

Salt and freshly ground pepper

1/3 cup olive oil


Preheat oven to 325 degrees F.  Remove seeds, string, and rind from the pumpkin flesh, then cut flesh into 3/4-inch cubes.  Set the pumpkin cubes in a colander and toss with the flour until the cubes are coated and the excess flour has escaped.  Toss again with garlic, thyme, Parmesan chees, and season with salt and pepper to taste (pumpkin is sweet and bland and requires a fat pinch from the salt box).  Rub the interior of a casserole with a generous amount of the olive oil, pack in the floured and seasoned pumpkin cubes, and dribble the remaining oil evenly over the top.  Set in the preheated oven and bake for 2 to 2 1/2 hours.  The top of the dish will form a dark rich crust; the pumpkin within dissolves in the mouth into molten succulence.

My Notes

The author comments, 

Although pumpkin is quite fine in this dish, the actual squash used for it in Provence is courge rouge, which is similar but more flavorful and less sweet.  It is just now starting to appear in American markets, somewhat pumpkin-shaped but of a deeper, reddish hue.  

I know from experience that the pumpkins in the market are intended to be for jack-o'lanterns and not for eating.  They taste terrible!  It was after Halloween when I went to look for pumpkins for this recipe, so I hoped to find one labeled as a sugar pumpkin or pie pumpkin.  

Alas, no such luck.  All items that looked like a standard pumpkin were missing from the store's produce section.  However, I recalled the author's comments about courge rouge, and I looked for something like that.

What I found was kuri rouge, or red kuri squash.  Also known as the Hokkaido pumpkin, it is supposed to be sweet and the cooked flesh tastes like chestnut.  The skin is edible after cooking.  I decided to give it a try.

I bought three (at nearly 5 pounds total) but found that only two were needed to fill my casserole dish (about 3 1/2 pounds total).  

Even though the skin is edible after cooking, I chose to follow the instructions and peel it.  It was very easy to peel with my veggie peeler; then I trimmed off the ends, cut it in half, and removed the seeds and strings.

Peeled and trimmed.


I'm saving the seeds for eating and possibly planting.  Here are the pumpkin pieces:


Dusted with flour

Seasonings on top
I put in about 3/4 teaspoon of salt.  
Well-mixed, packed into the casserole dish, and oiled.  Ready for baking.

I cooked it for two hours.  Note that the dish is not covered, as the idea is to cook off much of the vegetable's moisture.  I think the oil will keep it from becoming dry.

The Verdict

While it was cooking, my kitchen smelled wonderful!  The garlic came through the most, but it had my mouth watering and I wasn't even hungry.

Mmmmmmm!
The pumpkin cooked down further than I had expected.  I think I could have used the other kuri, overloaded the dish, and still have it fit after cooking.

I thought the crust would be more developed, which it might have been had I cooked it another 1/2 hour as was my option in the recipe.  But this looked fine to me.

My guest taster and I ate it as a light dinner -- just the tian and wine.  It was excellent.


The pumpkin was soft and flavorful, although the parts on top were a bit crunchy, making the whole dish more interesting.  Not a soft dish, but a mixture of soft and not.  The garlic had cooked to a mellow level, and the thyme added a nice understated note.  My guest taster loves salt, and he thought it had just enough.  I could not taste the pepper, but I suspect it added some depth to the mixture.

We also thought the Parmesan cheese added some crunch to the dish.  We weren't sure, but I think the cheese on the surface also got crunchy.  

It was not a spectacular dish.  It was flavorful, and I can see how it would be a good main dish, possibly with bread or buttered noodles and some fruit or a salad.  I can also imagine it as a side dish to some roast meat, like chicken.

My only criticism was that I think I could have used 1/4 cup of oil instead of 1/3 cup.  The oil puddled up on my plate and there was some in the bottom of the casserole dish.  I know we needed at least 1/4 cup to keep it moist, but I think we didn't need 1/3 cup.  I'm not fond of food that seems greasy, and while this wasn't really greasy, I would have liked to reduce the amount of leftover oil.

Not that this stopped us for thoroughly enjoying it.  What started out as "We will taste it to see how it is." turned into "We ate it all because it was so good."  It was a lovely dinner. 

Success!

All gone!


Wednesday, November 1, 2023

Lengua en adobo, Marinated tongue -- a Pinedo recipe

I wanted to make a Pinedo recipe that used a different ingredient than the recipes I had been choosing.  I know a local store that includes a butcher shop with high-quality items, so this recipe with tongue was a solid possibility.  I was pleased to find tongue for sale in their store.  The recipe is on page 146.


My Translation

Marinated tongue.

(French style.)

         Toast some mulatto chiles that will be ground with garlic and oregano from Castilla [thyme]

         Olive oil, vinegar and butter are put in a saucepan. Then the chile is added, taking care that it does not burn and has some broth left to serve it.

         In this marinade, put the cooked and sliced tongue.


I have not eaten tongue often, but a friend who lived on a cattle ranch would pressure cook one and share it with me occasionally.  And once I had marinated tongue as an appetizer at a Basque restaurant.  Both experiences were positive, so I wanted to try cooking tongue on my own.

My Redaction

3 pound cow's tongue, washed well
2 cups pinot noir wine
2 cups + 1/2 cup apple cider vinegar
6 cups water (or to cover)
2 ounces guajillo chiles, toasted, stemmed, seeded, and ground
5 cloves garlic, chopped
3 tablespoons fresh thyme, finely chopped
2 tablespoons butter
2 tablespoons olive oil
1/4 teaspoon salt


Place the tongue, wine, water, and 2 cups vinegar in a large pan.  Bring liquid to a boil, lower to a simmer, and cook for 1 1/2 hours.  Turn the tongue over and cook for another 1 1/2 hours.


While the tongue is cooking, toast the chiles, then grind them until mostly powdered.  Finely chop the thyme.  Chop the garlic cloves.
Chiles toasted, stemmed, and seeded
Ground in a small coffee grinder.
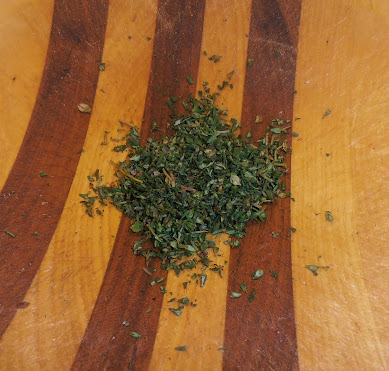
I used this much thyme.  Consider using more.
Put the chiles, thyme, and garlic into a sturdy bowl or mortar.  Using a pestle or similar object, pound and mix the ingredients until they form a paste.  Set it aside.

Chiles, garlic, and thyme, ready to be pounded.
Pounded.  The moisture from the garlic eventually made it a paste.

When the tongue is cooked, remove it from the liquid and allow to cool just to the point where it is easy to handle.  Pull the skin off and discard.  (The internet tells me that if the tongue cools too much, it is hard to remove the skin.)
Barely cool enough.
Skinned.

If you need to let the tongue cool more, let it cool now.  Then slice the meat very thin, cutting across the grain whenever you can.
In a saucepan or frying pan, melt the butter, then add the olive oil.  Gently sauté about 2/3 of the chile paste along with the salt.  When the garlic starts smelling very good, add 1/2 cup vinegar.  Simmer for several minutes to blend the flavors, then add the tongue a few pieces at a time.
The sauce.
When the pieces are heated through and coated with the marinade, remove to a platter.  Repeat with the other pieces, however many you want to serve.  (Three pounds is a lot!  You might want to save some for later.)

The Verdict

My guest taster and I had the tongue as the main part of our meal -- we had some sourdough bread along side it and that was about all we ate.  (There was the rest of the pinot noir, of course!)

We tried it "as is" and also on top of small pieces of bread.  We compared its flavor to pieces of tongue that were warmed up without being in the sauce.


We liked it!  The sauce was very strong in flavor -- mostly chiles and garlic, but the thyme did add a layer of flavor that was subtle, more like a background flavor.  I think I would have liked to taste it more for balance, so if I did this again, I would perhaps double the amount of fresh thyme.  

The tongue itself was mildly flavored.  I couldn't really taste the wine and vinegar, but I'm pretty sure they made the meat better.  Some parts of the tongue were chewy and some were more tender.  I liked both, and so did my guest taster.  

The tongue with the sauce was very good.  The sauce added a kick and a depth to make the meat much more interesting.  I thought eating it with a bite of bread was best because the bread added a tang that was different from the vinegar in the sauce.  It also added a different texture that I felt on my tongue (as I was eating the tongue!).

My guest taster and I both felt the spiciness level was just right for us -- spicy from the chiles but not too much so.  Any more and we would be distracted from the flavors of the meat and sauce.  I gave some slices to another guest taster who wished it was spicier.  As I have discovered, everyone has their own preference for the fire of chiles, so adjust your choices accordingly.

Success!  We had more of it later on, reheated in the sauce, which was still good.  Putting a few slices on a sandwich was also enjoyed.  I recommend it heartily.

 I'm not sure why Miss Pinedo called this "French style", as I would consider the use of chiles to be more Mexican in style.  Perhaps it was wine and vinegar liquid for cooking the tongue?  Or the use of garlic and thyme with the chiles.  Still, the flavor combinations were just right.

Sunday, October 15, 2023

Pastel de Cándida, Cándida's Pie -- a Pinedo recipe

It's time for another Pinedo recipe!  This time my sweet tooth was working hard on my thoughts, so I picked a dessert recipe.  I looked through the pie section and chose one that looked intriguing.  It is on pages 181 - 182 and another copy is on page 188.

Cándida's pie.

Boil a kettle cup of sugar and a half of milk: let it boil until the state of cajeta.

           The pies are made with rich dough and after they are cooked, the inside of them is filled with the cajeta, smearing them with fresh cream and sprinkling them with walnuts and almonds ground in the mortar.

         Put the pies in the oven right away to dry.


Cándida's pie.

         Boil a kettle cup of very rich milk with another cup of sugar to the point of cajeta. After cooking, the pie crusts are covered with the milk mixture. They are spread with fresh cream and sprinkled with walnuts and clean almonds broken in the mortar.

         Place the pies in the oven for five to ten minutes to dry and brown.


This recipe has a person's name on it -- and I wish I knew who Cándida was.  But it is interesting, too, to know that cándida also translates to "white", which the pie is when you pour cream over the top, or it translates to "candy", which describes the filling.

To give you fair notice, I failed making this recipe.  In the verdict section below, I will give you my recommendations on how to make it that may not fail.

My Redaction

64 ounces whole milk (too much!)
128 ounces sugar
1 pie crust to cover a 9-inch pie pan (you can do an 8-inch pan, too), pre-baked
Fresh cream, about 1/4 cup
1/4 to 1/2 cup chopped walnuts and almonds.

Don't use all that milk

Boil the milk and sugar together until it gets thick, somewhere between the thread stage (230 degrees F) and the soft ball stage (240 degrees F).  Let cool until spreadable, not runny hot.

Pour the filling in the baked crust.  Spread it around and level the surface.

Pour enough cream over the top to make a thin layer.  Sprinkle with nuts.

Put the pie into the oven to dry it.  I used a warm oven for 20 minutes.

My Notes

Pinedo suggests either a 2-to-1 ratio of sugar to milk (in the first recipe) or a 1-to-1 ratio (in the second recipe).  I decided to use the 2-to-1 ratio.  

I also (foolishly) chose to start with 1/2 gallon of milk, when I should have, more likely, used 2 cups.  I wasn't sure how much the mixture would reduce to during cooking, and I am still not sure what volume a kettle cup holds. 

The idea of cooking to the state of cajeta means to make a thick mixture.  This mixture of only milk and sugar matches the more modern cajeta recipes, which makes a caramel often called dulce de leche.  That is what I set out to do.

I have previously attempted to make a cajeta and was reasonably successful (see this post).  I have read advice online to cook it in an uncovered slow-cooker.  I started my milk and sugar mixture this way.  It barely fit in the slow-cooker, and after 6 hours of it cooking on high, there was no change in the mixture other than the sugar being dissolved and it was a little foamy.  I thought that at this rate, it would take days to get the mixture thick.

In the beginning

After six hours
So I put it in my Dutch oven on the stove, brought it to a boil, and let it slowly boil.  I was surprised when it overflowed the pan.  When hot, the mixture expanded a lot!

Not the Dutch oven but still had issues with it boiling over.

Then I moved half the volume to another pan, brought both pans to a simmer, and let them cook until they reached the soft-ball stage.  I kept checking their temperatures and doing a cold water test, and I wasn't convinced they would thicken well until I got it to the soft-ball stage.

Once spread in the crust, the mixture was tacky but not very sticky to the touch.  

I poured on the cream and decided to cover the whole surface well with the nuts.  I used about an equal mixture of walnuts and almonds.


My oven was heated to warm, and I left the pie in there for 20 minutes.  I could not tell if the cream had dried or browned, but the nuts appeared to have absorbed much of the cream.

I let the pie cool before serving.

The Verdict

There was a lot of leftover filling, which I spread into shallow, foil-lined casserole dishes.  This filling crystallized as it cooled, turning into a candy that was harder than fudge but not truly hard.  I could break it up with a knife into chunks, although sometimes the chunks shattered.  

This did not bode well for the pie filling.  So I was not surprised that its filling was also very firm.  Disappointing, because I expected (well, hoped for) a softer filling.  At least it didn't all flow off the crust when I cut it.

I still ate some of it.  It was tasty but too sweet, really.  The firm filling was too firm, so sometimes I warmed it up in the microwave.  This melted the filling a little and made it more like a pie.  (Careful!  It can burn your mouth!)

I liked the cream on top and I especially liked the nuts, which toned down the sweetness.  Sometimes I poured more cream on top as I was serving it, which also helped tone down the sweetness.  My guest taster loved the pie even with the hard filling, which surprised me.

It has to be declared as a failure, though.  The filling was supposed to be soft.  I expected it to be sweet but not THAT sweet.  Perhaps the 1-to-1 ratio would have been better.

The extra filling candy went to my work and was shared with many people.  One woman, born and raised in Mexico, noted that she has had that candy before -- so I know I am not the only person who has crystallized dulce de leche.  It makes a good candy in small doses.  People commented that they were surprised it was only made of milk and sugar.  It was brown and rich, and made me think it had vanilla in it.  

So how would I fix the filling?  

If I wanted to make the filling from scratch, I would use perhaps 2 cups of milk and 2 to 4 cups of sugar.  This would cook faster and not have such an opportunity to crystallize when cooling.  (Although you wouldn't have the extra candy!)  I'm not sure if I would stop it at the thread stage or take it to the soft-ball stage.  More experimentation is needed.

Or I could buy two cans of sweetened condensed milk and boil them unopened for a few hours while completely submerged in water.  Once they are cooled (in the water), they can be opened.  The internet recommends this, but you do have to be careful to keep the cans submerged.  I have done this in the past, and it makes a good creamy caramel filling.

Or I could buy cans of dulce de leche.  

I would make my choice based on how much of a hurry I was.  Keep in mind this makes a very sweet pie.  The cream does help, and you can pour a thicker layer if you'd like.  You can also choose how much coverage you want with the nuts.  I covered the cream layer completely.  If you want to show the color contrast between the cream and the nuts, use fewer.  That is assuming drying the pie in the oven keeps the cream white.

Officially, a failure, but all was not lost.


Sunday, October 1, 2023

Lebkuchen or German Honey Cake, the 1553 edition

After having attempted and, finally, succeeded in making German Honey Cakes via Laura Ingalls Wilder (click on these posts to view the saga: attempt #1, attempts #2 and #3, and success at last), I decided to try a 1553 recipe for Nurnberger Lebkuchen as found in the Sabina Welserin cookbook, Das Kochbuch der Sabina Welserin, as translated by David Friedman.  Click here to see the translation.

What makes lebkuchen special is that the baked cookies are said to last a long time without spoiling, staying moist and flavorful.  Also, the dough does not have fat or eggs, so it can be stored unbaked for months and even years, and it supposed to develop a better flavor with time.  It was an item of wealth in medieval times, where bakers would invest money in jars and ingredients, and mature dough was given in dowries.

My goal was to make the dough with the intent to let it rest and mature for many months.  I'm not sure how long, and I might do some test baking along the way to assess any changes.  Here is the part of the recipe I was using:

163 To make Nürnberger Lebkuchen

Take one quart of honey, put it into a large pan, skim it well and let it boil a good while.  Put one and a half pounds of sugar into it and stir it continually with a wooden spatula and let it cook for a while, as long as one cooks an egg, pour it hot into a quarter pound of flour, stir it around slowly and put the described spices in the dough, stir it around slowly and not too long; take on and a half ounces of cinnamon sticks, one and a half ounces of nutmeg, three fourths of an ounce of cloves, three ounces of ginger, a pinch of mace, and chap or grind each one separately so that they are not too small, the cinnamon sticks, especially, should be coarsely ground.  And when you have put the spices in the dough, then let the dough set for as long as one needs to hard boil eggs.


I gathered my ingredients and had at it.

My Redaction

1 quart honey (about 3 pounds)

1 1/2 pounds sugar

1/4 pound flour

2 ounces ground cinnamon (see my notes, below)

1 1/2 ounces ground nutmeg

3/4 ounce ground cloves

2 1/2 ounces ground ginger (see my notes, below)

a pinch of mace

And the mace.
My Notes

It did not go well.

First, and I take responsibility for this decision, I boiled the honey and the honey-sugar mixture too long.  I made a hard-crack candy that in no way resembled a dough.  Afterwards, I read more about lebkuchen and now believe the honey should be heated to just boiling for two reasons:  to dissolve the sugar and to make it easier to mix in the flour.  But no cooking beyond that seems necessary.

Despite all my planning and shopping, I discovered I only had 2 1/2 ounces of ginger, so I used that and put in another 1/2 ounce of ground cinnamon in its place.  The entire amount of spices was a lot!  It turns out it was too much.  More on that below.

Almost 7 ounces of spices by weight

I was skeptical about the amount of flour.  It seemed like it was not enough to actually make a dough.  I was right:  what I ended up with was a vat of goo, not dough.  It was still goo even after mixing in the spices.

Mixing in the flour.


Mixing in the spices.

I put the goo into a jar to let it cool, then thought about how I would address the problem.

Note the total amount that was made.

Yes, I ended up with a solid mass in the glass jar (why did I put it in the jar???).  Clearly this was not the intended result.  

So I put the jar into a pan filled with hot water and put some more water on top of the solid mass in the jar.  After letting it heat for a while, the mass softened enough that I was able to pour it out of the jar and into a saucepan.  

A low heat allowed the mass to dissolve into the water, then I brought it to a boil and cooked it until it was nearly at the thread stage, about 220 degrees Fahrenheit.  It seemed to resist getting hotter, and I didn't want to scorch it.

Then I mixed in more flour.  I lost track of how much flour it was -- I just kept adding flour and mixing until the mass started clinging to itself more and acting like a dough.

This made a very dark dough, and I took two small balls of it and baked it on a greased pan in the toaster oven at 350 degrees for 10 minutes. 

The cookies smelled good and were baked just right.  However, they tasted awful:  all I got was a too-strong spice flavor that was decidedly unpleasant.  

I didn't want to throw it away and declare a failure.  It seemed that I just needed to dilute the spices to get a better cookie.

So I added about three more pounds of honey and one cup of sugar, heated to just boiling, and mixed in well.  Then I added more flour, mixing in a cup at a time until I couldn't stir it by hand any more.  At that point I put big scoops of the almost-dough onto the counter and mixed in more flour by hand (gently kneading) until I had a soft, almost sticky dough.

Huge!  I guess it weighed about 10 pounds.

I baked two more cookies.  They were lighter in color than the awful ones, and their taste was much better.  The spices were still strong but not repellant.  The cookies were moist and lightly browned on the edges.  I decided that was enough.

What a color difference.

It was a huge amount of dough.  I filled two jars with it, then baked the rest:  I rolled the dough to about 1/4 inch thick, used a cutter to get the cookies, then baked them in the toaster oven at 350 degrees for 7 minutes, which was right because they were thinner than the hand-formed balls I practiced with.  Notice that I did not follow the given directions (see the Friedman webpage) for baking them.  Maybe I will at another time.

Rolling and cutting

Baked.

Dough for storing.

The Verdict

The cookies were good.  Not mouth-wateringly spectacular, but good.  I think they would be improved with the chocolate frosting (see the Wilder post attempt #1) or a simple white frosting decoration.  They also seem to ask to be eaten with coffee or tea, or dunked in milk.  They were moist, not crisp, and I might try baking them longer to see if I like crisp.

I took four cookies and baked them at 350 degrees for 8 minutes.  This made them hard (not really crunchy or crisp) and not comfortable to eat.  Then I brushed them with rose water and let them dry.  This improved the flavor but were still to hard to eat comfortably.

I also took two baked cookies and brushed them on both sides with rose water, then let them dry.  My guest taster and I both agreed that this new flavor improved the cookie eating experienced.  I recommend it!

The dough jars were covered with a lid and put into a cool, dark cupboard, along with a box of the cookies.  Everything had the date written on them, and I put notes on my calendar to check on them.

When I check in on them, I will report back.

I declare this a success.  It took a lot of effort and perseverance to achieve it, but I believe I did.  Part of the effort was all the clean up:  every pan and utensil had sticky goo on it, as did the counters and stovetop.  Fortunately, it was all sugar-based goo, which cleans up completely with hot water and patience. 

Now I will apply more patience while the dough and the cookies mature.

Whew!


Cookies Consent

This website uses cookies to offer you a better Browsing Experience. By using our website, You agree to the use of Cookies

Learn More