Sunday, May 19, 2019

Rose Shrub, a Springtime Treat

I have been hard-pressed to do my blog posts for the last two months.  No, work and life in general have not been the culprits; I can only point to my loquat tree in astonishment.

A loquat, in case you didn't know, is a semi-tropical fruit that happily grows in my area and I have a decent-sized tree on my property.  It has produced fruit before but this year, it outdid itself.  I have picked over 120 pounds of fruit so far and it looks like another 20 to 40 are still on it.  I have made loquat jam, loquat chutney, spiced loquats, and loquat liqueur.  I have 12 pounds cleaned and frozen, waiting for a break in my schedule.  I've given away many pounds to friends.  Loquats are lovely to eat fresh, so I've had a lot of that.

Here is a picture of my tree and a closeup of the fruit on the tree.

One heavily laden loquat tree
Luscious, heavenly, flavorful loquats
The fruit is sweet and tastes somewhat like peaches or apricots without the tartness.  But it is different from them, which makes it a treat.  The recipes are not historic and, although they are foodie fun, most of them I got off the Internet, so I didn't want to write them up for my blog.  Now you know!

But today's recipe has to do with another springtime treat:  Roses!

The wet winter and now cool, wet spring has my yard in full bloom and among the flowers are the roses I planted a few years ago.  Two are highly scented and one of those has been producing flowers regularly.  I decided I wanted to try something with the petals.

I turned to a book I used once before, when I made a Rosemary Tea Sherbert  (part 1 and part 2).  It is Flower Cookery -- The Art of Cooking with Flowers.

By Mary MacNicol, Fleet Press Corp, published 1967

Today's recipe is on page 164.

Rose Shrub

Take one and a half pounds of fresh rose petals, add three cups of water and boil up.  Remove from heat and when cool, strain.  Then add two and half pounds of sugar, and the beaten white of an egg, boil, skim, strain and bottle.


My Redaction

I picked all the rose petals I could off of the three rose bushes.  The dark red roses aren't scented but I wanted them for color.  The other two were deeply scented. 

The recipe books all say to remove the bitter white base of the rose petals.  I tasted them and found that only the red petals had a bitter base, which I tore off.  The other bases were sweet.

A beautiful basketful, picked on a rainy day
It filled my basket to the brim and yet the total weight was barely six ounces.  I needed to scale the proportions.

Rounding up to call it 6
1 1/2 pounds petals (by weight) to 3 cups of water (by volume) is the same as

24 ounces petals to 24 ounces water, so that scales down to 6 ounces of petals to 6 ounces of water.

Similarly, 2 1/2 pounds of sugar is 40 ounces (by weight), so

24 ounces petals to 40 ounces sugar gives

3 ounces petals to 5 ounces sugar.  I had 6 ounces petals so I used 10 ounces of sugar.


That is not a lot of water but the roses took up so much volume that I chose to use my enameled cast iron Dutch oven.  I put the water in the bottom and then packed the petals in on top.

A large pot filled with roses.
I liked that the lid was heavy as I wanted to keep as much of the water and rose scent in the container as possible.  I set the heat to medium high until the water boiled -- I saw steam coming out from under the lid.  Then I turned the heat down to low, which stopped the steam, but I could still hear it simmering.

After about 25 minutes, I turned the heat off and let the whole thing cool for a few hours.  At no time during the cooking and cooling process did I lift the lid.

Once it was cold, I looked inside.

Now they are cooked down.
I decided to squeeze the petals to extract all the liquid I could from them.  I scooped them into a small colander, placed that in the pan, and squeezed with my hands until no more liquid came out. 

Squished until they could offer no more.
You can see the lovely red liquid in the bottom of the pan.

Then I strained the liquid through a fine sieve into a measuring cup and saw it was almost 8 ounces.  I still decided to use the original 6 ounces of liquid quantity to determine the sugar amount because that is what the recipe seemed to indicate.

I put the liquid into a small saucepan and then I added the sugar and the entire amount of egg white, beaten.  I suppose I could have put in a lot less white but I chose not to.  I stirred it all together and put it over medium heat.
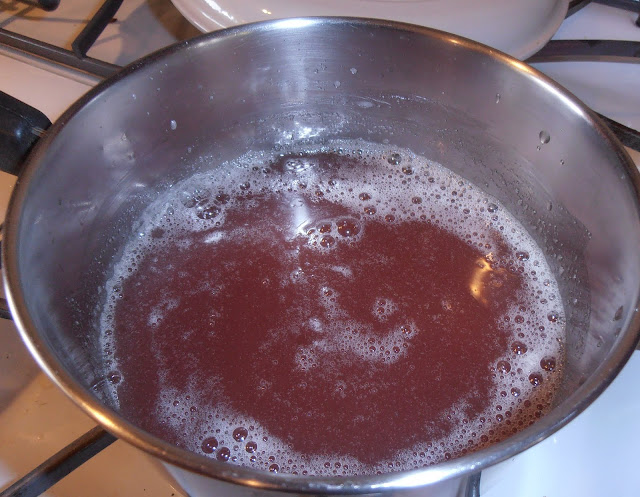
Just starting to warm up.
It started foaming almost immediately but I waited to skim it until it had come to a boil.  As it was heating I kept turning the temperature down so it wouldn't foam over.  When I saw bubbling along the edges, I used a small ladle to skim the foam off the top.

Foam!  You can see the boiling at this point, so I started skimming.
I kept skimming through the foam even though it seemed like I was taking a lot off.  Eventually I started seeing the clear syrup peeking through the foam.

Dark islands of syrup.
So I kept skimming, trying not to take the syrup off, until the surface was pretty clear.

Nearly done.
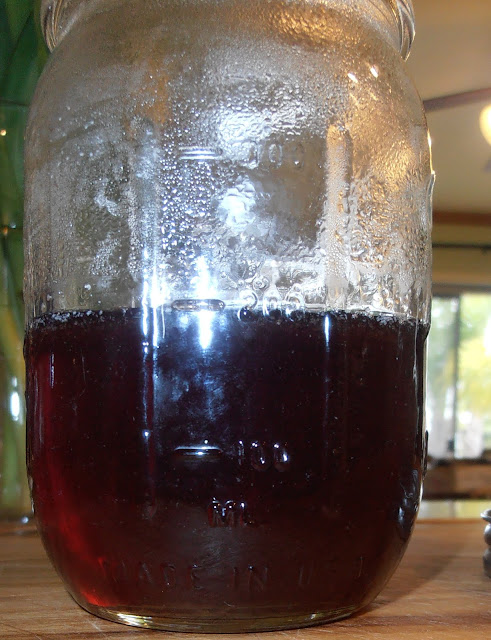
I used a wet paper towel to wipe the sides of the pan so that when I poured the syrup out, it wouldn't pick up more foam.  Then I poured the syrup through the fine mesh sieve into a clean jar.

8 Ounces of Nectar!
After it cooled, I gave it the taste test.

The Verdict

First we tasted it just as it was, straight out of the jar.  It was definitely a sweet syrup, thick, with a lovely rose flavor.  One tester is a person who does not generally like the flavor of roses.  When she tried this, she liked it.  She felt the sugar gave the taste enough body to feel like she was drinking something, instead of just getting a strong scent of roses.  She also felt the rose flavor was an actual flavor and not just perfume.

Everyone liked it although we all agreed that it was too sweet to have more than just a sip or two.

So we tried it mixed with several other liquids.

Just adding cold water was okay but I think too much water was added; the ratio should be more like equal parts rose shrub and water but for me to say that, I will need to experiment more.

I also added equal parts tonic water, which was interesting because the tonic water is bubbly and has a bitter taste.  That shifted the whole experience away from sweet, which I liked, and the bitter added an extra dimension in flavor.  One taster, who does not like bitter, did not like the tonic water mix.

I mixed some of the shrub with a white wine, a little more wine than syrup.  That was intriguing because I no longer got the definite rose flavor but it didn't taste like wine, either.  It was a perfumed, fruity sensation that I truly liked.  One tester thought it could be described as a "rose sangria".  She does not normally like wine but felt this was a mixture she could drink, and she described it as "classy."  I liked that.

We also mixed it with white wine vinegar.  When it was about 2 parts shrub to 1 part vinegar, it was too tart for a beverage but we thought it would be a good sweet-and-sour glaze on roasted meat.  At about 3 parts syrup to 1 part vinegar, it was a refreshing, sippable beverage.  Actually, this is what I think of when I think about a beverage called shrub.

Success!

I want to make more (keeping blooming, my rose bushes!) and try it with other foods.  I think it would be good in lemonade, or drizzled over fresh loquats (or strawberries), or on pancakes, or in my hot chocolate, or mixed with vanilla yogurt as a fruit salad dressing, or brushed on the top of a cake hot from the oven (white, yellow, or lemon cake).

Sunday, May 5, 2019

Non Bread -- Uzbekistan

This conversation went through my head when I was thinking about writing up this post:

"This is about non bread.  No, not non-bread, non bread!  Seriously, it is about bread.  Non bread."

So rather than subject you to the silliness of the conversation, I would like to show you how I made a bread called Non.

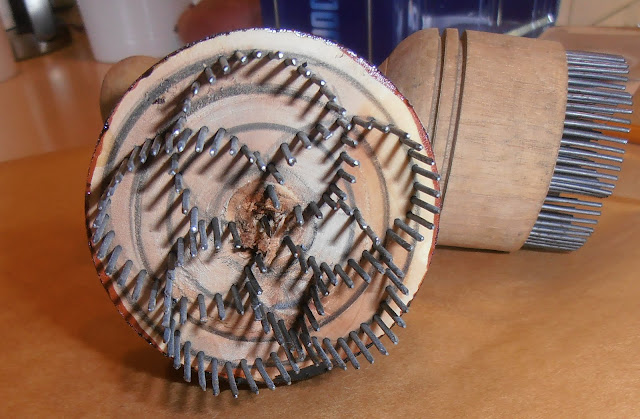
Not too long ago, my daughter had the good fortune to visit Uzbekistan.  Being a good daughter who knows me well, she returned with various food-related items, like barberries, spices, roasted apricot pits, and these dried, salty yogurt balls called kurt.  She also brought me two (yes, two!!!) bread stamps that are used on the popular bread of the region.


She subsequently acquired a cookbook for the region (it is hers, but it lives in my house for the time being) called Samarkand, Recipes and Stories from Central Asia & the Caucasus, by Caroline Eden and Eleanor Ford.

ISBN 978-1-909487-42-0
The beautiful pattern you see on the book's cover is a picture of a fabric they call ikat.  If I understand it correctly, the warp threads are tied into groups and the dye is applied, then the threads are separated for the weaving.  You get that interesting jagged look to the fabric.  Lovely!

I felt the need to use those bread stamps.  I also felt the need to try the bread!  My daughter said she loved eating it. 

The recipe is on page 152.  The author began it with this:
Non is the flatbread that is made the length and breadth of Central Asia.  It is usually baked by being slapped onto the searingly hot clay walls of a tandoor oven.  At home, using a pizza stone and the oven cranked to maximum is the best way to achieve the characteristic chewy, elastic texture.
I decided I would take them up on their challenge to crank my oven up to the maximum!

Non

1 1/2 cups all-purpose flour
1 1/2 teaspoons fast-action dried yeast
3/4 teaspoon salt
1/2 teaspoon superfine sugar
sunflower oil or melted lard
1/2 teaspoon black onion seeds


Put the flour in a large bowl; add the dried yeast to one side, and the salt and sugar to the other.  Make a well in the center, pour in 1/2 cup cold water, and mix thoroughly.  If it feels stiff, add a little more water to make a sticky dough.  Turn onto an oiled surface and knead for 10 minutes until the tackiness has gone and the dough is silky soft and smooth.  Form into a ball and put in an oiled bowl.  Cover with a kitchen towel and let rise for about 2 hours, or until at least doubled in size.

Knock the air out of the dough and form it into a domed round.  Sit it on a floured wooden board lined with a piece of parchment paper and cover again with the kitchen towel.  Let prove for another 45 minutes, or until doubled in size again.

Preheat the oven to 475 degrees F, or as hot as it will go, and put a pizza stone or baking sheet in to heat up--it needs to get really hot before you bake the non.

Make an indentation in the middle of the bread by pressing with the heel of your hand, leaving a doughnut-shaped ring around the edge.  Pierce a pattern in the middle using a non bread stamp or the tines of a fork.  Brush the top with oil or lard and sprinkle with the onion seeds.  Trim the excess parchment from the sides of the bread.

Put a handful of ice cubes on the bottom of the oven--this will create steam.  Use the board to lift the bread to the oven and carefully slide it (still on the parchment paper) onto the preheated stone or pan.  Bake for 15 minutes.  The top should be golden and the load should sound hollow when tapped underneath.

My Notes

I used regular granulated sugar, canola oil, and white sesame seeds instead of the onion seeds.  My daughter assured me that most of the non she ate had sesame seeds on it.

Yeast on the left, well in the middle, sugar and salt on the right
I was astonished that the water was to be cold; I had expected it to be warm to start the yeast.  It was easy to mix the dough and adjust the water to make it sticky.  Kneading it was just fun:  the ball of dough is small so it truly did not take a lot of effort to get it moving and to keep working it for ten minutes.  It turned out beautifully soft and smooth. 

Sticky dough
Silky soft and smooth
The timing on the two risings was just right.  I put the dough in my oven set to "Proof" for the 2 hours rise and then just left it on the counter for the second rising.

It has risen!
I chose the decorative bread stamp to pierce the center. 

The stamp I used
The stamp I didn't use
It flattened to about 6 inches diameter before the second rising.


This is my hand imprint after the second rising.


Here it is stamped, oiled, and sprinkled.


Now comes the time for true confessions:  I ended up making this recipe twice. 

The first time, I set my oven for as hot as it would go, which turned out to be 550 degrees F.  When the bread went in, it puffed up considerably, and in about 7 minutes, was burning.  Yes, too brown and some of the sesame seeds were burnt. 


The inside looked pretty good but I thought it was still too wet.


My daughter thought I hadn't flattened the dough enough, and that it should be wider and thinner.  This loaf was too puffy.

So I tried it again, which was still fun to mix and knead.

I flattened the dough to about 8 inches in diameter this time.


I set the oven temperature to 475 degrees F as the recipe specified.  After 10 minutes of baking, it was the perfect golden color and sounded hollow when thumped.


And when I sliced it, I thought it had cooked just right.


The Verdict

I had my daughter try it because she alone had tasted it in Uzbekistan and could correctly judge the results of my efforts.

Her response?

The flavor and texture were just right.  Hooray!  Chewy, like a bagel, with a classic bread taste highlighted by the slightly toasted sesame seeds.

She still thought the bread was too thick and should have been pressed out to a wider diameter than 8 inches.  Also, I did not make the center indentation thin enough.  She said it should be very flat, without any puff at all.  So the next time I make it, I will aim for 10 inches diameter at the least.

We cut it into little wedges and ate it for several meals, with a sausage stew, with grilled pork chops, and at breakfast along side poached eggs.  We all thought it was perfect with a light spread of cream cheese and a dab of our favorite fruit jam.

Even the first attempt tasted pretty good, although I dislike burnt seeds.  They were easily brushed off, so it wasn't a big problem.  But the second attempt was much better.

Success!  Easy and simple to make, wonderful to eat. 

Now I am excited about trying other recipes from the same book.  Something with barberries, perhaps!