My friend KC made me aware of a cooking gadget called a tvare, a Norwegian whisk. She showed me the steps and how convenient making it from a Christmas tree really is. So I did!
Wikipedia tells us:
tvare f or m (definite singular tvara or tvaren, indefinite plural tvarer, definite plural tvarene)
- stirring stick for cooking, with tines at the end. A Norwegian whisk. Fashioned crudely from the crowns of conifer trees, etc.
- archaic auger or drill
Other sources I spotted mentioned that "tvare" is the tool and "tvara" means "to mix." The idea is to cut the tree trunk so you get a handle and have branches near the thick end to make the tines.
The instructions were straightforward:
- Cut the part of the tree you want to use
- Trim the branches
- Remove the bark -- don't worry about this too much because of the next two steps
- Soak it in boiling water for 10 to 15 minutes
- Resume removing the bark
- Sand it smooth
- Seal it with oil
My Attempt
I used my Noble fir Christmas tree, with my focus on the top two fifths or so. I thought I could get two tvarene from this and still have handles long enough to make me happy.
I looked for branch cluster and cut the trunk just below it. I had to remind myself that the handle was the part of the trunk above the cluster so the tines would curve upward when the tool was in use.
I cut the thickest part of the trunch first and then, after deciding how long a handle I wanted, I cut above that to get the second tvare.
Then I trimmed the branches to what I considered a good length for the tines.
I knew it could be a challenge to smooth off the bumps of the branches I didn't want, so I cut them as close to the trunk as I could.
I had a very sharp knife to start peeling off the bark.
There were three parts to pay attention to for this step: the brown bark, the white fibrous layer under the bark, and the creamy wood below that.
My goal was to remove as much of the first two layers as I could while working outside and then leave the details to come off once the tvare soaked in the hot water.

To soak them, I used a big pan filled with water and brought to boiling. I turned the fire down so the water was simmering. Neither piece of wood fit in the pan, so I put one end in the water for about 10 minutes then flipped it so the other end soaked, too. The steam seemed to be beneficial for the parts that never actually touched the water.
The water turned dark reddish-brown and smelled wonderful.
What I liked about this is the layers that still needed to come off were easily removed -- they slipped off with my fingernail or with a gentle push with the knife blade. The wood cleaned up beautifully, even in the tight corners where the branches met the trunk.

The next step was to sand everything but I felt the wood was still too freshly cut off the tree. I left the tvaren on the counter for a week or so, until they felt lighter and warmer to the touch than when they were freshly cut. They dried inside and out, and I could tell the difference.
For the bigger tvare I used a 120 grit sanding sponge. It worked well, especially in the tight spots, except where small wood parts protruded from the tines. I had to get my knife and whittle those off so they wouldn't tear the sponge. I also carved the thicker bumps down as much as I could so there wouldn't be any place for food to hide when the tvare was being cleaned.
I decided to go more "rustic" for the smaller tvare. I sanded it completely with a piece of sandstone. This worked really well, especially over the bumps and across the cut trunk ends. The piece (when I started using it) had a narrow point that I used to get in the tight spots. Eventually it broke off but I was done using the point at that time.
 |
| The sandstone in the middle. |
The difference between the two sanding methods was this: the sponge made the wood satiny smooth and a joy to hold. The stone made it easy to remove bumps and smooth them down without having to use the knife but the wood's surface wasn't as texturally pleasant. It was perfectly acceptable, just not like satin.
Some of the cut tine ends splintered when I cut them, so I used the knife to whittle them to more of a point. My goal was to reduce places for food to hide from cleaning.
Once the pieces were wiped with a damp cloth to remove the sanding dust, I let them dry for a few hours.
I wiped them both thoroughly three times with block oil, letting it soak in for about an hour for each layer. The wood soaked the oil up each time, with no excess to wipe off. I feel that was just right but can always oil them again any time.
 |
| Completed tvaren. I oiled the cutting board, too! |
The Verdict
They are both fun to hold. The bigger one's smooth surface just invites your hand to slide over it. It is fun to feel the bumps.
The smaller tvare's handle, near the top, is very thin and a little flexible. I will have to be careful not to break it when using it, but I think I would only be using this to mix small quantities or substances that were not too heavy or thick.
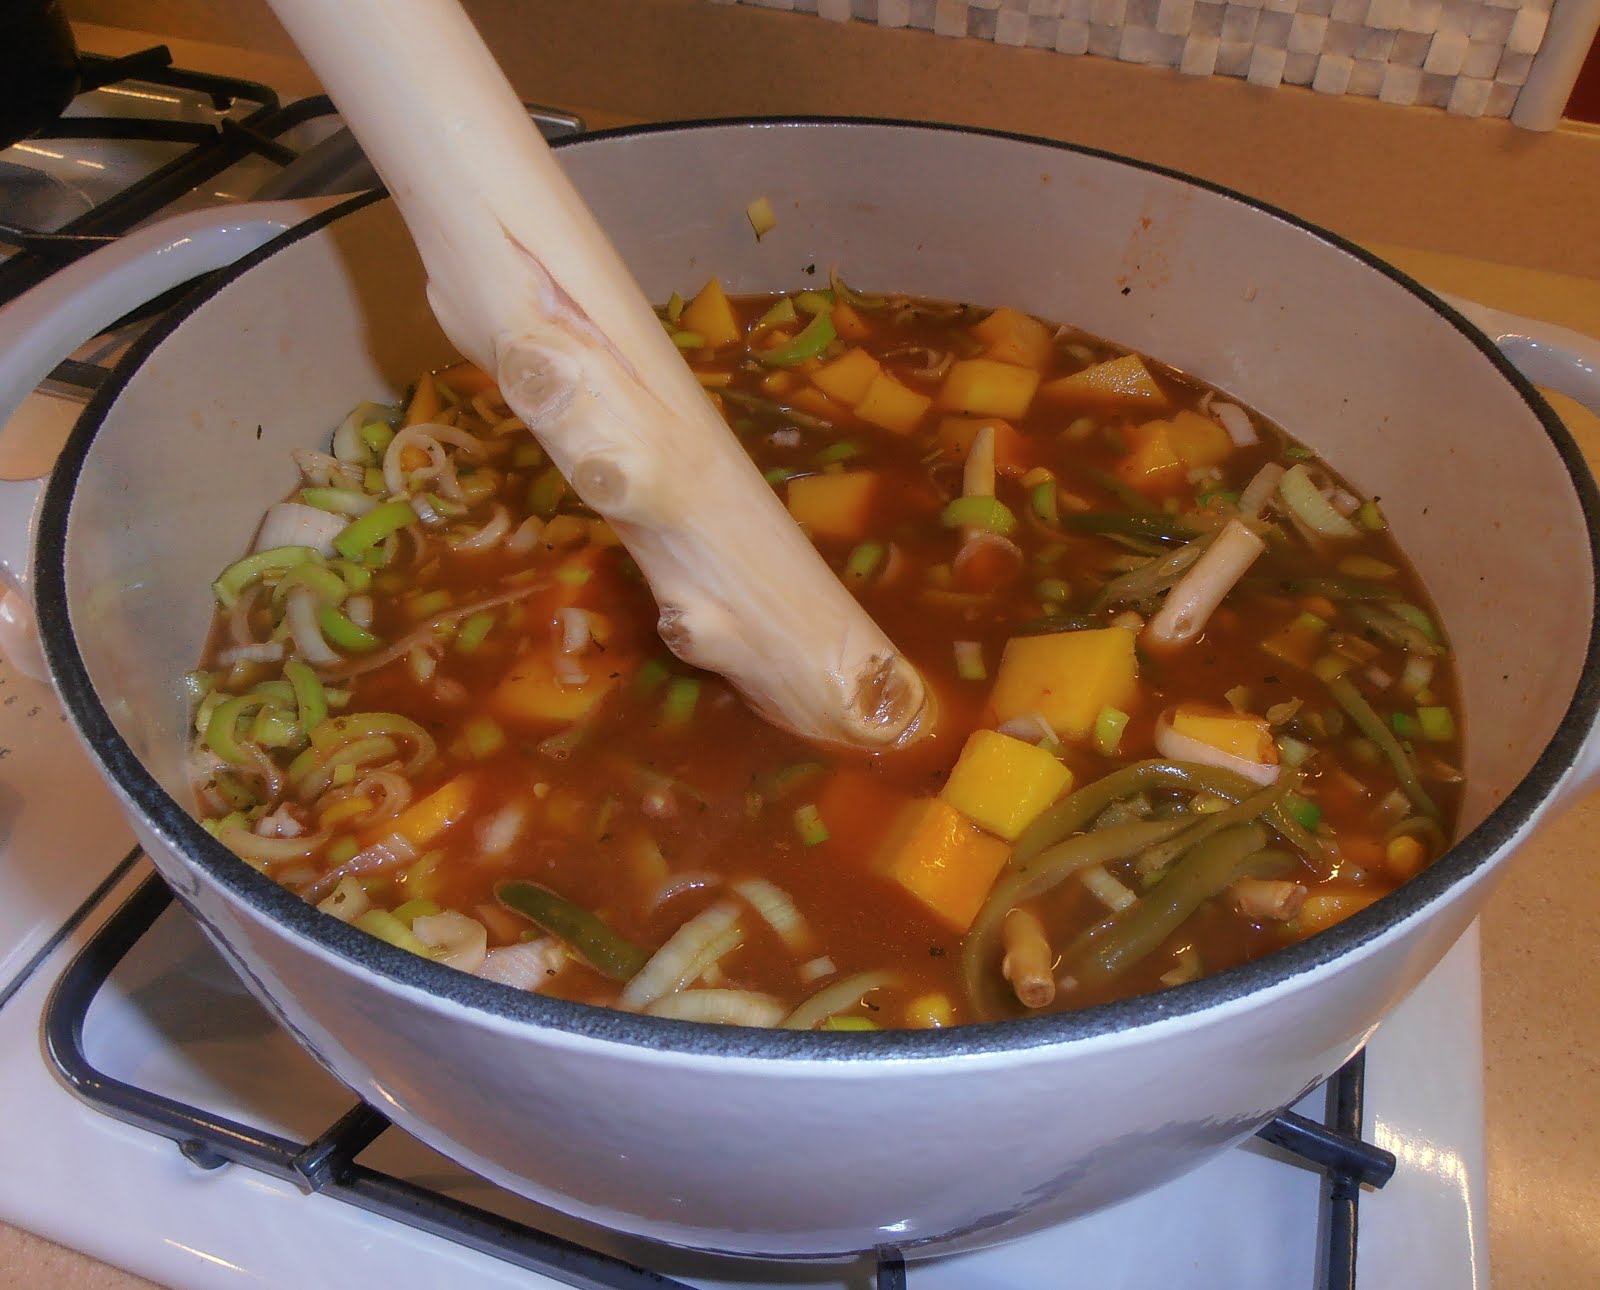
To feel that I was completing this experiment, I had to try them out. So I made a stew of sausages and vegetables, in my big Dutch oven, and gave it a stir. The result? The big tvare was almost too big for that pot -- stirring was restricted but twirling it worked really well. The smaller tvare worked better but I worried I would break the handle. It wasn't very stressed but I was being cautious.
They both cleaned up well with a quick rinse and a wipe down.
So I declare it a success!
I really like having both of them. They are striking to look at, fun to hold, and quite usable. I decided to put them on display in my kitchen in a glass vase to show off their entire glory.
I encourage you to make one, too, the next time you have the opportunity to get the top of a pine tree. I enjoyed the process and felt like I was connecting to history!