Monday, March 15, 2021

Tomato Pudding (AKA Pie) - A Shaker Recipe

I laughed when I realized my last six posts were all about desserts or sort-of-desserts.  My sweet tooth obviously took control of my decision-making process!  So I went on a search for something more savory to prepare.

I'm still exploring The Best of Shaker Cooking by Amy Bess Miller and Persis Fuller.  With over 900 recipes, you can understand why it takes time to peruse.  There are so many temptations!  I found a recipe for lamb shanks I would love to make; it is almost time to find lamb shanks in the stores.  Fingers are crossed.

ISBN 0-02-584980-8
This recipe comes from the Vegetable section (See?  No desserts!).  There are twelve tomato recipes; within the recipes they have a quote from a Shaker sister:  "We have tomatoes for every meal -- fried for breakfast, stewed for dinner, soup for supper."  The Shakers were good gardeners and good cooks - which I envy - and their tomato recipes show us how to fry and stew them, but also how to bake and broil them, as well as making dumplings, custard, pie, puddings, salad, and toast.

The recipe specifically labeled as "pie" is basically sliced tomatoes bound together with a mixture of sugar, cream, egg, and nutmeg, and placed between two crusts.  

The recipe I tried is called a pudding.  It is a cooked filling on top of buttered crumbs and topped with a crust.  They offer a second pudding recipe that is similar, using bread cubes on the bottom, crumbs on the top, and the filling has more herbs.  I chose the simpler one to see what the filling is like without all the extras.  Besides, it is fun to make pie crust.  

The recipe source is credited to the Hancock Shaker Village.  Click here to visit their website.

Tomato Pudding (page 158)

4 cups canned tomatoes cooked down to 2 cups

1 cup light brown sugar

1 tablespoon grated onion

1/2 teaspoon salt

1/4 teaspoon pepper

1 cup bread crumbs

1/2 cup melted butter

1 pastry lid for 8 inch pie plate


Combine first 5 ingredients and bring to a boil.  Simmer to thicken.  

In an 8-inch pie dish put bread crumbs, cover with butter, top with tomato mixture, and cover with pastry crust.  Bake in 350 degree F oven for 30 minutes.  Watch to see that bottom doesn't burn (use tip of knife to lift up crust).  Tomatoes burn easily.  Serves 4 - 6.

My Notes

First I made the pie crust dough and let it rest in the refrigerator while I did everything else.

The three cans of diced tomatoes yielded 43.5 ounces instead of the 4 cups = 32 ounces asked for in the recipe.  I decided to use it all and reduce to about half.

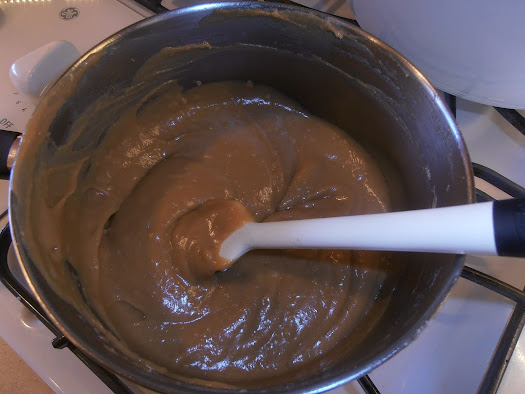
Being cautious about burning the tomatoes while reducing them, I keep the heat on very low for a long time.  This wasn't really reducing the quantity, so I turned the heat up after a few hours but watched it carefully and stirred it to make sure nothing was sticking on the bottom.

When it reduced to just under 3 cups (not quite half), I decided it was time to add the other flavors.  I adjusted their measures up a little to match the greater tomato quantity. (Not the sugar.)


To be honest, I was surprised at the amount of sugar listed in the recipe.  (Not that I was complaining, and still not a dessert!)  I wondered if it could be lowered and still taste good.

I also started preheating the oven at this point.

The instructions said to bring to a boil and simmer to thicken, so I put it on medium heat until it started to boil and then put it down to low to just a bare simmer.  I decided that "to thicken" meant to dissolve the sugar and to give the flavors a chance to infuse.  I wasn't sure it would thicken up much more.

It actually did thicken a little more (or was it my imagination?) and it tasted good.  I liked the hint of pepper.  It was a bit sweeter than I expected for a savory recipe.

The bread crumbs made a thick base in the pie pan.

There were no directions to mix the crumbs and the melted butter, just to cover the crumbs.  So I did!  I just poured the butter over the crumbs.

And then I poured the filling over it all.


You can see how full the pan was, which shouldn't have surprised me considering I made more filling that the recipe called for.  I decided it was acceptable because all that was left was to place the crust.

The filling was still very hot and I worried that the crust would be melted if it took me too long to get it "just right" once it was in place.

So I rolled the chilled crust and used an 8 inch cake pan as a guide for where to cut the crust to fit the pie pan.
Leaving an allowance for a decorative edge.

Then I flipped the crust on top of the hot filling and went to work to form the edge.  Boy, did I work quickly!


And then I popped it into the hot oven and set the timer for 30 minutes.

I checked it "using the tip of a knife", barely lifting the crust to see how the filling looked.  It darkened but did not look or smell burned.  I checked after 20 and after 25 minutes of cooking.  

It did overflow the pan - again, not surprising - but I had another pan underneath to catch the drips.

At 30 minutes the crust was nicely browned and it all smelled good.


I let the pie cool to lukewarm before serving.

The Verdict

Cooling allowed the filling to set up and firm before slicing.

I was impressed at how well the layers showed and stayed distinct.


I was also pleased that the tomatoes didn't burn.

I served it with a tossed green salad and a little sliced pork on the side.  It was nice to have the meat be a side dish in this meal.

As for the flavor:  it was good!  A distinctly tomato flavor, with some savory from the pepper and possibly from the onion.  The filling was very moist but not runny.  The top crust added a rich mouthfeel and a crispy crunch.  The bottom crumbs layer added a more chewy crunch, just like a similar crust you find on cheesecakes. 

Success!

Yes, it was sweet but not overly so.  I think you could reduce the sugar by at least 1/4 cup and still have a good result.  

My guest taster thought it was just right as it was.  I loved it, too, but I think it would be better with more pepper and some lemon zest.  The second tomato pudding recipe calls for more onion and adds parsley and basil, and a lot less sugar (lists 1/4 cup).  That would be good, too, and make it more savory.

We enjoyed the leftovers warmed up the next day.


Monday, March 1, 2021

Chocolate Puffs, a Train Recipe

When I travel, my souvenirs tend to be cookbooks.  Why not?  They are fun and useful memories of the journey, and I can "revisit" the trip when I cook.  

Today's recipe is from a cookbook I bought when in Sacramento, touring the California Railroad Museum.  This book contains recipes from the famed "Harvey Houses", which were a creation of Fred Harvey.  His company provided restaurants located along the train routes, where people could get off the train and have a nice meal in a clean place with pleasant servers:

In the 1870s, people traveling west of the Mississippi were still venturing into the wild.  Loud, smoke-belching trains might have cut across the rough terrain, but the harsh weather, rigid seats, and short breaks for bad food in the middle of nowhere showed that the West was by no means won.  Entrepreneur Fred Harvey had an eye for such problems and a nerve for the impossible.  In 1876, he began establishing high quality dining rooms along the Santa Fe Railroad, and his Harvey Houses helped change the entire picture of the American West. 

... Suddenly, after surging through mountain snow or sweltering heat, rail travelers halted at a surprising sight:  a Harvey House arose out of nowhere and served them like royalty.  Fine china, Irish linen ... and, oh, the "Harvey Girls."  Magical and romantic in a region still rough-edged and rowdy, these polished young servers made the Western rail dining experience a true pleasure.

Some of the sites were developed further into beautiful hotels and resort destinations complete with tours.  It was the advent of air travel, automobiles, and faster trains needing to make fewer stops that is attributed to the demise of the business, which I find sad.  

There are many recipes I would like to try in The Harvey House Cookbook by George H. Foster and Peter C. Weiglin.  Chocolate Puffs, on page 108, is credited to chef George Burnickel, who worked on the California Limited.  

ISBN 978-1-58979-321-7

Chocolate Puffs

1 cup flour

1 oz. melted chocolate

1 cup water

3 eggs

1/2 cup butter

Strawberry preserves

Whipped cream

Boil together one cupful of flour, one cupful of water, and half a cup of butter.  Remove from the fire and beat in an ounce of melted chocolate and three eggs (one at a time).  Bake in a gem pan, and when done cut off the top and put into each cake a teaspoonful of strawberry preserves.  Cover with whipped cream, sweetened and flavored.

And water.
My Notes

I didn't have strawberry preserves but I did have a most marvelous pomegranate jelly made by my friend, MR.  I thought it would go well with chocolate.  Also, I had no whipped cream.

A gem pan is a muffin tin, so I used my regular sized, non-stick muffin tin.  

Mr. Burnickel did not specify an oven temperature, probably expecting that anyone reading the instructions would have experience in knowing the right one, so I did a little reading on the side.  The recipe looked like a choux paste and the word "puff" in the name gave me enough hints on what to do.  I preheated my oven to 400 degrees F.

The chocolate was melted in the microwave (with some left over for nibbling!).  The butter was frozen so I was reluctant to put the flour-water-butter mixture over a high heat for boiling.  I wanted the butter to have a chance to melt.  The three ingredients went over a medium heat, and I stirred it a lot until it all came together and didn't stick to the sides of the pan any more.

Pre-chocolate

Then I turned off the fire and mixed in the chocolate until that mixture looked smooth and well-blended.  After that, the eggs, beating in each one until the mixture looked smooth before adding the next.

With chocolate and eggs.

I used a ladle to scoop the batter into each pan.  I wasn't sure how much they would puff so I filled the cups about halfway to 2/3 full.  That left me with one empty cup, which I filled with water.  (This is recommended to keep balance in the way the pan heats.)

My reading suggested cooking them at 400 degrees F and then reducing the temperature to 350 degrees F.  I cooked them for 12 minutes at 400, which made them puff nicely, and then 23 minutes at 350.  The recommendation was to remove them only after they were "very firm."

I managed to keep the over door closed until about 20 minutes into the 350 degree cooking slot.  Then it was briefly opened for me to poke it, checking for firmness.  They browned well and didn't burn, and they smelled lovely.

I wanted to take them from the pan immediately so they could cool on a rack.  They all stuck to my non-stick pan!  So I let them cool completely in the pan and pulled them out later with the help of a small metal spatula.  

The Verdict

Some of the puffiness had left my cooled chocolate puffs, but they didn't sink down to anything embarrassing.  The bottoms tore when I took them from the pan, so I didn't cut off the tops for serving, I just turned them over.

The texture inside looked just right.

The interior was visibly moist and the "feel" of the puff was delicate and tender.

I served it with a spoonful of pomegranate jelly on top.  The jelly looked like a jewel.

My guest taster noted that the exterior was a little crispy and the interior was moist and tender - very nice!  The chocolate flavor was subtle but pleasantly there, and the pomegranate jelly (tart and sweet) went very well with the chocolate.  I agreed with him completely.

We both enjoyed it as a simple and yet satisfying dessert.  It was pretty and it was tasty.  When you include how few ingredients it required and how easy it was to prepare, I think it gets very high marks.  

Success!  I would do it again if I can have chocolate in the house that isn't already consumed for being, well, chocolate.  

Be sure to grease the pan!