Showing posts with label eggs. Show all posts

Friday, November 15, 2024

Eggs Baked in Whole Tomatoes -- a recipe from the The Egg Basket of the World

In 1879 Lyman Byce and Isaac Dias invented the first reliably working incubator for hatching eggs in Petaluma, California.  This sparked the creation of egg ranches in the area and, by 1917, Petaluma was considered the "undisputed" world leader of the chicken and egg industry.

The town embraced this and unabashedly promoted itself and its industry as "The Egg Basket of the World", offering a National Egg Day which included a parade with an Egg Queen and her court of attendant chicks, and decorating the town with giant plaster egg baskets and roosters.  In 1918, Petaluma reported producing 16 million dozen eggs.

In 1927, the Petaluma High School Parent-Teacher Association (PTA) published The Egg Basket Cook Book to help finance the PTA activities as well as promote the industry and share their egg-cooking knowledge.

The book is basically what I call a "ladies' group" cookbook because most (if not all) the recipes were submitted by Petaluma locals.  I value these recipes because no one is going to submit a recipe that they think is subpar, knowing their neighbors might try them.  The recipes are tried and true.

I chose the "Eggs Baked in Whole Tomatoes" recipe in the "From the Egg Basket" section on page 27.  This section also addresses the food value of eggs and methods of cooking them.  What is amusing about the entire book is that no recipe has "eggs" in them -- the word is always written as "EGGS".

Eggs Baked in Whole Tomatoes  -- M.P.

3 tomatoes

3 EGGS

salt and pepper

3 tablespoons buttered crumbs

3 slices of bacon

Breakfast!
Scoop out centers of large ripe tomatoes.  Break an EGG into each, season and cover with crumbs and lay a slice of bacon on each.  Bake in a moderate oven.  Turn bacon once while cooking.  Place under broiler to brown bacon.

My Notes

I noticed the pattern of one egg and one slice of bacon per tomato.  I only needed two servings, so I reduced everything down to enough for two.

The oven was set to 350 degrees F.  

I sliced the top of the tomatoes off with a knife then used a spoon to scoop out the centers.

Each tomato was set in a glass baking dish before I put the egg inside.

I didn't bother with buttered crumbs as I figured the bacon would drop grease onto them.  I cut the bacon slice in half and put the pieces as an "X" over the top.

I baked the tomatoes for 25 minutes.  See comments below.

Halfway through.  Time to turn the bacon.
Done. (Almost)

The Verdict

I served it with toast and juice.

A tidy breakfast.
Twenty-five mintues was not enough time.  The tomato was somewhat cooked, but the egg was raw.  

So I tried again, turning the temperature down to 325 degrees and cooking for 45 minutes.  The tomatoes were cooked through (skin split and the rest was soft) and the eggs were cooked.  But the yolks were solid, and I really wanted runny yolks.

I kept trying through several attempts.  I kept getting either raw eggs (325 degrees and 35 minutes) or solid yolks.

My observation is that the timing depends on the thickness of the tomato.  If the walls are thin, everything cooks quickly.  Thick walls take more time for the heat to get to the egg.  Don't be fooled by the top of the egg looking cooked!

Success, but it took a while.  The last time I tried it was with thick-walled tomatoes.  They cooked for 45 minutes at 325 degrees.  This gave basically soft-cooked eggs.  The whites were cooked but not hard and the yolks were soft but not runny.  The tomato was cooked through and soft.

I served it in bowls because the tomato released a lot of juice when it was cut.  Tasty!

It is not necessary to turn the bacon.  Just broil it for a minute or two at the end of the cooking cycle and it is done.  (I like chewy bacon.)

A large tomato can be scooped out so much that two eggs will fit inside it.  This takes longer to cook.

Make sure the tomato is shaped to stand upright when the stem end is removed.  Roma tomatoes are not very good for this.

If you want to read more about the history of Petaluma, see this book:

Heig, Adair.  History of Petaluma:  A California River Town.  Scottwall Associates.  Petaluma. 1982,

which you can access online by clicking here:  Heig.


Wednesday, December 1, 2021

Candied Egg Yolks

I find reading recipes from other cultures and times to be fascinating -- I love learning new techniques and new flavor combinations.  Having a sweet tooth, I also love to read and sometimes try recipes that use sugar.  This recipe from Encarnación Pinedo's book, El cocinero español, published in 1898, on page 13:

My translation:

Brilliant sugar syrup bath. 

The amount of sugar is graduated according to what you want bathe and add syrup that is clarified, letting it boil until, taking a little with your fingers, it snaps between them.  Once the syrup is cooked to its point, take the saucepan off the fire, nestle it into straw, and add almonds, cooked egg yolks or whatever you want to polish, covering the saucepan so that it cannot give the air to the syrup and so it is left until it is perfectly cold. Once cold, the rind or crust that has been formed is cut on the side of the yolks or what has been done:  this will be carefully removed, and the honey is drained well; immediately rinse them in warm water and again let drain.

It is intriguing!  I've candied nuts and peel before, but I have never thought about candying cooked egg yolks.  

I looked around the internet and discovered there is a classic Spanish recipe called "Yemas de Santa Teresa".  The recipes vary but the general technique is to make a sugar syrup flavored with lemon peel (or juice) and sometimes cinnamon, then the raw egg yolks are mixed into it.  The whole mixture is cooked lightly, cooled, and formed into balls that are sometimes rolled in powdered sugar.  It is quite popular.

So this seemed to me an adaptation of the idea, and I wanted to try it.  

The challenge is deciding what temperature is right for the sugar syrup.  The idea that the hot syrup snaps between your fingers suggests the hard crack stage (about 300 degrees F) but allowing the ingredients to soak in the syrup until everything is cold and there is syrup to drain off suggests the thread stage (about 230 - 235 degrees F).  

I chose the thread stage so as to have something to drain when the mixture is cold instead of a solid block of candy. Also, I'm not sure anyone wants to put their fingers into syrup at the hard crack stage.

My Redaction

6 hard-cooked eggs

2 cups sugar

1 cup water

*Have a candy thermometer handy, if possible.

Just add water.

Carefully peel the eggs and remove the whites.  The goal is to keep the yolks as whole and round as they can be.  Save the whites for another recipe.

Put the sugar and water into a small saucepan that has a well-fitting lid.  Stir until the sugar is dissolved.  The mixture won't be clear but you won't hear any more scraping noise from the sugar on the bottom of the pan. Turn the heat to medium.

Do not stir the mixture any more.  Watch it cook (it will boil and turn clear at about 212 degrees F) and start checking the temperature after it boils.

When the temperature of the liquid hits 232 degrees F, remove it from the heat and put it on a folded towel.  Then carefully add the yolks.  They float, so gently swirl the pan to make sure the yolks are completely coated with the syrup.

Finally, put on the lid and wrap the pan in towels.  I used two:  one under the pan that also came up and covered the lid, and one that wrapped around the sides.  I tucked the towels closely around the pan and left it to cool, undisturbed.

After letting it sit for 11 hours, I unwrapped the pot and opened the lid.

There was no crust to cut.  The syrup was very thick.  The yolks had remained floating, so the tops did not look candied.

The tops looked a little dry.
I used a slotted spoon to remove them to a colander.  They were so fragile!  I accidently tapped one with the spoon and a piece broke off.  Be very careful when fishing them out of the syrup.


Putting them in the colander was not a good choice -- the syrup was so thick that it was slow to move through the holes.  So I moved everything to a rack.

This made it easy to separate the yolks and also to pour warm water over them, letting the plate catch the pour.  I turned the yolks over after the first rinse and then poured a little more.

Shiny!  And a little damp, still.
I decided to let them sit out overnight to dry.

The Verdict

The next morning, they had lost their sheen.


I tasted one and it was -- disappointing.  

It tasted like a cooked egg yolk.  It was only vaguely sweet.  It was not interesting or different; it could have been just freshly taken from the hard-cooked egg and had a little sugar sprinkled on it.  The texture was that of a cooked egg yolk.  Honestly, I think it would have tasted better with a little salt on it.

I'm not willing to say Miss Pinedo was wrong here; I think I misjudged the syrup temperature.  My guess was based on her statements about the syrup snapping between your fingers and that the yolks had to soak in the syrup until everything was cold.  

It is not clear to me that cooking the syrup at a higher temperature would have improved the result.  The syrup did not penetrate the yolks much, as can be seen here:


The darker areas show about how far the sugar penetrated into the yolk.  I had hoped for more after it sat for so long.  Cooking the syrup to a higher temperature would not have had it penetrate so far, I suspect (but don't know).

I had also hoped for a shiny, possibly hard, shell around them, which I knew might not happen with the syrup cooked to below the hard crack stage.  I don't know why the instructions were to rinse them with warm water as it didn't seem to help at all.

Before I cleaned everything up, I decided to dunk two of the remaining three yolks into the syrup and allow them to drain and dry.

Easy to tell which two were recoated.
These were definitely improved.  The sugar coating made the creamy yolk-to-sugar ratio better, making it more like a candy than just an egg yolk.  They were shinier and also not sticky once they had some time to dry.  I wonder if dunking and drying them again would make it even better. 

I will call this a failure.  Perhaps I can learn more and improve it.  Or perhaps I will try the Yemas de Santa Teresa as a comparison.


Tuesday, June 15, 2021

Cheesy Chile Relleno Puff - A Most Favorite Redo

The last post of the year is reserved for one of my favorite recipes.  In 2018 I made a chile relleno souffle that was a lot like a favorite recipe I have made for decades.  The reason I used that particular recipe is that I lost the original recipe (several times, actually) but found this version.

Recently I was sorting a stack of handwritten recipes I had received from my mom when she closed down her household.  There I found my original recipe, which I had written for her years ago.  Hooray for Mom!  I knew then I needed to make it again.

I wrote this years and years ago.

Cheesy Chile Relleno Puff   (4 servings)

7 ounce can whole green chiles

4 ounces Monterey Jack cheese, shredded

6 eggs, slightly beaten

3/4 cup milk

1 tbsp. flour

1 tsp. baking powder

1/2 tsp garlic salt

4 ounces Cheddar cheese, shredded

That is a white cheddar sitting on top of the Monterey Jack.

In a greased 7" x 11" baking dish, layer split chiles and Monterey Jack cheese.  Combine eggs, milk, flour, baking powder, and garlic salt; mix well.  Pour over chiles, top with Cheddar cheese.  Bake at 350 degrees F for 30 minutes until puffed and browned.

Serve with Chile Sauce:

8 ounce can tomato sauce

1/4 cup hot picante sauce

1 tsp oregano

(Mix and heat for 5 minutes)


Good with warm flour tortillas or with tortilla chips and guacamole.

Enjoy!


My Notes

I use Ortega or Anaheim chiles as they are mild enough in heat that I can serve it to just about anyone.  They have a distinct flavor that makes this puff tasty.

Also, instead of using garlic salt, I put in 1/4 tsp garlic powder and 1/4 tsp salt.  It is okay to use more.

The layers, in order:


Although I used a glass baking dish, I did not change the temperature of the oven.  Even at 350 degrees F, it took 40 minutes to get the puff browned.

My tastes have changed over the years so I no longer make the Chile Sauce, although it is good. 

I prefer to serve it with a tasty, chunky salsa (I use mild but you could choose hotter), home made guacamole (with seasoned salt and lime juice), and a spoonful of sour cream.


The Verdict

It was very puffy coming out of the oven but settled afterwards.  I suspect my baking powder is getting old as I recall it staying puffy (or at least puffier) when served.  But never mind.  It still looks good and tastes wonderful!

You can't beat the egg, chile, cheese combination.  It is flavorful with a creamy and rich mouthfeel.  The toppings just add to the variety of tastes, and they all work together well.

Think of it as an omelet or fritatta with a Mexican twist.  

You could use more of the chiles to get a thicker layer.  Just be careful not to overwhelm the egg and cheese flavors with them.  

Yellow Cheddar makes this dish more attractive to the eye but the sharp white Cheddar I used was very good.  I think the sharper the Cheddar the better it works with the strong chile flavor.

I laughed at first when I read that it served four:  it is cooked in a big dish for four people.  I thought maybe it should be for eight people.  

But the recipe is right -- four people will probably want to have two pieces each of this flavorful main course, even with side dishes like a good salad or an appetizer like tortilla chips and salsa.  

It is always a success.  Give it a try!


Tuesday, December 15, 2020

Forgotten Cookies -- One of My Most Favorite

I reserve the last post of the year for one of my favorite recipes.  This year I want to record a seasonal favorite:  Forgotten Cookies!

I say "seasonal" because I tend to make them at Christmastime, however they are good any time of the year.  I just know that if I make them, I will eat them, so keeping it to a season is best for my waistline.

Once these are made, they are hard to forget.  They are light, crisp, sweet, and flavorful.  At a time when sweet goodies are in abundance, they are a nice change from the heavier cookies, cakes, and pies.

So why are they Forgotten Cookies?  Because once you prepare their mixture, you put them in the oven and forget about them!  I typically choose to make them at night so they can sit in the oven while I sleep, but you can make them any time you know you won't need your oven for the day.

Please enjoy one of my favorite recipes:

Forgotten Cookies  (30 to 35 cookies)


My handwriting many years ago.
2 large egg whites
2/3 cup sugar
1 teaspoon vanilla
1 cup chocolate chips
1 cup chopped pecans or walnuts


I used vanilla sugar instead of sugar and vanilla.  Works great either way!

Preheat oven to 350 degrees F.  Beat the egg whites to foamy.  Gradually add the sugar and vanilla, and beat until very stiff.  Fold in chocolate chips and nuts.

Put aluminum foil on the cookie sheets then spoon-drop cookies onto the foil.   Never use a greased pan.

Turn off oven.  Put cookies in.  Forget about them until the next morning.  Don't open the oven until ready to take the cookies out.

My Notes

Sometimes I use vanilla sugar and sometimes I use sugar and vanilla, as directed in the recipe.  Either way is fine, especially if your vanilla sugar is highly flavored. If you don't know how to make vanilla sugar, look at this post:  Vanilla Sugar and Grace Firth.

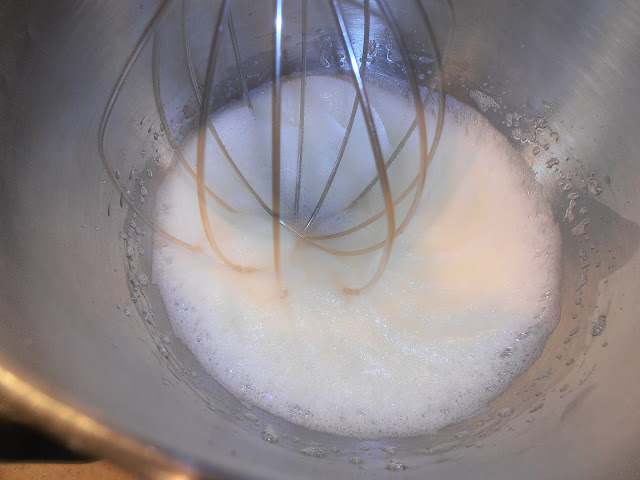
By "foamy", I used to think "as soon as I see a lot of bubbles in the whites."  But putting in the sugar at this stage gives a wetter mixture, so I wait until the bubbles are small and the whites are changing from yellowish to creamy.

Too soon!
Getting closer
Now is a good time to add the sugar.
When I add the sugar and vanilla, I truly just toss in a little at a time while the mixer is beating the whites.  Let them mix in and then toss in some more.  Since your aim is to have the whites "very stiff," you can take your time with their addition.

See the peaks?
Sometimes I use foil and sometimes I use my ceramic-coated cookie pan or my silicone baking sheet.  It helps to have the cookies on a flexible sheet because they like to stick to the surface.  If you are very careful you can use a spatula to get them off a hard pan, but they are delicate and easily broken.  It is easier to just peel them off the foil or silicone sheet.

As for the chocolate chips and nuts additions, I vary it according to my needs and tastes at the time.  Just chocolate chips (as I did for this example) is fabulous.  There is something about the slow bake time that transforms the chips into slightly softer versions of themselves, which is appealing. I used 1 cup chocolate chips for this example and thought the amount was just right.

Sometimes I use just nuts, and sometimes I put in crushed peppermint candies.  The candies are small and intense in flavor, so using 1/2 to 3/4 cup seems about right.  It is also fine to put in both chocolate chips and peppermints!  Whatever your taste buds desire.

When you drop the mixture onto the cookie sheet, pay attention to how big the portions are.  Too big means the heat won't necessarily get through to the middle of the cookie, which leaves a danger of eating uncooked egg white.  They don't have to be huge to be appreciated.

The pictures I have of the cookies here show the cookies being too big.  Not greatly so but there were some that had sticky centers.

These cookies don't spread and only slightly puff, so you can put them very close together on the cookie sheet.

Here is a pan before baking:

Make them a little smaller than this.
And here it is after baking (turned 180 degrees):

They have a rounder, softer look after baking.

The Verdict

These are so good!  You can vary the sugar level to make them less sweet.  The combination of crispy egg white, sweet, vanilla, and creamy chocolate is irresistible.  And they are light, which makes it easy to enjoy them and not feel full.

If your oven is big enough, make several batches at a time.  I did a triple batch after having a lot of whites left over from another recipe.

I have heard that people have piped the cookies for a more uniform, decorative effect.  This is great as long as the additions can fit through the nozzle.

I also know that there is a way to bake them in a low temperature oven, to make them quickly instead of waiting overnight.  Either way, you end up with a scrumptious cookie.

Merry Christmas!

Sunday, August 16, 2020

Egg Cake (part 2) -- A Medieval Syrian Recipe

Yesterday I wrote about my first attempt at making a medieval Syrian egg cake.  They turned out more like patties and I wasn't convinced I had done it right.  You can read about it here.

I tried it again.  This time I started with 1/2 pound of my homemade sausage (flavor blend #1; you can see the post about it here) and I didn't use cheese inside (honestly, because I forgot!).

First I browned the sausage, breaking it up into smallish pieces.  This was in a big frypan.  While the sausage cooked, I started heating up two small frypans.  I used medium low heat, 3 out of 10.  Once the sausage was ready, I put about one quarter into each small pan, which had been lighted coated with olive oil. 


Then I poured three beaten eggs over the meat in each pan.  This filled the pan nicely.


At this point I patiently waited for the eggs to cook all the way through to the top.  I was concerned about the bottom burning or scorching but I saw no signs of that happening.  It seems the medium low heat was just right.

The recipe says:
Fill the pan with the flavored eggs, leave until dried out, and overturn into a bowl.  Turn it over and fry the other side for a long time.
I wondered how I would do this bowl maneuver; my thought was that any runny egg bits would smear all over the bowl and be difficult to cook.  Now I think "leave until dried out" means really, truly wait until the eggs are cooked all the way through, but I didn't think that when I was right there cooking. 

I managed to wait for the eggs to be cooked all the way for one pan and almost all the way for the other.  Instead of using a bowl, I used the large pan that the sausage was cooked in:  I just flipped the egg cake over into the heated pan.


This is the one that I didn't cook until the top was entirely dry, and you can see that some of the liquid egg splashed out and made the cake look sloppy.  After that egg cooked, I simply cut it off with the spatula to tidy up the cake's look.

The second egg cake was flipped into the pan of the first egg cake.  It was nearly dry on top so there wasn't much that slopped and the cake fit in the pan nicely.


I cooked them both just a little while longer to make sure they were done, then I served them up with toast and the rest of the sausage on the side.  I sprinkled the tops with the spice mix I had used before and some Parmesan cheese.

Homemade Swedish rye bread.  I love cooking.

The Verdict

Definitely more cake-like in its form.  I believe I achieved what the recipe's author intended this time.  

The flavor was fine -- not overcooked eggs and still moist.  The spice mix and cheese on top were good, although I wish I had remembered to put the cheese inside the cake, too.  


The sausage added a nice spice "zing" that I had wished for the first time I tried the recipe.  It still could have used more spice and I think an asiago cheese would have been better.  To me, eggs are pretty bland and need more flavor to make them interesting.  

This would be good to serve to multiple people by cutting it into wedges.  I think it would work for a buffet brunch meal; you could adjust the flavorings to suit your guests just like you would an omelet.  

Success!  Both in flavor and in form.

Saturday, August 15, 2020

Egg Cake (part 1) -- A Medieval Syrian Recipe

Yes, I am still exploring Scents and Flavors, translated by Charles Perry.  It is worth it!

ISBN 978-1-4798-5628-2

This time my attention was caught by something that would be good for breakfast or as a main course at any meal, although it was offered in the section on Sour and Salty Pickles.  The category was

The thirty-eighth type is egg dishes and egg cakes, of which there are several kinds.

I chose recipe number 8.125 on page 253:

The second kind.

Take meat, pound, and boil.  When done, pound again finely, and fry in fat.  Mince parsley and put the mean and parsley in a bowl.  Break eggs on top and add hot spices, coriander leaves and coriander seeds, pounded cheese, and Ceylon cinnamon.  Fry this mixture in a pan with olive or sesame oil.  The pan should be round with a high rim and a long handle like the handle of a ladle.  Set on a charcoal fire, spoon in the olive or sesame oil, and wait until the oil is hot, then add the eggs and flavorings -- three eggs and a little of the flavorings and fried meat to each egg cake.  Fill the pan with the flavored eggs, leave until dried out, and overturn into a bowl.  Turn it over and fry the other side for a long time.  Prick with a knife and pour on a little olive or sesame oil and spices.  Turn over every so often as described until done.


My Redaction

1 pound ground pork
1/4 cup minced parsley
6 eggs
1/4 teaspoon pepper
1/4 teaspoon coriander
1/2 teaspoon cinnamon
1/4 teaspoon caraway
1/4 cup grated parmesan cheese
sesame oil


My Notes

Cook the meat in sesame oil until the pink is gone.  Mix the meat and the parsley in a bowl.

I took the comment about a little meat with three eggs to heart and put 1/3 of the meat mixture in a separate bowl, then cracked six eggs over the top of it.  Then I put the spices and cheese on top of that.


When I mixed them together, I found it was very wet and runny, and the spices clumped together.  It was hard to get it all to mix through thoroughly without lumps of flavoring in some parts and nothing much in others.

You can see the clumps.

I heated more sesame oil in the pan and poured some of the egg-meat mixture in.


It was very runny and made a puddle of eggs with chunks of meat within.  I strongly suspected this is not what was intended.

Turning them over was easy.  They looked like lumpy pancakes.


So I added the rest of the meat mixture to the egg mixture and tried again.


This time they were thicker patties and that made more sense to me.  I ended up making ten of these and serving them for breakfast with some fresh orange slices.  They were cooked only once on each side.  I tried poking a few and putting some sesame oil onto them.  I sprinkled the whole batch with more of the same spices, which were mixed in a little bowl.

If you look closely, you can see the sprinkled spices.
The Verdict

I just don't think I did these correctly.  The more I think about it, the more I believe I should have used a smaller diameter pan and filled it with just one egg cake.  It would be more like an omelet or a fritatta.  Then the whole thing could be cut into wedges or (if small enough) served to one person.

There were some issues with the meat.  Notice that the ground meat was in long tubes, which I did not break up much when cooking.  I think that was a mistake for the patties as I made them.  It might not be a problem with a thicker egg cake.

There was also a problem with the clumping spices.  Most of the egg cake was pretty bland but occasionally I would get a burst of spice flavoring.  In the future, I would use more spice and I would mix it and the cheese thoroughly into the meat before adding the eggs.

My guest taster and I enjoyed eating them, but we both wanted more flavor.  When we included the pickled raisins (see this post), it was much more enjoyable.

Neither one of us liked the cakes with the extra sesame oil poured on it.

Over all I would call it a success because it certainly wasn't a failure, but I am not thrilled with the outcome.  It needs to be done again.  Look again at tomorrow's post for part two.

The leftovers reheated nicely.  That was a bonus!