Friday, December 15, 2023

Fresh Mint Liqueur - From My Most Favorite Cookbook!

I reserve the last post of the year for one of my most favorite recipes.  This time I want to profile one of my most favorite cookbooks.  I realized while making one of its recipes that I have used it regularly for more than 20 years and have never been disappointed.  I've shared it with friends, talked about it with others, and tried a variety of its recipes.  That makes it long overdue for highlighting on my blog.

The book is Classic Liqueurs, The Art of Making and Cooking with Liqueurs by Cheryl Long and Heather Kibbey.  I came across it one day while traveling:  I needed a break from driving and saw a large tent sale of some kind in a parking lot.  What I discovered was a used book sale which was, of course, heaven!  This book just asked to go home with me, and I am so glad it did.

ISBN 0-914667-11-4
Mine is the 1990 edition, and I know there have been other editions since then.  The description on the back cover says it all:

The books tells, simply and exactly, how to make the world's most famous liqueurs as well as exquisite fruit liqueurs in the home kitchen. ... Their easy and natural approach results in high-quality liqueurs.

The chapters include the basics of liqueur making, making fruit liqueurs, and making non-fruit liqueurs, serving and mixing liqueurs, and cooking with liqueurs.  The authors' backgrounds include being a food consultant, an editor of restaurant magazines, teachers of cooking classes, and a food columnist. 

A liqueur consists of three basic ingredients:  alcohol, sugar, and flavoring.  (Although they list "alcohol, water, and flavorings" because they discuss how water quality varies and can influence the liqueur's final result.  Sugar is important, so I include it.)  The alcohols that I've used are vodka and brandy, but you can use other types like pure grain alcohol, cognac, whiskey, scotch, and rum.  

The flavorings vary between fresh and dried fruits, fruit peels, seeds, herbs, and spices.  They recommend other ingredients to adjust the body and smoothness of the liqueur, none of which I have ever used.  

Something you have to know about making liqueurs:  they require a lot of patience.  Quite often they are quick and easy to assemble (like the recipe I describe below) but then you have to wait, often for weeks, while the flavors infuse into the liquid.  After that, you have to wait for months for the liqueur to age.  Planning ahead if you are considering liqueurs as gifts is crucial.  

But oh, it is worth it.  Aging brings a smoothness to the flavor and the mouthfeel.  The taste sensations go from "good" to "sublime."  And while the authors mention that most recipes reach their peak flavor after a year of aging and hold that for up to three years, I have tried my liqueurs after they aged for a decade or more and still found them to be wonderful.  

One aspect of liqueur making that I love as compared to making wine or beer is how little space and equipment you need.  Long and Kibbey's recipes make small batches (which are easily doubled), so I have a few repurposed glass jars which easily tuck onto a shelf in a cupboard to be ignored while the required infusing and aging times are passing.  I have some cloth bags that I use for filtering and some metal mesh sieves that are in my kitchen for other purposes.  The items that take up the most space are the bottles needed for gift-giving.  I noticed I tend to hoard these, but still they don't take up much room in my storage areas.  I suppose if I wanted to make a lot of liqueurs at once I might be pressed for space, but it has never been an issue.  

The only complaint I have had with making small batches is that if a liqueur turns out to be quite exquisite, you only have a small amount of it.  Of course, that makes it even more precious!

The overall concept of liqueur making is simple:  infuse the flavors into the water and alcohol liquid (sometimes sugar is added at this time and sometimes later), strain out the solids, and finally, let the mixture age.  I recommend putting notes into a calendar to remind you when to check on them and move to the next stage.  I also put notes on the container, like the name and the starting/ending dates -- one friend writes the entire recipe she used as part of her container notes, which I think is an excellent idea.  The cupboard should be one that is dark, cool, and out of the way.

Once you understand these basics and have tried some recipes, you can confidently try your own combinations.  They didn't always turn out how I envisioned them, but they have always produced a liqueur that was worth drinking.  I've used fruits like loquats and mulberries, and fruit blends like guavas-and-limes and guavas-and-cranberries.  I've tossed in spices that I thought would go well with a particular fruit.  I currently have a fig leaf liqueur aging.  Once I had a large volume of maraschino cherry juice that I mixed with vodka and a little sugar.  My guest tasters liked it but suggested it needed something more to make it "just right."  One taster figured it out:  a little bit of almond extract did the trick.  

The recipe I want to share with you is a repeat of one I made in 2002 that turned out to be wonderful:  Fresh Mint Liqueur on page 54.

1 1/4 cups fresh mint leaves, slightly packed

3 cups vodka

2 cups granulated sugar

1 cup water

1 teaspoon glycerine*

8 drops green food coloring*

2 drops blue food coloring*

*I skipped these ingredients.

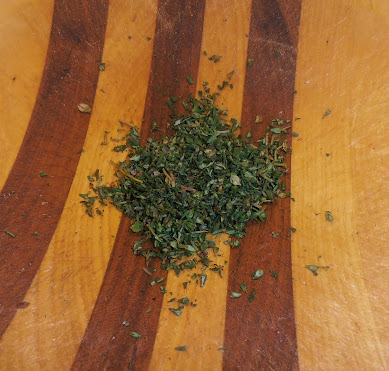
The mint variety is an important choice.

Wash leaves in cold water several times.  Shake or pat dry gently.  Snip each leaf in half or thirds; discard stems.  Measure cut mint leaves, packing gently.

Combine mint leaves and vodka in aging container.  Cap and let stand in a cool place for 2 weeks, shaking occasionally.

After the initial aging, pour liqueur through colander into a large bowl to remove the leaves; discard leaves.

In a saucepan, combine sugar and water.  Bring to a boil, stirring constantly.  Let cool.  Add cooled sugar syrup to mint liqueur base, stirring to combine.  Add glycerine and food color; pour into aging container for secondary aging of 1 to 3 more months.

My Notes

Mint comes in a wide variety of flavors, so if you have the opportunity to choose, consider what you really like about mint.  The first time I made it, I used a variety called chocolate mint (the stems are brownish), which has a mint flavor without the bite of spearmint or peppermint.  I really like that its mint flavor seems deeper, too.  I still have chocolate mint in my yard, so that is what I used here.  Timing is important, too, when using home-grown herbs.  I think spring or early summer is a good time to harvest them.

This is a single batch of the liqueur base:
Clamp lid, "lightning lid", jars are wonderful for this.
So I doubled it:
This is after the initial infusion period.  Notice how the color has changed, and the batch has a lovely mint scent:
This is filtered:
Making the sugar syrup:
In the beginning
Boiling and getting ready to cool.
I have never felt the need to add food coloring to my liqueurs.  I like them just the way they are.  Also, I have never used glycerine.  At first because I just couldn't find it in the stores; later, I felt that the sugar syrups usually give a good mouthfeel.  If they don't, I add a little more sugar, and that fixes the problem.

And here it is in its aging container.  The date is when the final aging began, not the initial infusing.
Planning in June for a December post.
The Verdict

The first time I made this I was new at liqueur-making, and I was astonished and pleased with the result.  The best way to describe the flavor is:  like drinking a candy cane with a kick!  Sweet (but not too sweet), minty in a wonderful way, and then the warmth of the alcohol washes over you.  It was one of the exquisite liqueurs I have made over the years.

So having a large amount of chocolate mint growing in my yard inspired me to try it again.  Doubling the recipe was my choice because of how good I expected it to be.

A close-up of the color with no food coloring added.

Liqueurs are for small quantities that are sipped and appreciated.
After about 5 months of aging, I tasted it.  It was minty without a bite, sweet but not too much so, a good mouthfeel, and reasonably smooth.  I think all of it will improve with more aging.  The double batch made almost 1/2 gallon, which will last me a long time unless I start giving it away.  Christmas is soon, so I just might.  There is plenty to share!

Success, again.  So far it is not at the epic level the first attempt was, but time may change that.  

Others of Long and Kibbey's recipes I've tried are:  apricot, lemon, peach, plum, taboo (citrus and vanilla, one of the epic liqueurs), and crème de cacao (but with cocoa powder, not the liquid chocolate they suggest).  I've also used their recipes as inspiration for other fruits, herbs, and spices in liqueurs.


Friday, December 1, 2023

Zīrbāj with Quince -- a Medieval Chicken Stew

I was out driving one day and passed a farm stand selling, among many other things, quinces and pumpkins.  The pumpkins were an edible variety, so I purchased one to make another batch of the Pumpkin Tian.  (Click here for the post.  This time I included zucchini, onions, and corn.  It, too, was good.)

I knew I wanted to do something with quinces, but I really didn't want to make candied quince, quince paste, or any other "usual" recipe involving quinces and great quantities of sugar.

This book, Medieval Cuisine of the Islamic World by Lilia Zaouali, offered up an intriguing choice:  a meat and fruit stew that included quinces, apples, and jujubes.  I happened to have all three available, and I chose chicken as my meat.

ISBN 978-0-520-26174-7

The recipe is on page 80; it is number 19 in the Sweet-and-Sour Dishes chapter.

Zīrbāj with Quince

Take some cooked meat, add some coarsely crushed chickpeas, and cook [some more]; then add the broth of the meat, vinegar, honey or sugar, some saffron, some quinces [cut] into pieces, and some new apples, also cut into pieces.  If you like, [put in] some peeled almonds and some jujubes, or else pistachios and mint.  Let thicken over fire and serve.

Another version:  follow the same procedure, with a little starch to thicken [the sauce]; the color remains yellow.


My Redaction

1 1/2 pounds chicken thighs, skinned

1/3 cup dried garbanzo beans

3 quinces

2 apples

12 dried jujubes

1/2 cup chopped almonds

3 tablespoons honey

4 tablespoons balsamic vinegar

1 tablespoon saffron


Since the recipe called for cooked meat to start, I put the chicken thighs in water (about 1/2 way up the sides) and simmered them for 20 minutes.  The pan was covered.

In the meantime, I needed to crush the garbanzo beans.  My first thought was to use a mortar and pestle, but that resulted in beans flying all over the kitchen.  (!)  So I turned to my coffee grinder that is not allowed to touch coffee beans, and it did a good job.

Before
After
The recipe didn't specify if the beans were to be dried or cooked, so after I ground them, I soaked them in 1/2 cup hot water while the chicken was cooking.  

When the chicken was done, I deboned it.

I changed the procedure a little at this point.  I was concerned about cooking the beans with just the meat -- it didn't seem like enough water for them.  So I mixed the beans and their water with the deboned meat and its water, simmering for another 10 minutes, covered.

While this was cooking, I cut the quinces and apples into bite-sized pieces.  They went into a bigger pan.  Then I added the chicken/bean mix along with the jujubes, almonds, saffron, honey, and vinegar.
After mixing them well, I thought the liquid level was too low, so I added a little bit more water.
I set the fire to very low and simmered the mixture for 45 minutes covered and another 45 minutes uncovered.
At this point it was thick, the fruit was soft, and I thought it was ready to go.

The Verdict
My guest taster and I had just the stew for dinner.

Garnished with chopped almonds
We liked the flavor:  meaty and fruity, savory and sweet.  The jujubes added an element of bitter (warn your table guests about the seeds!), the quinces were a little sour, the nuts added a needed crunch.  I liked the saffron, honey, vinegar mix but wished it had more of a sweet and sour bite to it.  I think perhaps another vinegar, like apple cider or red wine, would have been better for this.  

Usually you mix the honey and vinegar in a 1-to-1 combination to get a good sweet and sour effect, but I put in more balsamic than honey.  I think that was right.  Even more vinegar would have been fine.

My only complaint was that the chicken was overcooked.  My guest taster did not agree.  I wanted the meat to be firmer.  If I did this again, I would not pre-cook the chicken, knowing that it had plenty of time to get cooked during the last phase.  I would start with chunks of chicken meat, already deboned.

Also, I would consider cooking the entire mixture only 45 minutes total with the lid off.  

I used an entire tablespoon of saffron but the stew did not turn out yellow.  Should I have used more?  I really can't say.

The leftover stew reheated nicely for lunch the next day.

Success!


Friday, November 24, 2023

An Update on the Medieval Lebkuchen

Previously I tried a recipe for Lebkuchen (click here to see the post) that suggested the dough and the cookies get better with time.

So I baked a batch and put them away in a dark cupboard.  I also put away two large containers of dough.

It has been three months, so time to check in on them.  How are they doing?

The cookies looked the same as when they were put away:

Three months old
The dough looked the same, too!

No mold on the surface.
My guest taster and I tried the cookies.  We could not detect anything different from what we had tried before.  Spicy, a little chewy.  (Still almost too spicy for me.)

So I took some of the dough from the top and shaped it into a short log.


I felt that the dough was drier or less tacky than it had been previously.  I could shape it easily with my hands without getting all covered in dough.  

Then, with a greased knife, I cut the log into approximately 1/4 inch-thick slices and prepared to bake them.  Forgive me; I was not trying for beautiful cookies at all, and it shows.

Don't judge!
I baked them at 350 degrees Fahrenheit for about 10 minutes.  That is when they looked like they were done.


My guest taster and I both agreed that these cookies were fluffier (less dense) than the previous batch.  We also felt that the spices were less intense, which I appreciated very much.  I liked them!

So we enjoyed a few then put the rest into the container with the first batch, marking them separately so I can track how each batch does over time.  My calendar is marked to check in on them in another 3 months.

So far, so good!

Wednesday, November 15, 2023

Pumpkin Tian

My friends MS and SS gave me this interesting book they found on a trip:  Simple Cooking by John Thorne, which was published throughout the 1980s.

ISBN 9780865475045

Mr. Thorne has written a book where he gives us his opinions of cookbooks, the people who write them, and ways of cooking during a time of changing goals and techniques due to technology and convenience.  He makes some good observations along the way:

My goal as a cook has always been not so much to attain some specific sense of mastery as to be able to go into the kitchen, take up what I find there, and make a meal of it.

If you're in sympathy with this notion, you'll know from your own experience that such simple cooking isn't easy cooking, or the supermarkets wouldn't be as stuffed as they are with convenience foods.  You may also have discovered that an impromptu, impulsive, and ever-adaptive cooking style is not one that the cookbook - of whatever sort, it seems - is by nature equipped to explain. 

He shares with us the idea that cooking is not so much the following of a recipe but an understanding of the concepts, and even then knowing that it is (and should be) an art:  "opinionated, argumentative, contradictory, with each cook making the exact same 'traditional' dish in his or her own particular way".  From this, we transcend the constricting recipes:

Observing, listening, tasting, we feel inside ourselves a shifting of that complex balance of option, opinion, and taste - the living logic of the dish - as it settles itself into the shape that we will want to make.  And then we find ourselves on the other side - the before side - of the recipe, which is just where, I think, a good cook wants to be.

I know that I have achieved that level of cooking, at least sometimes.  I see the concepts of the recipes in front of me, and I occasionally feel like I can take those concepts and use them with other ingredients not called for on that piece of paper.  I think my experience redacting historical recipes that come with minimal instructions and often no measurements helped pushed me to that level:  you have to use your imagination and your sense of what is right.  When you listen to that, you are more likely to reach success.

Mr. Thorne includes a chapter titled "The Tian", which describes this Provençal dish as

a vegetable casserole, a modest penny-stretcher meant, whether served hot or cold, as the main course or a side dish, to provide the bulk of the meal at the least possible cost. ... The defining characteristic of a tian -- slow cooking in olive oil and seasonings -- brings out the best of taste and texture in a host of vegetables. ...

Originally, the tian was a simple peasant dish of vegetables that took its name from the vast, heavy earthenware terrine it was cooked in -- a tian. 

A look around the internet shows a variety of recipes and the adaptability of the technique.  No pumpkin?  Use whatever vegetables you have on hand, like spinach, Swiss chard, red bell peppers, zucchini, eggplant, mushrooms, or tomatoes -- singly or mixed together. You can include other ingredients like rice, cheese, eggs, chickpeas, or bread crumbs.  For seasoning, pick whatever you think would go well with the vegetables you have, and that includes fresh herbs, wine, milk, cream, and spices.

Mr. Thorne gives us citations for other cookbooks and chefs to explore for more ideas.  Since the concept of a tian is an old one, there are many ways to approach it, and many different outcomes that can be like a gratin or more like a frittata.  Ratatouille can fit into this category (and so I think of the cute and fun movie!).

I chose to make his recipe that focuses on just one vegetable, the pumpkin, and aim to have it "cooked to perfection."  I love pumpkin and this looks just amazing.

Pumpkin Tian (pgs 43-44)

One small pumpkin (3 to 4 pounds)

1/4 cup flour

6 cloves garlic, finely minced

Generous pinch fresh thyme (approx. 1 teaspoon)

2 tablespoons freshly grated Parmesan cheese

Salt and freshly ground pepper

1/3 cup olive oil


Preheat oven to 325 degrees F.  Remove seeds, string, and rind from the pumpkin flesh, then cut flesh into 3/4-inch cubes.  Set the pumpkin cubes in a colander and toss with the flour until the cubes are coated and the excess flour has escaped.  Toss again with garlic, thyme, Parmesan chees, and season with salt and pepper to taste (pumpkin is sweet and bland and requires a fat pinch from the salt box).  Rub the interior of a casserole with a generous amount of the olive oil, pack in the floured and seasoned pumpkin cubes, and dribble the remaining oil evenly over the top.  Set in the preheated oven and bake for 2 to 2 1/2 hours.  The top of the dish will form a dark rich crust; the pumpkin within dissolves in the mouth into molten succulence.

My Notes

The author comments, 

Although pumpkin is quite fine in this dish, the actual squash used for it in Provence is courge rouge, which is similar but more flavorful and less sweet.  It is just now starting to appear in American markets, somewhat pumpkin-shaped but of a deeper, red dish hue.  

I know from experience that the pumpkins in the market are intended to be for jack-o'lanterns and not for eating.  They taste terrible!  It was after Halloween when I went to look for pumpkins for this recipe, so I hoped to find one labeled as a sugar pumpkin or pie pumpkin.  

Alas, no such luck.  All items that looked like a standard pumpkin were missing from the store's produce section.  However, I recalled the author's comments about courge rouge, and I looked for something like that.

What I found was kuri rouge, or red kuri squash.  Also known as the Hokkaido pumpkin, it is supposed to be sweet and the cooked flesh tastes like chestnut.  The skin is edible after cooking.  I decided to give it a try.

I bought three (at nearly 5 pounds total) but found that only two were needed to fill my casserole dish (about 3 1/2 pounds total).  

Even though the skin is edible after cooking, I chose to follow the instructions and peel it.  It was very easy to peel with my veggie peeler; then I trimmed off the ends, cut it in half, and removed the seeds and strings.

Peeled and trimmed.


I'm saving the seeds for eating and possibly planting.  Here are the pumpkin pieces:


Dusted with flour

Seasonings on top
I put in about 3/4 teaspoon of salt.  
Well-mixed, packed into the casserole dish, and oiled.  Ready for baking.

I cooked it for two hours.  Note that the dish is not covered, as the idea is to cook off much of the vegetable's moisture.  I think the oil will keep it from becoming dry.

The Verdict

While it was cooking, my kitchen smelled wonderful!  The garlic came through the most, but it had my mouth watering and I wasn't even hungry.

Mmmmmmm!
The pumpkin cooked down further than I had expected.  I think I could have used the other kuri, overloaded the dish, and still have it fit after cooking.

I thought the crust would be more developed, which it might have been had I cooked it another 1/2 hour as was my option in the recipe.  But this looked fine to me.

My guest taster and I ate it as a light dinner -- just the tian and wine.  It was excellent.


The pumpkin was soft and flavorful, although the parts on top were a bit crunchy, making the whole dish more interesting.  Not a soft dish, but a mixture of soft and not.  The garlic had cooked to a mellow level, and the thyme added a nice understated note.  My guest taster loves salt, and he thought it had just enough.  I could not taste the pepper, but I suspect it added some depth to the mixture.

We also thought the Parmesan cheese added some crunch to the dish.  We weren't sure, but I think the cheese on the surface also got crunchy.  

It was not a spectacular dish.  It was flavorful, and I can see how it would be a good main dish, possibly with bread or buttered noodles and some fruit or a salad.  I can also imagine it as a side dish to some roast meat, like chicken.

My only criticism was that I think I could have used 1/4 cup of oil instead of 1/3 cup.  The oil puddled up on my plate and there was some in the bottom of the casserole dish.  I know we needed at least 1/4 cup to keep it moist, but I think we didn't need 1/3 cup.  I'm not fond of food that seems greasy, and while this wasn't really greasy, I would have liked to reduce the amount of leftover oil.

Not that this stopped us for thoroughly enjoying it.  What started out as "We will taste it to see how it is." turned into "We ate it all because it was so good."  It was a lovely dinner. 

Success!

All gone!


Wednesday, November 1, 2023

Lengua en adobo, Marinated tongue -- a Pinedo recipe

I wanted to make a Pinedo recipe that used a different ingredient than the recipes I had been choosing.  I know a local store that includes a butcher shop with high-quality items, so this recipe with tongue was a solid possibility.  I was pleased to find tongue for sale in their store.  The recipe is on page 146.


My Translation

Marinated tongue.

(French style.)

         Toast some mulatto chiles that will be ground with garlic and oregano from Castilla [thyme]

         Olive oil, vinegar and butter are put in a saucepan. Then the chile is added, taking care that it does not burn and has some broth left to serve it.

         In this marinade, put the cooked and sliced tongue.


I have not eaten tongue often, but a friend who lived on a cattle ranch would pressure cook one and share it with me occasionally.  And once I had marinated tongue as an appetizer at a Basque restaurant.  Both experiences were positive, so I wanted to try cooking tongue on my own.

My Redaction

3 pound cow's tongue, washed well
2 cups pinot noir wine
2 cups + 1/2 cup apple cider vinegar
6 cups water (or to cover)
2 ounces guajillo chiles, toasted, stemmed, seeded, and ground
5 cloves garlic, chopped
3 tablespoons fresh thyme, finely chopped
2 tablespoons butter
2 tablespoons olive oil
1/4 teaspoon salt


Place the tongue, wine, water, and 2 cups vinegar in a large pan.  Bring liquid to a boil, lower to a simmer, and cook for 1 1/2 hours.  Turn the tongue over and cook for another 1 1/2 hours.


While the tongue is cooking, toast the chiles, then grind them until mostly powdered.  Finely chop the thyme.  Chop the garlic cloves.
Chiles toasted, stemmed, and seeded
Ground in a small coffee grinder.
I used this much thyme.  Consider using more.
Put the chiles, thyme, and garlic into a sturdy bowl or mortar.  Using a pestle or similar object, pound and mix the ingredients until they form a paste.  Set it aside.

Chiles, garlic, and thyme, ready to be pounded.
Pounded.  The moisture from the garlic eventually made it a paste.

When the tongue is cooked, remove it from the liquid and allow to cool just to the point where it is easy to handle.  Pull the skin off and discard.  (The internet tells me that if the tongue cools too much, it is hard to remove the skin.)
Barely cool enough.
Skinned.

If you need to let the tongue cool more, let it cool now.  Then slice the meat very thin, cutting across the grain whenever you can.
In a saucepan or frying pan, melt the butter, then add the olive oil.  Gently sauté about 2/3 of the chile paste along with the salt.  When the garlic starts smelling very good, add 1/2 cup vinegar.  Simmer for several minutes to blend the flavors, then add the tongue a few pieces at a time.
The sauce.
When the pieces are heated through and coated with the marinade, remove to a platter.  Repeat with the other pieces, however many you want to serve.  (Three pounds is a lot!  You might want to save some for later.)

The Verdict

My guest taster and I had the tongue as the main part of our meal -- we had some sourdough bread along side it and that was about all we ate.  (There was the rest of the pinot noir, of course!)

We tried it "as is" and also on top of small pieces of bread.  We compared its flavor to pieces of tongue that were warmed up without being in the sauce.


We liked it!  The sauce was very strong in flavor -- mostly chiles and garlic, but the thyme did add a layer of flavor that was subtle, more like a background flavor.  I think I would have liked to taste it more for balance, so if I did this again, I would perhaps double the amount of fresh thyme.  

The tongue itself was mildly flavored.  I couldn't really taste the wine and vinegar, but I'm pretty sure they made the meat better.  Some parts of the tongue were chewy and some were more tender.  I liked both, and so did my guest taster.  

The tongue with the sauce was very good.  The sauce added a kick and a depth to make the meat much more interesting.  I thought eating it with a bite of bread was best because the bread added a tang that was different from the vinegar in the sauce.  It also added a different texture that I felt on my tongue (as I was eating the tongue!).

My guest taster and I both felt the spiciness level was just right for us -- spicy from the chiles but not too much so.  Any more and we would be distracted from the flavors of the meat and sauce.  I gave some slices to another guest taster who wished it was spicier.  As I have discovered, everyone has their own preference for the fire of chiles, so adjust your choices accordingly.

Success!  We had more of it later on, reheated in the sauce, which was still good.  Putting a few slices on a sandwich was also enjoyed.  I recommend it heartily.

 I'm not sure why Miss Pinedo called this "French style", as I would consider the use of chiles to be more Mexican in style.  Perhaps it was wine and vinegar liquid for cooking the tongue?  Or the use of garlic and thyme with the chiles.  Still, the flavor combinations were just right.