Sunday, April 16, 2017

Royal Paskha -- A Russian Easter Treat

Happy Easter!

I looked through my cookbook library to find something interesting and fun to make for my Easter post and found an appealing recipe in Russian Cuisine, by Lydia Lyakhovskaya.  I received this book as a gift when friends traveled to Russia to adopt their daughter.  I believe it was originally published in Russian and then translated to English.

ISBN 5-8194-0010-0
I used this book before when I made a Baked Cottage Cheese Pudding.

Yesterday (because this is a "make it ahead of time" dish) I put together this recipe,

Royal Paskha  (page 132)

2 cups butter
5 or 6 egg yolks (I used 5)
2 cups sugar
4 cups cottage cheese
1 1/4 cups heavy (whipping) cream (I used 1 cup)
100g (3 1/2 ounces) each raisins, almonds, and candied peel
cardamom or vanilla


Rub butter with sugar until white gradually adding egg yolks one at a time.  Rub paste until sugar completely dissolves, add vanilla or minced and sifted through a fine sieve cardamom for flavour.  Add cottage cheese twice grated on a fine shredder, raisins, almonds, candied orange peel or grated lemon rinds.  Mix thoroughly, add whipped cream and stir from top to bottom.  Fill the paste into a special paskha mould over a slightly wet gauze, cover it with a saucer, press by a small weight and refrigerate for 12 hours.

My Notes

I let the butter come to room temperature.  The almonds had been blanched so I chopped them and toasted them.  It seemed to me that the extra nutty flavor would be a positive addition to the mix.  I used 2 ounces because that is what I had.


I chose to use cardamom and decided to use 1/2 teaspoon.  Also I had no candied orange peel so I used the finely shredded peel of one medium-sized lemon.

Here are the butter and sugar before they were "rubbed" together using the mixer.  I was curious as to how white they would actually get!

Yes, that is one entire pound of butter.
This is their level of whiteness.  It was surprising to me.  This was after I let the mixer run and run and run just to make sure the ingredients were well mixed.

I thought the butter would make it yellower.
While the machine was still running, I added the yolks one at a time and allowed each to be thoroughly mixed before adding the next.

Look at the volume in the bowl.  That will change soon.
I didn't check that the sugar was dissolving; I took it on faith that it would at some time.  The cottage cheese was very wet on top which caused me to use less cream when its time came.

Everything but the cream makes a full bowl.
I chose not to grate the cottage cheese since it was small curd and really wet.  I hoped the long time in the mixer would break it up and incorporate it well.

One note about the cream:  the recipe called for heavy cream (30%) and the translation said to mix in the whipped cream.  I had seen another recipe that called for the cream but did not ask for it to be whipped so I just poured it in.  Besides, I didn't think my mixer's bowl could take any more volume.  And that the mixture would be weighted made me think it wasn't a good idea to whip it.

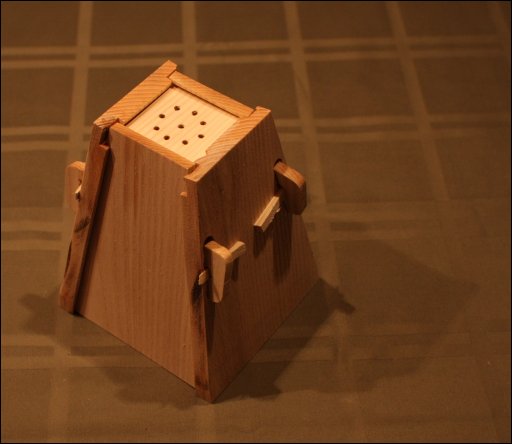
I should have made a half recipe but I didn't.  My goodness, it made a large quantity of paskha!  I don't have a traditional paskha mould, although the other recipe I saw mentions you can use a new, clean, large ceramic flower pot.  The traditional shape is a pyramid.

From:  https://erik.nygren.org/category/crafts-food.html
So I used one medium mixing bowl and two smaller dessert moulds.  I lined the moulds with damp cheese cloth and the mixing bowl with a damp white cotton cloth.

Mixing bowl.
Full mould.

Partially filled mould.
Once I found a place for each in the refrigerator, I placed a weight on top of the bowl and one mould.  The other mould was only partly filled so I decided to see what it was like without a weight on it.

The weight was heavy but low so it fit under the shelf.
The next morning I removed the two smaller versions and put them on plates.  Each required a little tidying up (wiping the edges of the plates, smoothing out some bumps and dips on the paskha) and then I decorated them with a few raisins, fresh mint leaves, and slivers of lemon peel.

Rounded fluted edges
From above
Sharper fluted edges


From above
The Verdict

I expected it to be heavy.  I expected it to be rich.  I expected a sweet cheese "pudding" of sorts.

I was surprised!  It was much lighter than expected, probably because of the close to 10 minutes of continuous beating with the mixer.  It was rich but not overwhelmingly so.  The three guest tasters all agreed it was good for a few bites and then the richness kicked in and our taste buds were satisfied.  Like a good cheesecake, a little goes a long way.

The flavor was delightfully lemony.  The cheese and butter provided a creamy base and the sugar made it lightly sweet.  I was glad I toasted the almonds because they contributed a little umami to some of the bites.  I wish I had put in more cardamom (1 teaspoon?) because I couldn't really taste it.  However that might have been too much competition with the lemon.  The raisins were an occasional chewy counterpoint.

The texture was grainy visually but nicely smooth to the tongue except when encountering the nuts and raisins.  They kept it from being too uniform in texture.

The weighted mould's paskha seemed to have shaped to the mould better than the unweighted one.  Both were thicker and drier than I had expected when I ladled the mixture into the containers the night before.  I was happy to have used the cheesecloth for both as it made getting the paskha out of the mould easy.  I just jiggled the cloth gently all around the edges, put the plate on top (with the cloth out to the sides), and flipped the whole thing.

I have not yet turned out the larger bowl of paskha.  I think I will take it to work tomorrow and share the goodness.  If I were to do this again I would make a half recipe (3 yolks) unless I knew I was feeding a crowd.

Success!  Wonderfully so!

Sunday, April 9, 2017

Egg Preservation -- Month Three

At the end of March I pulled out two more eggs from my egg preservation experiment.  (See original post here.)

The "crust" had formed on the surface again.


But it broke up easily and I picked out one egg coated in Vaseline and another that was left plain.


The shell of the coated egg felt like a normal eggshell.  The plain shell felt very rough.

Vaseline on the left.
I had originally decided to put them into some sort of baked good but I had several guest tasters and they wanted to try the eggs just as eggs, so I cracked them into a bowl. I really wanted to see what they were like before committing them to the fry pan.

I noticed that the whites were very runny for both eggs.

Vaseline egg

Plain egg on the right.
I also noticed that the shells felt like they cracked easily; in fact, more easily than I expected and the shells felt "thin."

They looked good and smelled good so I went ahead and fried them.  I tipped the eggs from the bowl into the pan and, in both cases, the yolk broke.  I was being careful so it felt like even the yolks were fragile.


I cooked them to "over medium" and served them up with no seasonings or sauce.


The Verdict

To be honest, I could taste the cal.  However everyone else thought they tasted just like regular eggs, including the one guest who is a "super taster".  So maybe my imagination is working hard, but I swear I could taste a mineral addition with every bite.

I would not want to eat them without salt and/or ketchup but the others were quite happy with them as they were.  We declared it a success and expressed amazement that the eggs have been sitting, unrefrigerated, for three months with the only downside of really runny whites.

Saturday, April 1, 2017

Dulcia Domestica -- Roman Empire "Dates Alexandrine"

I have returned to my The Roman Cookery of Apicius book.  This time I have a dessert made with dates and almonds and cinnamon.

ISBN 0-88179-008-7
"Dulcia Domestica" means "homemade sweets".  The author who translated and redacted the recipes, John Edwards, said in the footnotes,
The word Alexandrine when used as an adjective by Apicius implied "expensive" or "best quality."  Alexandria itself was the great port of arrival for spices from India and China.

Dulcia Domestica:  The Original Recipe (Translated)

Take palms or dates, with the stones removed, and stuff them with nuts or nut kernels and ground pepper.  Salt the dates on top and bottom and fry in cooked honey, and serve.

Mr. Edwards also comments
In the preparation of sweets, Apicius used the word "pepper" loosely.  In the first century A.D., cinnamon and nutmeg were thought by the Romans to have common points of origin with pepper.  They were, in those days, prohibitively expensive.
So in his redaction, Mr. Edwards has us using cinnamon.

Dates Alexandria (page 173)

20 whole dates
20 blanched almonds
1 t. cinnamon
butter
salt
liquid honey

And olive oil for the pan
Remove pits from dates.  Roll almonds in cinnamon and stuff one in each date.  Place dates on a greased pan.  Sprinkle salt over the dates, then coat each one with honey.  Glaze in a 450 degree F oven for 10 minutes, then serve.

My Notes

I bought pitted dates, which was really convenient.  To slice them open to allow the almonds, I inserted the knife into the side hole and cut outwards.  This kept the date from being crushed by the knife.

It was easy to blanch the almonds.  The benefit was that the almonds were still damp so the cinnamon stuck to them well.  You really want a light dusting of cinnamon all over the almond.  Some will rub off on your fingers while stuffing and some will rub off to the inside of the date.

I kept rolling the almonds in the extra cinnamon as I was taking some out.
Some dates were big enough that I put in two almonds to make it look filled.

I think they would be better pushed closed, if possible.
I used kosher salt and sprinkled just a little over the tops.  None on the bottoms.

A little more is acceptable.
The pan was greased with olive oil (I think this is more realistic than using butter).

Then I drizzled each date with a bit of honey.  I did not try to coat each one thoroughly.

Just a zigzag drizzle across each.
I cooked them in a toaster oven.  Because of the close quarters and high heat, I cooked them for 5 minutes instead of ten.

I pulled it out when the honey smoked a little.
After they came out of the oven, I let them cool to the touch.  But get them out of the puddle of honey before it gets too cool, or they will stick to the pan despite the olive oil.

The Verdict

Confession time:  I made these once before but didn't document it.  They were good!  This time around didn't disappoint, either.

The nice part about cooking them in the honey is that the honey gets less sticky, making it a pleasure to eat the dates instead of a mess.

I loved the crunchy texture and cinnamon, sweet date flavors.  At first I thought the honey glaze was going to be too much sweet, but it really was just a back up flavor.  It made the overall taste deeper.  But what really startled me was the addition of the salt.

I know salt and sweet together can be good.  In fact, a little salt can make the sweet taste sweeter.  But this was a stronger salt sensation and, once I expected it, was a lovely complement to the sweet.  It reminded me a little of kettle corn, a sweet and salty crunchy version of candied popcorn.

Dates Alexandrine were a solid success.

Now here is the good part:  The second day they tasted even better!  What I noticed is that the salt dissolved into the honey and spread out over more of the date.  It was a lighter salt experience but still good.

I shared the dates with my colleagues.  I had wanted more cinnamon flavor (as did my guest tasters at dinner) but several of my colleagues admitted to disliking cinnamon.  However they did like the dates as given to them and thought the amount of cinnamon was just right.

So it is your choice!  If you think your diners love cinnamon, consider putting on more on the almonds or sprinkling some into the dates.  If you are not sure, go with the recipe.

I liked the author's idea to bake the dates.  However if I were to do this as a public demonstration, I would fry them as the original recipe indicates.

Finally, I would like to try this with pepper only, or a mixture of cinnamon and pepper, some time.  I think the bitter from the pepper would be intriguing and the whole flavor surprising.