Showing posts with label fire. Show all posts

Friday, March 15, 2024

A Little Foodie Fun, with Fire! Mole Colorado

It was another cold and rainy day, so I made a fire in my fireplace.  At this point, it is almost a reflex to want to cook with that fire, so today I decided to create a mole colorado, Oaxacan style.  (Pronounced "moh-lay".)

A mole is a sauce, and this particular one needed to be tomato-based.  My challenge was to create it without a specific recipe.  I wanted to make it using general guidelines for moles and many of the traditional ingredients as I had read about them.

The guidelines are:

  • Moist ingredients (tomatoes, onions, garlic) - char the exterior on a comal or dry skillet
  • Dry ingredients (chiles, spices, nuts, seeds) - toast on a dry skillet
  • Blend everything together with just enough water
  • Simmer until the flavors meld and the sauce thickens

Some of the ingredients I picked were not appropriate for charring or toasting, so I held those out until the blending step.  But I get ahead of myself.  

My Creation

1 large brown onion, unpeeled
4 Roma tomatoes
3 cloves of garlic, unpeeled
3 New Mexico chiles
3 costeño chiles
1/4 cup white sesame seeds
1-3 inch long stick of cinnamon plus another 1/2 teaspoon ground cinnamon
3 allspice berries (you might want more)
1 ounce bittersweet chocolate
1/2 cup raisins
1/4 teaspoon salt
about 2 1/2 cups water

First I needed to char the tomatoes, onion, and garlic.  The onion was big, so I cut it in half and placed the pieces cut-side-down on the dry skillet.  The tomatoes went whole over hot coals.  The garlic cloves were also placed in a dry skillet.
Coals cool down and sometimes they do that faster than I anticipate, so the garlic and the tomatoes got moved around as needed to find the heat.  You can see in the picture above that the live fire was closest to the pan with the onions, so that is where the garlic and tomatoes ended up.

I wanted to do more than just char the onion halves on the cut side.  I wanted them to be pretty cooked once they were ready to leave the fire.  So after they cooked on the cut side, I turned them to cook on the skin sides.  In all, they were on the fire the longest and were soft almost all the way through.  They also got a nice char on the cut side.


I charred the garlic with their skins on until the skins split.  This had cooked the garlic to soft.  The chiles were charred in the dry skillet until they had turned mostly black and puffed up.

The big chiles are New Mexico, the small are costeño.  Note the garlic cloves.

The tomatoes didn't get much charring but they did get soft and the skin broke up.


I toasted the sesame seeds until they smelled nutty, which also made them more ivory than white in color.  Toasting the cinnamon stick didn't change its appearance much, but it smelled more spicy than usual.  The whole allspice berries also smelled a little fruity once toasted.

Use more allspice

Once everything was done with the fire, I moved to the kitchen.  I removed the peel from the onion and the garlic cloves.  I did not remove the stem ends from the tomatoes.  I pulled off the stems from the chiles and removed their seeds.  

All the ingredients went into the blender *in batches* with some water to get it all moving.  This included the chocolate (broken into pieces) and the raisins but not the ground cinnamon and salt.

The first batch needed one cup of water.  Once that was blended, I poured most of it into a kettle.  I left some behind to act as liquid for the next batch, which only needed 1/2 cup water to get it going.  The third and fourth batches didn't need more water at all when I left some of the previous batch with them.  Then I used about 1 cup water to rinse out the blender jar.

All batches went into the same kettle, then were stirred together.  This means it is not important what ingredients went into which batch -- as long as they were blended to smooth each time and added to the kettle.  By "smooth", I mean that there were no visible chunks, even though the mixture looked grainy.  The chiles became tiny, dark flakes in the liquid, so it wasn't perfectly smooth looking.  

This is smooth!

The kettle went onto the fire, where I put coals below it, a few around it, and it was near the live fire.  I stirred it often.  I also rotated the kettle so the hot side near the live fire was switched with the cooler side away from the fire.  I added more coals around the edges as needed.

It started steaming quickly.  Sometimes it bubbled and blurped on the hot side, reminding me to stir it more.  

See the blurp?

I tasted it occasionally.  Before cooking, the dominant flavor was raw tomato, bright and acidic.  I knew the mole had to cook at least until that raw tomato flavor was gone.  That took about 30 minutes.  Then the dominant flavor was onion (it was a very large onion), and I wanted to cook the sauce long enough to get that onion flavor blended with the others.  That took about another 30 minutes.

After 1 hour of cooking, I decided it needed more cinnamon, so I added 1/2 teaspoon ground cinnamon (untoasted) and it needed salt, so I added 1/4 teaspoon.  I wish I had added more allspice, but I was reluctant just in case I over-seasoned it.

It cooked another 10 minutes when I declared it thick enough.  You can see by comparing the first kettle picture to the one below that the level reduced about an inch, mostly from steaming.


Notice, too, that the color darkened considerably.  That isn't from the lighting -- the uncooked sauce was red; the cooked sauce was brown.

The Verdict

I had some roasted pork tenderloin and some roasted turkey in my refrigerator, so I sliced them up and warmed them in the oven.  A few slices went onto each plate, some mole was spooned over the top, and was garnished with sesame seeds.  There were flour tortillas and a tossed green salad on the side.  And wine!
Pretty!
We liked the mole with both meats.  We couldn't really decide which one was better with it.  (This was not a problem!)  I particularly liked dunking the flour tortilla into the extra mole and eating it without any other meat or garnish.  I thought the flavor of the mole was emphasized this way.

That flavor was ... complex...  Not that this was unexpected, with all the different ingredients involved.  It is just challenging to describe.

My guest taster thought there was meat in it, so I would say it had an umami taste.  We both thought it was fruity, probably from the raisins.  It was bitter, but not in a bad way.  That could be from the charring, but also from the bittersweet chocolate.  My guest taster had wondered if there was chocolate in it, and was happy to learn there was.  I could taste the cinnamon but not the allspice.  I wanted more of both spices.

I could not taste the garlic, but I don't know if it needed any more.  I would say not.  

The chiles were there, adding a lot of flavor and only some heat.  I had been warned that costeños were hotter than what I was used to, and to use them with caution.  This was good advice!  While I didn't get a burn from the chiles, their heat was present.  Maybe I could have put in one or two more, but considering I am a chile newby, it was good that I didn't.

The sesame seeds, surprisingly, didn't get broken up much by the blender.  I was surprised at how many were still whole or nearly so after the mole was cooked.  This added a nice little sesame flavor blast while I was eating it.  

In summary, it was sweet, bitter, deep, rich, mildly spiced with a little chile heat.  As I said, it was complex.  We loved it.

The next day we heated up some of the pork roast, covered the slices with a fried egg, and spooned some mole over the top.  That, with some flour tortillas, was breakfast.  Excellent.

I don't know how my mole would compare to a "typical" mole colorado from Oaxaca.  I don't think it matters.  It was good and we wanted more.  I achieved success.

Monday, January 15, 2024

A Good Sauce for Chicken -- 15th Century Italy

I was given a copy of a Ken Albala book I did not know existed:  Cooking in Europe 1250-1650, part of the Daily Life through History series published by the Greenwood Press in 2006.  (Thank you, DS!)

ISBN 0-313-33096-4

Some of the recipes I had seen before, but many I had not and it was a fascinating read.  It has several organizational lists which I found to be very helpful.  One is by era (Middle Ages, Renaissance, and Late Renaissance and Elizabethan Era), and within it, subcategories (Cold Foods, Soups, Meat, etc.)  The other is by country (France, England, Spain, Italy, Belgium, and Switzerland) with subcategories by era.  There is a list of recipes for special occasions (novelty, holidays, illness).

Ken includes a glossary at the beginning of the book.  Each recipe has a title and cites the source, location, and time period it came from.  He also puts comments after the recipes to define unusual words specific to the recipe or to clarify a technique.  Some of his comments help interpret the recipe to more modern, smaller quantities, since most of us are not cooking for large groups of people.  Clearly he has tried most of the recipes, so his experience and knowledge of food history are a valuable aspect of this book.

I recommend it as worthwhile for a better understanding of historical cooking and to get a feel for how a master historical cook would approach these recipes.

Today was a cold and rainy day, which made it perfect for building a fire in my living room fireplace.  This inspired me to cook something over that fire, and I found a recipe in Ken's book.  On page 51 is A Good Sauce for Chickens, cited as from Italy in the 15th century, by "Anonimo Veneziano", which Ken says means "Anonymous Venetian."  

To Make a good sauce for chickens, take pomegranate and make wine by hand, and place in this wine good sweet spices, and if it seems too strong, add pounded anise, or rosewater.  Others use wine of sour pomegranates and wine of good sweet grapes, and place these two wines together with enough sweet spices.  If you don't have grapes put in a bit of honey and let it boil, the spices should be raw, you don't want to let it stand so it spoils.

Ken notes that "wine" means "juice" and that the goal is a sweet-and-sour fruit sauce with spices.

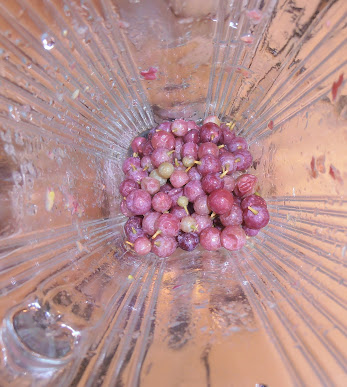
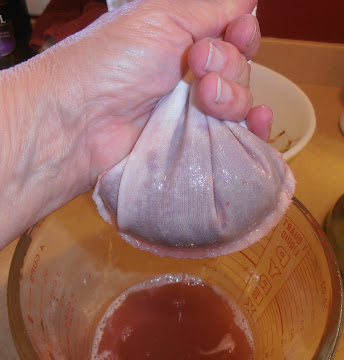
It is winter, and my grape vine is merely empty twigs, but I did have a bag of frozen grapes from it.  After they partially defrosted, I put them in batches into the blender to coarsely chop them.  Then each batch went into a small cloth bag, where I squeezed out the juice.  This resulted in grape juice that was light in flavor and tart, not sweet.  

Grapes, stems and all

Pulsed to coarsely chop

Squeeze to nearly dry
The juice, more than enough for this recipe

I also had a bottle of homemade pomegranate molasses.  Using fruit from my own tree, I had mixed the juice with a little sugar and lemon juice, then reduced it to 1/4 of its volume.  This stores the juice well for a long time and takes up a small space in my refrigerator.

I was ready to give this recipe a try.

My Redaction

3 large pieces of boneless, skinless chicken thighs (about 2 pounds total)

olive oil

1/4 cup pomegranate molasses

1/2 cup grape juice

1 teaspoon poudre fines (a mixture of cinnamon, cloves, ginger, grains of paradise, pepper, and saffron)

1 tablespoon honey

The honey and olive oil were added later.

The chicken meat was coated on all sides with olive oil and placed on a hot, oiled grill over live coals.  While it was cooking, I kept track of the heat from the coals and added more coals as needed.  It took about 40 minutes to cook the meat through, turning it over once after about 20 minutes.

I mixed the pomegranate and grape juices with the spices, then tasted it.  Both juices were tart, and the mixture was less tart than the molasses but still too tart for my preference.  So I added the honey.  The mixture was put in a small ceramic pan near the fire to begin warming it.  Once the chicken was nearly done cooking, I put the pan on a trivet closer to the fire and with hot coals near one side.  I stirred it with a fork often to even the heating through the liquid.  Once it was steaming, I considered it ready.

Cozy, warm, and welcoming.

Starting to cook the chicken

Warming the sauce while the chicken cooked

Heating the sauce in earnest


The Verdict

Dinner is served!
A piece of chicken was set on top of a slice of sourdough bread, then the sauce was spooned over the top.  This put sauce and some spices on the meat.  Most of the sauce, though, ran off the meat where it was soaked up by the bread.  This was served with a simple side salad of greens, tomato, and croutons, with a raspberry vinaigrette dressing.

View from above.
My guest taster had no idea what was in the sauce, so I had him describe what he tasted.  He thought there was citrus in it, and said it was fruity.  He could taste some spices but none were dominating.  He did not think it needed salt and that the sweet-and-sour ratio was just right.  Over all, he loved it and had seconds.  He particularly enjoyed how the bread soaked up the sauce; he cut a piece of soaked bread with each bite of chicken, which I did, too.

See how the bread soaked up the sauce?

I thought the sweet-and-sour ratio was just right, too.  It was not "balanced" as it was more on the sour side.  The sweet was just enough to temper the sour; the sour was just enough tempered to make my taste buds tingle, my mouth water, and inspire me to take another bite.  If it had been any sweeter, I don't think I would have had the same physical reaction, and I wanted that reaction.

It is possible I could have put in more spices, but I'm not sure I wanted them to be more prevalent.  They were there and they added depth to the sauce.  I really enjoyed the emphasis on the fruit flavors.  

Success!

It was great fun cooking over fire in my home.  It doesn't get cold enough in sunny Southern California to build fires often, so I take advantage of it when I can.  It reminds me of the times I've spent demonstrating historical cooking to the public, which I miss.  And the chicken, by itself, had that wonderful grilled meat flavor you can only get from cooking it over fire.  Mmmmmmmmm!


Saturday, February 15, 2020

String-Roasting in My Fireplace

Hooray!  It has been cold enough to have a fire!

I had hoped (and planned) for a day like this and so I had purchased two tiny Rock Cornish Game hens to cook in front of the fire.  I wanted to try string roasting again and this time get it right.  (Previously I tried it at a public cooking demonstration and it didn't turn out.  See this post here.)

What I wanted was a good fire that was putting out a lot of heat but also had some good embers.  I also needed to plan where the string would be:  The recommendation was to have it hanging from the mantel and to make it long, but my mantel wouldn't work for that.

My fireplace has a metal piece at the top of the opening, and that piece had a slotted hole in it.  Its original purpose is unknown to me but it looked promising for string roasting.  The only problem was that I knew the string would be short.

A long string is useful because you can get the meat to twirl, which twists the string first one way and then the other.  Basically, it is like having the meat turn itself on a spit, with little work from the cook.  But I knew I would make it work even with a short string.

When I started the fire, I took the birds out of the refrigerator so they could start coming to room temperature.  I knew I needed to wait 60 to 90 minutes for the fire to mature enough for cooking.

With two birds to cook at the same time, I decided to hang one below the other, using chopsticks inserted in them to act as connectors.  I know this description isn't very useful unless you already know what I'm doing; the pictures below will help.

I found an S-hook (made by my awesome blacksmith friends) and put it into the slot.  Then I estimated the total length the two birds would need, along with a little distance between them.  From there I estimated the longest distance from the top of the opening to the top of the first bird that I thought I could get away with, and cut a string four times that length.

It is important to have a pan below the birds to catch the drips and that figured into my estimation.  I chose the shortest pan I could use close to the fire and put it into the fireplace with two cups of water in it.

The chopsticks were inserted into the birds (two per bird), the long string was tied into a loop, and two more loops were tied at a length that would separate the birds but not too far apart.  I put in an effort to make those two loops the same length.  I also got all the strings wet.

I coated each bird with melted butter and many dried breadcrumbs.  No other seasoning was used.

Once the fire was ready, I put the loops on the chopsticks and hung the birds on the hook.  Here is the set up:


The long loop had each end over a stick and went over the S-hook.  The small loops connected the lower stick of the first bird with the upper stick of the second bird.  In this picture one of the loops is too close to the end of the stick.  Push the loops so they are snug up against the bird:  This keeps the birds balanced and stops the risk of the whole thing coming apart while cooking.

It was easy to get them spinning but with the short string, they didn't stay spinning very long.  The fire was hot and I didn't want to sit in front of it.  So I sat off to the side and used a long handled fork to keep the birds spinning.  Every few minutes I used the fork to push on a stick to twist the string.  Then I let it go and watched it spin until it slowed down again.  I thought this worked well.

It took about 45 minutes until my thermometer showed the meat was over 140 degrees F on both birds.  They were a lovely golden brown so I decided to take them down.  Unfortunately I lost control of them when unhooking the long loop and they fell down into the drip bowl.  This didn't harm the birds but it did dump the liquid all over the floor of the fireplace.  No drippings to try!


The birds rested on the kitchen counter while I quickly tidied the hearth.  (The cats were very interested in what I had left there!)

The red juices concerned me.
The Verdict

The birds were attractive to serve; it was fun to tell my guest taster about the cooking process while we ate dinner.  I served stuffing and a salad as side dishes.


The meat was tender, the breast was still moist, and the skin had some crisp and crackle to it.  

The flavor was good!  My guest taster wanted more salt but I didn't need it.  We enjoyed it.  I call it a success!


The only part that wasn't cooked enough -- there was still a lot of pink -- was where the thigh was pressed up against the rest of the body.  It was easy to fix with a minute in the microwave oven.  From this, I think I could have roasted the birds another 10 to 15 minutes without worrying about overcooking them.

I had thought about turning the birds while they were cooking to make sure the tops got as cooked as the bottoms, but with two tied together, I decided it was too risky.  I didn't want to drop them.  This was a good decision considering what happened when I took them off at the end.  Fortunately, the birds were cooked well top to bottom.  I think this worked because the fire was so big.


Saturday, February 1, 2020

The Magic of Fire -- A Book Review

I live in Southern California, where the idea of seasons is laughable to many who live elsewhere.  Yes, we have seasons but their differences are mild:  winter is colder (but no snow, maybe we get rain, rarely does it freeze), spring is typically cool ("May gray" and "June gloom"), summer is hotter and drier (but "hot" is a relative assessment), fall can be cooler (but it is our usual wildfire season, so expect hot and dry).

This puts my next statement in context:  It was cold enough that I was able to build a fire in the fireplace.  (That is, without overheating the room.)  That means it was an opportunity to cook!

I love cooking with fire.  I don't get the opportunity to do it very often as my home isn't set up for it unless the weather is cold enough.  I could try it outside but reference that wildfire comment made above; we are all very aware of the danger a single spark poses.

So I grabbed that opportunity, and will do so again if others arrive.

Fortunately, my fireplace is huge and raised up off the floor.  The area in front of it is all ceramic tile.  There are enough horizontal surfaces around it to give me working space.  *Sigh*, it is a lovely setup for an historical cook.

As the fire was getting started, I recalled a book I used in 2014 in a post for this blog: String-Roasted Chicken.


ISBN 1-58008-453-2
There are many aspects of this book I enjoy -- the drawings, the stories, the recipes, and the cooking ideas -- but the one I want to focus on is Mr. Rubel's description of the different fire types you need for your cooking.  He includes how long the fire has been burning, the amount of embers and heat to expect, and each type's usefulness in cooking.

I'm going to paraphrase his words from pages 17 and 18:
New fire:  15 to 30 minutes after lighting; no embers; has limited use in cooking.
Moderately mature fire:  30 to 60 minutes after lighting; some embers; only useful for dishes that need a few embers.
Mature fire:  60 to 90 minutes after lighting; first five logs in fire reduced to embers that are producing most of the heat needed for cooking but still there is a gentle fire that helps, too.  Most recipes start with this level.
Long-burning fire:  More than four hours after lighting; has a substantial ash base which is what distinguishes it from the mature fire.  May have one of the flame types listed below. 
Gentle:  one or two logs burning lazily; slow ember production
Moderate:  two or three logs burning with some energy but flames only a few inches long; there is a hot bed of embers, enough to harvest a fresh amount every 10 to 15 minutes
High:  three or four longs burning fiercely; a substantial bed of embers and more being produced rapidly; long flames
What I like about his description is that I now have a way to judge either what recipe to make or what fire to aim for.  Do I need a long, slow heat to cook beans?  Do I need the more focused heat from a lot of embers?  Mr. Rubel tells us what fire he recommends for his recipes but I can extrapolate from there for recipes from other books.

So what did I cook over my first fire of the season?  Nothing precisely from his book but it did inspire me to try some techniques I haven't used in a long time as well as a new one.

The easiest, but still wonderful, recipe is for Roasted Onion Salad. I wrote about it in 2013 but baked the onions in the oven.  This time I set the onions in the fireplace and let them roast by the fire, with an occasional turn.


As the fire changed, I moved the onions around to keep them cooking.


They came out beautifully tender and mild.  After they were peeled, I sliced them and dressed them with a quality balsamic vinegar, freshly grated nutmeg, and a dash of olive oil.  I served them with grilled sausages for a light, flavorful dinner.  (I tried to grill the sausages over embers but didn't have enough to make it work.)

The next day was still cold so I kept the fire going and tried out cooking in my big ceramic pot.  An important part of cooking with ceramic is getting it warmed up slowly to avoid thermal shock.  I put the empty pot on the hearth as the fire was rekindled and turned it a few times to warm it evenly.

Then I added the ingredients for a chicken and vegetable stew:  chicken thighs, garlic cloves, cabbage, young potatoes, mushrooms, cherry tomatoes, onions, fresh thyme, ground pepper, salt, lemon slices, and water.


I put in the thyme and about half of the veggies first.
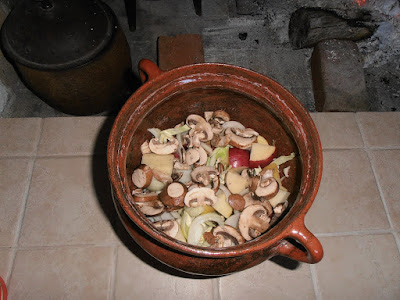


Then the chicken and spices on top of that.


I topped it off with the rest of the veggies and the sliced lemon, with water to cover.


The cover went on and the pot was moved close to the fire.


I turned it to put the cooler side towards the fire every 30 minutes or so as the fire grew in size, embers were produced, and the contents warmed up.  Then I moved the pot onto the bricks.


At this point the pot was hot all the way through, so I just checked on it and the fire every hour or so.  I let the stew cook most of the day (to the fire at 11:30 am, it was ready for dinner around 6pm).

It was a good stew!  It needed more seasoning -- especially salt -- but the meat was cooked, the water turned to broth, and all the vegetables were tender.  I dished the vegetables and broth into a bowl then used tongs to put a piece of chicken on top.  It was a complete meal, along with a glass of wine, of course!  (For the leftovers, I added some red wine and more salt and pepper before I reheated it.  Yum!)


I want to point out an advantage of using the bricks.  The fireplace floor is below the tiled hearth so the bricks give me a higher floor, making it easier to move the heavy pot in and out without having to lift it up.  This is important considering I'm sitting sideways to the fire and have to lean over to move the pots!

That evening I got out my small iron kettle and filled it with course sea salt.  I decided to make Hard Eggs, which I wrote about in 2012.  I buried four eggs in the salt, set it near the fire for an hour or so, then moved it even closer before going to bed.

The next morning I dug the eggs out of the salt to see how they had cooked.


They looked good, but the telling is in the peeling, and this is how they turned out.


Two were obviously cooked more than the other two, to the point where they looked dark and rubbery.  But we ate them anyway, just to see.


The lighter ones were really good:  the flavor was deeper, almost caramel-like, than a typical hard-boiled egg.  The surface was slightly salty, which surprised me.  I think the salt may have infiltrated the shell because the eggs were slightly damp when they went into the salt.  I am not a big hard-boiled egg fan but I did like these very much.

The darker ones were too chewy, too rubbery for my liking, but they were still edible.  I suspect that I moved the kettle too close to the fire when it was very hot.  The salt is very good at moderating the heat around the egg (which is why they didn't explode) but it can only do so much when the fire is hot.

Mr. Rubel brings up this point, too, on page 81, "Roasted Eggs" (in ashes):
While these instructions are easily stated, this is, in fact, one of the most difficult recipes in this book to master.  If the buried eggs get too hot too quickly, they soon explode with a muffled "pop."  If they are less hot, but still too hot, and especially if too hot for too long, they dry out in the all-night baking.  But if the ashes are too cool, the eggs don't cook fully.  Perfect warmth maintained for 8 hours results in eggs of lovely golden hues and a delicate flavor.
I achieved the golden hue and delicate flavor for two of the four eggs.  Between that, the stew, and the onion salad, I declare my fire-based cooking adventure a huge success!

I do recommend getting The Magic of Fire by William Rubel.  It is beautifully produced and has a wide variety of cooking techniques.  I am itching to try Fagioli al Fiasco, which has us cooking beans in a glass container.  When you read his writing, you know you are hearing the voice of long experience.  And that is the highest compliment I can give!


Wednesday, March 2, 2016

Playing with Fire -- Cooking on My Hearth (part 2)

The success of cooking shish kabobs in my home's hearth emboldened me to try out my Dutch oven again, this time by making bread.

After the fire was burning for a while and producing coals, I started the dough for a simple wheat with rosemary in the bread machine.

I wanted a loaf shape so I planned on using a metal loaf pan sitting on a trivet in the Dutch oven.

Nifty blacksmith-made trivet!
When the dough was ready, I put it into the Dutch oven which had been sitting near the fire.  This was a lovely place to let the dough do its last rise:  comfortably warm and completely draft free.  Be sure to put on the lid.

Ready to rise
There was a nice pile of coals waiting for me when the dough was ready to bake.


There weren't many flames in the rest of the fire place but the coals seemed like enough, so I set up the oven with coals underneath and more above.

The flash hides the glow.
But it turned out not to be enough coals or enough heat after all.  I think with the charcoal I use in my public demonstrations it would have been but it appears that burning firewood does not produce the same amount of heat for the same length of time and I completely misjudged my fire.

I didn't take a picture of the bread in the Dutch oven but here is a worded image:  The risen dough had risen a little more and was dry on top but had not baked at all.  I finished it by baking it in the regular oven and it came out fine although a little flat on the top where it fell.


So the next night I tried again, this time with a raisin bread recipe.

I started the dough as soon as I started the fire.  I loaded the fire up with extra wood because my goal was to have a good set of coals and extra flame with more coals being produced while the bread was baking.  Just in case!

Again I used the Dutch oven sitting outside the fire place as a warm spot for the dough to rise.

Before rising
It has risen!
I had a good supply of coals for the top and the bottom and also some off to the side in reserve.

The glow is intense enough to show up despite the flash.
Without the flash
This seemed just fine.  After about 30 minutes I could not smell bread baking and I worried that the coals on top had died down too much to be effective.  So I took a small piece of burning wood and put it on top of the oven.


Once the 45 minutes of baking time was up, I lifted the lid to see how the bread was doing.  *I didn't lift it previously because everything I have read about baking in a Dutch oven warns us that lifting the lid releases the heat inside and can ruin your baking.

What did I find?  That extra piece of wood was completely unnecessary:

This time being "upper crust" is not an advantage.
The loaf sounded hollow so I removed the pan from the Dutch oven and tipped the loaf out to cool.
Then I sliced it to see how the baking went.

Nearly done.
The loaf was pretty and mostly cooked correctly.  It was too moist overall and almost doughy at the bottom.  Of course there was that burnt top, too.

This tells me I should have had more coals beneath the oven and fewer on top.

Still, the bread was tasty once I cut off the burnt part, and I was saved from tasting the burnt raisins on the top, a flavor I despise.

And then I discovered the bread was even better once it was lightly toasted.

Yum.  
What I Learned

As in Part 1, I learned that fire management is very important.  I had to pay attention to how fast the wood was being consumed, how fast the coals gave up their heat, and to add more wood to keep up my heat supply.

The second baking attempt had enough heat to actually bake the bread but then I messed up the balance between the top and the bottom of the Dutch oven so that the top burned and the bottom was not baked enough. I didn't not experiment with using my hand held over the coals to test their heat but now I see how crucial that can be for the balance.

I suppose the air space formed by the trivet makes a difference in how much heat needs to be beneath the oven. I used the trivet to allow air to circulate around the loaf pan.  Perhaps it didn't need to be raised at all.

I have seen bread baked without a pan in a Dutch oven.  It was just set down on the greased bottom of the oven. I wanted a loaf shape but I also got the benefit of being able to pull the first, failed loaf out of the oven to finish baking it in the electric oven.  It was easier to remove the pan with the successful loaf without having to move the Dutch oven out of the fire place, helpful considering the weight of the oven and all the ash.  My tiles stayed cleaner.

There is a difference between cooking over a fire pit with coals and cooking beside a fire place.  It is harder to see into the fire place and lifting heavy pots from the side is a challenge.  I used my lid-lifter to look into the Dutch oven while the coals were still on it but I had to make sure I lifted straight up to keep the ashes out of the food.  So I also had to make sure I didn't scrape my hands on the hot chimney while lifting.

None of this makes the job impossible.  I hope I can have more fires so I can practice more cooking on my hearth!