I have read that the Mexican "national dish" is Chiles en Nogada, made with green poblano chiles stuffed with a savory meat filling, topped with a walnut-and-cream sauce, and garnished with pomegranate seeds. It originated in Puebla in the 1820s, and my friend who grew up there tells me it is good but challenging to prepare.
The word "nogada" indicates a walnut-based sauce, and Pinedo gave us three recipes with nogada in them. None of them use cream and all of them call for breadcrumbs soaked in liquid.
I chose the recipe on page 23, which puts the nogada over cooked chicken.
Pinedo's Recipe
Aves en nogada de nuez
My TranslationPoultry in Walnut Nogada
The chickens will be cooked in water with vinegar and salt,
and immediately they are cut apart; each piece is coated in beaten egg and
fried in hot fat.
Nuts and
soaked breadcrumbs and garlic are ground: at the time of serving them, the
nogada will be [put] on top, with a tablespoon of olive oil.
My Redaction
2 1/2 pounds boneless, skinless chicken thighs
2 cups water, or enough to barely cover the meat
3 tablespoons apple cider vinegar
1 teaspoon salt
1 1/2 cups walnuts (shelled)
1/2 cup dried breadcrumbs (or less, see below)
1 teaspoon crushed garlic
3 eggs (but I think 2 would do it), well-beaten
oil for frying
1 tablespoon olive oil
Place the chicken thighs in a deep pan, add just enough water to barely cover, then add the salt and vinegar. Swirl the pan to mix the liquids.Bring the liquids to a boil then turn the heat down so it is just barely simmering. Set the timer for 10 minutes; when that time is up, turn the thighs over and simmer for another 10 minutes. Skim the foam that floats to the top while the chicken is cooking.
In the meantime, grind or pound the walnuts until they are small- and medium-sized bits.
When the chicken is done, remove it from the pan and set it on a plate to drain.
Begin heating about 1/2 inch of oil or fat in a skillet.
Soak the breadcrumbs mixed in 1 cup (or more! see below) of the broth from the pan until they do not look dry anymore.
Mix the walnuts, breadcrumbs, and garlic together to make the nogada. Set aside.
Pour the beaten eggs into a bowl. Dip a piece of chicken into them, coating all sides.
Fry the chicken in the hot oil, turning once, until golden brown on both sides.
Set fried chicken on a serving platter. When all pieces are done, pour or spread the nogada over them, then drizzle with the olive oil. Serve.
My Notes
Since I used thighs, I didn't have to cut the chicken up after simmering. Cooking them for 20 minutes got them mostly done and the frying finished cooking them through.
 |
| Barely covered in water |
 |
| Simmered and now draining |
I originally guessed at 1/2 cup breadcrumbs and 1/2 cup broth, but decided to add 1/2 cup more broth after I saw how thick the soaked crumbs were. Even after I mixed them with the nuts and garlic, I still thought it was too thick but chose to leave it as it was. It was spoonable but not pourable.
 |
Nuts and garlic on the left, breadcrumbs on the right.
|
 |
| Mixed with the extra liquid. Still thick. |
The oil for frying was hot but made the meat more golden when I made it hotter. I fried two thighs at a time so the oil temperature wouldn't drop too much.
 |
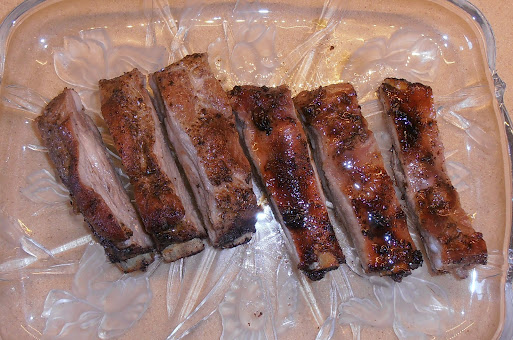
| Frying and getting golden. |
 |
| Ready for the nogada! |
I had a lot of beaten egg left over after cooking all the chicken, so two eggs probably would have worked.
 |
| Nogada spread and olive oil drizzled. |
The VerdictI served the chicken with some coleslaw and wine.
I was pleased to see the thighs were cooked all the way through.
My guest taster and I both thought the nogada could have been thinner, so it was pourable, but there wasn't anything really wrong with having it so thick. I think I would use 1/4 cup breadcrumbs next time, and then once they were mixed with the nuts and garlic, keep adding broth until the nogada was a consistency I liked.
We both believe that the thick nogada would be a good sandwich spread.
The sauce's flavor was very nuanced. We could taste the garlic, but it was very subtle, which we liked. The nuts were the dominant flavor and we liked their slight crunch. We could even taste the salt and vaguely the vinegar from the broth. My guest taster, who loves salt on his food, was quite satisfied with the very light salt level of the nogada. This surprised me.
We liked the flavor balance and blend very much.
The chicken had almost a Chinese vibe to it, which I attributed to the egg-only coating and being fried. It went well with the sauce as it was not heavy or strongly flavored.
Over all, the meat and the slightly crunchy nogada with its nutty and mildly garlic flavor went well together, and we declared it a success.
I shared it with my friend who grew up in Puebla. She liked it, including the mild garlic flavor and the salt level. It was a different experience for her, since she mostly cooks Mexican food with a lot of chiles, but one she enjoyed.
It would be interesting to see what the nogada is like when it is thinner and pourable. I don't think I would change the flavor balance at all.