Wednesday, April 1, 2020

Playing with Pumpkins, Part One

This post is the tale of two pumpkins, both of which were purchased (at separate times) from a local farmers market and a local produce stand.


You see, I want to cook with pumpkins but the ones I've bought in the grocery store are just icky in flavor.  Jack-o'lantern pumpkins are bitter and nasty.  Even the last "pie pumpkin" was pretty mediocre in flavor.  So when I found these pumpkins grown locally, I knew I had to try them.

What to do with them?

The orange one was still called a pie pumpkin but I decided to stuff it and make a savory main dish from it.

I used foods I like for stuffing, but I put them together rather haphazardly.  This means I wrote down what I used but didn't take a picture of all the ingredients before I used them.  Here is the list:

1 pound pork sausage (bulk)
1 apple, cored and cut into small pieces
1/4 large onion, sliced into thin pieces
1/2 bagel, cut into cubes and toasted
1/4 teaspoon powdered mace
1/2 cup red wine

Preheat the oven to 300 degrees F.

Any bread will do, I think.  I just happened to have a bagel handy.

The key to stuffing something (a bird, a pumpkin, whatever) is to have your stuffing completely cooked before the whole thing goes into the oven.  So brown the sausage and break it up into smallish pieces.

Partially cooked; still needs to be broken up more.
Saute the apple and onion together until tender.

I love apples and onions cooked together!
After the bread bits are toasted, break them up into smallish pieces, if they aren't already so.

I used my fingers to break them into small pieces.
Mix the sausage, apple and onion, bread cubes, and mace together in a big bowl.  Then sprinkle the wine over the top and mix it in.

Smells yummy!
Wash and dry the outside of the pumpkin.  Cut open the top -- make the opening wide -- and scoop out the seeds and strings.  Trim the strings off the inside of the top, too.

Using 1/2 teaspoon each of salt and pepper, sprinkle the inside surface of the pumpkin to spice it.

Sprinkle them separately or mix them together.  Tilt the pumpkin to get all the inside covered.
Stuff the pumpkin.  I had to push to get it all to fit, but it did fit.


Put the lid on the pumpkin and place the pumpkin in a deep pan, like a Dutch oven.  Add 1/2 cup water to the pan.

Put in oven and bake until the pumpkin is tender when you push a pick into the side.  I baked mine about 2 hours.  I checked it after one hour and added a cup of water to the pan.  The original 1/2 cup had evaporated.

The Verdict

After two hours, the pumpkin was tender but not falling apart.  I served it as a main dish and had grilled brussel sprouts as the side dish.

When I took off the lid, I could still smell the wine.  Yum!


It was easy to slice the pumpkin into wedges for serving.


The taste?  The stuffing was enjoyable:  The sausage was flavorful as a good pork sausage can be. The apples and onions added moistness and sweetness while also complementing the pork. The bread added bulk and held the wine while shifting the texture away from just meat.

The pumpkin itself was, fortunately, not bitter.  It had a mild pumpkin flavor that went well with the stuffing.  I am glad that I spiced the inside of the pumpkin before stuffing because I could taste the salt and pepper, and I liked what I tasted.

Overall a good meal.  We both liked it and are looking forward to eating the leftovers.  Success!


Sunday, March 15, 2020

Roman Fish Sauce -- Liquamen, Garum -- Once Again

A little over a year ago, a fisherman friend, MB, gave me a bag of mackerel he had caught off a local pier.  I decided I wanted to make liquamen again, but this time with a lower salt ratio.

My previous attempt is documented here.  Beware:  Some of the pictures are pretty graphic.

After reading around the internet at other bloggers' attempts, I decided to use the smallest recommended amount of salt, roughly 10 parts fish to 1 part salt, by weight.

The mix of whole fish and salt went into a glass container that I sealed up tight and put on the floor by a sliding glass door.  The idea was that I could see it go through the process, get some sunshine on it, and still not stink up my house.  Well, that and keep the cats out of it, too. 

The container sat on my floor for an entire year.  I watched it first start accumulating liquid, then the fish started "melting" into the liquid.  Occasionally I shook the container just to see how it was coming along.

After a while I saw fish bones and brown chunky muck as the majority of the contents.  And then the muck started separating into layers:  chunks on the bottom, clear liquid on top, and other particulate liquid on top of that.  Even after I shook it, the layers would reappear.

You can see the layers reforming after the container was moved.
Once the one-year mark passed, I opened the container and began filtering the contents.   One thing I noticed is that there were no big particles left -- all the flesh had broken down into tiny bits.  The only things that were big were the bones.

This is what I ladled out, leaving bones behind.  Very fine textures.

First filtering.
I used the same bag and metal filtering process I used before.  The bag got out the "big" particles but the liquid was still cloudy.  The metal coffee filter cleared it up.

But now the big test had arrived.  How did it taste as compared to the previous attempt and to what you can buy in the Asian market?

I asked my Vietnamese friends, CN and LP, to give it a try.  CN had told me once, "I am Vietnamese!  We have fish sauce in our blood!"  So I knew they were the right people to judge.

They had tried my first attempt and I asked them to compare it to my second attempt.

Their assessment was put so nicely in a note from LP: 
I have never had pure fish sauce before.  It's so good, especially the second time with less salt.  The taste is rich in protein.
I have had fish sauce my whole life and this sauce is the best.  I have used a couple of teaspoons in soup.  It tasted better than the fish sauce I bought in the store. 

There you have it!  An expert's opinion!

I liked it, too.  My thought was that, with less salt, I could taste more of a sweetness to it.  Perhaps it was wishful thinking or perhaps it was that I expected it to taste more like the Thai fish sauce + reduced grape juice mixture that I tried first.  (See this post.)  But it tasted better to me.

I am so glad I tried the "reduced salt" version.  Trust me, it is still very salty, but I think more flavorful.

I use it in soups and stews, to increase the salt content but, more importantly, to raise up the richness and meaty taste, the "umami" fifth flavor we love so much.  Sometimes I made a sauce from it.  It is really good on grilled beef.

Success!  I won't actively seek out more raw fish to make this sauce, but if some happens to come my way, I know what to do with it.
 

Sunday, March 1, 2020

I Made a Tvare

My friend KC made me aware of a cooking gadget called a tvare, a Norwegian whisk.  She showed me the steps and how convenient making it from a Christmas tree really is.  So I did!

Wikipedia tells us:
tvare f or m (definite singular tvara or tvaren, indefinite plural tvarer, definite plural tvarene)

    1. stirring stick for cooking, with tines at the end.  A Norwegian whisk.  Fashioned crudely from the crowns of conifer trees, etc.
    2. archaic auger or drill 

Other sources I spotted mentioned that "tvare" is the tool and "tvara" means "to mix."  The idea is to cut the tree trunk so you get a handle and have branches near the thick end to make the tines.

The instructions were straightforward:
  1. Cut the part of the tree you want to use
  2. Trim the branches
  3. Remove the bark -- don't worry about this too much because of the next two steps
  4. Soak it in boiling water for 10 to 15 minutes 
  5. Resume removing the bark
  6. Sand it smooth
  7. Seal it with oil
My Attempt

I used my Noble fir Christmas tree, with my focus on the top two fifths or so.  I thought I could get two tvarene from this and still have handles long enough to make me happy.  


I looked for branch cluster and cut the trunk just below it.  I had to remind myself that the handle was the part of the trunk above the cluster so the tines would curve upward when the tool was in use.


I cut the thickest part of the trunch first and then, after deciding how long a handle I wanted, I cut above that to get the second tvare.

Then I trimmed the branches to what I considered a good length for the tines.


I knew it could be a challenge to smooth off the bumps of the branches I didn't want, so I cut them as close to the trunk as I could.  


I had a very sharp knife to start peeling off the bark.


There were three parts to pay attention to for this step:  the brown bark, the white fibrous layer under the bark, and the creamy wood below that.


My goal was to remove as much of the first two layers as I could while working outside and then leave the details to come off once the tvare soaked in the hot water.


To soak them, I used a big pan filled with water and brought to boiling.  I turned the fire down so the water was simmering.  Neither piece of wood fit in the pan, so I put one end in the water for about 10 minutes then flipped it so the other end soaked, too.  The steam seemed to be beneficial for the parts that never actually touched the water.


The water turned dark reddish-brown and smelled wonderful.

What I liked about this is the layers that still needed to come off were easily removed -- they slipped off with my fingernail or with a gentle push with the knife blade.  The wood cleaned up beautifully, even in the tight corners where the branches met the trunk.


The next step was to sand everything but I felt the wood was still too freshly cut off the tree.  I left the tvaren on the counter for a week or so, until they felt lighter and warmer to the touch than when they were freshly cut.  They dried inside and out, and I could tell the difference.

For the bigger tvare I used a 120 grit sanding sponge.  It worked well, especially in the tight spots, except where small wood parts protruded from the tines.  I had to get my knife and whittle those off so they wouldn't tear the sponge.  I also carved the thicker bumps down as much as I could so there wouldn't be any place for food to hide when the tvare was being cleaned.

I decided to go more "rustic" for the smaller tvare.  I sanded it completely with a piece of sandstone.  This worked really well, especially over the bumps and across the cut trunk ends.  The piece (when I started using it) had a narrow point that I used to get in the tight spots.  Eventually it broke off but I was done using the point at that time.

The sandstone in the middle.
The difference between the two sanding methods was this:  the sponge made the wood satiny smooth and a joy to hold.  The stone made it easy to remove bumps and smooth them down without having to use the knife but the wood's surface wasn't as texturally pleasant.  It was perfectly acceptable, just not like satin.  

Some of the cut tine ends splintered when I cut them, so I used the knife to whittle them to more of a point.  My goal was to reduce places for food to hide from cleaning.

Once the pieces were wiped with a damp cloth to remove the sanding dust, I let them dry for a few hours.  

I wiped them both thoroughly three times with block oil, letting it soak in for about an hour for each layer.  The wood soaked the oil up each time, with no excess to wipe off.  I feel that was just right but can always oil them again any time.

Completed tvaren.  I oiled the cutting board, too!
The Verdict

They are both fun to hold.  The bigger one's smooth surface just invites your hand to slide over it.  It is fun to feel the bumps.

The smaller tvare's handle, near the top, is very thin and a little flexible.  I will have to be careful not to break it when using it, but I think I would only be using this to mix small quantities or substances that were not too heavy or thick.

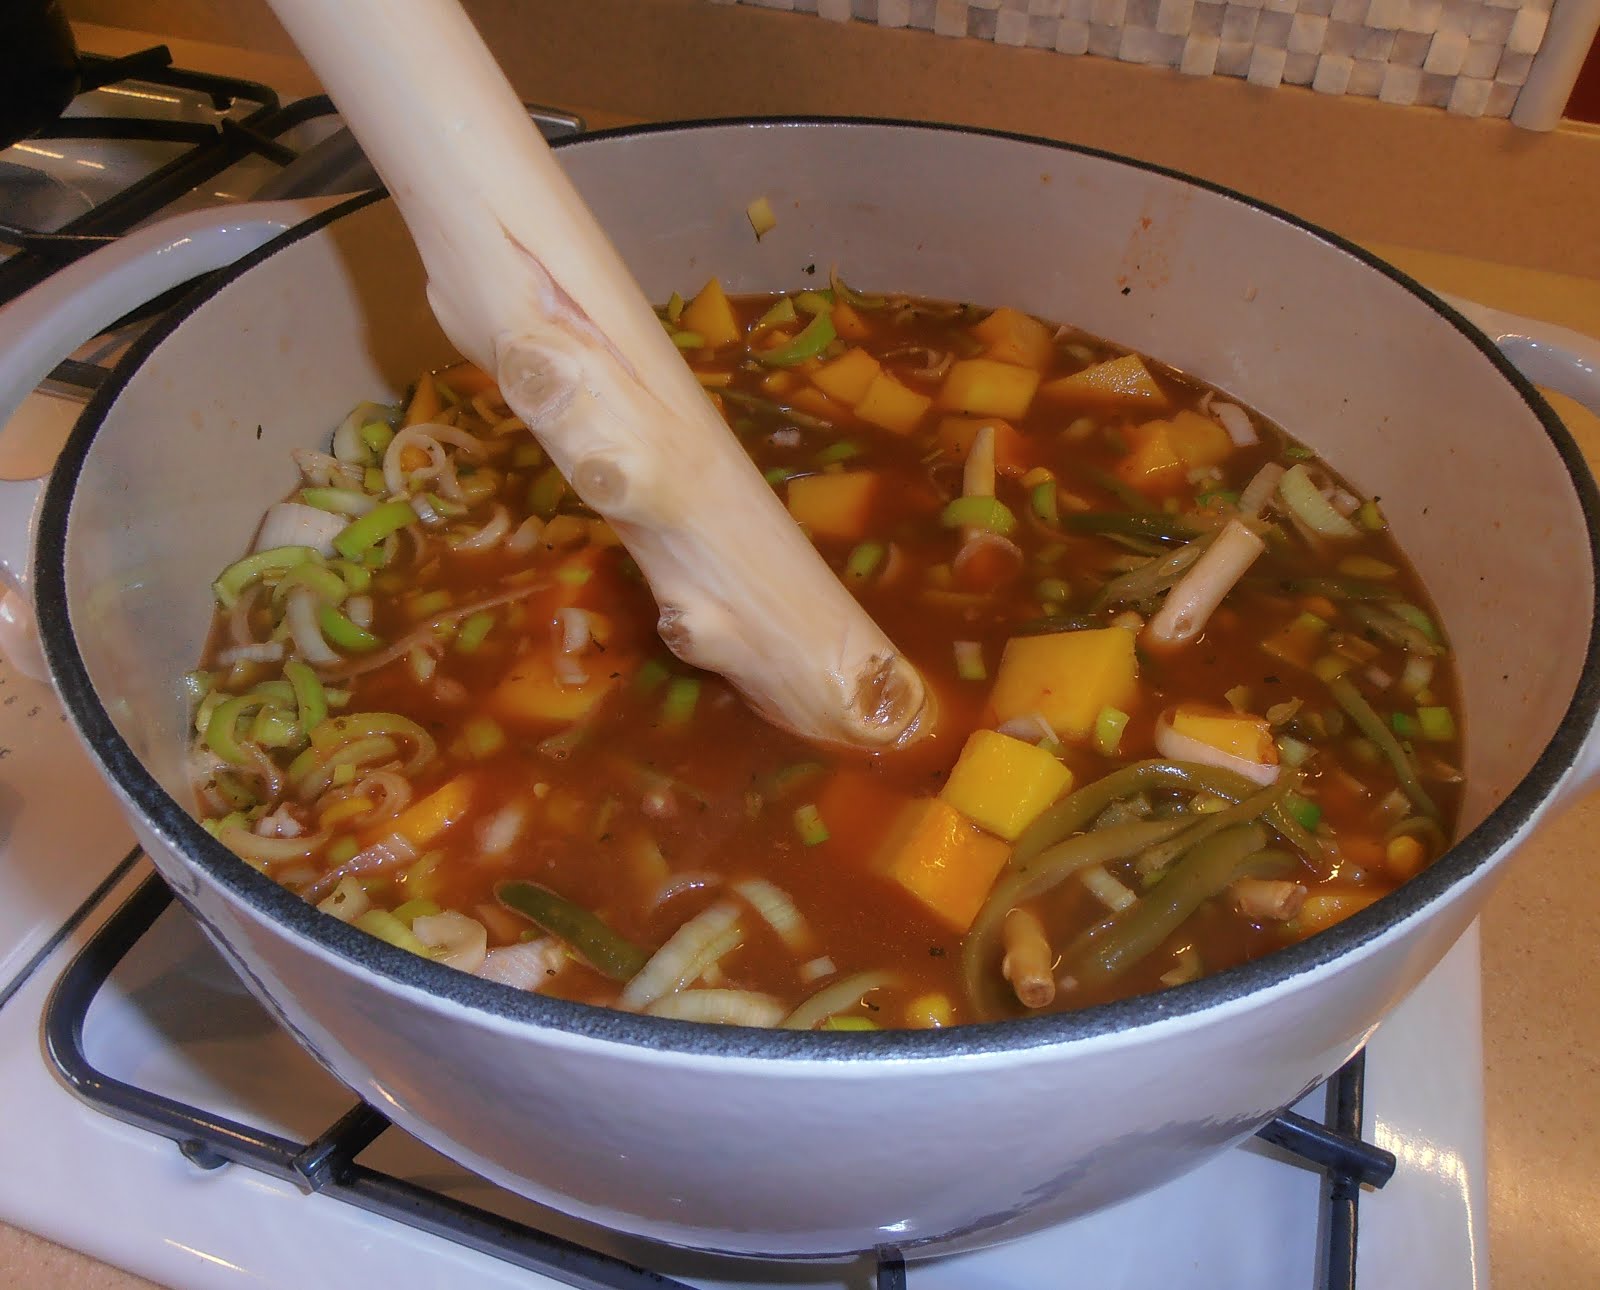
To feel that I was completing this experiment, I had to try them out.  So I made a stew of sausages and vegetables, in my big Dutch oven, and gave it a stir.  The result?  The big tvare was almost too big for that pot -- stirring was restricted but twirling it worked really well.  The smaller tvare worked better but I worried I would break the handle.  It wasn't very stressed but I was being cautious.

They both cleaned up well with a quick rinse and a wipe down.

So I declare it a success!


I really like having both of them.  They are striking to look at, fun to hold, and quite usable.  I decided to put them on display in my kitchen in a glass vase to show off their entire glory.

I encourage you to make one, too, the next time you have the opportunity to get the top of a pine tree.  I enjoyed the process and felt like I was connecting to history!


Saturday, February 15, 2020

String-Roasting in My Fireplace

Hooray!  It has been cold enough to have a fire!

I had hoped (and planned) for a day like this and so I had purchased two tiny Rock Cornish Game hens to cook in front of the fire.  I wanted to try string roasting again and this time get it right.  (Previously I tried it at a public cooking demonstration and it didn't turn out.  See this post here.)

What I wanted was a good fire that was putting out a lot of heat but also had some good embers.  I also needed to plan where the string would be:  The recommendation was to have it hanging from the mantel and to make it long, but my mantel wouldn't work for that.

My fireplace has a metal piece at the top of the opening, and that piece had a slotted hole in it.  Its original purpose is unknown to me but it looked promising for string roasting.  The only problem was that I knew the string would be short.

A long string is useful because you can get the meat to twirl, which twists the string first one way and then the other.  Basically, it is like having the meat turn itself on a spit, with little work from the cook.  But I knew I would make it work even with a short string.

When I started the fire, I took the birds out of the refrigerator so they could start coming to room temperature.  I knew I needed to wait 60 to 90 minutes for the fire to mature enough for cooking.

With two birds to cook at the same time, I decided to hang one below the other, using chopsticks inserted in them to act as connectors.  I know this description isn't very useful unless you already know what I'm doing; the pictures below will help.

I found an S-hook (made by my awesome blacksmith friends) and put it into the slot.  Then I estimated the total length the two birds would need, along with a little distance between them.  From there I estimated the longest distance from the top of the opening to the top of the first bird that I thought I could get away with, and cut a string four times that length.

It is important to have a pan below the birds to catch the drips and that figured into my estimation.  I chose the shortest pan I could use close to the fire and put it into the fireplace with two cups of water in it.

The chopsticks were inserted into the birds (two per bird), the long string was tied into a loop, and two more loops were tied at a length that would separate the birds but not too far apart.  I put in an effort to make those two loops the same length.  I also got all the strings wet.

I coated each bird with melted butter and many dried breadcrumbs.  No other seasoning was used.

Once the fire was ready, I put the loops on the chopsticks and hung the birds on the hook.  Here is the set up:


The long loop had each end over a stick and went over the S-hook.  The small loops connected the lower stick of the first bird with the upper stick of the second bird.  In this picture one of the loops is too close to the end of the stick.  Push the loops so they are snug up against the bird:  This keeps the birds balanced and stops the risk of the whole thing coming apart while cooking.

It was easy to get them spinning but with the short string, they didn't stay spinning very long.  The fire was hot and I didn't want to sit in front of it.  So I sat off to the side and used a long handled fork to keep the birds spinning.  Every few minutes I used the fork to push on a stick to twist the string.  Then I let it go and watched it spin until it slowed down again.  I thought this worked well.

It took about 45 minutes until my thermometer showed the meat was over 140 degrees F on both birds.  They were a lovely golden brown so I decided to take them down.  Unfortunately I lost control of them when unhooking the long loop and they fell down into the drip bowl.  This didn't harm the birds but it did dump the liquid all over the floor of the fireplace.  No drippings to try!


The birds rested on the kitchen counter while I quickly tidied the hearth.  (The cats were very interested in what I had left there!)

The red juices concerned me.
The Verdict

The birds were attractive to serve; it was fun to tell my guest taster about the cooking process while we ate dinner.  I served stuffing and a salad as side dishes.


The meat was tender, the breast was still moist, and the skin had some crisp and crackle to it.  

The flavor was good!  My guest taster wanted more salt but I didn't need it.  We enjoyed it.  I call it a success!


The only part that wasn't cooked enough -- there was still a lot of pink -- was where the thigh was pressed up against the rest of the body.  It was easy to fix with a minute in the microwave oven.  From this, I think I could have roasted the birds another 10 to 15 minutes without worrying about overcooking them.

I had thought about turning the birds while they were cooking to make sure the tops got as cooked as the bottoms, but with two tied together, I decided it was too risky.  I didn't want to drop them.  This was a good decision considering what happened when I took them off at the end.  Fortunately, the birds were cooked well top to bottom.  I think this worked because the fire was so big.


Saturday, February 1, 2020

The Magic of Fire -- A Book Review

I live in Southern California, where the idea of seasons is laughable to many who live elsewhere.  Yes, we have seasons but their differences are mild:  winter is colder (but no snow, maybe we get rain, rarely does it freeze), spring is typically cool ("May gray" and "June gloom"), summer is hotter and drier (but "hot" is a relative assessment), fall can be cooler (but it is our usual wildfire season, so expect hot and dry).

This puts my next statement in context:  It was cold enough that I was able to build a fire in the fireplace.  (That is, without overheating the room.)  That means it was an opportunity to cook!

I love cooking with fire.  I don't get the opportunity to do it very often as my home isn't set up for it unless the weather is cold enough.  I could try it outside but reference that wildfire comment made above; we are all very aware of the danger a single spark poses.

So I grabbed that opportunity, and will do so again if others arrive.

Fortunately, my fireplace is huge and raised up off the floor.  The area in front of it is all ceramic tile.  There are enough horizontal surfaces around it to give me working space.  *Sigh*, it is a lovely setup for an historical cook.

As the fire was getting started, I recalled a book I used in 2014 in a post for this blog: String-Roasted Chicken.


ISBN 1-58008-453-2
There are many aspects of this book I enjoy -- the drawings, the stories, the recipes, and the cooking ideas -- but the one I want to focus on is Mr. Rubel's description of the different fire types you need for your cooking.  He includes how long the fire has been burning, the amount of embers and heat to expect, and each type's usefulness in cooking.

I'm going to paraphrase his words from pages 17 and 18:
New fire:  15 to 30 minutes after lighting; no embers; has limited use in cooking.
Moderately mature fire:  30 to 60 minutes after lighting; some embers; only useful for dishes that need a few embers.
Mature fire:  60 to 90 minutes after lighting; first five logs in fire reduced to embers that are producing most of the heat needed for cooking but still there is a gentle fire that helps, too.  Most recipes start with this level.
Long-burning fire:  More than four hours after lighting; has a substantial ash base which is what distinguishes it from the mature fire.  May have one of the flame types listed below. 
Gentle:  one or two logs burning lazily; slow ember production
Moderate:  two or three logs burning with some energy but flames only a few inches long; there is a hot bed of embers, enough to harvest a fresh amount every 10 to 15 minutes
High:  three or four longs burning fiercely; a substantial bed of embers and more being produced rapidly; long flames
What I like about his description is that I now have a way to judge either what recipe to make or what fire to aim for.  Do I need a long, slow heat to cook beans?  Do I need the more focused heat from a lot of embers?  Mr. Rubel tells us what fire he recommends for his recipes but I can extrapolate from there for recipes from other books.

So what did I cook over my first fire of the season?  Nothing precisely from his book but it did inspire me to try some techniques I haven't used in a long time as well as a new one.

The easiest, but still wonderful, recipe is for Roasted Onion Salad. I wrote about it in 2013 but baked the onions in the oven.  This time I set the onions in the fireplace and let them roast by the fire, with an occasional turn.


As the fire changed, I moved the onions around to keep them cooking.


They came out beautifully tender and mild.  After they were peeled, I sliced them and dressed them with a quality balsamic vinegar, freshly grated nutmeg, and a dash of olive oil.  I served them with grilled sausages for a light, flavorful dinner.  (I tried to grill the sausages over embers but didn't have enough to make it work.)

The next day was still cold so I kept the fire going and tried out cooking in my big ceramic pot.  An important part of cooking with ceramic is getting it warmed up slowly to avoid thermal shock.  I put the empty pot on the hearth as the fire was rekindled and turned it a few times to warm it evenly.

Then I added the ingredients for a chicken and vegetable stew:  chicken thighs, garlic cloves, cabbage, young potatoes, mushrooms, cherry tomatoes, onions, fresh thyme, ground pepper, salt, lemon slices, and water.


I put in the thyme and about half of the veggies first.
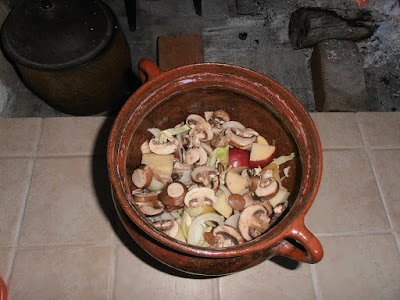


Then the chicken and spices on top of that.


I topped it off with the rest of the veggies and the sliced lemon, with water to cover.


The cover went on and the pot was moved close to the fire.


I turned it to put the cooler side towards the fire every 30 minutes or so as the fire grew in size, embers were produced, and the contents warmed up.  Then I moved the pot onto the bricks.


At this point the pot was hot all the way through, so I just checked on it and the fire every hour or so.  I let the stew cook most of the day (to the fire at 11:30 am, it was ready for dinner around 6pm).

It was a good stew!  It needed more seasoning -- especially salt -- but the meat was cooked, the water turned to broth, and all the vegetables were tender.  I dished the vegetables and broth into a bowl then used tongs to put a piece of chicken on top.  It was a complete meal, along with a glass of wine, of course!  (For the leftovers, I added some red wine and more salt and pepper before I reheated it.  Yum!)


I want to point out an advantage of using the bricks.  The fireplace floor is below the tiled hearth so the bricks give me a higher floor, making it easier to move the heavy pot in and out without having to lift it up.  This is important considering I'm sitting sideways to the fire and have to lean over to move the pots!

That evening I got out my small iron kettle and filled it with course sea salt.  I decided to make Hard Eggs, which I wrote about in 2012.  I buried four eggs in the salt, set it near the fire for an hour or so, then moved it even closer before going to bed.

The next morning I dug the eggs out of the salt to see how they had cooked.


They looked good, but the telling is in the peeling, and this is how they turned out.


Two were obviously cooked more than the other two, to the point where they looked dark and rubbery.  But we ate them anyway, just to see.


The lighter ones were really good:  the flavor was deeper, almost caramel-like, than a typical hard-boiled egg.  The surface was slightly salty, which surprised me.  I think the salt may have infiltrated the shell because the eggs were slightly damp when they went into the salt.  I am not a big hard-boiled egg fan but I did like these very much.

The darker ones were too chewy, too rubbery for my liking, but they were still edible.  I suspect that I moved the kettle too close to the fire when it was very hot.  The salt is very good at moderating the heat around the egg (which is why they didn't explode) but it can only do so much when the fire is hot.

Mr. Rubel brings up this point, too, on page 81, "Roasted Eggs" (in ashes):
While these instructions are easily stated, this is, in fact, one of the most difficult recipes in this book to master.  If the buried eggs get too hot too quickly, they soon explode with a muffled "pop."  If they are less hot, but still too hot, and especially if too hot for too long, they dry out in the all-night baking.  But if the ashes are too cool, the eggs don't cook fully.  Perfect warmth maintained for 8 hours results in eggs of lovely golden hues and a delicate flavor.
I achieved the golden hue and delicate flavor for two of the four eggs.  Between that, the stew, and the onion salad, I declare my fire-based cooking adventure a huge success!

I do recommend getting The Magic of Fire by William Rubel.  It is beautifully produced and has a wide variety of cooking techniques.  I am itching to try Fagioli al Fiasco, which has us cooking beans in a glass container.  When you read his writing, you know you are hearing the voice of long experience.  And that is the highest compliment I can give!


Wednesday, January 15, 2020

Cracknells, Revisited

I was making Royal Frosting the other day, which requires egg whites and not the yolks.  I decided to take the opportunity to make cracknells again with those yolks.

To see the whole procedure, see the original post, "To make Cracknells".

This time I started with the yolks, 6 or 7, I hadn't quite remembered the amount.  This was about 1/2 of what I used to make cracknells the first time, so I chose to use 1/2 pound each of flour and sugar.

Considering the alternate recipes that used no yolks and all butter, I decided that was about right but if I needed to, I could put in more butter.

I also wanted to make a different flavor.  One of the alternate suggestions was caraway and rose water.  I LOVE caraway and I love rosewater, so why not both?

Here's the list:

1/2 lb flour
1/2 lb sugar
6 or 7 egg yolks
2 tablespoons butter
1 teaspoon rose water
1 teaspoon caraway seeds

glaze:
1 egg white and 1 tablespoon rose water, well mixed

Preheat the oven to warm, about 155 degrees F.

I mixed in the yolks and butter together into the mixed flour and sugar.  Then I mixed in the rose water and caraway seeds, and kneaded in enough extra flour to make the dough non-sticky.

The dough rolled out to about 1/4 inch depth on the floured silicone mat.  I cut the dough in rounds at about 2 inches (5 cm) in diameter.  That made a lot of them and they fit well in the pan.

I kept rolling the dough and cutting out shapes until I had used up all the dough.

Then I poked holes with a fork and brushed glaze well over each one.

They baked for four hours at that temperature; at the 2 hour mark I loosened them from the pan.  A few cracked but I pushed them together for the rest of the baking.

After the four hours, I turned off the oven and let them sit in the oven overnight.

The next day, I took them off the pans.

The Verdict

Oh my, yes, these are good!  The caraway was there but understated.  Slightly sweet and very crispy.  I could not taste the rose water at all.  And I was still glad I used a glaze.

Some were missing before I took the picture...
These things are addictive.  I want to just keep nibbling on them.  If any survive, I want to try them with cheese and wine as a dessert.  Just having one while drinking some wine was good!  Success again!

Try making them.  They are easy and tasty and different from a cracker and from a cookie.  A nice way to surprise your guests.


Thursday, January 2, 2020

Lumbardy Tartes -- The Sequel

Yesterday I wrote about my first attempt at making a Lumbardy Tart -- a savory beet-filled pie from the Dining with William Shakespeare book.


I kept thinking about it and realized I really needed to make it again, and make it thicker and more flavorful, if I could.

So here we go, Attempt Number Two!  My redaction for a 9-inch pie pan.

My Redaction (see the previous post for more details)

Preheat oven to 450 degrees F or 425 degrees F if using a glass or ceramic pie pan.

I made the same pie crust as Ms. Lorwin did and loved it even more.  It came out drier than the first attempt, which made it easier to work with.  It rested in the refrigerator while I made the filling.

Filling:

1 1/2 lb beets
2 cups shredded sharp Cheddar cheese
1 tablespoon dried bread crumbs
2 tablespoons brown sugar
1 teaspoon cinnamon
1 teaspoon ginger
3 egg yolks
1/2 cup currants, soaked in boiling water for 3 minutes then drained
4 tablespoons butter, melted

Following Ms. Lorwin's directions but using the above quantities yielded a 9 inch pie pan that was adequately filled.

Stuffed to the brim!
I used the same little cutters to make a design on the top crust.  This time the dough didn't stretch as much, plus the holes were cut further apart.  I like the way the design turned out.


I was using a ceramic pan so I baked it at 425 degrees F for 20 minutes, then at 325 degrees F for 25 minutes.  This seemed about right.

Not even a tad overbaked.
The Verdict

The crust was crispy, flaky, and tasty, just as before!  I liked that it didn't come across as overbaked, not even a little.

The thicker filling was more impressive visually.  One piece was quite filling.

Look at that flaky crust!!!
But the flavor was so much better!

The beet flavor was still dominant but having more currants made it more balanced.  Their bit of chewy sweetness added an interesting twist as you ate it.

I used four times the amount of spice as Ms. Lorwin called for.  This meant that you could actually taste the cinnamon and ginger, but their flavors were not too much.  They were supporting characters and I really only knew they were there when I focused on them; otherwise they added a wonderful depth.

I used the same amount of melted butter as for an 8 inch pie and think this was just right for the 9 inch pie.  Not greasy on my lips but nicely rich.

Now I would say this wasn't a pie that was made of beets (as I would consider saying for yesterday's post) but a pie that started with beets and became so much more.  The other flavors made it intriguing.

Success again!  I am so glad I tried it again.  I recommend it as a surprising main course for a light dinner, and the leftovers are just as good.


Cookies Consent

This website uses cookies to offer you a better Browsing Experience. By using our website, You agree to the use of Cookies

Learn More