Wednesday, January 15, 2020

Cracknells, Revisited

I was making Royal Frosting the other day, which requires egg whites and not the yolks.  I decided to take the opportunity to make cracknells again with those yolks.

To see the whole procedure, see the original post, "To make Cracknells".

This time I started with the yolks, 6 or 7, I hadn't quite remembered the amount.  This was about 1/2 of what I used to make cracknells the first time, so I chose to use 1/2 pound each of flour and sugar.

Considering the alternate recipes that used no yolks and all butter, I decided that was about right but if I needed to, I could put in more butter.

I also wanted to make a different flavor.  One of the alternate suggestions was caraway and rose water.  I LOVE caraway and I love rosewater, so why not both?

Here's the list:

1/2 lb flour
1/2 lb sugar
6 or 7 egg yolks
2 tablespoons butter
1 teaspoon rose water
1 teaspoon caraway seeds

glaze:
1 egg white and 1 tablespoon rose water, well mixed

Preheat the oven to warm, about 155 degrees F.

I mixed in the yolks and butter together into the mixed flour and sugar.  Then I mixed in the rose water and caraway seeds, and kneaded in enough extra flour to make the dough non-sticky.

The dough rolled out to about 1/4 inch depth on the floured silicone mat.  I cut the dough in rounds at about 2 inches (5 cm) in diameter.  That made a lot of them and they fit well in the pan.

I kept rolling the dough and cutting out shapes until I had used up all the dough.

Then I poked holes with a fork and brushed glaze well over each one.

They baked for four hours at that temperature; at the 2 hour mark I loosened them from the pan.  A few cracked but I pushed them together for the rest of the baking.

After the four hours, I turned off the oven and let them sit in the oven overnight.

The next day, I took them off the pans.

The Verdict

Oh my, yes, these are good!  The caraway was there but understated.  Slightly sweet and very crispy.  I could not taste the rose water at all.  And I was still glad I used a glaze.

Some were missing before I took the picture...
These things are addictive.  I want to just keep nibbling on them.  If any survive, I want to try them with cheese and wine as a dessert.  Just having one while drinking some wine was good!  Success again!

Try making them.  They are easy and tasty and different from a cracker and from a cookie.  A nice way to surprise your guests.


Thursday, January 2, 2020

Lumbardy Tartes -- The Sequel

Yesterday I wrote about my first attempt at making a Lumbardy Tart -- a savory beet-filled pie from the Dining with William Shakespeare book.


I kept thinking about it and realized I really needed to make it again, and make it thicker and more flavorful, if I could.

So here we go, Attempt Number Two!  My redaction for a 9-inch pie pan.

My Redaction (see the previous post for more details)

Preheat oven to 450 degrees F or 425 degrees F if using a glass or ceramic pie pan.

I made the same pie crust as Ms. Lorwin did and loved it even more.  It came out drier than the first attempt, which made it easier to work with.  It rested in the refrigerator while I made the filling.

Filling:

1 1/2 lb beets
2 cups shredded sharp Cheddar cheese
1 tablespoon dried bread crumbs
2 tablespoons brown sugar
1 teaspoon cinnamon
1 teaspoon ginger
3 egg yolks
1/2 cup currants, soaked in boiling water for 3 minutes then drained
4 tablespoons butter, melted

Following Ms. Lorwin's directions but using the above quantities yielded a 9 inch pie pan that was adequately filled.

Stuffed to the brim!
I used the same little cutters to make a design on the top crust.  This time the dough didn't stretch as much, plus the holes were cut further apart.  I like the way the design turned out.


I was using a ceramic pan so I baked it at 425 degrees F for 20 minutes, then at 325 degrees F for 25 minutes.  This seemed about right.

Not even a tad overbaked.
The Verdict

The crust was crispy, flaky, and tasty, just as before!  I liked that it didn't come across as overbaked, not even a little.

The thicker filling was more impressive visually.  One piece was quite filling.

Look at that flaky crust!!!
But the flavor was so much better!

The beet flavor was still dominant but having more currants made it more balanced.  Their bit of chewy sweetness added an interesting twist as you ate it.

I used four times the amount of spice as Ms. Lorwin called for.  This meant that you could actually taste the cinnamon and ginger, but their flavors were not too much.  They were supporting characters and I really only knew they were there when I focused on them; otherwise they added a wonderful depth.

I used the same amount of melted butter as for an 8 inch pie and think this was just right for the 9 inch pie.  Not greasy on my lips but nicely rich.

Now I would say this wasn't a pie that was made of beets (as I would consider saying for yesterday's post) but a pie that started with beets and became so much more.  The other flavors made it intriguing.

Success again!  I am so glad I tried it again.  I recommend it as a surprising main course for a light dinner, and the leftovers are just as good.


Wednesday, January 1, 2020

Lumbardy Tartes, and a Happy New Year to You!

The New Year is upon us: 2020!  I wish us all a good year -- to everyone in the world and to the world, too.

This is the beginning of my ninth year of blogging.  I continue to be astonished that I am able to do it regularly and successfully.  My regular guest tasters have commented that my historical cooking "never disappoints", to which I respond with "Whew!"  because I know that I don't know how the recipe will turn out but I try it out on them anyway.  (But usually I have a back-up plan just in case the meal is a flop.)

For the record, this is my 190th post (!!!!) and at the time of this writing I have over 80,000 page views.  I typically see about 1000 page views in a month; compare that to the 1000 page views I had in my first year of blogging.  Again, astonishing!

************

I was wandering through my local farmers market recently, enjoying my first arepas (the sauce was particularly amazing) and wondering which vegetables should come home with me, when a table full of beets caught my attention.  They were a good size -- not too big -- and they had their greens still attached, unlike what I find at the grocery store.  There were red beets and golden beets.  The price was right, too.

Once I had them home, I perused my cookbooks for ideas.  What was really appealing was Lumbardy Tartes, from Dining with William Shakespeare, by Madge Lorwin.

ISBN 0-689-10731-5
I've tried two other recipes from this book:  My Salmon is Soused and How to Pickle Mushrooms.

Today's recipe is on page 238, and is titled

"To Make Lumbardy Tartes"

Take Beets, chop them small, and put to them grated bread and cheese, and mingle them wel in the chopping, take a few Corrans, and a dish of sweet Butter, & melt it then stir al these in the Butter, together with three yolks of Eggs, Synamon, ginger, and sugar, and make your Tart as large as you will, and fill it with the stuff, bake it and serve it in.

John Partidge, The good Huswifes Handmaide for the Kitchin

Ms. Lorwin provides the original recipe and its source and then gives us her "working version", i.e. her redaction.  That is the one I decided to try.

The Working Version

1 pound fresh young beets
2 tablespoons brown sugar
1 teaspoon grated bread crumbs
3/4 cup grated mild Cheddar cheese
1/4 currants, parboiled
1/4 teaspoon cinnamon
1/4 teaspoon ginger
3 egg yolks
4 tablespoons butter, melted.

The pastry
2 cups sifted unbleached flour
1 teaspoon salt
3/4 cup cold butter
1/2 cup cold water
1 egg, separated


I used all of the red and most of the golden beets.

Actually used 1 1/2 sticks of butter.  And water, of course!
Peel the beets -- this is best done with a potato peeler -- and grate them into a mixing bowl.  Add the sugar and stir until it melts.  Mix in the bread crumbs, grated cheese, currants, spices, and egg yolks.  Then stir in the melted butter.  Cover and set aside while you are making the pastry.  The instructions for making the pastry are on page 31.*

Divide the dough into two parts, the part for the bottom crust a bit larger than the piece for the top crust.  On a floured work surface, roll out the piece for the bottom crust to fit an eight-inch pie dish and fit it into the dish.  Then roll out the piece for the top crust.

Spread the filling evenly in the dish and cover it with the top crust.  Seal the edges with the tines of a wet fork and trim off the surplus pastry.  Punch fork holes in the crust and brush it with egg white.  Bake at 450 degrees for twenty minutes, then lower the heat to 350 degrees and bake twenty-five minutes longer.  Serve slightly warm.

*Pastry instructions from page 31:  To make the pastry, sift the flour and salt together into a large mixing bowl.  Add 1/2 cup of the butter and crumble it into the flour until it is like fine meal.  Dice the rest of the butter into 1/4-inch cubes and stir them into the flour mixture.

Add [the cold water] to the egg yolk ..., and stir until well blended.  Pour the mixture over the flour-butter mix and stir quickly until a ball of dough can be formed with the hands -- if more liquid is needed, add additional [water], one tablespoonful at a time.  

My Notes

Preheat the oven before you start!  I forgot that and had to wait after the pie was made before it could bake.

I decided to make the crust first so it could rest before I rolled it out, which I have found to be a good idea any time I make a pie crust.

I could have used my food processor to mix the butter with the flour-salt mixture but decided to mix it all by hand.  I thought the instructions to mix in some of the butter and then the rest was interesting.  I didn't just stir in the small cubes but mixed them in more thoroughly, just not as much as the 1/2 cup.

Once the water/egg yolk mixture was poured over the flour mixture, I stirred it with a wooden spoon.  The whole thing came together quickly and I didn't need my hands to form the ball.  The dough then was wrapped in plastic and placed in the refrigerator until I was ready to roll it out.

Freshly mixed.  Almost untouched by human hands.
Then I turned my attention to the beets.  After removing the tops, I weighed out 1 pound, which used all of the red beets and most of the golden beets.  The food processor made short work of grating them and, thankfully, kept the juice inside the container instead of on my clothes.

I think the red and gold are pretty!
Ms. Lorwin called for 3/4 cup of mild Cheddar cheese; I decided to use extra sharp Cheddar cheese and put in a full 1 cup.

As for parboiling the currants, I decided that what really needed to happen was to get them softened.  The currants went into a bowl, had boiling water poured over them, and then they sat for 2 minutes, after which I drained them.

When the filling was mixed, I prepared to roll the dough for the crust.

But once mixed, everything was beet red.
At first I rolled the dough on a floured countertop.  But it was pretty moist and wanted to stick to the counter despite the flour dusting, so after I did the bottom crust, I changed to using the silicone rolling mat, which made it easier to move the crust.


I used a 9 inch pie pan so the beet mixture did not fill the pan.


Instead of pricking the top crust with a fork, I used some small cutters and cut out a design.

The challenge was getting the design centered on the tart.
I really liked the advice to seal the edges with the fork.  Then I brushed the top with egg white beaten with a little water.


I watched the baking times carefully as my oven tends to cook things faster than what I expect.  Sure enough, I started worrying that the top would over-bake after 15 minutes at 450 degrees F.  It was getting brown and threatening to burn.  So I pulled the pie out for the last 3 minutes, let the oven cool to below 350 degrees F, then put the pie back in the oven while it heated up to 350.  Even then, I only let it cook another 20 minutes.

The crust was just a tad overcooked.
The Verdict

I served it as a main course, with a tossed green salad as a side dish.  The tart was pretty to see and smelled good!  The crust looked puffy, which was a good sign.

I also liked that the filling was firm enough to stay in the crust when a piece was cut -- no sliding filling at all.

Pretty!
The crust was wonderful, despite being a little overbaked.  Crispy and flaky yet with enough structure to keep its shape when served.  Buttery in flavor, too.  It didn't stick to the pan, and it was flexible, easy to roll out, and very forgiving as I tried to center it on the pan.  I think it is one of the best pie crusts I have ever made.

The filling had a dominant flavor of beets, and was just a bit sweet to enhance the savory aspect of it.  The currants added a nice chewy, sweet blast.  The spices were really subtle, and I think I would add more if I made this again.  I wanted to taste them and it was hard to tell they were there.  The butter in the filling was there but I think I would put in less just because I kept getting a buttery film on my lips when I ate it that I didn't like.

I couldn't taste the cheese at all, which makes me want to put in more.  I had room in the 9-inch pan to put in more beets and more cheese, so I think that would be a good idea.

In total, it was so good!  Flavorful, tasty, filling.  We had two pieces each as the main course.

It almost felt sinful having "pie" for dinner, especially because it was so pretty and looked like it could be a fruit-filled dessert pie.

One guest taster remarked that she liked how the texture of the shredded beets was there in the filling.  She found that very appealing and I agreed with her.

I had the leftovers reheated for lunch and was pleased to see how well the crust held up in the refrigerator and then heated in the microwave oven.  No soggy crust at all.

Success!

Since I had extra room in the pan, if I make this again I would use more beets, more cheese, and more spices. I want a crust that is stuffed full.

I thought Ms. Lorwin's direction to use 1 teaspoon grated bread crumbs was silly at first.  One teaspoon?  It seemed like it would not be enough.  But she was right:  the filling was firm enough and didn't need to have more crumbs to hold it together.  Also, the filling was not juicy, so no extra crumbs were needed to help that.  Forgive me for doubting, Ms. Lorwin!

HEADS UP!  I redid the recipe the way I wanted to try.  Tune in tomorrow for the sequel!


Sunday, December 15, 2019

Chocolate Biscotti - One of My Most Favorites

I always reserve the last post of the year for one of my Most Favorite recipes, and this year it is one I found in 2004 and have been making ever since. 

The name is Chocolate Biscotti, but it is really "Chocolate plus whatever else you want to add in Biscotti."  You can shift the flavor and the experience around quite a bit depending on what you mix into the dough, or you can leave it "as is" and enjoy it as straight chocolate.

Keep in mind that, as a biscotti, it is baked twice, and so it crisp and a bit hard.  This makes it perfect for dunking! 

Without further delay, I give you one of my favorite recipes, especially good to make and give away during the holidays.

Chocolate Biscotti

2 cups flour
1/2 cup unsweetened cocoa powder
1 teaspoon baking soda
1 teaspoon (or less, to taste) salt
6 tablespoons butter, softened
1 cup sugar
2 large eggs
3/4 to 2 cups add-ins:  nuts, chocolate chips, crushed peppermint sticks, etc
powdered sugar

So simple!
Preheat oven to 350 degrees F.

Grease and flour a large cookie sheet.

In a bowl, whisk together flour, cocoa powder, baking soda, and salt.

Whisk slowly so the powders don't go flying!
In another bowl that can go with a mixer, cream butter and sugar until light and fluffy.

Add eggs and beat well.

Sugar, butter, and eggs.
Stir in flour mixture to form a stiff dough.

It should stick together but is somewhat dry.
Stir in add-ins.

Stiff dough means you have to work to distribute the add-ins evenly.
Split dough in half.  With floured hands, compress the dough to remove air spaces.  Shape each half into a log that is about 2 inches wide and 12 inches long, and is slightly flattened.  Round off the ends.

Place the logs on the cookie sheet and sprinkle them lightly with powdered sugar.  Leave space between them as they will spread.

Both shaped; one powdered.

Bake the logs for 35 minutes or until they are slightly firm to the touch.  Cool them on the cookie sheet for 5 minutes.  Leave the oven on.


Fresh out of the first bake time.  The puddles are melted candy.
On a cutting board cut the biscotti, either across or diagonally, into slices about 3/4 inches wide.

I like using a bread knife to slice them.
Place each slice cut side down on the cookie sheet and bake another 10 minutes.

Cool on a rack.  Store in an air-tight container or freeze for future use.

Cooling after the second bake.
My Notes

I made this for Christmas giving, so I added crushed peppermint sticks.  One aspect of putting candy into the dough is that some of it will melt and run onto the cookie sheet.  Sometimes this will scorch and taste burnt, so if you see that, peel it off before you slice the logs.

This recipe is very reliable.  The only issue I've had is that sometimes the dough doesn't come together with just two eggs; if this occurs, I mix in a little milk until it forms that "stiff dough."  For this rendition, I added 1/4 cup milk and it all came together beautifully.

Too dry but a little milk made it just right.
Sometimes the dough is sticky, even with flouring my hands, so it is fine to cover it and chill it for 30 minutes or more. 

I like to slice it on the diagonal, so I shape the logs like parallelograms.  I slice parallel to the ends.  This makes the ends about as big as the regular slices.    Also, you might not want to bake the ends the second time as they tend to get overcooked.  They taste just fine without the second baking.

I aim for this shape.
The Verdict

Success?  Always! 

The flavor is a deep enough chocolate to satisfy a chocolate lover.  It is sweet but not overly so.  The add-ins can make it fun (peppermint!) or more savory (toasted nuts) or intriguing (white chocolate chips). 

The biggest problem is making them last long enough around the house to share with others!

I hope you enjoy one of my favorite recipes.  Merry Christmas and Happy Whatever You Love to Celebrate!


Sunday, December 1, 2019

"To make Cracknells"

I am still enjoying a book I bought recently, titled John Evelyn, Cook. The first recipe I tried from it was for a Quaking Pudding -- see here for the post.

ISBN 0 907325 653
Today I was intrigued by Recipe #127, "To make Cracknells."  I wondered if they were a form of cracker, my neighbor thought they might be like pie crust, and they also struck me as some form of cookie.

The recipe does not look complicated but it is vague about some of the quantities.  I made sure I had ample amounts of all and crossed my fingers.

127. To make Cracknells.

Take a pound of sugar finely searsed, and a pound of the finest floure, mingle them together; take the powder of dry'd Orenge Pills, finelie sersed, mingle it amongst the flowre and Sugar such a quantity as you like, then take a little butter and as much egge yolkes as will make it into a very Stiff paste, then rolle them out very thin, putt them upon Papers verie well flowred, and pricke them thicke, beat a peice of the yolke of an egge with a litle rose or orenge flowre water, and wash them verie well over, and bake them in a slow oven before they be too hard raise them from your Paper, and then put them in againe to harden keep them neere the fire.

My Redaction

1 pound all-purpose flour
1 pound sugar
1/4 ounce dried orange zest (see notes below)
2 tablespoons butter, softened
15 egg yolks, beaten  (see instructions)

glaze:  1 egg yolk, beaten, divided
            1 teaspoon rose water
            1 teaspoon orange flower water

I ended up needing more than 1 dozen eggs!
Preheat oven to 200 degrees F.

Place the flour and sugar in a large bowl and mix well.  Add the orange peel and mix well.

Slightly sparkly from the sugar
Cut in the butter, as you do for making a pie crust.  Use your hands, if necessary, to make sure there are no big pieces of butter left in the flour mixture.

I didn't know in advance how many yolks were needed to make "a very Stiff paste" so I mixed in 2 at a time until the mixture pulled together in a ball.  I recommend you put in 10 yolks at first and mix them in well.  Then put in one at a time, mixing well, until you achieve the goal.  It will be a slightly sticky ball that holds together with only a gentle squeeze.

Just before there were enough yolks in it.  A little crumbly overall.
This is just right.
Flour your rolling surface and keep extra flour nearby.  Roll the dough to about 1/4 inch thickness or less.  I floured the top of the dough as needed to keep the rolling pin from sticking to it.  At first I rolled it on the countertop but found it worked better on my Roul'pat.  It made it easier to pick up the pieces, because they were slightly sticky.

As thin as I could take it, without the paste breaking.
I had to choose how to cut them.  I decided to use a 4 1/2 inch round cutter, so they looked generous.  I also cut some rectangles that were about 1 to 1 1/2 inches wide.

The pieces were placed on well-floured pans and pricked many times with a small fork.

For the glaze, I beat the yolk then divided it into two small bowls.  I added the orange flower water to one and the rose water to the other, mixing each well.  I used a brush to put the glaze on each piece; I heeded Mr. Evelyn's direction to "wash them verie well over" -- I spread the glaze thinly but tried to cover each piece well.

Here, five were glazed with rosewater, the one with a notch used orange flower water.
As each tray (there were three) was pricked and glazed, it went into the oven.

I checked them every 30 minutes; after 2 hours I turned the oven to "warm" (175 degrees F) and left them for four hours.  Then I turned the oven off and left the pieces in overnight.  At the 2 hour mark, I loosened the pieces as directed.  I also loosened them again before leaving them in overnight.

All done.
The Verdict

There were 16 rounds and several rectangular pieces in total.

The first thing I noticed was that most of the round pieces had stuck to the pan again, so some broke when I took them off.  I think the pans could have used more flour on them.  Also, they didn't spread, which I appreciated.

The next noticeable thing was that the rounds weren't all dry all the way through.  The middles (and sometimes to near the edges) were still soft and a little sticky, whereas the rectangular pieces (narrower) were dry all the way through.  I think I probably should have cut smaller pieces, perhaps 2 inch diameter rounds.  This would give more to share around and a better chance of having each piece dried all the way through.

You can see the darker region on the round -- that is the sticky part.
This gave me some that were crispy (the ones with a soft middle) and some that were crunchy (dried all the way through), both of which I liked.  Neither were too hard to chew and both had the flavor come through.

And what was that flavor?  Definitely orange, definitely sweet (but not overly so).  The ones with the orange flower glaze were more "orangey" than the rose water glaze.  Both glazes gave a light floral perfume to the flavor, and I can say I really like the rose/orange combination.  The one piece I left unglazed for comparison was good but the glaze increases the flavor level, so I would always want to use a glaze.  I have no preference for the glaze flavor -- both were good!  The differences were subtle but there.

Success!  Here is a picture showing a top and a side view.  I estimate the thickness to be about 1/4 inch.  The glaze became shiny and the paste became dry all the way through.


When I first read the recipe (okay, the first three times I read the recipe), I had no idea what Mr. Evelyn meant by "Orenge Pills" -- I kept thinking, "What kind of pill is he talking about?"  Then I realized he meant "peels" and so I had to figure out how to get dried, powdered orange peel.

My daughter had the best idea: remove the zest off the oranges and then dry it, which is what I did.  I knew I was just getting the good part of the peel without the bitter white part.  So I did that with four small oranges (from my yard!), placed the zest on a pan, and dried it in a warm (175 degree F) oven for about 30 minutes.  Once it cooled I rubbed it with my fingers to break up the clumps.  I considered pounding it in my mortar but decided to keep the particles as big as they were.  I'm glad I did, as I think they added a good orange flavor.

Here is the picture I took about it.  The composition made me laugh!


Finally, the book's editor added a footnote to this recipe:  "Related to the French craquelins.  See Hess, pp. 155-6 for a discussion of cracknells."

I checked with my fellow historical cooks about the Hess book.  My friend JH sent me a picture of the pages; it lists two versions of the cracknell recipe.  One is flavored with caraway and rosewater, and also contains yeast.  There is a half pound of butter and no egg yolks at all.  The other uses 4 yolks, 1 white, and 2 ounces of butter and is flavored with rosewater and coriander seeds.  Neither uses a glaze.  The first bakes in a "soft oven" and the other calls for "an oven that is not too hot."  A variation has them baked on buttered plates in "a pretty quick oven."

As for craquelins, they are defined as "made of the yolks of eggs, water, and flower; and fashioned like a hollow trendle [a cupped disk or ring]."  Another reference says they are to be "thrown into boiling water and when they rise, they are to be lifted out, wiped, and baked", which is a medieval technique.

I can see why making the shape like a ring is recommended -- it would avoid the sticky center I found even after a long, slow bake.

These would be good as a light dessert, perhaps served with cheese and wine, especially if they were smaller.

I still think the glaze is necessary!

Friday, November 15, 2019

Pumpkin Stuffed with Jeweled Rice -- Uzbekistan

When my daughter went to Uzbekistan last year, she brought me back barberries to try, because she is a good daughter who knows how to shop for me.

She also received, as a gift, a book on Uzbek recipes, titled Samarkand, Recipes and Stories from Central Asia & the Caucasus, by Caroline Eden and Eleanor Ford.


One recipe that sounded so inviting has been on my mind to try for a long time.  The only issue was getting a pie pumpkin instead of a jack-o-lantern pumpkin.  The former are edible and the latter are bitter and tasteless.  My persistence and patience paid off recently as I found a little side-of-the-road produce stand that had what I've been looking for.

So now I can make the

Pumpkin Stuffed with Jeweled Rice

1 pumpkin (about 2 1/4 pounds)
olive oil
2 teaspoons ground cinnamon
1 scant teaspoon ground cardamom
1 teaspoon dried chile flakes
1/2 cup dried barberries or unsweetened dried cranberries
2 tablespoons orange blossom water
generous pinch of saffron strands
1/2 cup sliced almonds
1/2 cup pistachios, chopped
1 orange
2 tablespoons sugar
2/3 cup dried sour cherries
1/2 cup basmati rice, rinsed
sea salt and freshly ground black pepper
4 tablespoons butter


Preheat the oven to 425 degrees F.  Cut a lid off the pumpkin and reserve it.  Scrape out the seeds and straggly strands and discard.  Continue scooping out more of the flesh, leaving the shell about 1-inch thick (save the flesh for soup).  Rub the inside of the pumpkin with a little olive oil and the cinnamon, cardamom, and dried chile.  Season with salt and pepper.  Roast for 30 minutes.

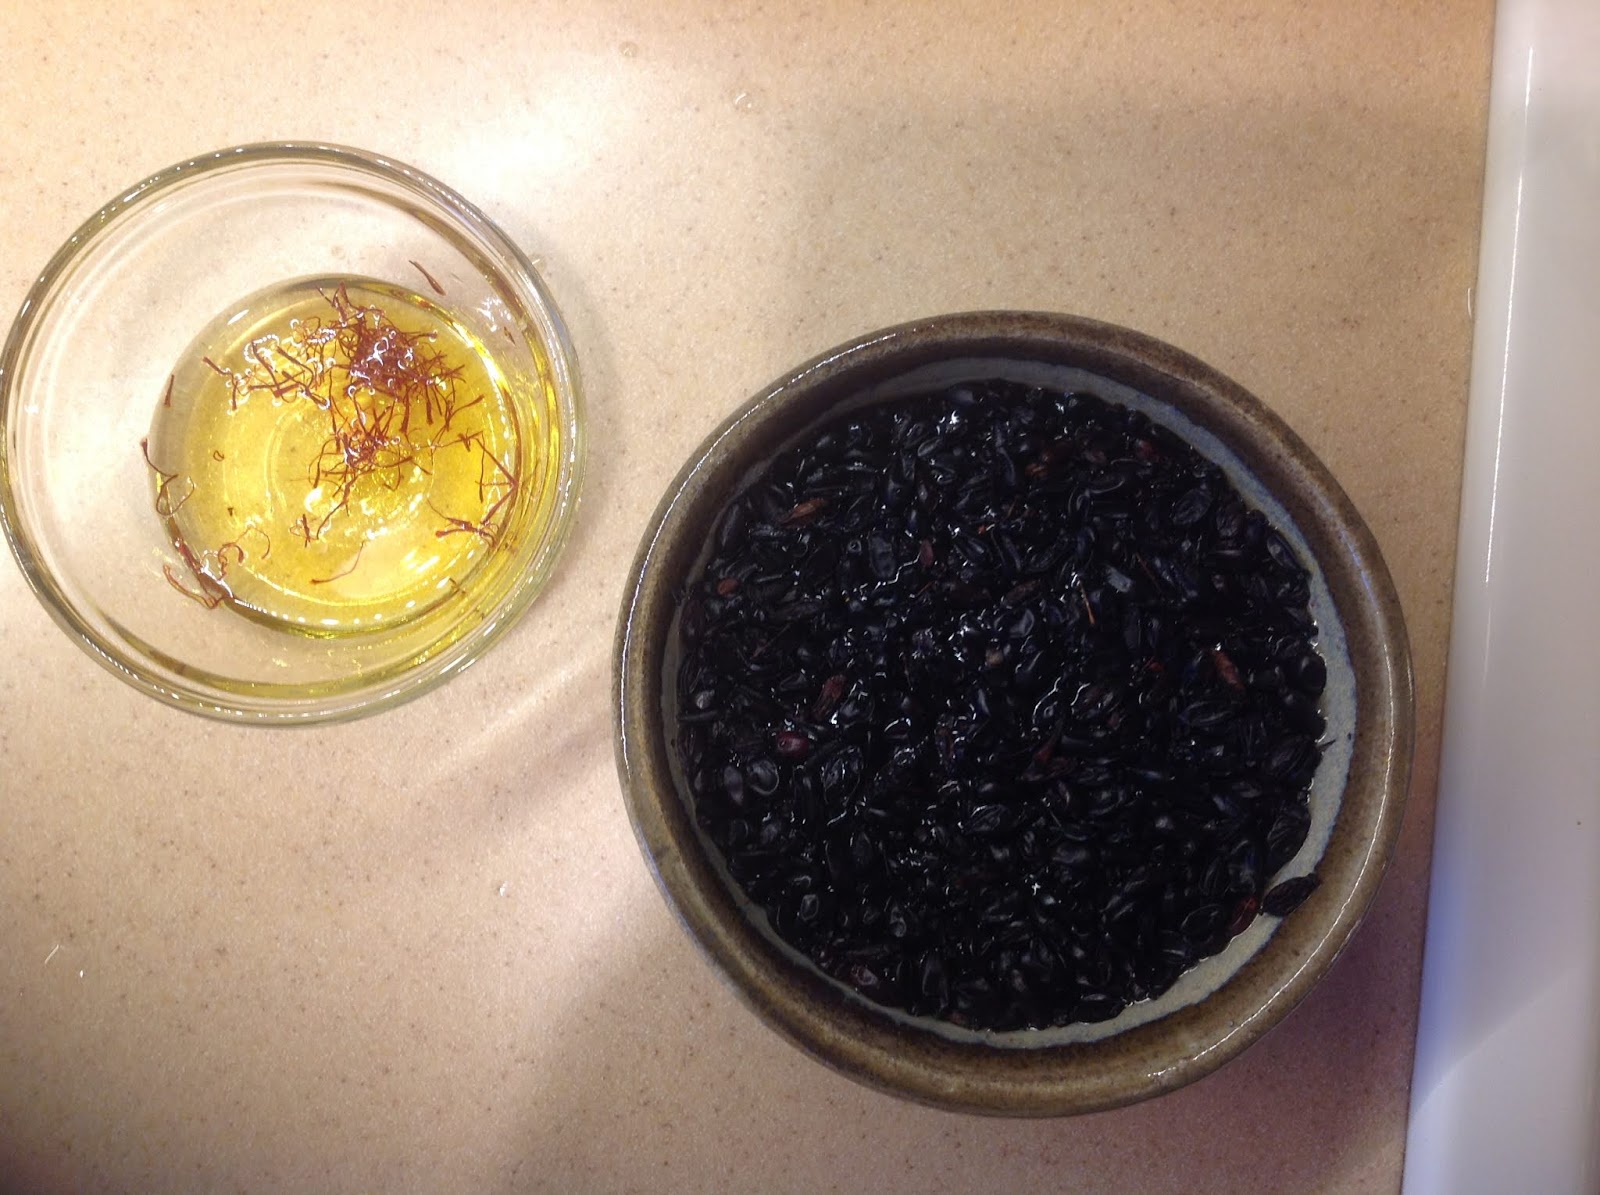
Meanwhile, put the barberries into a bowl of cold water and let soak for about 15 minutes, then drain.  Put the orange blossom water into a small bowl and crumble in the saffron.  Set aside.  Toast the almonds and pistachios in a dry pan.  Set aside.

Use a peeler to remove half the orange zest in strips.  Slice these crosswise into thin slivers.  Bring a small pan of water to a boil, drop in the orange zest, boil for 1 minute, then drain and refresh under cold running water (this removes the bitterness.)  Return the pan to the heat and add the sugar and a generous splash of water.  Heat to dissolve the sugar, then add the orange zest and cook the liquid down to a syrup.  Remove from the heat and stir in the toasted nuts, barberries, and sour cherries.  Set aside.

Partially cook the rice in fast-boiling water for 6 minutes.  Drain.  Stir the fruity nut mixture through the rice, then drizzle with orange blossom water.  Season well.  Spoon the jeweled rice into the pumpkin, top with the butter, and place the lid back on top.

Tear off a piece of aluminum foil large enough to double wrap the pumpkin and lay out on a baking sheet.  Sit the pumpkin on top, rub the skin with a little olive oil, and wrap the foil around it.  Roast for another 30 to 60 minutes until the flesh is tender and a knife goes in easily (allow more roasting time if there is resistance to the knife).  Let sit for 10 minutes before serving.

My Notes

I used barberries, of course!  My sour cherries were whole, seeded, and frozen, not dried, so I used about 1/2 cup.  The pistachios were already dry roasted and salted, so when I toasted them, I just barely got some of them browned.  I used regular rice, not basmati, and about 1 tablespoon of butter instead of 4.

My pumpkin weighed about 4 1/2 pounds before cleaning, and the shell was less than 1 inch thick, so I didn't scoop out any of the flesh.  I mixed the cinnamon, cardamom, and chile flakes in a bowl then added some salt and pepper.  It was this I spread on the inside of the pumpkin before roasting.  The spice mixture was surprisingly thick.

Post-first-roasting.
Here are the barberries soaking and the saffron infusing the orange blossom water:

I forgot to crumble the saffron.
My orange was very small so I used the whole zest.  Plan the zest cooking steps carefully so you can do them easily:  To "refresh" the boiled zest, I first drained them in a small sieve, rinsed them under the faucet, and then left them in the sieve to continue draining while I returned to the pan and added the sugar and water.  Once the sugar was completely dissolved, I put in the zest and boiled the mix until it was reduced to looking just slightly syrupy.

While boiling down to syrup
I added the nuts and fruit right into this pan and stirred well.

The fruity nut mixture before the rice was added.
Once the rice was boiled, I drained it and put it into the pan with the fruit and nuts and mixed well.  After drizzling on the saffron and orange water, I added some pepper (not salt because the pistachios were already salted) and stirred well.

The quantity of jeweled rice fit the inside of the pumpkin perfectly!
Nicely portioned.
Important:  The pumpkin was still pretty hot from its first roasting when it was time to rub the skin with olive oil before wrapping in foil.  Be careful!  I had to rub quickly to avoid burning my fingers.

After 30 minutes of the second roasting, the pumpkin was cooked to tender.  I tested it by stabbing it with a knife through the foil.  : )   The pumpkin rested its ten minutes while I finalized the accompanying meat dish.

The Verdict

I served it as a side dish to the Pork Roasted in Milk, and accompanied by a tossed green salad.  I first served it with the lid on but that made it hard to serve, so I removed the lid, which looked pretty good.

The text suggested cutting the pumpkin in wedges for serving, which I did.


A lot of the rice mixture fell out during the "transfer from the pumpkin to the plate" but it was easy enough to scoop it back up and pile it on the wedge and on the plate around the wedge.

It was an attractive presentation -- we all agreed that the jeweled rice was dramatic and the pumpkin wedge with it intriguing.  I will describe the flavors of the two separately.

The rice stuffing was very tasty:  The fruits (cherry and barberry) were tart and kept the filling from being too much like a dessert, but still added a sweetness that kept it from being too tart.  The nuts and the barberry seeds added a lovely crunch to offset the softness of the rice and fruits.  The orange zest and orange blossom water flavors were very muted but, I think, added a dimension of flavor that rounded out the overall taste experience.

The spices on the inside surface of the pumpkin contributed to the flavor blend, although I was not pleased with the occasional bite of the chile flakes.  My guest tasters liked it, though, and I know I am a "flavor, not fire" person, so I decided I could live with it for their sake.  I thought it was interesting that those spices were there and not mixed into the stuffing at all.  It seemed to be an interface that brought the two parts, pumpkin and stuffing, together.

The pumpkin itself was not exciting.  I think it added something flavorwise to the rice mixture but I think it would be better to stuff a squash that had more flavor of its own.  We discussed the idea of fixing the stuffing without the pumpkin and thought, while it might be good, it would be missing something.  I suspect the pumpkin provided moisture to help finish cooking the rice, too.

So, success!  It paired well with the pork and the salad.  The leftovers await my attention for another day and I look forward to having them.

I think it would make a good stuffing for a turkey or a chicken, too.  The meat juices would add a lovely, savory dimension.  Perhaps I will give it a try.

Oh, the drama!

Friday, November 1, 2019

A Quaking Pudding

I was wandering through a little bookstore in Los Angeles one day.  The cookbook section was small but had some interesting books, including the one I decided to buy.

ISBN 0 907325 653
Such a simple title!  I was intrigued to open it and was not disappointed.  From page 7:
John Evelyn (1620 - 1706), virtuoso, diarist and author, was the second son of a prosperous gentry family of Wotton in Surrey, whose wealth was founded on the manufacture of gunpowder in Queen Elizabeth's reign.
The description goes on to tell us that, among other things, he was a founder of the Royal Society, and "the first gardener-cook for whom meat was incomplete without a salad."  He was particularly interested in gardening, architecture, and city planning.

The editor of this volume, Christopher Driver, tells us that he first saw the manuscripts of John Evelyn some time in the 1950s:
... I saw exhibited there a large volume bound in decorated calf gilt, with Evelyn's arms on the cover and his woodcut bookplate inside.  It was titled, Receipts Medicinal, and proved on inspected to contain not only prescriptions for sick cattle and humans, but receipts for the still-room, formulas for preserves and perfumery (many of these in Portuguese), and culinary recipes.  (page 8)
He later went back and typed up the receipts of cookery.  "Evelyn's neat - but faint - hand always gives me a frisson, as though a friend had planted a great walnut tree three centuries ago."

The story of John Evelyn's life, as far as the editor could determine, is a good read.  Mr. Evelyn lived during a time of change in England, and his manuscripts reflect that.  I recommend it.

There are 343 receipts listed, some of which have a title only and no text.  There are many repeats.  Mr. Driver has reproduced them faithfully, including the spelling of the time and making notes about words that were crossed out or added in after the original words were written.  He also tried to determine the relationships that are mentioned in the receipts, tying the name or title to a person known at the time, and how Mr. Evelyn or his family might have known them.

Especially useful is the Glossary, starting page 179, that defines so many of the words used in the receipts.  I think I would use this when reading other old recipes, too.  Did you know a "kilderkin" was 16 gallons of beer?

The first recipe that caught my attention was #76, on page 69:

A quaking pudding

Take eight egges a pinte of creame, 4 spoonefulls of flower, a nutmeg a little rosewater, a quantity of sugar you thinke fitt, wett the cloath you intend to boile it in, then floure it and let it boile two houres.

I have made boiled puddings before and usually enjoy them, so I wanted to try this one.  The idea of it "quaking" made me think it might be more delicate than the puddings I've tried that used a lot of flour or had a base of bread crumbs.

My Redaction

8 eggs
1 pint heavy cream
4 tablespoons flour
1/2 tablespoon freshly ground nutmeg
1 tablespoon rosewater
1/2 cup sugar

See the nutmeg bits?  I grated them then pounded the rest in a mortar.
First I filled a large pan up halfway with water and also filled the kettle, and began heating the water in both.

I broke the eggs into a bowl and beat them with a fork.  Then I poured in the cream and stirred it well.

The flour was spooned into the mixture.  First I stirred it to break up the clumps of flour, then beat it more vigorously to distribute the grains well.

The nutmeg and rosewater were stirred in next.

Finally, I added the sugar and stirred until all the sugar was dissolved.

The mixture looked a lot like pancake batter, but was very thin.

Yes, just like pancake batter.
I rinsed the pudding cloth well (this gets rid of any residual soap from the last washing), then draped it over a bowl that was deep enough to hold all the mixture.

I sprinkled flour over the cloth.  It shouldn't be thick but it should be spread around well.

The picture doesn't show it well, but the cloth is at least lightly sprinkled.
At this point the water in the large pan was simmering and the kettle was steaming.

So I poured the mixture into the cloth, pulled the edges up and gathered them into a bundle to contain the mixture.  I tied the edges together with a sturdy cotton string, not too snugly because you need to leave room for the pudding to swell.


Some of the mixture was seeping out so I worked quickly to get the cloth put into the large pan of hot water.  As soon as it touched the water, the parts seeping out cooked and stopped the leak.

I poured in enough hot water from the kettle to nearly fill the pan, putting the water level an inch or so below the top edge of the pan.

Finally, I gathered the excess cloth into a bundle and rested it on one of the handles of the pan.  This keeps it from falling over the edge and possibly catching on fire.

Bubble, bubble, toil and trouble!
I adjusted the flame under the pan until the water was just simmering without boiling over or bouncing the cloth around.  I noticed the water was circulating around the whole thing, and I liked that.

I set the timer for 2 hours.

After two hours of gently boiling it, I pulled the pudding cloth from the hot water, let it drain back into the pan for a minute or so, and then placed the whole thing in a bowl.  I removed the string and opened the cloth -- it is hot so be careful when touching it.

The top, as it came out of the cloth.
I could see the pudding was, indeed, quaking!  It looked delicate so I carefully put my serving bowl over the pudding's bowl and inverted it.  This allowed the pudding to transfer without breaking or having to pull the cloth off.

The underside.  I removed that bit of eggshell before serving.  The brown specks are nutmeg.
I sprinkled a little ground mace over the top to decorate it before serving.

It needed something decorative around the edges but that didn't happen.
The Verdict

The pudding was served still warm as a side dish to some pork confit on a bed of apples and onions, and a tossed green salad.  (Remember, John Evelyn thought meat was incomplete without a salad!)

It was easy to remove pieces with a spoon.  It was soft but firm enough to hold its shape.

Cut away view, from the side.
The texture was mostly smooth, meaning it felt smooth on the tongue but looked a little lumpy. 

The flavor was very delicate:  the rosewater and nutmeg combination suggested that some fruit had been added.  My guest taster thought there might be vanilla in it.  The sweetness was a little too much for me for it to be a side dish -- I think next time I would add only 1/3 cup sugar.  But it wasn't bad, and seemed to emphasize the sensation that fruit had been added.

My guest taster wondered if there was cheese in it, which I attribute to the heavy cream and the texture.

The ground mace was warmed by the pudding and provided a lovely scent to entice our taste buds.

It was, as I suspected, a delicate custard.  The little flour in it probably acted as a binder to allow me to turn it out into a dish without it breaking.  But that also allowed it to quake, or wiggle when the bowl was moved. 

A success, for certain!  We both enjoyed it as a side dish and I look forward to having the leftovers for breakfast or lunch.


Cookies Consent

This website uses cookies to offer you a better Browsing Experience. By using our website, You agree to the use of Cookies

Learn More