Ukraine has been on my mind lately, so I could not avoid temptation when this book, Summer Kitchens by Olia Hercules, crossed my path in a bookstore recently.
 |
| ISBN 978-1-68188-570-4 |
It had me sold on the "Fermenting, pickling, and preserving" chapter. But the other chapters that cover breakfasts, broths, breads, vegetables, meats, and desserts also offer intriguing recipes.
They aren't all necessarily historic recipes, meaning very old. They are cultural, with any history they contain coming from previous generations of Ukrainians making tasty food from what they could grow or otherwise obtain. (But that is really what historical means!)
Some are more "modern" recipes invented recently, like the "Tomato and mulberry salad" that looks so tempting: mulberries, tomatoes, red onions, and fresh basil all brought together with an oil and vinegar dressing. (I have a mulberry tree!)
The pictures are wonderful, and the stories Ms. Hercules tells of her experiences in Ukraine make the entire book a treat to read.
My garden has an abundance of basil and chives right now, so I was drawn to the recipe on page 60, "Salted herbs for winter." Ms. Hercules says
[E]very summer, my grandmother would preserve fresh herbs in salt: although they lost their vibrant color and became mildly fermented in the process, they were delicious. ... these salted herbs would most often be used as a base for the soup of greens that is normally cooked in spring. ... My grandmother would also add the rinsed herbs to other soups and stews.
Salted herbs for winter
8 ounces herbs and greens, such as dill, parsley, green onions, sorrel, and wild garlic
1 1/2 tablespoons sea salt
 |
| 4 oz basil, 4 oz chives, crushed sea salt |
Cover with a lid and leave at room temperature for 2-3 days (you might want to push the herbs down a little further on the second day). Once a layer of liquid has formed at the top, move the jar to the cellar or fridge, where the salted herbs will keep for several months.
The herbs will be quite salty, so use them in small amounts as a seasoning or give them a quick rinse first.
My Notes
I mixed my herbs before finely chopping them, as you can see in the picture above. The quantity you see is in a 14 cup container. I estimate the unchopped herbs would measure about 9 cups. They were weighed after rinsing.
Then I took handfuls of herbs and chopped them. Some were very fine and some were more coarse; this did not bother me. What I imagined was how I would feel if I were eating food with this - did I want a big piece of basil in my mouth? Well, probably not, but I wouldn't mind the size pieces I was getting.
 |
| As finely chopped as I wanted them, on the left. I love my ulu knife. |
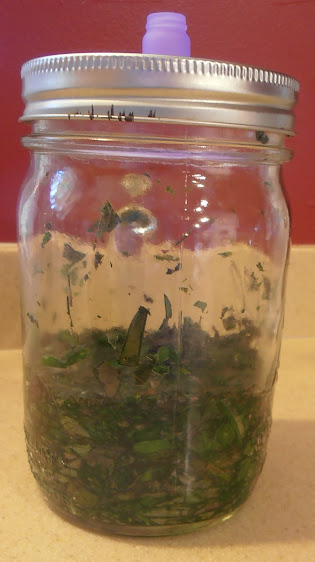
The herbs and salt didn't fill the jar. I put on the lid but I used a fermenting insert just because I had one and wanted to use it.
 |
| Assembly completed. |
On the second day, I pressed the herbs down as suggested. They compacted down to about half their previous height in the jar. I noticed they were wetter, although there was not a lot of liquid in the jar.
 |
| Day 2 |
 |
| Close up view of the herbs. |
 |
| Quantity used for a 6 egg omelet. |
 |
| Plus some on top. |

No comments:
Post a Comment