Wednesday, July 15, 2020

Playing with History -- Roman Empire Honey Cheesecake

Yes, we are still in a pandemic and yes, I still need to minimize my trips to the store.  But if I plan ahead well, I can get some ingredients I don't normally keep around the house (although I am not always sure why I don't!) and make historical recipes.  So while I still consider myself in the "Making Do Challenge", I'm going to stop using that phrase in the title of my posts.

Today I was looking at a webpage by another blogger.  She (I don't see her name on the blog) made a recipe from PBS.org and Squidoo Ancient Roman Recipes (which is another blogger site!).   It was for Libum, a sort of cheesecake soaked in honey.  You can view her page here.

I liked the idea of a dessert that is a cross between bread and cake, and it only uses a few ingredients.  At first I thought I would not be making it for this blog, so I made it according to her directions.  It came out just as she directed:  four lovely loaves with a mild cheesy flavor, the scent of bay, and the sweetness of honey.  My guest taster and I both truly enjoyed them after a dinner of a big tossed green salad (which also had some sliced meat and crumbled cheese on it).

We both wanted to have them again, which got me to thinking about what I would do instead of what her instructions said.  And that, my friends, had me decide to write it up for my blog.

Since I am not following the historical directions as closely as I normally would, I decided that "Playing with History" was the best description for my post.  In a way it is an historical upgrade but I see it more as a side step instead.

Libum  (Honey cakes or Honey Cheesecake)

(these are from the PBS.org site)

Ancient Roman Libum Recipe

Libum to be made as follows: 2 pounds cheese well crushed in a mortar; when it is well crushed, add in 1 pound bread-wheat flour or, if you want it to be lighter, just 1/2 a pound, to be mixed with the cheese. Add one egg and mix all together well. Make a loaf of this, with the leaves under it, and cook slowly in a hot fire under a brick.

- from Cato's On Agriculture, reprinted in The Classical Cookbook


Modern Roman Libum Recipe (serves 4)

1 cup plain, all purpose flour
8 ounces ricotta cheese
1 egg, beaten
bay leaves
1/2 cup clear honey

Sift the flour into a bowl. Beat the cheese until its soft and stir it into the flour along with the egg. Form a soft dough and divide into 4. Mold each one into a bun and place them on a greased baking tray with a fresh bay leaf underneath. Heat the oven to 425° F. Cover the cakes with your brick and bake for 35-40 minutes until golden-brown. Warm the honey and place the warm cakes in it so that they absorb it. Allow to stand 30 minutes before serving.

And bay leaves and frontignac.
My Notes

I followed the modern recipe except I first put the ricotta into a bowl, measured the flour over it, then poured the beaten egg over the top.  I mixed it with a spoon until it was barely mixed, then used my hands to finish mixing it.  The spoon came in handy to scrape the dough off the sides of the bowl.

It was a little sticky to work with but came together as a cohesive ball with just a little hand mixing.  I was careful not to overwork it; I kept thinking about how quick breads are best with minimal mixing.

Soft, moist, but not too sticky
Instead of four cakes, I made eight little ones.  Each one sat on half of a bay leaf.


The oven temperature was 375 degrees F and they baked for 30 minutes before they turned lightly golden brown.

They puffed!
I decided that four of them would soak in honey, which I diluted a little with water and warmed on the stove.  The other four would soak in the elderflower syrup, frontignac, which I had written about in a previous post (but did not warm).  (See here for how to make frontignac.)

As soon as the cakes were done, I flipped each one over and peeled off the bay leaf.

Leaf off, leaf on.  I love the leaf imprint!
Then, while they were still very warm, I put them into the honey and the frontignac to soak.  I let them soak an entire hour.
in frontignac
in slightly diluted and warmed honey
The Verdict

The first time I made them, they soaked about 15 minutes in warmed undiluted honey while we ravenously hovered over them and then couldn't wait any longer.  They smelled wonderful!  The bay scents the air and stimulates the appetite.  There was some honey soaked into the cakes, which was tasty.  We sopped up the rest of the honey with the cakes as we were eating them.

This time I managed to control myself and wait the entire hour.

I diluted the honey this time to make it more syrupy than just warming it.  I wanted it to soak into the cakes more.

After soaking for one hour, I noticed that the frontignac appeared to have been absorbed more than the honey but both syrups still had not been completely absorbed.

I flipped the cakes over to put a little glaze on top of each one, then decorated them with borage flowers that were from my garden.

Just too cute!
We had them for dessert, two each.  Both had their syrup soaked into the bottoms and up about 1/4 inch.  Both were tasty and flavorful!  Bay, cheese, honey or elderflower, all in a light bread base.  I liked the honey best and my guest taster liked the frontignac best.  Both were good.

You can see how far the syrup soaked into the cake.
The only difference I noticed between making the small ones and the large ones is that the small ones seemed a little drier in the middle.  Not bad, just a small difference.  We enjoyed them with a homemade fig wine as an aperitif.

Success!  I might make them again and try making six instead of four or eight.  Making the servings a little bigger might keep them moist without making them too big.


Wednesday, July 1, 2020

The "Making Do" Challenge -- Pickled Lemons (a revisit)

About four years ago, my neighbor gave me his Meyer lemons, and my daughter and I pickled them and wrote about it here:  Pickled Lemons.

They were fine but did not inspire me to want to keep making them.  My neighbor's tree has since died (whaaaaaa!) but my friend DL gave me lemons from his wife, GL's tree.  I wanted to try pickling lemons again but this time using a recipe from Charles Perry's translation of Scents and Flavors, a 14th century Syrian cookbook.

ISBN 978-1-4798-5628-2
I wrote about this book previously, as its recipes were featured at a culinary symposium, put on by the Society for Creative Anachronism.  You can read about it here:  West Coast Culinary Symposium 2018.

This book is fun to read.  The Arabic writings are on the left side of the page and his translation is on the right.  The recipes are intriguing and look tasty.  The spices referenced are wide and varied, including the usual cinnamon, cardamom, cloves, ginger, pepper, and other familiar ones.  But there are also others like spikenard, betel nut, and rose hips. Few recipes look complicated but many use techniques or food combinations I am not used to but look good and doable.

In all honesty, this looks like a cookbook I could spend a lot of time exploring and still offer up tasty meals.

I looked in Chapter 8:  How to Make the Various Types of Sour and Salty Pickles.  The book offers several variations on salted lemons, and I chose the first variation, recipe number 8.20.

Salted Lemons -- First variation

Take salted lemons, cut up small, put in a vessel, and squeeze the juice of fresh lemons to cover.  You can also use sour orange juice, which is milder than lemon juice.  Add oil, mixed spices, pounded toasted coriander seeds, minced parsley, mint, and rue, and set aside.  It is one of the very best and most fragrant of condiments.


These are the ingredients for the pickling liquid. 

My Notes

The night before making the recipe I sliced the cleaned lemons, spread them in a pan, and sprinkled kosher salt over them.  The pan was left slightly tilted so the liquid would gather at the bottom.  The next morning the slices were softer and the salt had been absorbed.

the night before
the morning after
My goal was to make one quart jar full of pickled lemons.

The two lemons missing their peels were juiced for the pickling liquid.  (Their peels were dried and powdered -- well worth it as a flavoring ingredients themselves.  They are really good in bread with olives and sun-dried tomatoes.)

I used a premixed "Poudre fines", consisting of cinnamon, cloves, ginger, grains of paradise, pepper, and saffron.

1/4 teaspoon cumin
1/4 teaspoon coriander
1 teaspoon Poudre fines
1/4 cup mixture of coarsely chopped rue, mint, and parsley

These ingredients were mixed well together in a bowl.

First I put in some of the spice and herb mix. Then several lemon slices.  Then more mix.  I repeated this until the jar was full.

The lemon juice went in to cover, although there was some floating of the lemon slices.  (Two lemons' worth of juice was not enough and I had to add some lemon juice from a bottle.)  After that I poured about a one inch layer of oil over the top.

Not quite full but close enough.
The whole container went into the refrigerator for about a week before I tasted it.

The Verdict

We tried them out of the jar, without putting them with a meal.

The flavor was, well, luscious.  Sour (but not too much for me), barely salty, but the spices and especially the herb flavors came through.  I loved it and so did my guest taster.  I ate several and wanted more.  I think that I liked the mint the best but the whole blend was superb.

The peel is not bitter from the white and the yellow zest is softer in flavor and texture than fresh lemon peel.

We have since had them with a meal, roasted chicken next to a vegetable stew.  It is a great condiment, adding some zing and intrigue to the meal.  We also made sandwiches with cheese and meat and slices of pickled lemon -- it was amazing!

One guest taster, who loves lemons but does not like parsley or cinnamon, did not like the mixture at all.  I could not get parsley as a dominant flavor, but she did.

I have since refilled the jar with more salted lemon slices, using the same juice, herb, and spice mixture.  This one is a keeper.

Success!

Monday, June 15, 2020

The "Making Do" Challenge -- Frontignac (Elderflower Syrup)

I am still attempting to keep this blog going by doing historical recipes but using just what I have at hand.  My elder tree is flowering, so what to do with all those blooms?  I have enough dried for tea and other recipes.  Some recipes are for making elderflower fritters but I am not in the mood for that.

I revisited a book I have used before, Flower Cookery -- The Art of Cooking with Flowers.

No ISBN; the Library of Congress Number is 67-24072
The author is Mary MacNicol and the book was published in 1967 in New York by the Fleet Press Corporation.

I feel very strongly that Ms. MacNicol did not test all these recipes; rather her goal was to gather them into one volume.  She cites her sources in many cases.

There are seven pages of recipes for the elder flowers and berries.  Jam, wine, fritters, vinegar, pickled buds, sauces, ices, even pancakes.

The one that caught my attention is on page 57 and is listed as

Elder Flower Water, "Frontignac"

When elders are in flower gather them on a dry day.  They should be in full but fresh blossom.  Put the flowers in a preserving pan with sufficient water to cover them, and boil for 1/2 hour.  Then strain through a fine sieve, or woolen bag, and let it stand.  When cold put again in the pan, and allow 1/2 lb. of sugar for each pint of the flavoured water.  Boil 10 minutes, skimming well all the time.

When cold, bottle for use, corking the bottles tight and sealing them down.

For an ordinary shape of ice use a breakfastcupful of this syrup and make like any other ice, but use less sugar.

                                                                          The Cookery Book of Lady Clark of Tillypronie


I thought it was interesting the recipe is called a "water", when it truly is a syrup.  I thought waters were distilled and did not have sugar in them.  But I learn new ideas all the time.

The name Tillypronie was amusing to me, so I decided to see if I could look it up and find out more about Lady Clark and her book.  I was pleasantly surprised to find a lot about it.

Tillypronie is in Aberdeenshire, Scotland.  You can read in detail about it here.
The house was originally built 150 years ago in 1867 by Sir John Clark, the diplomat son of Queen Victoria’s physician, Sir James Clark, who was himself the son of a butler from Banffshire. 
There are some pictures of the grounds and it is a gorgeous place to live.

I was more interested in Lady Clark, so here is what I learned about her:
 Lady Clark was not just an exemplary hostess; she was also a highly accomplished cook. After her death in 1897, Sir John arranged for the thousands of recipes she had collected throughout her lifetime, and particularly during his diplomatic postings in Brussels, Paris and Turin, to be edited into a single volume which was published in 1909. Virginia Woolf gave the resulting book a glowing review in The Times Literary Supplement at the time.
It made me sad that her book was published after she died.  You can read more about it here.
The book is considered a valuable compilation of Victorian era recipes. Lady Clark obtained the recipes by asking hostesses or cooks, and then testing each one at Tillypronie. She documented each recipe's source with the name of her source, and often also the date. There is comprehensive coverage of plain British cooking, especially of meat and game, but the book has sections on all aspects of contemporary cooking including bread, cakes, eggs, cooking for invalids, jams, pies, sauces, sweets (puddings) and vegetables. She had lived in Italy and France, and the cuisines of these countries are represented by many dishes, as is Anglo-Indian cooking with a section called "Curries".
It looks so interesting!  I looked around the 'net and found a digital copy of her book (you can also buy print copies).  Her recipe is found here, under the Ices category.  Ms. MacNicol cited it word-for-word in her book.

My Notes

Elderflowers, sugar, and water are all that are needed here.  Here are my flowers:


That is how many I picked.  Here is what was left after I removed most of the stems:


"Water to cover" meant they were floating a little off the bottom, but not too much.  I measured 8 cups.


When the water got hot, the flowers and water darkened.  After it reached a boil, I turned down the heat and let it simmer for 30 minutes.


I used a coarse strainer first to get out the flowers and stems.  Then I poured it through a fine strainer to get out the small particles.

It measured 6 cups (3 pints).  I let it cool for a few hours.

Three pints meant 1 1/2 pounds sugar, which I weighed and then added to the liquid.  I heated it to a boil, stirring to dissolve all the sugar, then set it to a slow boil for 10 minutes.  I did not stir it and there was nothing to skim.

Once that cooled down, I bottled it.  I measured 5 1/4 cups syrup.  They are stored in the refrigerator.

The Verdict


Sweet, but not too sweet.  Flavorful and if you don't know what elderflowers taste like, I think it is hard to describe.  Floral but not perfumy, light and yet enticing.

I enjoyed sipping it from a spoon and putting some in my tea.

I had some leftover pie crust so I rolled that into strips, baked them, and then brushed them with the syrup (three times) while they were still hot.  I served them cool, with an unbrushed crust for a taste comparison.  The flavor was enhanced by the syrup but it was very subtle.


I also put together a simple dessert of sliced oranges and fresh strawberries, and drizzled a little of the syrup over them.  That was tasty.

Recently I was looking at a recipe for Roman honey cakes, made of cheese and flour and an egg, baked, then soaked in honey.  I think this syrup would be good to use instead of honey, too.  I don't have much honey in my pantry, so it is worth a try.

Success!  Worthwhile and perhaps I will try Lady Clark's suggestion to turn it into an ice.

What are you cooking?


Monday, June 1, 2020

The "Making Do" Challenge -- Stuffed Eggplant

I decided that I needed to "up" the challenge of maintaining an historical food blog during a pandemic by cooking an historical recipe without running to the store for all the ingredients.  This is what they had to do:  cook with what you have and still make it taste good.  (I've been doing that a lot lately and love the creativity it inspires!)

Two eggplants were telling me they needed to be used.  I kept thinking about a recipe I did a long time ago for this blog,  Eggplant -- The Perfect Way.   It is wonderful, with cheese and basil and spices.  But I did not have the right cheese and definitely no basil -- the snails made short work of that in my garden and the seedlings are not big enough yet.

But I did have a packet of ground lamb in the freezer.  Lamb and eggplant are a good pairing, and both together suggested a particular geographic location to consider for recipes.

ISBN 978-0-520-26174-7
I really like this book.  The foreword was written by food historian Charles Perry who deftly puts the recipes and time period into context.  It even contains a description of how to make murri, a soy-sauce-like condiment used at the time.  The recipes themselves are easy to understand and enticing to make.  The color plates are mostly of art, servingware, and kitchenware from the time period.

I chose Recipe 44, on page 94.

Stuffed Eggplant

Ibn Razin, in one of seventeen recipes for stuffed eggplant, calls for extra stuffing to be spread over the eggplant before it is put in the oven.

Take some of our large eggplants.  Remove the head [ris] of each eggplant and hollow out the inside in order to extract the pulp while taking care not to cut the skin; indeed, [the skin] should be of a good thickness.  Then take some meat and pound it in a mortar and boil it.  When it is cooked, pound it in the mortar [again] in order to make it still more tender.  Put [it] in a pot [dast] and add fresh sheep tail fat, dry coriander [seeds], caraway, pepper, Chinese cinnamon, and fresh chopped coriander [cilantro] and parsley in great quantities.  Fry all of it until it is roasted.  Add salt and stuff the eggplant with this mixture.  Close up [the stuffed eggplants] with what was cut off [i.e., the head].  Insert [in each eggplant] three sticks of good-quality wood that has been smoked [in order to reattach the head], then put them in the pot and cook over a lively fire in the sheep tail fat until they are well cooked.  Then put them on a serving dish [zubdiyya] and sprinkle with dry coriander.  At the moment of serving, remove the sticks and throw them away.


My Notes

I had no cilantro so I decided to use just parsley (from my garden!).  Instead of sheep tail fat, I used olive oil.

I thought it interesting that there was no mention of "purging" the eggplant, after having read Perry's discussion of how eggplant was unpopular until it was discovered that salting it would remove the bitterness.  I decided to follow the preparation directions in order -- that is, hollowing the eggplants before cooking the filling -- so I put the prepared eggplants into salted water while making the filling.

Honestly, I wasn't sure which end of the eggplant was the head.  I decided it was the big end so it would be easy to hollow it and still leave thick walls.


I used a knife with a long, slender blade to roughly cut a circle into the length of the eggplant.  This defined the thickness of the walls.  Then I used a sturdy spoon to scoop out the flesh.  Sometimes I poked the flesh a few times with the knife to make it easier to scoop.

Considering the meat I had was already ground, I decided I didn't need to pound it, boil it, and pound it again in order to make it tender. 

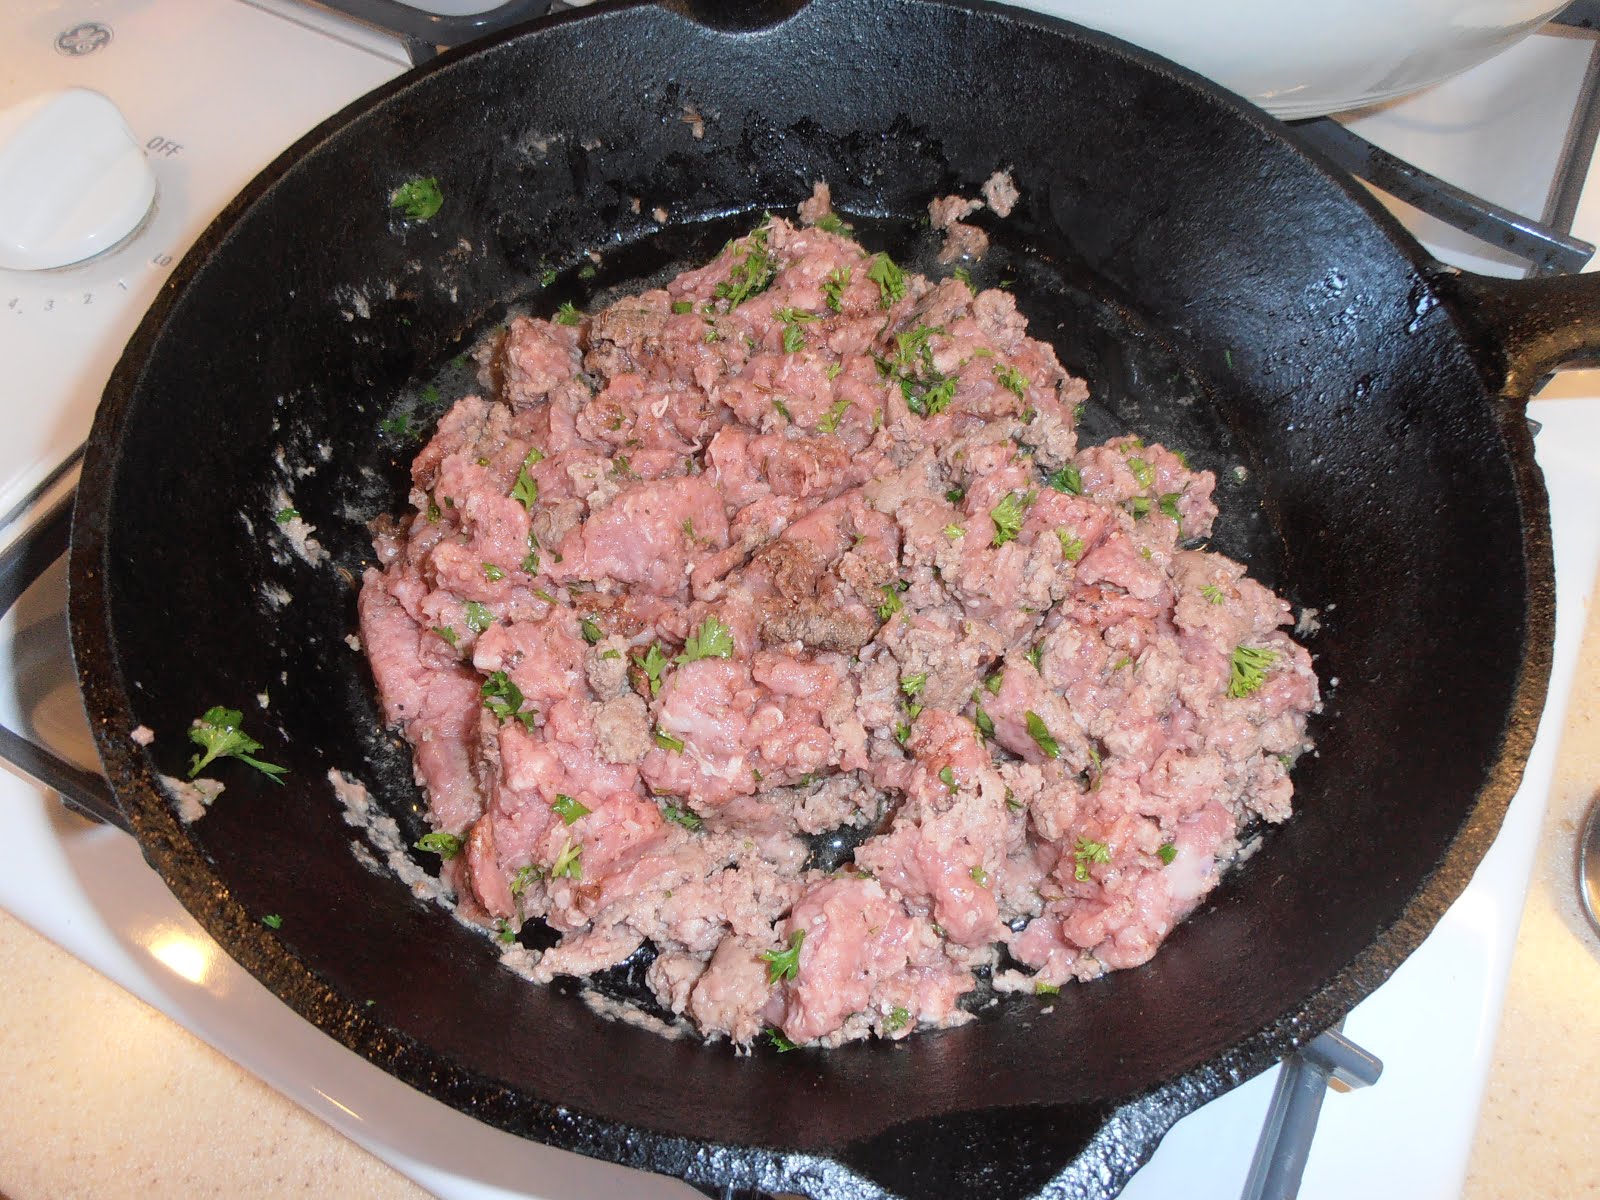
The one pound of lamb was sauteed in olive oil and I added

     1/4 teaspoon powdered coriander
     1/4 teaspoon caraway seeds
     1/2 teaspoon pepper
     1/2 teaspoon cinnamon
     1/4 cup chopped fresh parsley

Nearly done
Once it was cooked, I added 1/4 teaspoon salt and stirred it in well.

Stuffing the eggplant was easy.  I just spooned the filling in, pushing it down to compact it after every few scoops.  My goal was to stuff it to the brim and just a little past.

Stuff it!
I didn't happen to have any smoked sticks around so I decided to use toothpicks instead.  Then I fried the eggplants in olive oil, turning them to cook on all sides.

The picks were angled a little to help hold on the head.
I cooked them until the head fell off and the stuffing starting coming out. 

To serve them, I put them on a plate with the head next to it, after removing and throwing away the toothpicks.  Then I sprinkled them with some powdered coriander.

The Verdict


I served them with a tossed green salad and some of the sorrel puree that had been thinned and flavored with beef bouillon. 

The stuffing was great -- very flavorful and I think I got the spice balance just right.  The eggplant was slightly undercooked in places, making it harder to cut than the well-cooked parts.  But the combination of eggplant and filling was tasty! 

The eggplant was a little bland by itself, which served as a good support for the filling.  The combination was savory, spicy, creamy (the eggplant), slightly chewy (the filling).  I noticed that the coriander sprinkled on top was warmed by the hot eggplant and provided a lovely, enticing, spicy scent when I sat down to eat.

Success!

The ends of the eggplant were not cooked well at all.  I believe this is because they never touched the hot oil in the pan.  The sides were all that were eaten.

The note in italics at the beginning of the recipe came to mind at this point.  If I had baked the eggplants instead of frying them, I think they would have been thoroughly cooked, even at the ends.  I would not have had the issue of needing to stop cooking when the head fell off, either. 

If I did this again, I would try baking them.  I might even spread more of the filling over the top before doing so!

I did have extra filling, which went well in a quesadilla for my lunch the next day.


Friday, May 15, 2020

The "Making Do" Challenge -- Sorrel

In order to avoid going to the store during the pandemic, I looked around my yard for ideas on things to eat.  This is not as crazy an idea as that may sound as I tend to plant edibles when I can.

Several years ago I bought four little sorrel plants from the nice lady at the local farmers market and planted them in a corner.  I also bought spinach and planted them at the same time.  In less than a few days, the spinach had disappeared, presumably eaten by rabbits or squirrels or snails.  But the sorrel went untouched.

This was promising.  Even better, the sorrel grew and thrived so much that sometimes I just had to cut off all the leaves and toss them into the compost pile in order to get tender new leaves to eat.  You see, sorrel is like spinach with a tart, acidic bite.  The older leaves are a little tough (but not bad) and a lot more tart than the new leaves.

I often put some fresh sorrel leaves (old or new) into my salads and I really like putting big handfuls of chopped sorrel into soups and stews.  I noticed that the leaves tend to cook down to nothing recognizable as greenery and yet they add flavor, fiber, and nutrition to the dish.

But this was not the time to toss the great quantity of leaves into the compost pile.  I wanted to use them!

What caught my attention was a recipe found in The Gourmet Cookbook, volume 1.  It is a book published through "Gourmet Magazine" and this edition was published as the magazine neared its silver anniversary.  It is a lovely, two-volume boxed set, with a classy reddish-brown and gold cover.  I received as a gift from my friend DS, a talented cook who wanted to pass it on to someone who would appreciate it.  And I do.

6th printing, published 1974, by Gourmet Books, Inc.
I found on page 220 the recipe for

"Purée d'Oseille" or Sorrel Purée.

For 1 cup purée, wash thoroughly and drain 3 pounds sorrel.  In a saucepan over high heat cook the sorrel in the water that clings to the leaves for 10 to 15 minutes, or until it is very soft.  This is called "melted" sorrel.  Drain it in a sieve and press out as much water as possible.  Rub the sorrel through the sieve and add 2 tablespoons butter and salt and pepper to taste.


Three pounds less the weight of four earwigs and two snails

My Notes

Three pounds of sorrel is a lot of sorrel.  A lot of sorrel!  It took nearly all of the leaves my plants had -- and I was grateful for it as they were all older leaves.  None of it went into the compost pile.  I washed it in batches, making sure all the bits of mulch and dead leaves were pulled out.  I left the stems on the leaves.

The biggest saucepan I have could only hold about 1/2 pound of fresh leaves at a time, so I cooked them in batches, too.  Once a batch was "melted", it went into a sieve over a bowl to drain while I cooked the next batch.

About 1/2 pound
Fortunately, the leaves reduced in volume quickly.  The directions called for high heat but I learned to reduce it to about medium (4 out of 10) to keep the leaves from scorching.  It didn't take 10 to 15 minutes to get them very soft, either.  It was more like 4 to 5 minutes per batch.  I cooked them until the stems were soft and floppy as they were the last part to get that way.

From a full pan to a little puddle
I used tongs to turn the leaves while they were cooking.  That helped reduce scorching as well as made sure all the parts were cooked evenly.

All the melted sorrel drained very little -- maybe a tablespoon or so of liquid -- and I was reluctant to push on it much as I didn't want to press it through yet.  I estimated its quantity to be about 3 to 4 cups.

Preparing to push
I pushed the sorrel through the sieve using the backside of a ladle.  This worked well.  I noticed that an area would reduce to mostly fibers while the green purée dripped through to the bowl underneath.  But it was intense work!  I stopped after getting about 2 cups of purée, when I probably could have gotten another 1/2 cup more.

Voila!  See how thick it is?
I mixed in 3 tablespoons of melted butter and about 1/2 teaspoon each of salt and pepper.

The Verdict

The purée was a dark olive-green and very thick.  It mostly held its shape when stirred or piled up with a spoon.

I served it with some roast pork, a green salad, and some leftover red potatoes and rice.  This was a good choice because the sorrel was very tart and needed to be paired with something that could stand up to that.

And wine!  Don't forget the wine!
Yes, it was tart.  Almost too tart for my taste, although my guest taster thought it was wonderful.  We both described it as robust, tart, creamy, and complex.  Like spinach with lemon but with more.  The texture was silky smooth.  A small amount on the plate was plenty for me; my guest had seconds.  We both liked it but as I said, for me it was on the edge of being too tart.  I kept wishing I had cut it with spinach purée or something to tone it down a bit.

So I declare it a success!  Definitely a repeater for when the sorrel patch gets overgrown again, or earlier if I want to try it with new leaves and hope for a lower tartness level.  I wouldn't need to use the entire three pounds, though, to get enough for two.  (The book said the recipe would serve six.)

Two cups of purée is a lot to use up when each serving is small, so I started looking for other ways to include it in a meal.  Once it was thinned with some pork broth to make a sauce to spoon over poached eggs for breakfast.  Another time I put in more salt and pepper and then a little beef bouillon to shift the flavor to more meaty and used it as a side dish.  And yet another day we mixed a few spoonfuls of it into a bean-corn-and-pumpkin soup.  It shifted the flavor of the soup to something different, which was good because it was the third meal where we had the soup.  (Not the third meal in a row!)

I finished using up the sorrel purée by turning it into a soup.  I added a very herbal beef stock, more salt and pepper, chunks of crispy bacon, bits of onion cooked in the bacon fat, a big spoonful of cream cheese, and honey.  Yes, honey!  It seemed to temper the tartness.  I didn't add the honey until after I put in everything else and felt that it was still too tart for my tastebuds; after adding the honey, it was just right.  No, it wasn't sweet or even sweet-and-sour, but tart at a level I liked very much.  The soup was a big hit and I served it with toast (great for dunking!) and some pieces of bacon on the side.  The quantity was just right for two.  Success again!

I wonder how it would taste and what the texture would be if, instead of pushing it through the sieve, I put it through the blender.  That will be an experiment for another day.


Sunday, May 3, 2020

The "Making Do" Challenge -- Sausages, part 3

I'm in the midst of making sausage from a chunk of pork cushion meat, using the ingredients I have around the house.  This is part three; to see yesterday's post:  Click here.


Today I tried full-sized patties of each blend, to see how they turned out after having a day in the refrigerator for the flavors to blend.

Blend #1

As I feared, it was too salty.  Even my salt-loving guest taster agreed, and that says a lot.  I hadn't considered the impact of the salt in the liquamen when I was measuring the straight salt at the beginning.

To adjust this, I cut up more pork chunks and included seasoning and added it to Blend #1.  Here's what I used:

     2 lb 6 oz meat
     3 g pepper
     3 g mace
     15 g fresh parsley
     1/2 cup cold water

Note that I did not include any salt and I was out of dried apple.  The nice thing about the parsley was that it showed me how well I had mixed the new part in with the old.  It wasn't well blended until the parsley was distributed throughout.

This worked out so well.  The new blend had just the right amount of salt and a bright, slightly spicy flavor.  We enjoyed it with fried eggs at breakfast.

Blend #2

Well, the recommendations to mix garlic in to make sausage was spot on!  The garlic flavor was strong but not so much to put us off.  We truly enjoyed it as a patty along with a salad and crackers.  The salt balance was right and it was moist and flavorful.

Blend #3

This was the mix where I decided to increase the flavor ingredients to really make an impact, and boy, did it work.  My guest taster declared it "A keeper!" and I agreed.  I couldn't really taste the apple but imagined it added a bit of sweetness.  The rest of the flavors were bold in a pleasant way and the salt level (from just the liquamen) was just right.

And now for a bonus!

When I chunked up the rest of the cushion meat to adjust Blend #1, I had enough left over to try another blend.  I kept recalling a conversation I had with an Egyptian friend,  AF, when we discovered we were both foodies who liked to cook.  He told me his favorite spice combination on meat used cardamom, pepper, and cinnamon.  This caught my imagination and inspired me to try it with the fourth sausage flavor blend.

Blend #4

4 lb 5 oz pork
28 g salt
50 g raisins
2 g pepper
1 g ground cardamom
2 g cinnamon
1/2 cup red wine


This turned out to be my absolute favorite.  Sweet, spicy, bold, salty (just right), and the red wine added its own floral perfume to the mix.  Truly a wonderful eating experience.  I would make this again any time!


The Verdict

I declare my sausage-making experience quite the success.  All the blends turned out well, even #1 after I adjusted it to balance the salt.  And, of course, #4 was the best of all.

At this point I had to decide how I wanted to proceed.  I had the ingredients to make tube sausages but I was running out of time; I had too many other things that had to be done.  So I decided to make them all bulk sausage.

I weighed out 1/2 lb quantities, shaped them into cylinders, and wrapped each in plastic wrap.  Each lump was labeled with the blend number and all the lumps were put into freezer bags with notes as to what was in the blend.

The funny part was how potent the garlic scent was, even through two layers of plastic and solidly frozen.  It has since settled down but, wow!  Strong!

It is nice to know I have a variety of sausage flavors to work with.  It was also fun to discover how easy it was to make up my own flavor combinations and still have them tasty.  My guest taster was astonished at how good they all were; he just hadn't had "high quality edible art" before.

Now he knows!

Stay safe and well, everyone.

Pinterest needs a picture for me to post, so I am including a picture of my cat.  She did not get any sausage but she did ask for some.  : )


Saturday, May 2, 2020

The "Making Do" Challenge -- Sausages, part 2

Yesterday I wrote about the beginning of my sausage-making challenge.  I had 15 pounds of pork cushion meat and a variety of items in my kitchen and garden to help make amazingly-flavored sausages (I hoped!).  See yesterday's post here.

Today I want to tell you about the flavor combinations I tried.  These were combinations that I wanted to do by thinking about what I like and playing from there.

The First Blend

3 lb (1359 g) pork chunks
34 g salt
15 g dried apple
2 g total mace and black pepper, roughly 1 g each
about 65 ml liquamen mixed with 65 ml water

Following the directions from Sausage Making for Beginners, I weighed the salt and "other" ingredients, mixed them in with the pork, then set up my grinding station.

Meat and flavoring, but no liquid, tossed and waiting for the grinder
I have a metal grinding attachment for my mixer, so that was assembled and put into the freezer to chill.  The beginner's website said to use the fine plate but the mixer's instructions said to use the medium plate for sausage, so that is what I used.  I set up an ice water bath for the metal mixer bowl which will catch the ground meat.

The fit was very good!
As directed, everything was clean and cold.

It didn't take long to grind the three pounds of pork.


I took a little of the ground meat and cooked it to see what it tasted like before I added the liquid.  It was fine; I liked the flavor, which was a blend of the ingredients and none actually stood out.


Then I added the liquamen and water to it and mixed it with a wooden spoon until meat looked like the bulk sausage I have bought in the store.  I figured that was the best representation of what the paste should look like.  Really, it was just the ground meat but stickier.  I made another patty and was a little worried that it was too salty.  But I was willing to wait until the next day so the flavors could blend.

Then I packed the sausage into a plastic tub and put it into the refrigerator while I planned the next mixture.

The Second Blend

I had read so much about the wonderfulness of garlic in a pork sausage that I decided to try it in this blend.

3 pounds (1359 g) pork chunks
34 g salt
8 g of chopped garlic in oil
12 g fresh parsley
130 ml water

Garlic, salt, and parsley ready to be ground
I went through the same process:  grind the mix, add the water, stir to get a paste.

I cooked a small patty and thought the flavor was the right blend of garlic.  Not sure I got much of the parsley but it wasn't bland.

Then into the refrigerator while I set up the third blend.

The Third Blend

I had just a little over 2 1/4 lbs of pork chunks left.  I decided I would change the flavor ratios more, to make the flavors stronger.  I also wanted to use up the rest of the dried apple.

2 lb 5 oz pork
11 g chives
9 g dried apple
2 g mace
2 g black pepper
125 ml liquamen

Notice that I didn't add any salt to this one.  Since I decided to use all liquamen for the liquid, I hoped that would be enough salt.  I was still worried about the first blend being too salty.

Apple and oniony chives.  Yum!
When I tried a small patty of the paste, I thought the salt level was just right.  I also got the idea that I had put in too much pepper -- it had a bit of a burn to it!  But again, I thought it was a good idea to wait for the flavors to blend.

Tune in tomorrow for part 3 of the sausage-making extravaganza!

Friday, May 1, 2020

The "Making Do" Challenge -- Sausages, part 1

So the world came to a halt while we all hunkered down to wait for the COVID-19 virus to run its course.  As so many other people did, I purchased food to have enough to feed me and mine without having to go to the store very often.  I did not hoard and I never took the last of anything; it is important to me to share with others.

It occurred to me that I am fortunate enough to be able to afford the more expensive food items, like big chunks of meat, higher price-per-pound meat, fancy cheeses, etc.  Then I realized I should buy those foods and leave the inexpensive items for people with lower incomes.  So I came home with a 15 pound bag of pork cushion meat and an idea to learn how to make sausage.

My reading around the internet reminded me that our word "botulism" comes from the Latin word for sausage, emphasizing the need to be careful and clean in the making process.  I needed to learn the right way to do it; to this end, I found this website:  "Sausage Making for Beginners."

I appreciate the step-by-step instructions and discussion the author offers.  I like that he gives some recipes to help me see what to do.  And I am grateful for his emphasis on cleanliness.  The process looked doable, so I set about doing it.

I was inspired by this line:

You will be crafting high quality edible art.

In the area where he gives recipes, he gives these ratios:

  • 1 part meat and fat
  • 2.5% salt
  • 1% other stuff
  • Up to 10% liquid
The "other stuff" will define your sausage.  These are things like black pepper, paprika, garlic, sage, onion and chili powder.
The liquid portion can be anything wet (water, wine, stock, milk) and serves four purposes.  (1) It adds moisture to the meat resulting in a juicier sausage.  (2)  It lubricates the meat making stuffing much easier.  (3)  It adds flavor to the sausage if you choose to use wine or stock.  (4) It helps disperse the other seasonings throughout the rest of the sausage.  Make sure any liquid is ice cold before adding to the meat.

In a situation where I need to use what is in my house and not go shopping for specific ingredients, I felt like I was in control of the flavoring.  Between the spices in my pantry and the herbs in my garden, I believed I could make a variety of tasty sausages.

My goal, given the entire 15 pounds of pork to work with, was to make that variety and then freeze them for future use.  I decided that I would take several days to do the entire process.

I love the flavor combination of pork and apple, especially with nutmeg or mace involved.  I asked some experienced charcuterie makers what they thought about using fresh, grated apple and the general opinion was "meh."  Not really worth the effort and it added a lot of moisture.  But, they mentioned, they have had good results with dried fruits, so I decided to make dried apple bits to put into the sausage.

I took a clean apple, cut it into quarters, cored it, then sliced it thinly on my hand-shredder/slicer.  The pieces went onto a sheet and into my oven, set on warm.

Ready to dry
After drying like this overnight, I had crispy apple slices that I broke up into pieces (not intentionally but most had stuck to the pan), and planned on using them in at least one sausage mixture.

Dry and flavorful
I also got out the pork and started cutting it into the suggested 1 to 2 inch size chunks.  It was very cold, as it should be, but after getting through about half of the package, my meat-holding hand was going numb.  I stopped there and put the meat back into the refrigerator to chill overnight (the same night the apples were drying).

First cut the slabs.  Leave the fat, remove the slime (of which there was very little)
About 8 pounds of pork chunks.
Whew!  It helps to have a very sharp knife.

Tune back in tomorrow to see how I flavored the meat and did the grinding.


Cookies Consent

This website uses cookies to offer you a better Browsing Experience. By using our website, You agree to the use of Cookies

Learn More