Showing posts with label 10th century. Show all posts

Sunday, March 15, 2020

Roman Fish Sauce -- Liquamen, Garum -- Once Again

A little over a year ago, a fisherman friend, MB, gave me a bag of mackerel he had caught off a local pier.  I decided I wanted to make liquamen again, but this time with a lower salt ratio.

My previous attempt is documented here.  Beware:  Some of the pictures are pretty graphic.

After reading around the internet at other bloggers' attempts, I decided to use the smallest recommended amount of salt, roughly 10 parts fish to 1 part salt, by weight.

The mix of whole fish and salt went into a glass container that I sealed up tight and put on the floor by a sliding glass door.  The idea was that I could see it go through the process, get some sunshine on it, and still not stink up my house.  Well, that and keep the cats out of it, too. 

The container sat on my floor for an entire year.  I watched it first start accumulating liquid, then the fish started "melting" into the liquid.  Occasionally I shook the container just to see how it was coming along.

After a while I saw fish bones and brown chunky muck as the majority of the contents.  And then the muck started separating into layers:  chunks on the bottom, clear liquid on top, and other particulate liquid on top of that.  Even after I shook it, the layers would reappear.

You can see the layers reforming after the container was moved.
Once the one-year mark passed, I opened the container and began filtering the contents.   One thing I noticed is that there were no big particles left -- all the flesh had broken down into tiny bits.  The only things that were big were the bones.

This is what I ladled out, leaving bones behind.  Very fine textures.

First filtering.
I used the same bag and metal filtering process I used before.  The bag got out the "big" particles but the liquid was still cloudy.  The metal coffee filter cleared it up.

But now the big test had arrived.  How did it taste as compared to the previous attempt and to what you can buy in the Asian market?

I asked my Vietnamese friends, CN and LP, to give it a try.  CN had told me once, "I am Vietnamese!  We have fish sauce in our blood!"  So I knew they were the right people to judge.

They had tried my first attempt and I asked them to compare it to my second attempt.

Their assessment was put so nicely in a note from LP: 
I have never had pure fish sauce before.  It's so good, especially the second time with less salt.  The taste is rich in protein.
I have had fish sauce my whole life and this sauce is the best.  I have used a couple of teaspoons in soup.  It tasted better than the fish sauce I bought in the store. 

There you have it!  An expert's opinion!

I liked it, too.  My thought was that, with less salt, I could taste more of a sweetness to it.  Perhaps it was wishful thinking or perhaps it was that I expected it to taste more like the Thai fish sauce + reduced grape juice mixture that I tried first.  (See this post.)  But it tasted better to me.

I am so glad I tried the "reduced salt" version.  Trust me, it is still very salty, but I think more flavorful.

I use it in soups and stews, to increase the salt content but, more importantly, to raise up the richness and meaty taste, the "umami" fifth flavor we love so much.  Sometimes I made a sauce from it.  It is really good on grilled beef.

Success!  I won't actively seek out more raw fish to make this sauce, but if some happens to come my way, I know what to do with it.
 

Sunday, March 1, 2020

I Made a Tvare

My friend KC made me aware of a cooking gadget called a tvare, a Norwegian whisk.  She showed me the steps and how convenient making it from a Christmas tree really is.  So I did!

Wikipedia tells us:
tvare f or m (definite singular tvara or tvaren, indefinite plural tvarer, definite plural tvarene)

    1. stirring stick for cooking, with tines at the end.  A Norwegian whisk.  Fashioned crudely from the crowns of conifer trees, etc.
    2. archaic auger or drill 

Other sources I spotted mentioned that "tvare" is the tool and "tvara" means "to mix."  The idea is to cut the tree trunk so you get a handle and have branches near the thick end to make the tines.

The instructions were straightforward:
  1. Cut the part of the tree you want to use
  2. Trim the branches
  3. Remove the bark -- don't worry about this too much because of the next two steps
  4. Soak it in boiling water for 10 to 15 minutes 
  5. Resume removing the bark
  6. Sand it smooth
  7. Seal it with oil
My Attempt

I used my Noble fir Christmas tree, with my focus on the top two fifths or so.  I thought I could get two tvarene from this and still have handles long enough to make me happy.  


I looked for branch cluster and cut the trunk just below it.  I had to remind myself that the handle was the part of the trunk above the cluster so the tines would curve upward when the tool was in use.


I cut the thickest part of the trunch first and then, after deciding how long a handle I wanted, I cut above that to get the second tvare.

Then I trimmed the branches to what I considered a good length for the tines.


I knew it could be a challenge to smooth off the bumps of the branches I didn't want, so I cut them as close to the trunk as I could.  


I had a very sharp knife to start peeling off the bark.


There were three parts to pay attention to for this step:  the brown bark, the white fibrous layer under the bark, and the creamy wood below that.


My goal was to remove as much of the first two layers as I could while working outside and then leave the details to come off once the tvare soaked in the hot water.


To soak them, I used a big pan filled with water and brought to boiling.  I turned the fire down so the water was simmering.  Neither piece of wood fit in the pan, so I put one end in the water for about 10 minutes then flipped it so the other end soaked, too.  The steam seemed to be beneficial for the parts that never actually touched the water.


The water turned dark reddish-brown and smelled wonderful.

What I liked about this is the layers that still needed to come off were easily removed -- they slipped off with my fingernail or with a gentle push with the knife blade.  The wood cleaned up beautifully, even in the tight corners where the branches met the trunk.


The next step was to sand everything but I felt the wood was still too freshly cut off the tree.  I left the tvaren on the counter for a week or so, until they felt lighter and warmer to the touch than when they were freshly cut.  They dried inside and out, and I could tell the difference.

For the bigger tvare I used a 120 grit sanding sponge.  It worked well, especially in the tight spots, except where small wood parts protruded from the tines.  I had to get my knife and whittle those off so they wouldn't tear the sponge.  I also carved the thicker bumps down as much as I could so there wouldn't be any place for food to hide when the tvare was being cleaned.

I decided to go more "rustic" for the smaller tvare.  I sanded it completely with a piece of sandstone.  This worked really well, especially over the bumps and across the cut trunk ends.  The piece (when I started using it) had a narrow point that I used to get in the tight spots.  Eventually it broke off but I was done using the point at that time.

The sandstone in the middle.
The difference between the two sanding methods was this:  the sponge made the wood satiny smooth and a joy to hold.  The stone made it easy to remove bumps and smooth them down without having to use the knife but the wood's surface wasn't as texturally pleasant.  It was perfectly acceptable, just not like satin.  

Some of the cut tine ends splintered when I cut them, so I used the knife to whittle them to more of a point.  My goal was to reduce places for food to hide from cleaning.

Once the pieces were wiped with a damp cloth to remove the sanding dust, I let them dry for a few hours.  

I wiped them both thoroughly three times with block oil, letting it soak in for about an hour for each layer.  The wood soaked the oil up each time, with no excess to wipe off.  I feel that was just right but can always oil them again any time.

Completed tvaren.  I oiled the cutting board, too!
The Verdict

They are both fun to hold.  The bigger one's smooth surface just invites your hand to slide over it.  It is fun to feel the bumps.

The smaller tvare's handle, near the top, is very thin and a little flexible.  I will have to be careful not to break it when using it, but I think I would only be using this to mix small quantities or substances that were not too heavy or thick.

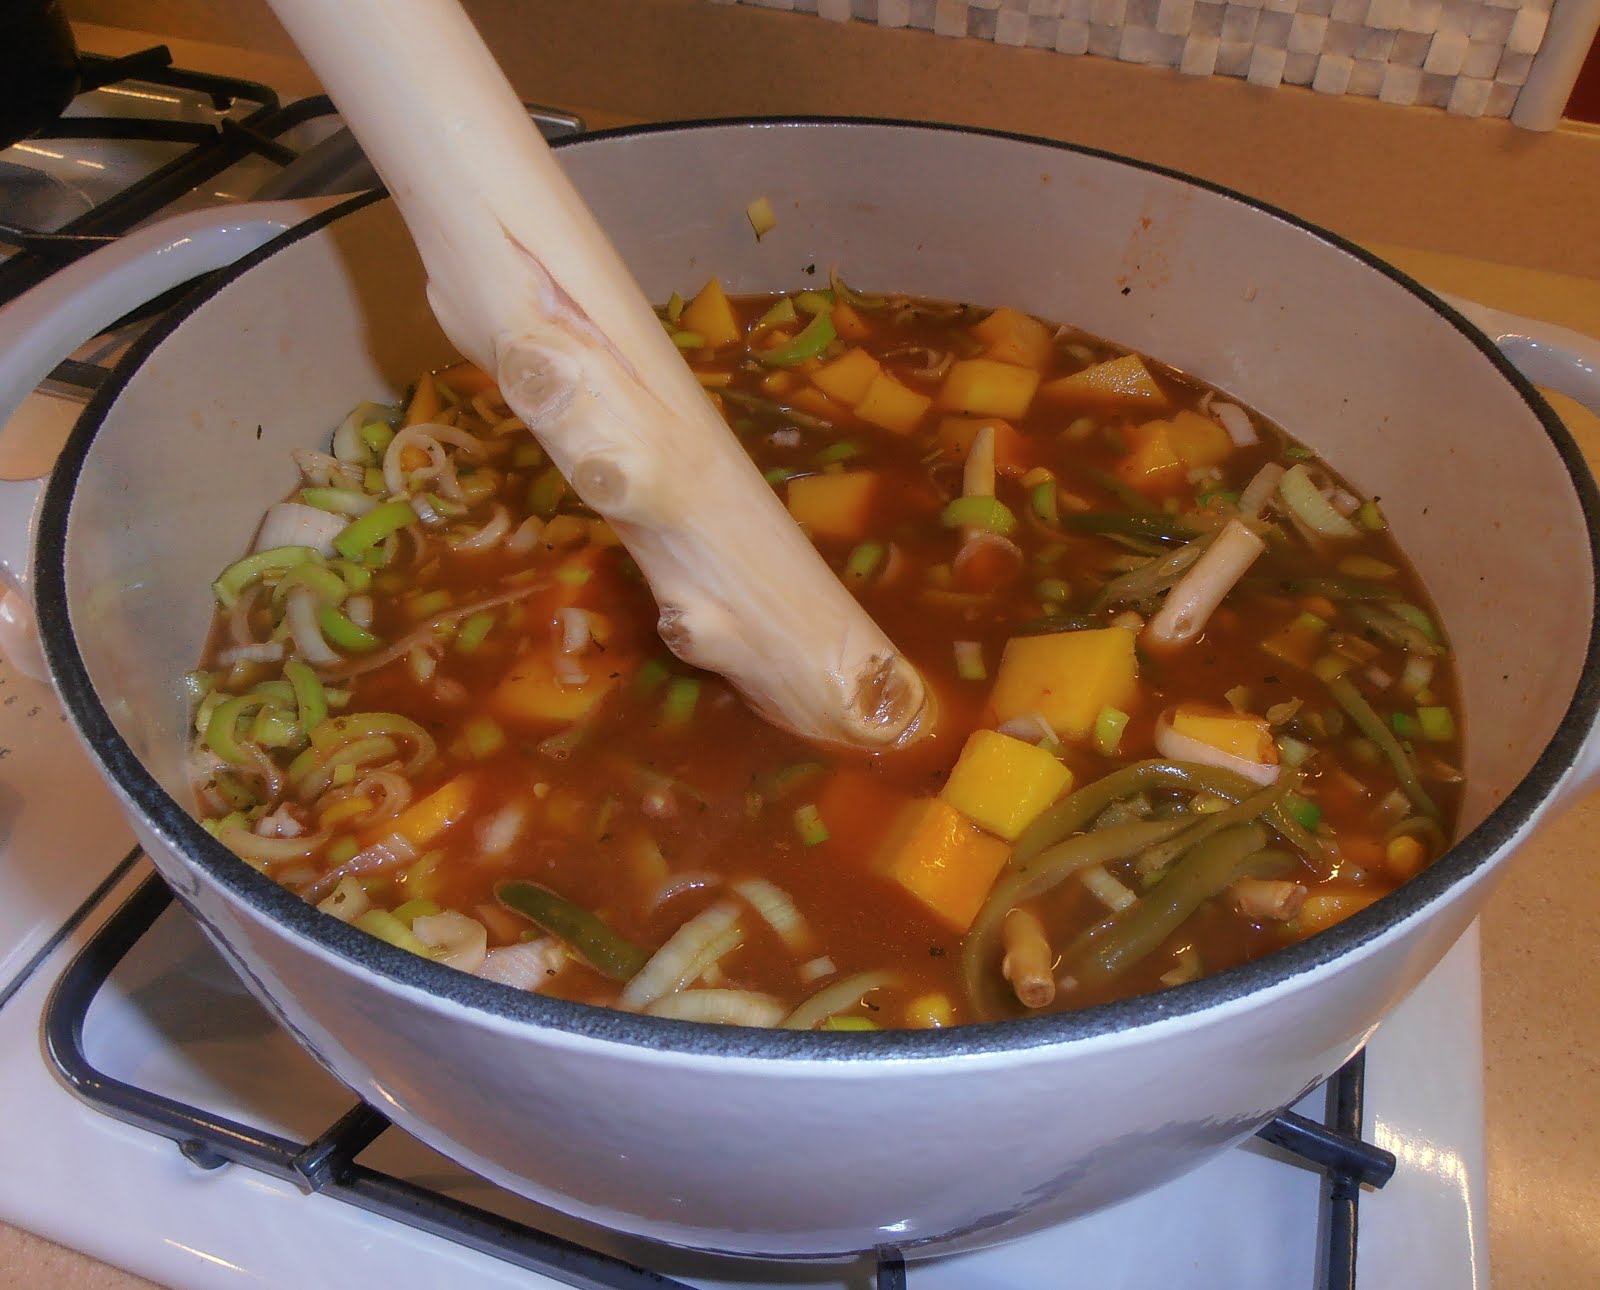
To feel that I was completing this experiment, I had to try them out.  So I made a stew of sausages and vegetables, in my big Dutch oven, and gave it a stir.  The result?  The big tvare was almost too big for that pot -- stirring was restricted but twirling it worked really well.  The smaller tvare worked better but I worried I would break the handle.  It wasn't very stressed but I was being cautious.

They both cleaned up well with a quick rinse and a wipe down.

So I declare it a success!


I really like having both of them.  They are striking to look at, fun to hold, and quite usable.  I decided to put them on display in my kitchen in a glass vase to show off their entire glory.

I encourage you to make one, too, the next time you have the opportunity to get the top of a pine tree.  I enjoyed the process and felt like I was connecting to history!


Tuesday, July 1, 2014

Something Different: A Culinary Symposium

My kitchen does not exist right now.  It is four walls with new electrical work and lights but no cabinets, counters, or appliances.  The remodel is moving along well!  For this post, I thought it would be fun to tell you about the culinary symposium I attended last March.

The West Coast Culinary Symposium is an event put on by the Society for Creative Anachronism (SCA).  Their web page promised "a chance for like-minded and enthusiastic people to get together and share their love and knowledge of pre-1600 period cooking and practices and share the tasty results.  It is also a time to gather as friends, make new ones, share ideas, and teach our skills to others hoping to learn."  All this came true and then some!  Excited historical cooks from all over the United States and some international travelers attended.

First, the Food 

The arrival evening was a "Traveler's Potluck" where we all brought something to share and the symposium supplied a variety of soups.  What an opportunity for showing off our skills! I brought my Deviled Eggs for Dessert, An Illusion Food which I posted on this blog on March 15, 2014.  But oh, the other offerings:  homemade cheeses, meat pies, pickled vegetables, artisan breads and spreads, fruit pies, Roman era gingerbread, and more.  Even taking small portions of these temptations didn't leave me enough room to taste all I wanted to try.

Asparagus Omelet
Onion Relish and Herbed Cheese Spread with pear slices
Meat Pie!  With pork, beef, chicken, and onions.
Meat Pie, the interior
Compost -- a medieval chutney


The groaning table
We also were served breakfast, lunch, dinner, and breakfast over the next two days.  These were cooked onsite by different groups and they all did fabulous jobs.  
Breakfast:  eggs, cheese, bacon, bread, apricot jam with rosewater, grapes, stewed greens
Lunch:  Porridge, cheese, red cabbage, sausages, onion relish, cheese, fruit, shortbread, various sauces
The lunch table:  I like how they served spreads in goblets
The dinner was particularly exciting as it was attended by the King and Queen of the kingdom.  Everyone went all out with the menu!

Elderberry cheesecake -- yum!
Meat pie as a peacock -- a subtlety
A meat stew subtlety, too
Homemade cheeses
One of my servings  : )  The chicken was baked with bacon and there is a nice spinach dish, too
You might have noticed that some dishes ended up being offered at two meals -- a very efficient way to use the leftovers.  But what was particularly nice was having leftover elderberry cheesecake for breakfast the next morning!
A good morning start
Oatmeal with stewed fruit
Next:  The Food Classes

I took three classes but got the benefit of a fourth in that they shared their food creations. 

In the Ottoman Turk cooking class we made several dishes, all tasty!  Most of the time my hands were busy helping out so I don't have a lot of pictures showing the preparation steps.  Also, with the construction going on, I can't find my notes.  Once I do, I'll update this post.

One recipe involved eggplants and gourds.  They were hollowed out, stuffed with a lamb and mint mixture, then steamed.  For serving they were sliced and adorned with a yogurt sauce and chopped mint.

Eggplant sliced open lengthwise and hollowed out
The hollowed gourd
Getting ready to steam
Slicing in anticipation of serving
What a lovely presentation! 
We also used a lamb and mint stuffing to fill up grape leaves.  A special addition to the mixture was "Golden Prunes" which are dried and have a lovely tart taste.  It added a zing to the mixture that I liked very much.  The stuffed leaves were steamed at the same time as the eggplant and gourds.

Stuffed, rolled, and ready for steaming
Steamed and ready for eating!
Another dish, absolutely yummy and a surprising combination of foods, contained cooked chicken that was deboned and shredded then mixed with noodles, grapes, and almonds.  I can't recall the sauce but will look it up later.
The noodles, uncooked
The finished dish
We also made a sweet treat, a type of folded pastry filled with an almond mixture.  There was a professional pastry chef in the class who assisted in the rolling, cutting, and closing the treats.
The dough for the treats
Aren't they cute?
The finished product.  YUM!  Hard to save some for others.
The afternoon class was about outdoor cooking.  The instructor had a neat portable fire pit that assembles from boards and uses sand and bricks to insulate the wood from the fire.  A metal structure fitted around it to provide a place to hang pots and spits.  The advantage of it coming apart is that the otherwise very heavy pit can be broken into easily carried pieces.

The ceramic pots are used as cloches
Notice the spitted roast is off to the side of the fire and has a drip pan beneath it.  The sand you see is only a few inches deep.
There was also a portable all metal fire pit that was fun to look at.  The ceramic pot is being used to help heat the charcoal faster and also to warm the pot up before it is placed over cooking food.

Love the medieval styling
The warmed cloche will go over the chicken, making a little oven and cooking the meat faster and more evenly
The class next door on Roman Empire cooking generously shared the results of their cooking.  I got to try some food items that were entirely new to me!  One item I didn't get a picture of was fried pig's ears.  Yes, you read that right.  They were sliced into strips and fried until they were chewy, tasty treats.  Not exciting from my point of view but certainly fun to try and tell people about.

Another surprise was the grilled pig nipples.  They were marinated in some lovely sauce and then we helped to grill them.  They, too, were chewy but I liked the bacon-y flavor and would definitely try them again.

Heading to the grill.  The specks are seeds in the marinade
Cooking up nicely.
I don't want you to think the pig nipples were the big surprise, though.  No, that honor belongs to the dish containing leeks, pine nuts, and ... wait for it ... pig uterus.  That's right:  sow's womb.  The sauce on the dish really brought the flavors together and made my tastebuds sing:  a taste of olive oil and spices.  The uteri made me think of slightly chewy macaroni, which is what they looked like, too.  In all seriousness, I would eat this dish again.  If I couldn't get uteri, I would use macaroni. 
Very, very tasty!
My last class was on subtleties and illusion foods.  These are foods designed to "fool the eye" into thinking it is something it is not.  The instructor was very knowledgeable, experienced, and creative.  She had brought pictures of some of her past creations and also taught us how to work with sugar paste using a store-bought gum paste mixture and rosewater.

The carrots are made of meat loaf mixture and the shrimp are really marzipan.
This is made of sugar paste!
Adorable hard-boiled egg mice
Tools of the sugar paste sculpting trade
Mixing the gum paste with rosewater to make a smooth dough
Creating!
Creations
More creations
Food Related Fun

The days were packed with good food, good learning, and good people!  We also had a keynote speaker and two competitions.  One was called "Mortal Peril" and consisted of categories with answers to which we had to provide the questions.  Anyone could participate in the first round and the top three winners went on to the final round.  Great fun!  The other competition was a spice identification challenge, where about 30 spices were put in numbered glass containers and the competitors were given a paper listing all the spice names.  We could look at, sniff, and taste the spices to identify them.  It was quite a challenge!  I was pleased with how many I got right.  

The Verdict

Overall it was exhausting, exhilarating, and worth every minute.  I'm so glad I was able to go!  Along with all the knowledge I got from the classes, I learned that I love elderberry cheesecake and anything with rosewater in it.  I came home with cookbooks, spices, a two-hundred year old sourdough starter, a ceramic alembic, and a strong desire to sculpt in sugar paste.  I met a lot of nice and interesting people, had conversations about all sorts of cooking styles and methods, enjoyed the mountain setting, and filled my stomach with tasty and exotic foods.  I am not a member of the SCA but everyone was friendly and welcoming and accommodated my lack of SCA social skills.  

This event has my hearty recommendation!


Cookies Consent

This website uses cookies to offer you a better Browsing Experience. By using our website, You agree to the use of Cookies

Learn More