Showing posts with label pandemic. Show all posts

Sunday, August 16, 2020

Egg Cake (part 2) -- A Medieval Syrian Recipe

Yesterday I wrote about my first attempt at making a medieval Syrian egg cake.  They turned out more like patties and I wasn't convinced I had done it right.  You can read about it here.

I tried it again.  This time I started with 1/2 pound of my homemade sausage (flavor blend #1; you can see the post about it here) and I didn't use cheese inside (honestly, because I forgot!).

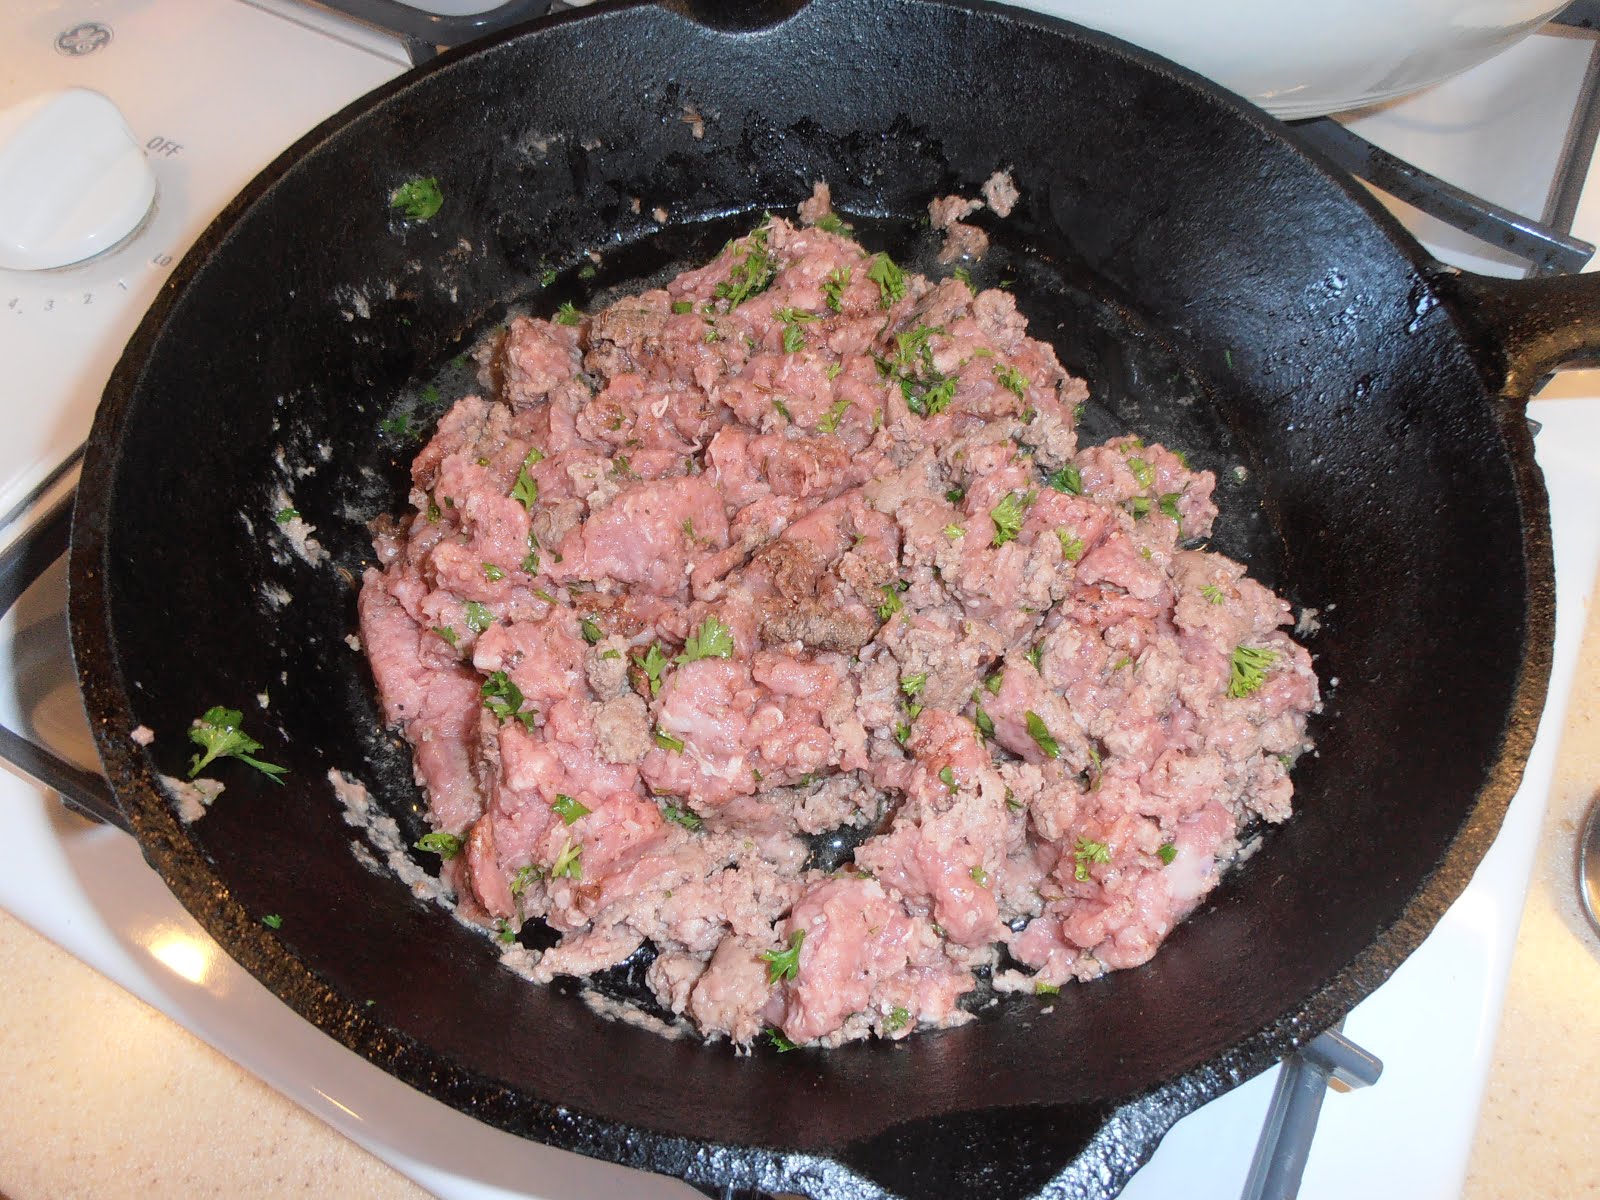
First I browned the sausage, breaking it up into smallish pieces.  This was in a big frypan.  While the sausage cooked, I started heating up two small frypans.  I used medium low heat, 3 out of 10.  Once the sausage was ready, I put about one quarter into each small pan, which had been lighted coated with olive oil. 


Then I poured three beaten eggs over the meat in each pan.  This filled the pan nicely.


At this point I patiently waited for the eggs to cook all the way through to the top.  I was concerned about the bottom burning or scorching but I saw no signs of that happening.  It seems the medium low heat was just right.

The recipe says:
Fill the pan with the flavored eggs, leave until dried out, and overturn into a bowl.  Turn it over and fry the other side for a long time.
I wondered how I would do this bowl maneuver; my thought was that any runny egg bits would smear all over the bowl and be difficult to cook.  Now I think "leave until dried out" means really, truly wait until the eggs are cooked all the way through, but I didn't think that when I was right there cooking. 

I managed to wait for the eggs to be cooked all the way for one pan and almost all the way for the other.  Instead of using a bowl, I used the large pan that the sausage was cooked in:  I just flipped the egg cake over into the heated pan.


This is the one that I didn't cook until the top was entirely dry, and you can see that some of the liquid egg splashed out and made the cake look sloppy.  After that egg cooked, I simply cut it off with the spatula to tidy up the cake's look.

The second egg cake was flipped into the pan of the first egg cake.  It was nearly dry on top so there wasn't much that slopped and the cake fit in the pan nicely.


I cooked them both just a little while longer to make sure they were done, then I served them up with toast and the rest of the sausage on the side.  I sprinkled the tops with the spice mix I had used before and some Parmesan cheese.

Homemade Swedish rye bread.  I love cooking.

The Verdict

Definitely more cake-like in its form.  I believe I achieved what the recipe's author intended this time.  

The flavor was fine -- not overcooked eggs and still moist.  The spice mix and cheese on top were good, although I wish I had remembered to put the cheese inside the cake, too.  


The sausage added a nice spice "zing" that I had wished for the first time I tried the recipe.  It still could have used more spice and I think an asiago cheese would have been better.  To me, eggs are pretty bland and need more flavor to make them interesting.  

This would be good to serve to multiple people by cutting it into wedges.  I think it would work for a buffet brunch meal; you could adjust the flavorings to suit your guests just like you would an omelet.  

Success!  Both in flavor and in form.

Saturday, August 15, 2020

Egg Cake (part 1) -- A Medieval Syrian Recipe

Yes, I am still exploring Scents and Flavors, translated by Charles Perry.  It is worth it!

ISBN 978-1-4798-5628-2

This time my attention was caught by something that would be good for breakfast or as a main course at any meal, although it was offered in the section on Sour and Salty Pickles.  The category was

The thirty-eighth type is egg dishes and egg cakes, of which there are several kinds.

I chose recipe number 8.125 on page 253:

The second kind.

Take meat, pound, and boil.  When done, pound again finely, and fry in fat.  Mince parsley and put the mean and parsley in a bowl.  Break eggs on top and add hot spices, coriander leaves and coriander seeds, pounded cheese, and Ceylon cinnamon.  Fry this mixture in a pan with olive or sesame oil.  The pan should be round with a high rim and a long handle like the handle of a ladle.  Set on a charcoal fire, spoon in the olive or sesame oil, and wait until the oil is hot, then add the eggs and flavorings -- three eggs and a little of the flavorings and fried meat to each egg cake.  Fill the pan with the flavored eggs, leave until dried out, and overturn into a bowl.  Turn it over and fry the other side for a long time.  Prick with a knife and pour on a little olive or sesame oil and spices.  Turn over every so often as described until done.


My Redaction

1 pound ground pork
1/4 cup minced parsley
6 eggs
1/4 teaspoon pepper
1/4 teaspoon coriander
1/2 teaspoon cinnamon
1/4 teaspoon caraway
1/4 cup grated parmesan cheese
sesame oil


My Notes

Cook the meat in sesame oil until the pink is gone.  Mix the meat and the parsley in a bowl.

I took the comment about a little meat with three eggs to heart and put 1/3 of the meat mixture in a separate bowl, then cracked six eggs over the top of it.  Then I put the spices and cheese on top of that.


When I mixed them together, I found it was very wet and runny, and the spices clumped together.  It was hard to get it all to mix through thoroughly without lumps of flavoring in some parts and nothing much in others.

You can see the clumps.

I heated more sesame oil in the pan and poured some of the egg-meat mixture in.


It was very runny and made a puddle of eggs with chunks of meat within.  I strongly suspected this is not what was intended.

Turning them over was easy.  They looked like lumpy pancakes.


So I added the rest of the meat mixture to the egg mixture and tried again.


This time they were thicker patties and that made more sense to me.  I ended up making ten of these and serving them for breakfast with some fresh orange slices.  They were cooked only once on each side.  I tried poking a few and putting some sesame oil onto them.  I sprinkled the whole batch with more of the same spices, which were mixed in a little bowl.

If you look closely, you can see the sprinkled spices.
The Verdict

I just don't think I did these correctly.  The more I think about it, the more I believe I should have used a smaller diameter pan and filled it with just one egg cake.  It would be more like an omelet or a fritatta.  Then the whole thing could be cut into wedges or (if small enough) served to one person.

There were some issues with the meat.  Notice that the ground meat was in long tubes, which I did not break up much when cooking.  I think that was a mistake for the patties as I made them.  It might not be a problem with a thicker egg cake.

There was also a problem with the clumping spices.  Most of the egg cake was pretty bland but occasionally I would get a burst of spice flavoring.  In the future, I would use more spice and I would mix it and the cheese thoroughly into the meat before adding the eggs.

My guest taster and I enjoyed eating them, but we both wanted more flavor.  When we included the pickled raisins (see this post), it was much more enjoyable.

Neither one of us liked the cakes with the extra sesame oil poured on it.

Over all I would call it a success because it certainly wasn't a failure, but I am not thrilled with the outcome.  It needs to be done again.  Look again at tomorrow's post for part two.

The leftovers reheated nicely.  That was a bonus!


Saturday, August 1, 2020

Pickled Raisins -- A Medieval Syrian Recipe

I am thoroughly enchanted with Scents and Flavors, translated by Charles Perry.

ISBN  978-1-4798-5628-2
The recipes seem so do-able and intriguing, with flavor combinations I would not normally think of using and techniques easily replicated in the modern kitchen.  I previously tried one of its pickled lemon recipes, with great success.  So much so that I continue to keep a jar of it in my refrigerator whenever I can get lemons.  They are an excellent additive to sandwiches as well as a flavorful relish with any sort of cooked meat.  Read my post on it here.

Therefore I was excited to try another recipe.  There are so many I want to try!  I decided to go with another pickled something, and I was inspired to do the pickled raisins after pruning my mint plant.  This recipe, found on page 215, is #8.38 in the section on various types of sour and salty pickles:

The eighth type is raisin pickles, of which there are several kinds

The first kind

Pick over raisins to remove the useless ones, wash the rest, and dry in a sieve.  Take the smallest ones, wash, and pound in a mortar with mint and wine vinegar; when smooth, strain with vinegar several times until nothing is left of the raisins in the sieve.  Take stems of fresh mint and remove the remaining leaves from the stalks.  Put with the raisins into a pickling jar, alternating a layer of raisins and a generous layer of fresh mint until the jar is nearly filled.  Pour in the vinegar that was strained with the raisins.  If too sour, add honey, sugar, or date syrup, according to the disposition of the individual.  Add some mixed spices and ginger, set aside, and use after six or seven days.  If you want, put in petals of Nisibin roses when they are in season.

My Redaction

For the liquid:
52 grams golden raisins
3 grams fresh mint leaves
3/4 cup (6 ounces) white wine vinegar
3/4 teaspoon honey
3/4 teaspoon mixed spices (cinnamon, cloves, ginger, grains of paradise, pepper, saffron)
1/2 teaspoon powdered ginger

For the pickle:
More raisins
More fresh mint leaves


My Notes

My goal was to fill one pint canning jar.

I did not use rose petals of any kind.

To make the liquid, I started with the raisins and mint leaves and added 1/2 cup vinegar.


I blended the batch until it was finely pureed.  Then I mixed in the spices.  I tasted it and it was lovely!  Sour, slightly sweet, spicy (especially from the ginger), and very minty.  But it was thick and I suspected it was too thick for what the recipe's author intended.

Thick, like a milkshake
So I added another 1/4 cup vinegar and some honey to balance out the sourness.  This made it thinner but not thin, and I decided it would work.

I took the sterilized jar and put in a layer of raisins, tamped it down a little with a pestle, put on a layer of mint leaves and tamped that.  To fill the jar took five layers of raisins with four layers of mint in between, tamping at each layer.


When I poured the liquid over the top, I realized the problem:  it was too thick to work its way down through the layers to the bottom.  So I took a chopstick and poked it into the layers, mostly around the jar's sides, to encourage the liquid to move to the bottom.  It seemed to work, although I'm not sure how well it got into the middle of the jar.  I kept adding liquid until the jar was full.

Once it seemed full, I put the lid on and then tapped the jar a lot.  I hoped it got more liquid down to the bottom.


I still had a lot of liquid left over, so I decided to fill another jar with the raisin pickle.  This time I used dark raisins instead of the golden.  I also decided to pour some liquid over each layer as I was assembling it (after tamping).  This worked well until I ran out of liquid and still needed a little more to finish filling the jar.  So I put together another raisin/mint/vinegar puree (with dark raisins and without measuring), thinned it with a little more vinegar, and added honey and spices (without measuring).  It tasted good and I used it.

That finished the second jar.

You can see where I switched to the dark raisin puree in the top layer.
Both jars were labeled and put into the refrigerator for a week.


The Verdict

The directions, "strain with vinegar several times until nothing is left of the raisins in the sieve" had
me believe that a thick liquid was acceptable, even though most recipes for items that are pickled are in a fairly runny vinegar base.  If nothing was left, then all of the raisin should be reduced to tiny (strainable) bits.  It is why I blended it instead of straining -- I had that modern advantage and it was a way to get the mixture smooth without having to continue to strain several times.

I mixed the spices into the liquid instead of putting them at the top of the jar because it was so thick.  It seemed like they wouldn't have contact with the raisins below the top if just placed on top.

How was it?

I was surprised to see that the whole mass was thick, not liquidy or sloshy at all.  This made sense in that the raisins (dried grapes) soaked up the liquid.  What I spooned onto my plate was moist but firm and not runny.

This was all dark raisins.
The flavor was amazing.  It was spicy, almost too much at first, but I got used to it quickly.  Cinnamon, ginger, pepper, mint, sweet, sour, and more.  It made me think of chutney with the benefit of being quick and easy to assemble, and uncooked.

Initially I was put off by the whole mint leaves.  Sometimes I got a leaf in my mouth and it seemed too strong.  But after a few servings of pickled raisins, I got used to it and enjoyed it.  I think in the future I will cut them before putting them in the jar.  A chiffonade might work well.

I also tasted the mixture that was with golden raisins.  The flavors were the same -- lovely! -- but I believe the golden raisins were more tender than the dark raisins.  They were both excellent.

My guest taster and I both said, "Wow!  This is good!" as we put the pickle on sandwiches, alongside cooked meat, and sometimes just ate a spoonful.  The flavors pack a punch and really brighten whatever meal they accompany.  Although I might cut back on the ginger just a little bit.

Success!  You should look at this book!

Yum.


Wednesday, July 15, 2020

Playing with History -- Roman Empire Honey Cheesecake

Yes, we are still in a pandemic and yes, I still need to minimize my trips to the store.  But if I plan ahead well, I can get some ingredients I don't normally keep around the house (although I am not always sure why I don't!) and make historical recipes.  So while I still consider myself in the "Making Do Challenge", I'm going to stop using that phrase in the title of my posts.

Today I was looking at a webpage by another blogger.  She (I don't see her name on the blog) made a recipe from PBS.org and Squidoo Ancient Roman Recipes (which is another blogger site!).   It was for Libum, a sort of cheesecake soaked in honey.  You can view her page here.

I liked the idea of a dessert that is a cross between bread and cake, and it only uses a few ingredients.  At first I thought I would not be making it for this blog, so I made it according to her directions.  It came out just as she directed:  four lovely loaves with a mild cheesy flavor, the scent of bay, and the sweetness of honey.  My guest taster and I both truly enjoyed them after a dinner of a big tossed green salad (which also had some sliced meat and crumbled cheese on it).

We both wanted to have them again, which got me to thinking about what I would do instead of what her instructions said.  And that, my friends, had me decide to write it up for my blog.

Since I am not following the historical directions as closely as I normally would, I decided that "Playing with History" was the best description for my post.  In a way it is an historical upgrade but I see it more as a side step instead.

Libum  (Honey cakes or Honey Cheesecake)

(these are from the PBS.org site)

Ancient Roman Libum Recipe

Libum to be made as follows: 2 pounds cheese well crushed in a mortar; when it is well crushed, add in 1 pound bread-wheat flour or, if you want it to be lighter, just 1/2 a pound, to be mixed with the cheese. Add one egg and mix all together well. Make a loaf of this, with the leaves under it, and cook slowly in a hot fire under a brick.

- from Cato's On Agriculture, reprinted in The Classical Cookbook


Modern Roman Libum Recipe (serves 4)

1 cup plain, all purpose flour
8 ounces ricotta cheese
1 egg, beaten
bay leaves
1/2 cup clear honey

Sift the flour into a bowl. Beat the cheese until its soft and stir it into the flour along with the egg. Form a soft dough and divide into 4. Mold each one into a bun and place them on a greased baking tray with a fresh bay leaf underneath. Heat the oven to 425° F. Cover the cakes with your brick and bake for 35-40 minutes until golden-brown. Warm the honey and place the warm cakes in it so that they absorb it. Allow to stand 30 minutes before serving.

And bay leaves and frontignac.
My Notes

I followed the modern recipe except I first put the ricotta into a bowl, measured the flour over it, then poured the beaten egg over the top.  I mixed it with a spoon until it was barely mixed, then used my hands to finish mixing it.  The spoon came in handy to scrape the dough off the sides of the bowl.

It was a little sticky to work with but came together as a cohesive ball with just a little hand mixing.  I was careful not to overwork it; I kept thinking about how quick breads are best with minimal mixing.

Soft, moist, but not too sticky
Instead of four cakes, I made eight little ones.  Each one sat on half of a bay leaf.


The oven temperature was 375 degrees F and they baked for 30 minutes before they turned lightly golden brown.

They puffed!
I decided that four of them would soak in honey, which I diluted a little with water and warmed on the stove.  The other four would soak in the elderflower syrup, frontignac, which I had written about in a previous post (but did not warm).  (See here for how to make frontignac.)

As soon as the cakes were done, I flipped each one over and peeled off the bay leaf.

Leaf off, leaf on.  I love the leaf imprint!
Then, while they were still very warm, I put them into the honey and the frontignac to soak.  I let them soak an entire hour.
in frontignac
in slightly diluted and warmed honey
The Verdict

The first time I made them, they soaked about 15 minutes in warmed undiluted honey while we ravenously hovered over them and then couldn't wait any longer.  They smelled wonderful!  The bay scents the air and stimulates the appetite.  There was some honey soaked into the cakes, which was tasty.  We sopped up the rest of the honey with the cakes as we were eating them.

This time I managed to control myself and wait the entire hour.

I diluted the honey this time to make it more syrupy than just warming it.  I wanted it to soak into the cakes more.

After soaking for one hour, I noticed that the frontignac appeared to have been absorbed more than the honey but both syrups still had not been completely absorbed.

I flipped the cakes over to put a little glaze on top of each one, then decorated them with borage flowers that were from my garden.

Just too cute!
We had them for dessert, two each.  Both had their syrup soaked into the bottoms and up about 1/4 inch.  Both were tasty and flavorful!  Bay, cheese, honey or elderflower, all in a light bread base.  I liked the honey best and my guest taster liked the frontignac best.  Both were good.

You can see how far the syrup soaked into the cake.
The only difference I noticed between making the small ones and the large ones is that the small ones seemed a little drier in the middle.  Not bad, just a small difference.  We enjoyed them with a homemade fig wine as an aperitif.

Success!  I might make them again and try making six instead of four or eight.  Making the servings a little bigger might keep them moist without making them too big.


Wednesday, July 1, 2020

The "Making Do" Challenge -- Pickled Lemons (a revisit)

About four years ago, my neighbor gave me his Meyer lemons, and my daughter and I pickled them and wrote about it here:  Pickled Lemons.

They were fine but did not inspire me to want to keep making them.  My neighbor's tree has since died (whaaaaaa!) but my friend DL gave me lemons from his wife, GL's tree.  I wanted to try pickling lemons again but this time using a recipe from Charles Perry's translation of Scents and Flavors, a 14th century Syrian cookbook.

ISBN 978-1-4798-5628-2
I wrote about this book previously, as its recipes were featured at a culinary symposium, put on by the Society for Creative Anachronism.  You can read about it here:  West Coast Culinary Symposium 2018.

This book is fun to read.  The Arabic writings are on the left side of the page and his translation is on the right.  The recipes are intriguing and look tasty.  The spices referenced are wide and varied, including the usual cinnamon, cardamom, cloves, ginger, pepper, and other familiar ones.  But there are also others like spikenard, betel nut, and rose hips. Few recipes look complicated but many use techniques or food combinations I am not used to but look good and doable.

In all honesty, this looks like a cookbook I could spend a lot of time exploring and still offer up tasty meals.

I looked in Chapter 8:  How to Make the Various Types of Sour and Salty Pickles.  The book offers several variations on salted lemons, and I chose the first variation, recipe number 8.20.

Salted Lemons -- First variation

Take salted lemons, cut up small, put in a vessel, and squeeze the juice of fresh lemons to cover.  You can also use sour orange juice, which is milder than lemon juice.  Add oil, mixed spices, pounded toasted coriander seeds, minced parsley, mint, and rue, and set aside.  It is one of the very best and most fragrant of condiments.


These are the ingredients for the pickling liquid. 

My Notes

The night before making the recipe I sliced the cleaned lemons, spread them in a pan, and sprinkled kosher salt over them.  The pan was left slightly tilted so the liquid would gather at the bottom.  The next morning the slices were softer and the salt had been absorbed.

the night before
the morning after
My goal was to make one quart jar full of pickled lemons.

The two lemons missing their peels were juiced for the pickling liquid.  (Their peels were dried and powdered -- well worth it as a flavoring ingredients themselves.  They are really good in bread with olives and sun-dried tomatoes.)

I used a premixed "Poudre fines", consisting of cinnamon, cloves, ginger, grains of paradise, pepper, and saffron.

1/4 teaspoon cumin
1/4 teaspoon coriander
1 teaspoon Poudre fines
1/4 cup mixture of coarsely chopped rue, mint, and parsley

These ingredients were mixed well together in a bowl.

First I put in some of the spice and herb mix. Then several lemon slices.  Then more mix.  I repeated this until the jar was full.

The lemon juice went in to cover, although there was some floating of the lemon slices.  (Two lemons' worth of juice was not enough and I had to add some lemon juice from a bottle.)  After that I poured about a one inch layer of oil over the top.

Not quite full but close enough.
The whole container went into the refrigerator for about a week before I tasted it.

The Verdict

We tried them out of the jar, without putting them with a meal.

The flavor was, well, luscious.  Sour (but not too much for me), barely salty, but the spices and especially the herb flavors came through.  I loved it and so did my guest taster.  I ate several and wanted more.  I think that I liked the mint the best but the whole blend was superb.

The peel is not bitter from the white and the yellow zest is softer in flavor and texture than fresh lemon peel.

We have since had them with a meal, roasted chicken next to a vegetable stew.  It is a great condiment, adding some zing and intrigue to the meal.  We also made sandwiches with cheese and meat and slices of pickled lemon -- it was amazing!

One guest taster, who loves lemons but does not like parsley or cinnamon, did not like the mixture at all.  I could not get parsley as a dominant flavor, but she did.

I have since refilled the jar with more salted lemon slices, using the same juice, herb, and spice mixture.  This one is a keeper.

Success!

Monday, June 15, 2020

The "Making Do" Challenge -- Frontignac (Elderflower Syrup)

I am still attempting to keep this blog going by doing historical recipes but using just what I have at hand.  My elder tree is flowering, so what to do with all those blooms?  I have enough dried for tea and other recipes.  Some recipes are for making elderflower fritters but I am not in the mood for that.

I revisited a book I have used before, Flower Cookery -- The Art of Cooking with Flowers.

No ISBN; the Library of Congress Number is 67-24072
The author is Mary MacNicol and the book was published in 1967 in New York by the Fleet Press Corporation.

I feel very strongly that Ms. MacNicol did not test all these recipes; rather her goal was to gather them into one volume.  She cites her sources in many cases.

There are seven pages of recipes for the elder flowers and berries.  Jam, wine, fritters, vinegar, pickled buds, sauces, ices, even pancakes.

The one that caught my attention is on page 57 and is listed as

Elder Flower Water, "Frontignac"

When elders are in flower gather them on a dry day.  They should be in full but fresh blossom.  Put the flowers in a preserving pan with sufficient water to cover them, and boil for 1/2 hour.  Then strain through a fine sieve, or woolen bag, and let it stand.  When cold put again in the pan, and allow 1/2 lb. of sugar for each pint of the flavoured water.  Boil 10 minutes, skimming well all the time.

When cold, bottle for use, corking the bottles tight and sealing them down.

For an ordinary shape of ice use a breakfastcupful of this syrup and make like any other ice, but use less sugar.

                                                                          The Cookery Book of Lady Clark of Tillypronie


I thought it was interesting the recipe is called a "water", when it truly is a syrup.  I thought waters were distilled and did not have sugar in them.  But I learn new ideas all the time.

The name Tillypronie was amusing to me, so I decided to see if I could look it up and find out more about Lady Clark and her book.  I was pleasantly surprised to find a lot about it.

Tillypronie is in Aberdeenshire, Scotland.  You can read in detail about it here.
The house was originally built 150 years ago in 1867 by Sir John Clark, the diplomat son of Queen Victoria’s physician, Sir James Clark, who was himself the son of a butler from Banffshire. 
There are some pictures of the grounds and it is a gorgeous place to live.

I was more interested in Lady Clark, so here is what I learned about her:
 Lady Clark was not just an exemplary hostess; she was also a highly accomplished cook. After her death in 1897, Sir John arranged for the thousands of recipes she had collected throughout her lifetime, and particularly during his diplomatic postings in Brussels, Paris and Turin, to be edited into a single volume which was published in 1909. Virginia Woolf gave the resulting book a glowing review in The Times Literary Supplement at the time.
It made me sad that her book was published after she died.  You can read more about it here.
The book is considered a valuable compilation of Victorian era recipes. Lady Clark obtained the recipes by asking hostesses or cooks, and then testing each one at Tillypronie. She documented each recipe's source with the name of her source, and often also the date. There is comprehensive coverage of plain British cooking, especially of meat and game, but the book has sections on all aspects of contemporary cooking including bread, cakes, eggs, cooking for invalids, jams, pies, sauces, sweets (puddings) and vegetables. She had lived in Italy and France, and the cuisines of these countries are represented by many dishes, as is Anglo-Indian cooking with a section called "Curries".
It looks so interesting!  I looked around the 'net and found a digital copy of her book (you can also buy print copies).  Her recipe is found here, under the Ices category.  Ms. MacNicol cited it word-for-word in her book.

My Notes

Elderflowers, sugar, and water are all that are needed here.  Here are my flowers:


That is how many I picked.  Here is what was left after I removed most of the stems:


"Water to cover" meant they were floating a little off the bottom, but not too much.  I measured 8 cups.


When the water got hot, the flowers and water darkened.  After it reached a boil, I turned down the heat and let it simmer for 30 minutes.


I used a coarse strainer first to get out the flowers and stems.  Then I poured it through a fine strainer to get out the small particles.

It measured 6 cups (3 pints).  I let it cool for a few hours.

Three pints meant 1 1/2 pounds sugar, which I weighed and then added to the liquid.  I heated it to a boil, stirring to dissolve all the sugar, then set it to a slow boil for 10 minutes.  I did not stir it and there was nothing to skim.

Once that cooled down, I bottled it.  I measured 5 1/4 cups syrup.  They are stored in the refrigerator.

The Verdict


Sweet, but not too sweet.  Flavorful and if you don't know what elderflowers taste like, I think it is hard to describe.  Floral but not perfumy, light and yet enticing.

I enjoyed sipping it from a spoon and putting some in my tea.

I had some leftover pie crust so I rolled that into strips, baked them, and then brushed them with the syrup (three times) while they were still hot.  I served them cool, with an unbrushed crust for a taste comparison.  The flavor was enhanced by the syrup but it was very subtle.


I also put together a simple dessert of sliced oranges and fresh strawberries, and drizzled a little of the syrup over them.  That was tasty.

Recently I was looking at a recipe for Roman honey cakes, made of cheese and flour and an egg, baked, then soaked in honey.  I think this syrup would be good to use instead of honey, too.  I don't have much honey in my pantry, so it is worth a try.

Success!  Worthwhile and perhaps I will try Lady Clark's suggestion to turn it into an ice.

What are you cooking?


Monday, June 1, 2020

The "Making Do" Challenge -- Stuffed Eggplant

I decided that I needed to "up" the challenge of maintaining an historical food blog during a pandemic by cooking an historical recipe without running to the store for all the ingredients.  This is what they had to do:  cook with what you have and still make it taste good.  (I've been doing that a lot lately and love the creativity it inspires!)

Two eggplants were telling me they needed to be used.  I kept thinking about a recipe I did a long time ago for this blog,  Eggplant -- The Perfect Way.   It is wonderful, with cheese and basil and spices.  But I did not have the right cheese and definitely no basil -- the snails made short work of that in my garden and the seedlings are not big enough yet.

But I did have a packet of ground lamb in the freezer.  Lamb and eggplant are a good pairing, and both together suggested a particular geographic location to consider for recipes.

ISBN 978-0-520-26174-7
I really like this book.  The foreword was written by food historian Charles Perry who deftly puts the recipes and time period into context.  It even contains a description of how to make murri, a soy-sauce-like condiment used at the time.  The recipes themselves are easy to understand and enticing to make.  The color plates are mostly of art, servingware, and kitchenware from the time period.

I chose Recipe 44, on page 94.

Stuffed Eggplant

Ibn Razin, in one of seventeen recipes for stuffed eggplant, calls for extra stuffing to be spread over the eggplant before it is put in the oven.

Take some of our large eggplants.  Remove the head [ris] of each eggplant and hollow out the inside in order to extract the pulp while taking care not to cut the skin; indeed, [the skin] should be of a good thickness.  Then take some meat and pound it in a mortar and boil it.  When it is cooked, pound it in the mortar [again] in order to make it still more tender.  Put [it] in a pot [dast] and add fresh sheep tail fat, dry coriander [seeds], caraway, pepper, Chinese cinnamon, and fresh chopped coriander [cilantro] and parsley in great quantities.  Fry all of it until it is roasted.  Add salt and stuff the eggplant with this mixture.  Close up [the stuffed eggplants] with what was cut off [i.e., the head].  Insert [in each eggplant] three sticks of good-quality wood that has been smoked [in order to reattach the head], then put them in the pot and cook over a lively fire in the sheep tail fat until they are well cooked.  Then put them on a serving dish [zubdiyya] and sprinkle with dry coriander.  At the moment of serving, remove the sticks and throw them away.


My Notes

I had no cilantro so I decided to use just parsley (from my garden!).  Instead of sheep tail fat, I used olive oil.

I thought it interesting that there was no mention of "purging" the eggplant, after having read Perry's discussion of how eggplant was unpopular until it was discovered that salting it would remove the bitterness.  I decided to follow the preparation directions in order -- that is, hollowing the eggplants before cooking the filling -- so I put the prepared eggplants into salted water while making the filling.

Honestly, I wasn't sure which end of the eggplant was the head.  I decided it was the big end so it would be easy to hollow it and still leave thick walls.


I used a knife with a long, slender blade to roughly cut a circle into the length of the eggplant.  This defined the thickness of the walls.  Then I used a sturdy spoon to scoop out the flesh.  Sometimes I poked the flesh a few times with the knife to make it easier to scoop.

Considering the meat I had was already ground, I decided I didn't need to pound it, boil it, and pound it again in order to make it tender. 

The one pound of lamb was sauteed in olive oil and I added

     1/4 teaspoon powdered coriander
     1/4 teaspoon caraway seeds
     1/2 teaspoon pepper
     1/2 teaspoon cinnamon
     1/4 cup chopped fresh parsley

Nearly done
Once it was cooked, I added 1/4 teaspoon salt and stirred it in well.

Stuffing the eggplant was easy.  I just spooned the filling in, pushing it down to compact it after every few scoops.  My goal was to stuff it to the brim and just a little past.

Stuff it!
I didn't happen to have any smoked sticks around so I decided to use toothpicks instead.  Then I fried the eggplants in olive oil, turning them to cook on all sides.

The picks were angled a little to help hold on the head.
I cooked them until the head fell off and the stuffing starting coming out. 

To serve them, I put them on a plate with the head next to it, after removing and throwing away the toothpicks.  Then I sprinkled them with some powdered coriander.

The Verdict


I served them with a tossed green salad and some of the sorrel puree that had been thinned and flavored with beef bouillon. 

The stuffing was great -- very flavorful and I think I got the spice balance just right.  The eggplant was slightly undercooked in places, making it harder to cut than the well-cooked parts.  But the combination of eggplant and filling was tasty! 

The eggplant was a little bland by itself, which served as a good support for the filling.  The combination was savory, spicy, creamy (the eggplant), slightly chewy (the filling).  I noticed that the coriander sprinkled on top was warmed by the hot eggplant and provided a lovely, enticing, spicy scent when I sat down to eat.

Success!

The ends of the eggplant were not cooked well at all.  I believe this is because they never touched the hot oil in the pan.  The sides were all that were eaten.

The note in italics at the beginning of the recipe came to mind at this point.  If I had baked the eggplants instead of frying them, I think they would have been thoroughly cooked, even at the ends.  I would not have had the issue of needing to stop cooking when the head fell off, either. 

If I did this again, I would try baking them.  I might even spread more of the filling over the top before doing so!

I did have extra filling, which went well in a quesadilla for my lunch the next day.


Cookies Consent

This website uses cookies to offer you a better Browsing Experience. By using our website, You agree to the use of Cookies

Learn More