Showing posts with label lemon. Show all posts

Wednesday, March 1, 2023

Bizcocho de cajitas -- Little box biscuits, a Pinedo recipe

After being pleasantly surprised by the recipe "Bizcochos de chocolate" turning out to be brownies (click here to see the post), I wanted to explore Encarnacion Pinedo's section on biscuits more.

On pages 33-34, I found "Bizcocho de cajitas", or "Little box biscuits", which was too cute of a name to pass up.  


Little box biscuits.

         A half-pound of powdered sugar is put in a tub, and twelve egg yolks are thrown in; [separately] the whites are beaten well for half an hour.

         Meanwhile another person will be stirring the yolks and sugar with a wooden spatula. Having raised the egg whites to the consistency of solid snow, the yolks with the sugar will be poured over the top, stirring all gently with the same spatula.

         In this state, six ounces of fine flour will be added, two more ounces of powdered sugar, and enough extract of lemon. The flour and sugar powder should have been previously passed through a very fine sieve; finally let everything be mixed well but gently;

precaution must be taken so that the beaten egg whites do not settle or reduce.

         With this dough, little boxes will be half-filled, because while being in the oven the dough becomes very inflated. The boxes can be made of tin or paper.

         The tin-foil boxes are rubbed inside with butter, and when you take them out of the oven, shake them while still hot. Those that are made in white paper boxes can be served in them and are not buttered.

         Before putting them in the oven, be careful to sprinkle them with sifted sugar.

         They should be cooked over high heat until they are deep or fiery yellow.

         Anise can be added instead of lemon.


My Redaction

I chose to scale down the quantities by one-half.  This yielded 24 little box biscuits.

4 ounces powdered sugar
6 eggs, separated
3 ounces flour
1 more ounce powdered sugar
3/4 - 1 teaspoon lemon extract
granulated sugar

Preheat oven to 350 degrees F.  

Put paper muffin cups into a muffin tin, or butter the tin's cups if not using paper.

Mix egg yolks and powdered sugar well.  Set aside.

Beat egg whites until stiff.  

Gently pour the yolk mixture over the whites.  Carefully fold the yolks into the white, making sure to mix all the way down to the bottom of the container.

Mix the flour and extra powdered sugar in a container.  Sift or fluff with a whisk.  Sprinkle gently over the egg white mixture.  

Add lemon extract.  Fold gently until everything is well mixed.  

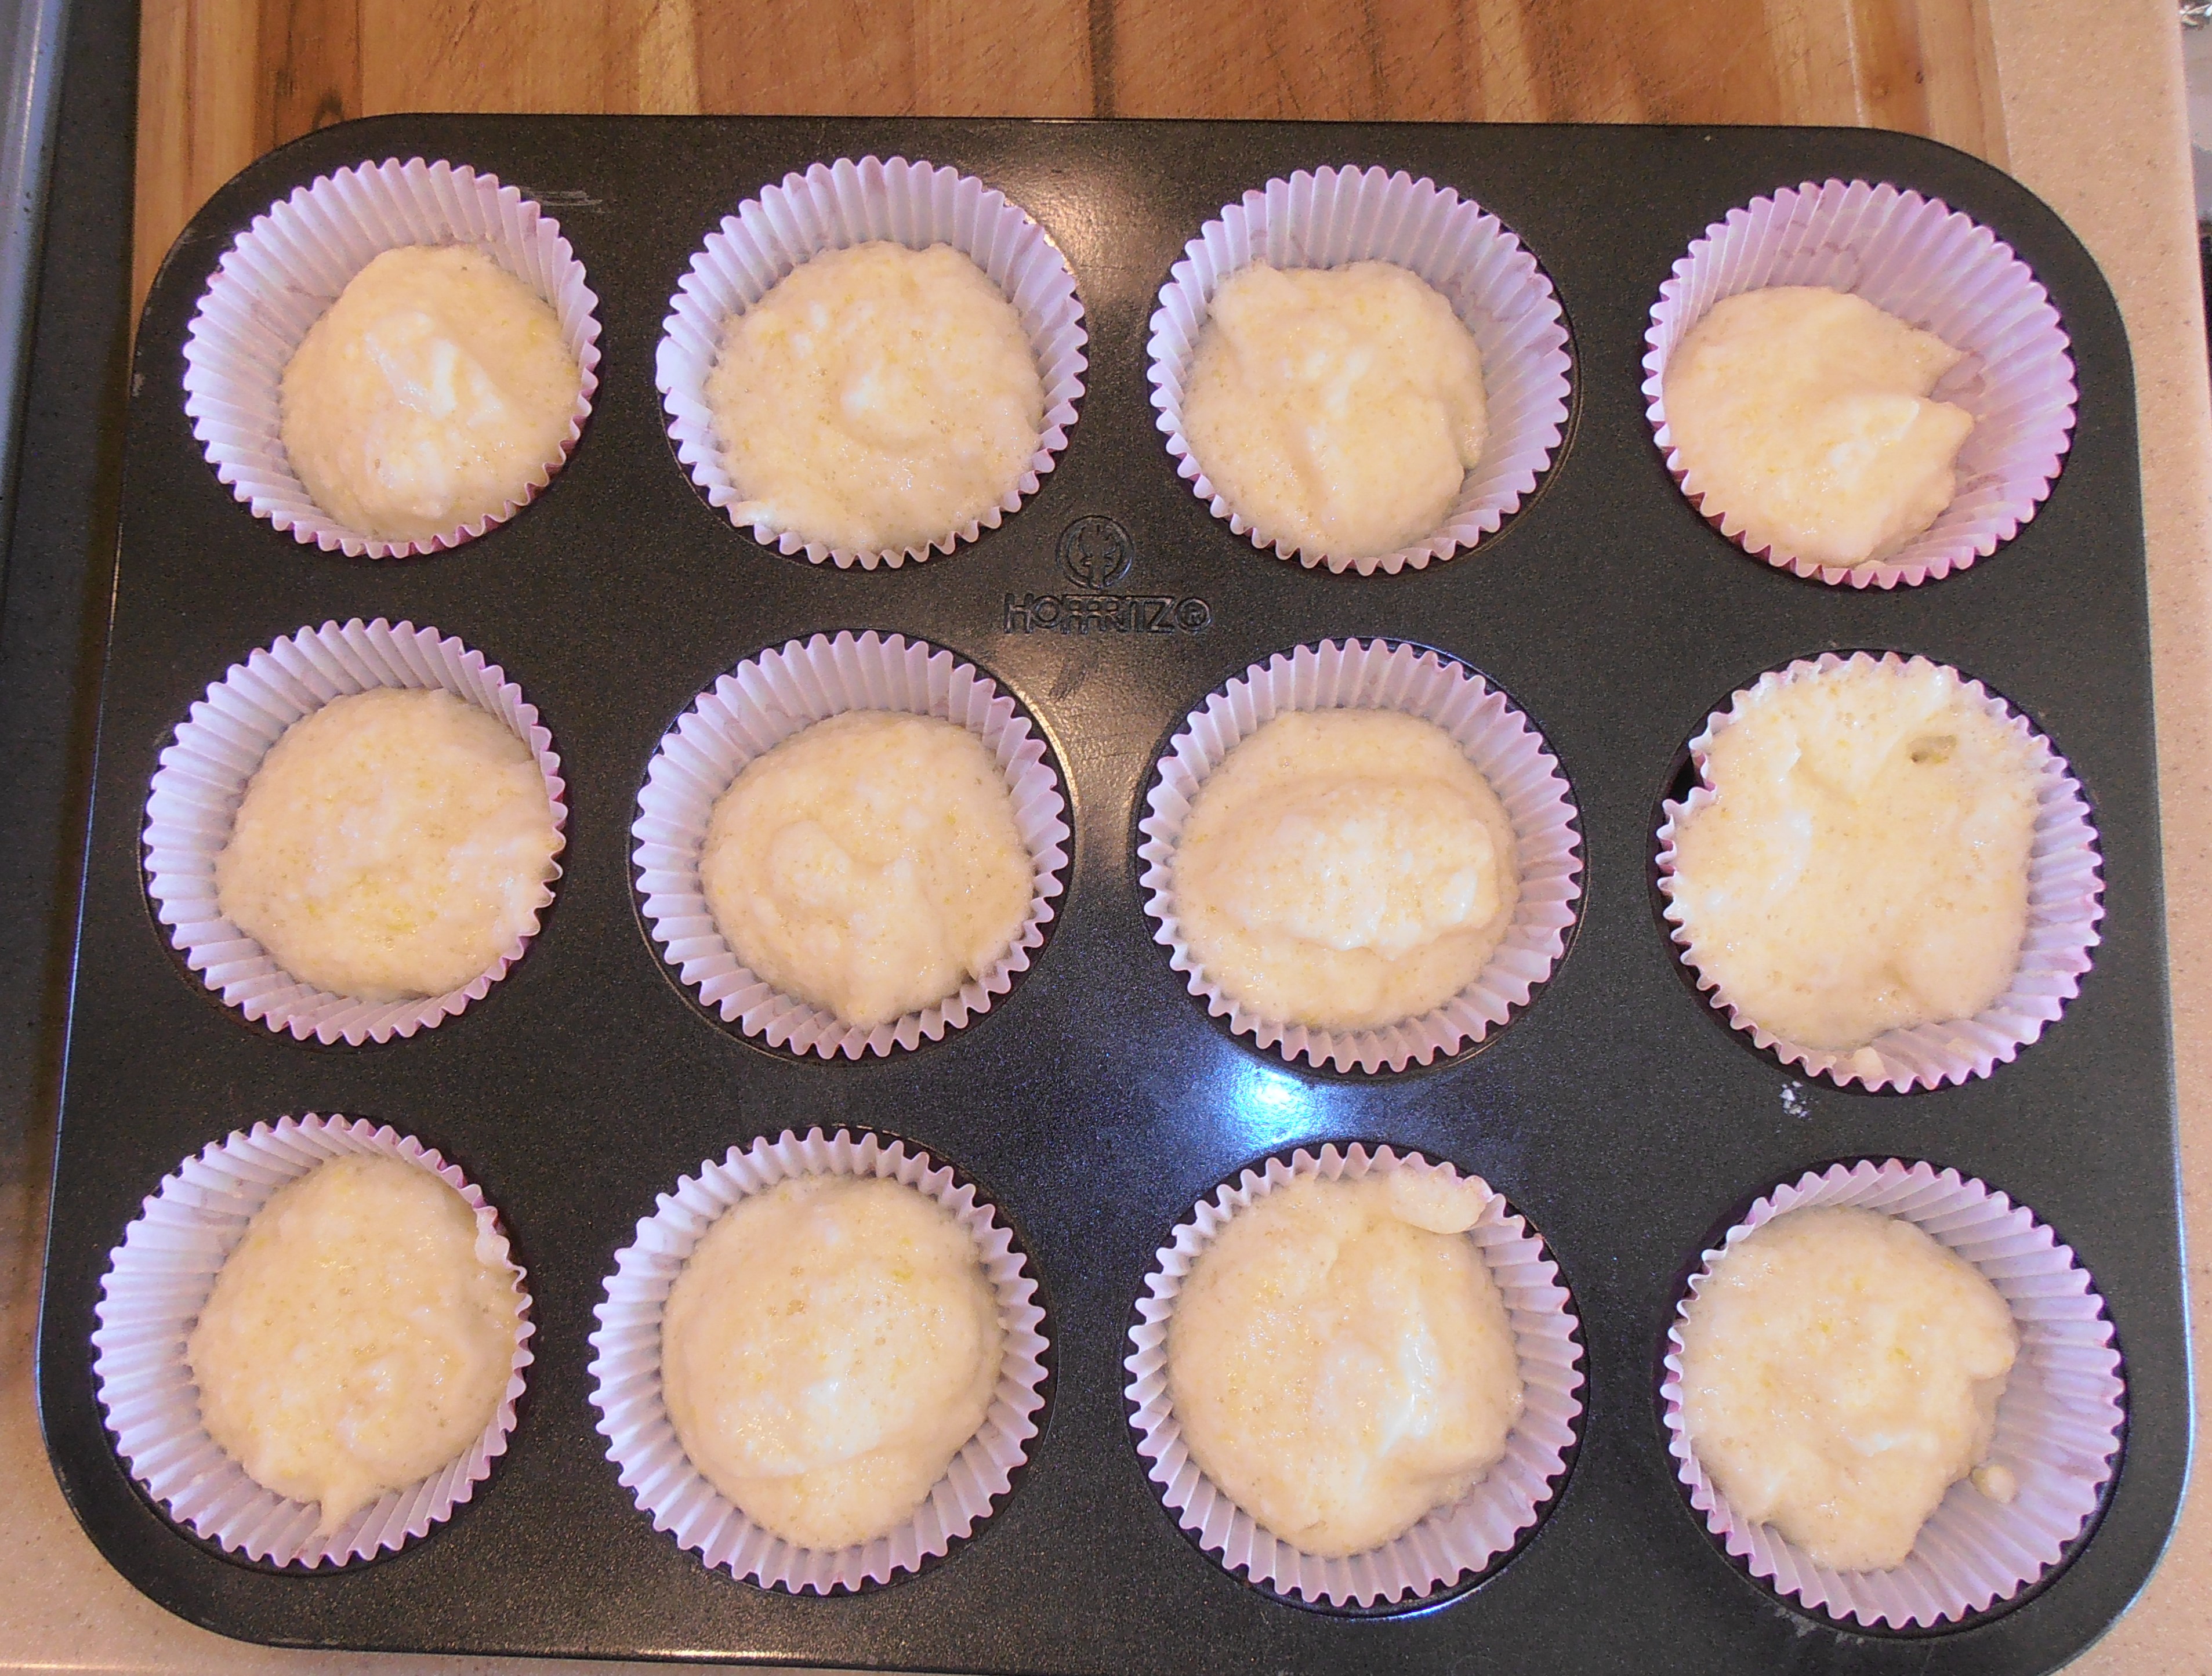
Spoon the batter into the muffin papers, filling them about one-half full.  Sift some granulated sugar over each cup.

Bake 10 to 12 minutes, or until a pick inserted in the middle comes out clean, and the tops are golden brown.

Immediately remove the biscuits from the tin and cool on a rack.


My Notes

Mixing the yolks and sugar first, then letting them sit while the whites are beaten gives the sugar time to dissolve.  

Before

After
I used 3/4 teaspoons lemon extract.  I learned that the book out of which Ms. Pinedo got this recipe specified using the zest of one lemon (in modern terms, about 1 tablespoon) for the whole recipe.  For a half recipe, that comes out to be 1 1/2 teaspoons zest.  3/4 to 1 teaspoons extract seemed the right conversion.

We all have to be grateful for modern mixers that can raise egg whites to "solid snow" in a matter of minutes.  I would not enjoy beating them for 30 minutes by hand.

It's always fun to take pictures of beaten egg whites.
The egg whites will lose some of their puff with all the mixing, but being gentle about it means they won't lose too much.  The heavier yolk mixture tends to sink to the bottom of the mixing bowl, so use a rubber scraper if possible and work to mix it throughout the whites.
Yolks over whites.

Folding.

Sprinkle the flour around, do not dump it on.

And fold again.
I used two spoons to get the batter into the cups:  one to scoop and the other to help push the batter off the first spoon.


The Verdict

These are cupcakes!  More specifically, very much like lemon chiffon cupcakes.  They are soft, light, and fluffy.  The flavor is lightly sweet and barely lemon.  

Beautiful!

Too bad the sparkles don't show up in the photograph
My guest taster and I found them to be more "eggy" than the traditional chiffon cakes; they were more chewy than I had expected.  It makes me wonder if a little more flour would settle that down and give it more of a tender crumb.

Almost a chiffon cake.
Not that we were complaining.  We both enjoyed their flavor and the lightness that accompanied the eggy background.  I think these would make a good base to hold a fruit compote and a little whipped cream, similar to a strawberry shortcake.

After having tried several (don't judge!), I found the lemon flavoring was not consistent.  Some were barely lemon and others had a stronger scent and taste.  To fix this, I would mix the extract into the yolk mixture with the powdered sugar.  This should distribute the extract throughout the batter.  I also think that using zest instead of extract -- still mixing in with the yolks -- would be excellent, if zest was available.

Using 1 teaspoon extract would not be bad, I think.  It would depend on how much you wanted the lemon flavor to come through.

Also, I sprinkled sugar over the top of one batch but not the other.  I noticed that the sugar added a delightful sparkle once the biscuits were baked.

Little box biscuits!  A success!

Tuesday, March 1, 2022

A Lemon Cordial Follow Up!

My most amazing, wonderful, awesome daughter read my previous post on the Lemon Cordial, made from an 18th century recipe, that used milk in the process.  In doing so, she recalled an article from Cook’s Illustrated titled “The Key to Crystal-Clear Cocktails? Milk. (Really.)”  It was written by Camper English and published in December, 2016.

The article focused on an old technique to make a “milk punch”:

The base recipe for milk punch includes citrus juice or another acidic ingredient. Milk (usually hot milk) is added to the mixed cocktail, curdling the milk, and then the punch is strained to remove the curds. The process removes most of the color and cloudiness from the drink, clarifying it, and it preserves the cocktail from spoilage for months or even years if kept cool.

The recipe I followed required sliced lemons to be put in milk then heated until the mixture forms curds and whey.  This is strained, and the resulting liquid is mixed with sugar and brandy to form the cordial.  I expected large curds that were distinct from the whey (the recipe said to boil the milk until the whey was “very clear”) but I never saw that because the curds were all small.

I tried filtering out the curds through cheesecloth, but that didn’t work.  I decided to add the brandy and sugar while hoping the cordial would taste right.  The curds started settling out, and the whole appearance was not appealing.  It was then I decided to filter it using a cloth bag. 

The result was a very clear and delicately flavored cordial that tasted of brandy and lemon with a good mouthfeel from the sugar.  I noticed (but did not mention in the post) that the curds had taken on the color of the brandy, and that the cordial was lighter in color after it was filtered.

Mr. English continues with:

The concept of clarifying cocktails with milk might seem a bit odd today, but in the milk punch heyday—the 1700s through the mid-1800s—spirits would have been far rougher around the edges than those we enjoy today, and in addition to clarifying and preserving the drink, the process also softened the harsh flavor of the booze. The resulting drink is unctuous and silky, clear and only subtly milky, with softer, mellow flavors.

What a surprise!  In doing the wrong thing with the original recipe, I stumbled across an historical technique.

Mr. English also tells us:

The earliest known milk punch recipe, as reported by cocktail historian David Wondrich in his book Punch, dates to 1711, and is attributed to housewife Mary Rockett. That recipe calls for a gallon of brandy, five quarts of water, eight lemons, and two pounds of sugar. To it, two gallons of scalding hot “new milk” are added, and after an hour, it is strained through a flannel bag.

He goes on to report on the variations professional bartenders are exploring today:  heating the milk or not, trying a variety of milks (animal and nut), changing the order of the steps, and more.  We are also treated to the science underlying the process, to help us understand the importance of the curds in stripping out the tannins, for example.

The article is a great read and brought insight to me on the lemon cordial recipe.  I recommend reading it!

Now I wonder why the cordial recipe required straining the curds before adding the brandy.  I can understand adding the sugar after straining – otherwise it makes the liquid very thick and slows down the straining process.  If, as Mr. English notes, the brandy in the 1700s was “rougher around the edges than those we enjoy today”, it seems the cordial would taste better if the brandy also came into contact with the curds. 

But perhaps that wasn’t the goal.  Perhaps the goal was to infuse the whey with the lemon flavor, which happens faster than infusing the alcohol with the lemons.  Once it was mixed with the brandy and sugar, you had a nice beverage.

When I put the sliced lemons – pulp, white, seeds, and peel – into the milk, I wondered if the white would make it taste bitter.  Perhaps the curds removed the bitter, and that was another advantage of using milk. 

To say I was as pleased as punch to read this article is an understatement.


Tuesday, February 15, 2022

A Lemon Cordial - with milk

I was perusing a book in my collection that caught my attention (again) because it had nothing printed on the spine.  But it did have print on the front cover and that was A Book of Cookery.  It is an intriguing book because the author, Kimberly K. Walters, does historical reenactment, and she compiled these recipes from a variety of historical sources to aid her reenactment work.

ISBN 978-0-692-26980-0

Her focus is the 18th century, the American Revolutionary War, and George Washington, but she notes in the "Forword" that she sometimes took from sources just before and after that time when she felt it was appropriate.  

The book contains more than just recipes, which she properly calls "receipts."  It also offers information on how to choose good food items, lists of what items are in season "in the colonies", a detailed description of how and what to serve for dinner courses ("removes"), how the table is to be set, and descriptions of cooking equipment.

As someone who has experience in historical cooking reenactment, I would judge this book to be quite valuable to anyone who wants to learn how to be a Colonial American cooking reenactor.  All you would have to add is equipment, costuming, and a location in which to cook.  

I had fun reading through the recipes.  My goal was to find one that used lemons because my neighbor had left a bag full of them on my doorstep.  There were several recipes that I considered, especially the Lemon Gingerbread on page 190, but I decided to try the Lemon Cordial on page 260.  I have made many cordials and liqueurs before but never one that had milk in it.  I wanted to see what it was like.

Lemon Cordial

Cut six fresh lemons in thin slices, put them into a quart and a half of milk, boil it until the whey is very clear, then pass it through a sieve; put to this whey, one and a half quarts of French brandy, and three pounds of powdered loaf sugar; stir it till the sugar is dissolved - let it stand to refine, and bottle it; pare some of the yellow rind of the lemons very thin, and put a little in each bottle. (Randolph).


My Notes

I decided to scale the recipe down a little.  "A quart and a half" is 6 cups, so the proportions for 2/3 of the amounts are pretty straightforward:

4 lemons (washed!)

4 cups milk

4 cups brandy

2 pounds powdered sugar

After the lemons were sliced and the milk was added, I turned the heat onto high to get the cooking going.  

I notice the curdling started right away.  This is a good thing!  It is how you get the curds and whey.

You can see the curds forming.

Once I saw some bubbles forming in the milk, I turned the heat to medium low.  

And this is where I started running into trouble.  You see, I have made curds and whey before with milk and vinegar (click here to see the post), so I expected the curds to be big and to clearly see the whey.

But that didn't happen here.  I let the mixture simmer for quite a while (a few hours!) and never saw the whey separate as I expected.  After the lemons looked very cooked, I turned the heat off and thought about what to do.

The lemons have gone limp. 
The curds were all tiny.  There was whey but everything was mixed.  I decided to pass it through a strainer lined with cheesecloth, but I was not confident this would work.


And it didn't.  Very little liquid came through; it all looked like it was still captured in the curds and lemon.

Then I decided to use some more fresh milk (1 cup) to rinse the curds off of the lemon slices, with hope I could get all that to sieve out.  I used my hands to gently squeeze the slices and to wipe the curds off of them.  This got the curds off the lemons but it still would not get the moisture out of the curds.  I had a thick, creamy liquid now.  I threw away the lemon slices.

At this point I thought that I would just have to expect a creamy, curdy cordial.  Maybe that would taste good?  So I added the powdered sugar and the brandy, mixing well.

This is a one-half gallon container

I tasted it and it was good!  But I didn't think this was supposed to be the desired result.  The container sat on the counter overnight.  The next day I saw that the curds had begun to settle -- and it was forming layers of what looked like curds in liquid at the bottom, liquid alone in the middle, and a foam on the top.  It made me think of syllabub.  I was not happy with this.

Then it occurred to me.  I should strain it through a cloth bag!  This is what I did when I made liquamen and it worked well to remove very fine particles.  Why did this take so long for me to consider?

Straining it through the bag worked really well.  The liquid was clear!
Unfiltered on the left.  Filtered on the right.

It took two days to let it all filter through.  Patience is a virtue here.  I felt confident that I was getting all the cordial through the bag.  In the end, I had just a little under 1/2 gallon of cordial.

The Verdict

The flavor was a lovely blend of lemon and brandy.  It did not strike my taste buds hard with lemon and it did not taste entirely of lemon.  It was definitely a blend.  The mouthfeel was good - enough of a syrupy texture to make me feel like I was sipping something substantial.  My guest taster and I both liked it very much and would love to have it either before or after a meal, or to go with some cheese and fruit as part of a dessert.

When I made curds and whey previously, I warmed up the milk before I added the acid for curdling.  Perhaps I should have done that here.

I should have filtered just the curds and whey through the bag before adding the sugar and brandy.  I think it would have gone faster as it wouldn't have been as thick. 

I did throw off the proportions a little by using the one extra cup of milk to rinse the lemons.  I think it curdled a little.  I doubt it affected the taste much.

I honestly don't know why the milk was important.  When I made lemon liqueur previously, I just soaked lemon peels in vodka for a few months, strained them out, and added sugar.  This worked just fine and the soaked peels were saved as zest for cooking.  

Of course this cordial took only a few days and it was ready for drinking right away.  I suspect it will improve with aging, which tends to smooth the flavors out.  I guess that the whey might add some thickness or improve the mouthfeel of the finished product.  This is all guesswork!

I call it a success.  I have enough to last a while so it will continue to age in the cupboard.  I need to add some lemon zest to it as per the recipe's recommendation.

Just so you know, "cordial" and "liqueur" are often used interchangeably.  They are both typically vodka or brandy infused with flavors, and sweetened.  Cordials are sometimes considered to be sweeter than a standard liqueur.  This was definitely sweet but not overwhelmingly so.


Saturday, January 1, 2022

Happy New Year 2022 - A recipe from a Peanuts cartoon cookbook

This post starts my eleventh year of food blogging.  This blog has had over 103,000 page views, which pleases me to no end.  I am honored and humbled that people want to look at it.  There are 242 posts, most of which were successful.

I also started another food blog, the California Food Project, in which I am exploring the history of California food stuffs and recipes from my "interested amateur" point-of-view.  I've also been translating an historical cookbook that relates to California food history and trying out some of the recipes.  Those results are posted on at least the CA Food Project blog; some are on this blog, too. 

The last two years have been challenging, to say the least:  a pandemic and its associated struggles, supply chain issues, political stress, learning to work from home, and more.  I found myself thinking back to happier, less stressful times.  For me, that often means my childhood.  While I don't mind the responsibilities and expectations of adulthood, there are days when I wish I could return to the innocence of my youth.

A conversation with my friend, GL, a life-long Peanuts cartoon fan, made me think of this cookbook:

Cartoons by Charles Schulz. Recipes by June Dutton.  Pub. 1969 by Determined Productions, Inc.

It is one of the first cookbooks I ever owned.  (The wear and tear on it shows its age!)  The even numbered pages have a recipe, and the odd numbered pages have an appropriate Peanuts cartoon.  The intensely pink paper with bright green borders is representative of the popular colors of the late 1960s and early 1970s.

The recipes are accessible to a novice cook, with examples like "Frieda's French Toast" and "Red Baron Root Beer" but also increase in complexity, like "Linus Van Pelt's Mother's Clam Chowder" and "Snoopy's Pizza."  As a kid, I know I learned from it.

I decided I wanted to start off 2022 by revisiting the memories of my childhood with a recipe that is tasty, simple to make, and fun to share with others:  lemon square cookies (page 84).


Lucy's Lemon Squares

1 cup flour

1/2 cup butter

1/4 cup powdered sugar

Blend with fingertips until well mixed.  Pat evenly into the bottom of an 8 x 8 inch baking pan.  Bake for 20 minutes at 350 degrees.  Meanwhile, beat together:

2 eggs

1 cup granulated sugar

1/2 teaspoon baking powder

2 1/2 tablespoons fresh lemon juice

dash of salt


Pour over baked crust and return to oven for 20-25 minutes at same temperature.

Cool on rack.  Cut in squares.  Sprinkle with sifted, powdered sugar.


My Notes

The butter was cold from the refrigerator and I wanted it that way.  I cut it into pieces before putting into the flour and powdered sugar.

Butter not cut up enough

These pieces were not small enough to blend with the dry ingredients.  I used a knife to cut them up into smaller pieces while in the bowl, then I was able to mix and blend them using my fingers.  I worked it until the mixture formed a dough, like a pie crust dough.


The pan I used (can you believe I don't have an 8 x 8 inch pan?) was 11 x 7, so more square inches than the recipe called for, but I used it anyway.  I patted the dough evenly across the bottom.  I remember to grease the pan first!

It baked for about 17 minutes and then it looked ready.  My oven sometimes runs a bit hot so I watched it for the last five minutes and pulled it early.


While the crust was baking, I mixed the topping ingredients, except the baking powder.  I put that in just before pouring the mixture over the crust.  Note that you put the topping on while the crust is still hot.
 

The pan went back into the oven for 15 minutes.  The lovely scent warned me it was ready, even before the 20 minutes was up.  


After it cooled, I sprinkled on some powdered sugar and cut it into rectangles (yes, not squares!).

The Verdict

I cut it into 15 pieces.  The ones near the edges caramelized somewhat so they were harder to remove than the ones in the center.  However, I did get them out.

You can see the layers.

Pretty with a light sprinkle of powdered sugar.

The taste:  the crust was crispy and very buttery.  The topping was lemony and sweet.  Not tart at all.   It was very rich!

As a kid, I would have loved this.  As an adult, it was very sweet, and I wanted it to be less sweet and more lemony and more tart.  One piece was enough.  I think I would decrease the sugar in the topping and increase lemon juice.  But it was good.  I think it would be nice to take to a gathering where I knew kids would be around.  Still, I would cut them into small pieces -- yes, it is that rich.  

So success.  Mostly success for kids, so it succeeded in reminding me of my childhood.

Happy New Year!  May we have a good and bountiful year.

Friday, January 1, 2021

Cork Cake and another New Year

Greetings from Southern California!  

This is the beginning of a new year and it has my fervent hope that it is much, much better than last year.  Not in the cooking realm -- I had fun with the recipes I tried in 2020 -- but in terms of health, peace, compassion, hope, family, and friends.  

It is also the start of my tenth year of this blog.  I have 218 posts and over 93,000 page views from all over the world.  I have to say it is a worthwhile adventure!  Having the freedom to explore any culture and any time period, then choosing what I want to try is just, well, wonderful.

One of my online cooking friends, JH, found a digital copy of the oldest cookbook published in the United States by a black woman.  Mrs. Malinda Russell was a free black woman who was married and had a son.  Her husband died and her son was disabled, and so she found herself in need of making a living.  At times she ran a laundry, kept a boarding house, and then a pastry shop.  

I have made Cooking my employment for the last twenty years, for the first families of Tennessee, (my native place,) Virginia, North Carolina, and Kentucky.  I know my Receipts to be good, as they have always given satisfaction.  I have been advised to have my Receipts published, as they are valuable, and every family has use for them. ... I have put out this book with the intention of benefiting the public as well as myself.

Mrs. Russell published her book in 1866, in Paw Paw, Michigan.   The title is A Domestic Cook Book:  Containing A Careful Selection of Useful Receipts for the Kitchen.  Click here to find the document.

I enjoyed reading the entire book.  Mostly there are recipes for cakes, icings, pies, muffins, cookies, custards, trifles, biscuits, and puddings, which is not surprising from a woman who ran a pastry shop.  She also includes recipes for cordials, jellies, jams, pickles, some meat dishes, soups, medicinal treatments, and preserves.

There are several recipes I'd like to try.  What I chose for this post was a simple cake recipe, as I needed a dessert for a special dinner.  The challenge was that she gives the ingredients but no other instructions.  (Aha!  Another Great British Baking Show technical challenge!)

Cork Cake (page 7)


Ingredients

3 cups sugar

1 cup butter

1 cup sour cream

5 cups flour

5 eggs

1 teaspoon soda

1 teaspoon cream tartar

flavor with lemon

My Redaction

I chose to flavor it with finely shredded peel from one small lemon.  It measured about 2 teaspoons.

I preheated the oven to 350 degrees F.  

First I creamed the softened butter and sugar.

Then I beat in the sour cream.


Next came the eggs and the lemon peel.

In a separate bowl, I mixed the flour, baking soda, and cream tartar. 

Then I added the dry mixture to the wet mixture and stirred it by hand until just blended. 


The batter was stiffer than I expected; I almost added another egg but decided to stick with Mrs. Russell's recipe.  Modern eggs are typically larger than the eggs she had available and I expected the batter to be very moist from five large eggs.  This is why I was surprised.

It took four 8-inch cake tins to use up all the batter.  I had to spread the batter all the way to the edges of each pan.  Two had a little more batter that the other two.  I tasted the batter and liked the fresh lemon flavor of it.

They all went into the oven at the same time.  I notice the batter spread a little more while it was baking.  The thinner layers came out at 20 minutes, the thicker at 25 minutes.  They were ready when the edges where lightly browned, the top center looked set, and a pick inserted into the middle came out clean or nearly so.


After they cooled completely, I took the two thinner layers and spread homemade lemon curd between them.  Then I mixed an icing of cream cheese, the juice from the lemon that donated its peel, and some powdered sugar.  I like to dissolve the sugar completely, so I mixed it into the juice and then lightly heated it in the microwave.  Then I put it into the cream cheese and mixed it until it was very soft and spreadable.  The flavor was lemon and creamy and only the tiniest bit sweet (just enough to take the bite off the juice). 

 I decided it needed a decoration on top, so a few dried cranberries and small sprig of mint did the job.


The Verdict

The cake was completed several hours before the meal, so I put it into the refrigerator due to the cream cheese and the lemon curd.  It came out of the fridge at the beginning of the meal, so the cake had not come to room temperature by the time we were ready to eat it.  

It was tasty -- lots of good lemon flavor in the cake, the curd, and the icing -- but I was disappointed because the cake seemed so firm and a bit dry.  My guest taster thought it was just fine.  I loved the curd and icing and the overall look.

But later (because leftovers!), I tried it again but this time I warmed it up in the microwave.  Just 15 seconds for one piece.  Boy, did that do the trick!

The cake was tender, soft, moist, tasty.  The lemon flavor really came through!  It was sweet but not too much so.  The icing was enticingly gooey and the curd just added a citrusy blast in every bite.


Now I know to warm it up before eating.  I never doubted Mrs. Russell, only my own skill in interpreting her receipt.  But I did a good job and I call it a success.


Wednesday, July 1, 2020

The "Making Do" Challenge -- Pickled Lemons (a revisit)

About four years ago, my neighbor gave me his Meyer lemons, and my daughter and I pickled them and wrote about it here:  Pickled Lemons.

They were fine but did not inspire me to want to keep making them.  My neighbor's tree has since died (whaaaaaa!) but my friend DL gave me lemons from his wife, GL's tree.  I wanted to try pickling lemons again but this time using a recipe from Charles Perry's translation of Scents and Flavors, a 14th century Syrian cookbook.

ISBN 978-1-4798-5628-2
I wrote about this book previously, as its recipes were featured at a culinary symposium, put on by the Society for Creative Anachronism.  You can read about it here:  West Coast Culinary Symposium 2018.

This book is fun to read.  The Arabic writings are on the left side of the page and his translation is on the right.  The recipes are intriguing and look tasty.  The spices referenced are wide and varied, including the usual cinnamon, cardamom, cloves, ginger, pepper, and other familiar ones.  But there are also others like spikenard, betel nut, and rose hips. Few recipes look complicated but many use techniques or food combinations I am not used to but look good and doable.

In all honesty, this looks like a cookbook I could spend a lot of time exploring and still offer up tasty meals.

I looked in Chapter 8:  How to Make the Various Types of Sour and Salty Pickles.  The book offers several variations on salted lemons, and I chose the first variation, recipe number 8.20.

Salted Lemons -- First variation

Take salted lemons, cut up small, put in a vessel, and squeeze the juice of fresh lemons to cover.  You can also use sour orange juice, which is milder than lemon juice.  Add oil, mixed spices, pounded toasted coriander seeds, minced parsley, mint, and rue, and set aside.  It is one of the very best and most fragrant of condiments.


These are the ingredients for the pickling liquid. 

My Notes

The night before making the recipe I sliced the cleaned lemons, spread them in a pan, and sprinkled kosher salt over them.  The pan was left slightly tilted so the liquid would gather at the bottom.  The next morning the slices were softer and the salt had been absorbed.

the night before
the morning after
My goal was to make one quart jar full of pickled lemons.

The two lemons missing their peels were juiced for the pickling liquid.  (Their peels were dried and powdered -- well worth it as a flavoring ingredients themselves.  They are really good in bread with olives and sun-dried tomatoes.)

I used a premixed "Poudre fines", consisting of cinnamon, cloves, ginger, grains of paradise, pepper, and saffron.

1/4 teaspoon cumin
1/4 teaspoon coriander
1 teaspoon Poudre fines
1/4 cup mixture of coarsely chopped rue, mint, and parsley

These ingredients were mixed well together in a bowl.

First I put in some of the spice and herb mix. Then several lemon slices.  Then more mix.  I repeated this until the jar was full.

The lemon juice went in to cover, although there was some floating of the lemon slices.  (Two lemons' worth of juice was not enough and I had to add some lemon juice from a bottle.)  After that I poured about a one inch layer of oil over the top.

Not quite full but close enough.
The whole container went into the refrigerator for about a week before I tasted it.

The Verdict

We tried them out of the jar, without putting them with a meal.

The flavor was, well, luscious.  Sour (but not too much for me), barely salty, but the spices and especially the herb flavors came through.  I loved it and so did my guest taster.  I ate several and wanted more.  I think that I liked the mint the best but the whole blend was superb.

The peel is not bitter from the white and the yellow zest is softer in flavor and texture than fresh lemon peel.

We have since had them with a meal, roasted chicken next to a vegetable stew.  It is a great condiment, adding some zing and intrigue to the meal.  We also made sandwiches with cheese and meat and slices of pickled lemon -- it was amazing!

One guest taster, who loves lemons but does not like parsley or cinnamon, did not like the mixture at all.  I could not get parsley as a dominant flavor, but she did.

I have since refilled the jar with more salted lemon slices, using the same juice, herb, and spice mixture.  This one is a keeper.

Success!

Monday, February 1, 2016

When Life Hands You Lemons ... Make a Lemon Cream Pie

In a previous post, I explained how my wonderful neighbor gave me his bountiful harvest of Meyer lemons and that my daughter and I decided that the end of the saying, "When life hands you lemons" is "get cooking!"

After pickling lemons and making a savory chicken and lemon pie, we wanted a dessert.  We revisited Rufus Estes' Good Things to Eat, which was the book used for the very first post of this blog, Peanut Meatose.

ISBN 0-486-43764-7
Here is an excerpt from that post:
Mr. Estes was born a slave in 1857, was employed by a restaurant-keeper at the age of 16, and then became a cook for the railroads at age 26, where he continued for most of the rest of his life.  His culinary skills were so valued that he was assigned to cook in a special car that catered to celebrities.  Mr. Estes prepared food for presidents, princesses, famous actors and singers, and more.  He was trusted to provide them with a good meal and, upon viewing his recipes, I can see that that trust was not misplaced. 
One thing I like about this book is that it is "The First Cookbook by an African-American Chef."  Mr. Estes says, in his foreword,
This book, the child of his brain, and experience, extending over a long period of time and varying environment, ... The recipes given in the following pages represent the labor of years.  Their worth has been demonstrated, not by experimentally, but by actual tests, day by day and month by month, under dissimilar, and, in many instances, not too favorable conditions.
This man was obviously talented and proud of his accomplishments, and I am grateful he took the time to share his recipes with us.

He offers quite a few recipes that use lemons, including an "old-fashion" lemon pie "because it is baked between two crusts, yet many have called it the best of all kinds."  It actually looks quite simple and I might try it some time.  He also gives a "Large Lemon Pie" recipe, which is what we call a Lemon Meringue Pie.

On page 92, he gives another lemon pie recipe that seems like a lemon meringue pie but is cooked differently.  This is what we decided to try.

Lemon Cream Pie

Stir into one cup of boiling water one tablespoonful of cornstarch dissolved in a little cold water.  Cook until thickened and clear, then add one cup sugar, a teaspoonful of butter, and the juice and grated rind of two lemons.  Add the beaten yolks of three eggs and take from the fire.  Have ready the bottom crust of a pie that has been baked, first pricking with a fork to prevent blisters.  Place the custard in the crust and bake half an hour.  When done, take from the oven and spread over the top a meringue made from the stiffly whipped whites of the eggs, and three tablespoonfuls of sugar.  Shut off the oven so it will be as cool as possible giving the meringue plenty of time to rise, stiffen and color to a delicate gold.
And water
My Notes
For the pastry, we used the same crust recipe I used for the Elizabethan meat pie last March.  It baked with a bottom weight (instead of pricking it) at 425 degrees F in a ceramic pie pan for 8 minutes.

I had trouble getting the cornstarch mixture to become completely clear but it did get thick.  I turned the heat down once it was pretty clear so as not to break the thickening feature of the cornstarch.

The Meyer lemons are small so I used the grated rind of two of them and the juice of three.


The "custard" was runny and we worried it wouldn't set up.


After baking for 30 minutes at 350 degrees F, it was still runny.  Since the crust wasn't very brown, we put it back into the oven for another 10 minutes.  During this time, the filling bubbled and thickened.

At this point the crust was brown and we didn't want it burnt, so we took the pie out of the oven.  The filling hadn't set but we hoped it would after it had a chance to cool.  I had whipped the egg whites and sugar into a meringue while the pie was baking so that had to go into a container into the refrigerator.

The pie cooled a little but the filling still hadn't set so we put it into the refrigerator, too, with the idea to put the meringue on the next day.

The Verdict

The next morning we checked the pie and the filling still hadn't set.  It was too runny to serve as a pie, so we poured the filling into a container.  By the way, the crust had cooked up beautifully and stayed in one piece when we popped it out of the pan.  Heart-breaking! (Tasty, too, later on.)

Tilt and slide
My daughter then made a vanilla cake (thank you, Betty Crocker!), split the layer, poured some filling over the bottom layer, put on the top layer, frosted the top of the cake with whipped cream, and decorated it with fresh blackberries and the lemon filling over the top.


It made for a lovely impromptu dessert and was well-received.  The lemon filling was tart, lemony, and not too sweet.  The little bits of zest were pretty and added a nice lemon burst.

The next day we made pancakes and, instead of syrup, we spooned the lemon filling and a blueberry compote over the top.

After that, we put the lemon sauce and more of the blueberry compote on some lemon scones.


I have to call this recipe a failure because it didn't set up properly to be served as a pie.  I think the problem was that there was not enough cornstarch to thicken the liquid.  The standard is 1 tablespoon cornstarch to 1 cup liquid and, between the water and the juice, we had more than 1 1/4 cup liquid. Next time I would use at least 1 1/2 tablespoons of cornstarch.  Still, I am not sure why this pie needed to be baked after the filling was cooked and thickened.

Finally, I needed to do something with the whipped egg whites I had made the night before.  Sitting had made them separate and they did not look like something I wanted to use "as is."  So I put them back into the mixer and beat them, hoping to get them back to stiff and usable.  I was surprised to see that they could be beaten back to stiff.  Once they were ready again, I spooned them into little piles on parchment paper and lightly baked them into simple meringue cookies.

The nice thing about knowing how to cook is being able to adapt and recover from failures.  : )

Cookies Consent

This website uses cookies to offer you a better Browsing Experience. By using our website, You agree to the use of Cookies

Learn More